
Subscribe to Our Youtube Channel
Related Manuals for COMPOUND CCB-MSB-K81


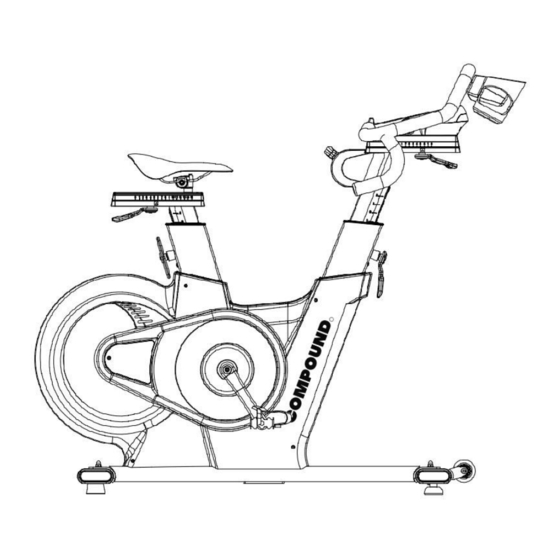
Summary of Contents for COMPOUND CCB-MSB-K81
- Page 1 CCB-MSB-K81 Caliber BLK – Magnetic Spin Bike Zwift & Kinomap with 18.5” HD Screen Owner’s Manual...
- Page 3 ATTENTION: Read instructions carefully, failure to do so may cause permanent damage to your body. Please verify that all parts associated with this product are in good condition and accounted for. During the assembly process please be sure to follow each step accordingly as it has been explained within the manual.
-
Page 4: Safety Information
SAFETY INFORMATION: 1. Keep children and pets away from this equipment at all times. DO NOT leave them unsupervised in the room where the machine is kept. 2. If you experience dizziness, nausea, chest pains or any other symptom while using this machine STOP the exercise. -
Page 5: Assembly Drawing
CAUTION: During assembly it is recommended that all bolts be tightened by hand, upon completing assembly, bolts should then be properly secured using the wrench. To avoid injury, check bolts carefully before use. Assembly Drawing STEP 1 Attach the front foot tube (35) first by lifting up the front of the frame and sliding the front foot tube (35) under the frame. -
Page 6: Right Pedal
STEP 2 Attach the pedals (20) into the crank arms (21), each pedal is marked with L (left) or R (right) to denote the side of the spinning bike they are on. Note – the pedal has to work with the same side with the crank. - Page 7 CAUTION: Riding this bike backwards may loosen the pedals which will damage the threads. Please always check pedals to ensure that the pedals are tightened. If the pedals have become loose, tighten threads with the wrench to ensure they are securely attached. If the pedals are loose and continue riding, it will cause the damage of the crank thread and pedals axle.
-
Page 9: Before Riding
Step 4: Remove the nuts, washers and bolts (14-1) from handlebar (46), and attach the storage holder (14) on the front of handlebar (46), then fix the storage holder (14) on handlebar with the nuts, washers and bolts (14-1). Before riding Securely confirm all of the release lever (6)(7)(63)(64), Saddle (1), Pedals (20) and screws are fastened before your training. -
Page 10: Replace Batteries
Replace batteries 1> Loosen the screws (41-B) from the covers and open the upper cover carefully. 2> Disassembling the wires connector. 3> Replace the batteries. Attention: ⚫ DO NOT draw the wires excessively to damage the wires. ⚫ Replace the batteries: it is recommended to replace all 4 pcs batteries at the same time. - Page 11 Instruction It is important that the handlebar and seat are set at the correct height for your body. Ask your instructor for assistance. Handlebar adjustment - Adjusting the handlebar height-Undo the adjuster release lever that are located where the handlebar post fits into the frame.
-
Page 12: Exploded Drawing
Exploded Drawing... -
Page 13: Part List
Part list Name Unit No. Name Unit REAR Foot tube adjuster pad Saddle (w/ 33~34) Seat slider w/ slider (w/3~5,50) Front foot tube set Upper end cap for seat slider Front foot tube adjuster pad Screw for seat slider Axle bolt for moving wheel Lower end cap for seat slider BB Axle w/ plate, nut, bushing Release lever set for seat slider... - Page 14 27 Foot tube nut Screw 28 Foot tube washer Sticker 29 Foot tube end cap Sticker 30 Foot tube bolt Release lever set for handlebar 31 Rear foot tube set Release lever set for head tube Bolt and Nut G01 Magnetic system set...
-
Page 15: Maintenance Chart
Maintenance Chart DESCRIPTION Daily Weekly Monthly Quarterly Annually Keep machine clean: Wipe machine down with clean & dry fabric to clear dirt & sweat. Visual check. Check security of handlebar post & seat post. Check security of saddle. Check security of all release levers. Check toe straps for signs of wear. -
Page 16: Console Instruction
Console instruction DISPLAY FUNCTION: ITEM DESCRIPTION . In SCAN mode, press MODE key to choose functions. SCAN . Automatically scan through each mode in sequence every 3 seconds. . The sequence of display when press MODE key: SPEED→RPM . Range 0 ~ 9999 SPEED . -
Page 17: Key Function
KEY FUNCTION: ITEM DESCRIPTION . Press SET key to increase value. Press and hold the key to increase value faster. . TIME setting range: 00:00~99:00 (Each increment is 1:00) . DIST setting range: 0.00~99.50 (Each increment is 0.5) . CAL setting range: 0~9990 (Each increment is 10) . - Page 18 Workout setting Press MODE key to select the function of TIME, DISTANCE, CALORIES and PULSE. Use SET Key for setting ⚫ and press MODE key for confirmation. For instance, the time set-up, when the time value is blinking, you can use SET Key to adjust the number. ⚫...
- Page 19 Outstanding Excellent Good Fair Below average Poor Trouble shooting: . The battery needs to be replaced when the low power symbol of LCD lights up. Please use ALKLINE BATTERYS. . If there is no signal when you pedal, please check if the cable is well connected. NOTE: 1.
Need help?
Do you have a question about the CCB-MSB-K81 and is the answer not in the manual?
Questions and answers