Advertisement
The additional upgrades we have made make this the best all-round sub in our history. Incorporated in the Trevoce15 EQ DSP is the new native EQ, and the IWoofer DSP engine. The native EQ has allowed us to extract the maximum bass extension possible from our design. This allows the full range of musical instruments and special effects to be reproduced. The Trevoce EQ DSP Series does this all without any increase in the size of the sub. Our Trevoce subs offer the smallest footprint you will find in triple driver designs.
Installation Precautions
Before installing
Before connecting your subwoofer, make sure all equipment is switched off and that voltage switch is set to your country's voltage. Do not connect the subwoofer power supply cable before completing all connections.
Features
World Class Digital Amplifier Technology
The TreVoce DSP Series powered subwoofer incorporates the latest digital amplifier technology to maximize performance while generating very little heat. In standby mode, the unit consumes less than 0.5 watts, making it one of the greenest solutions available.
Tuned System Performance
Rear mounted volume control, low pass crossover, phase control and App controlled DSP ensure optimal system integration and built-in native EQ ensures the deepest bass frequencies.
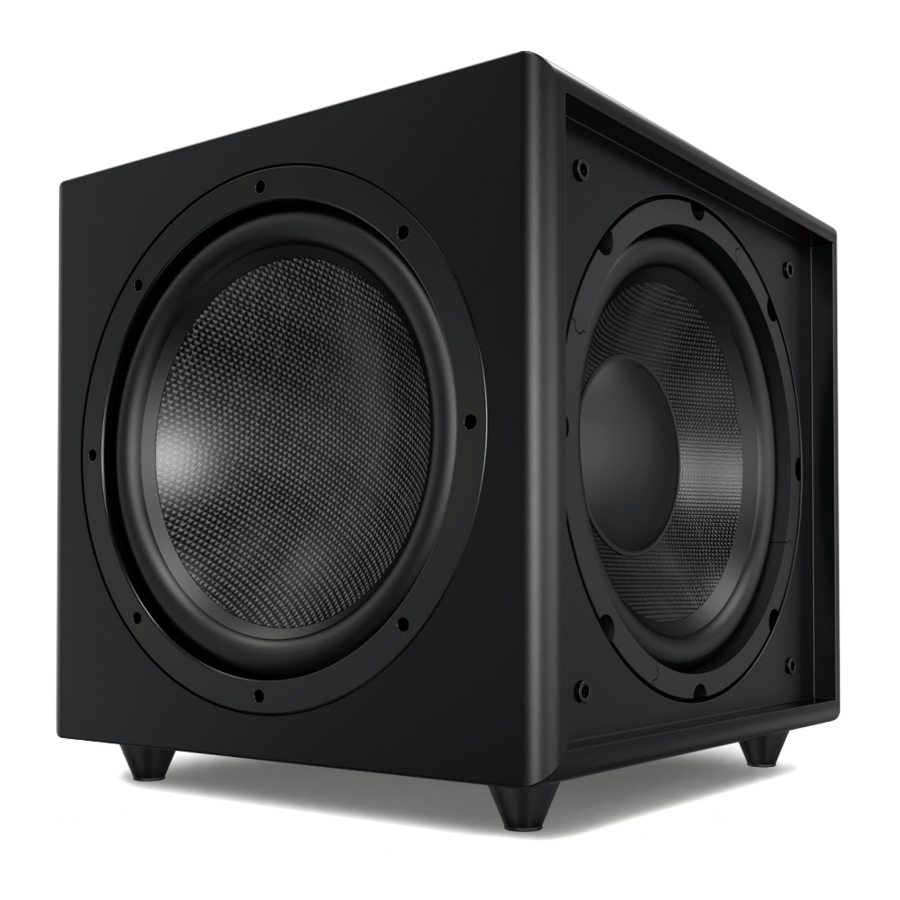
Cabinet
An attractive furniture quality solid cabinet with 'leather' finish, provides the foundation for high sound quality and clarity.
Connection & Controls

- High Level Inputs
Use for Left/Right connection from speakers. - Line Level Input
Use for Left/Right connection from subwoofer-out, or line-out, on amp/AVR. - LFE Input
Connect to the LFE output on the Receiver/Processor. - Balanced XLR Input
For lower noise connection if available. - Power LED
(Red) Standby Mode - (Blue) Power Mode ON - DSP Mode Switch
Set the DSP ( OFF or ON ) - Power Mode Switch
Set the power mode ( OFF, AUTO, or ON ) - Phase Switch
Allows you to set the phase of the woofer 0-180° - Crossover Control
Adjusts the subwoofers frequency output output to match main speakers - Volume Control
Adjusts subwoofer volume level. - Voltage Switch
Select input voltage. Default: 110-120V or 220-240V - Master Power Switch
Controls the main power to the subwoofer - AC Power Cord
Connect the included AC power cord. - Fuse Holder
Master Power Fuse. Includes spare fuse inside holder.
Settings & Controls
Setting the Power Mode
ON Mode:
If the subwoofer is set to ON mode, it will always be ready to play. However, undesired noise from interference or connections changing may be heard. Use the standard ON mode only if needed, set the power switch to OFF when not in use.
AUTO Mode:
Setting the switch to AUTO enables AUTO Sense. The subwoofer turns ON and OFF automatically in response to signal input. The subwoofer will enter standby mode if no signal is sensed for longer than 15 minutes.
Set the MODE switch to the ON position for setup.
After making all the connections, setup your subwoofer using the following steps:
- Plug the subwoofer into an electrical outlet using the included power cord. The status LED will illuminate solid blue when power is present and the subwoofer is ON.
- Set the controls and switches to their initial setup positions:
VOLUME set the dial to 50% or 12 o'clock
CROSSOVER adjust the upper frequency limit. The purpose is to control the overlap the upper frequencies of the subwoofer and the main speakers lower frequencies. Check your main speakers specs to determine their low-end limit.
PHASE set to 0° - Play a movie scene or soundtrack and set the system volume to an average level. Listen to the bass level from your favorite listening position and adjust the volume accordingly.
- Continue listening to your favorite source track and experiment with the phase control until you find the best setting for you. Depending on the location of the subwoofer the bass may sound louder and deeper when the phase has been optimized. In some cases adjusting the phase will have no audible difference.
- Initial setup is now complete.
Trevoce Subwoofers are equipped with pre-programmed built-in EQ for optimal sound and great performance. You may also use the (optional) iWoofer app to access and custom tune the DSP to suit listening preferences or room correction for example. There is also a Pro version of the iWoofer App (IOS Only) that adds additional functions available for a small fee.
iWoofer Setup
- If you intend to use the custom DSP functions you must first download the iWoofer app from the App Store or Google Play.
![www.apple.com]()
![play.google.com]()
- Continue reading to setup iWoofer app to access and setup the custom DSP features of the TreVoce.


DSP Features Set
X-Over Control
Gain Control
SHS Control
Delay Control
Phase Control
Dynamic Bass Base Control
Dynamic Bass Detailed Control
Remote Hardware Control
Auto-On Threshold Settings
Preset Manager
Preset Import/Export Features (Pro-only)
Room Correction (Pro-only) A Group of functions For Frequency Impulse Response Correction
SPL Meter (Pro-only)
Limiter-Compressor Bass Control (Pro-only)
Limiter-Compressor Detailed Control (Pro-only)
iWoofer App: DSP Discovery & Connect
From your listening position, using the Android or Apple App iWoofer App you can make any adjustment needed to get the maximum out of your system.
Open the iWoofer App: Turn On Bluetooth to allow iWoofer to connect to accessories. You may tap Ok, and the app will go into Demo Mode. Otherwise tap Settings, and turn ON Bluetooth, next tap to Home button, and open iWoofer again. Bluetooth range is (30-65ft) the app will find any number of subwoofers equipped iWoofer Hardware, all of them will appear under "Devices Found:" Choose the UDID or MAC address that show up for your iWoofer equipped sub.
Main Menu
Ok, we have seen the UDID and tapping it we get the main control menu.

The app has a renaming function in Options/Name menu, and UDID number could be replaced for any name whatever you like.

X-Over Menu
From here you will be able to fine-tune your subwoofer, carefully matching the main speakers to the sub, using variable slopes and role offs. Whether you have ported main speakers, needing 24 or even 48dB per octave filtering, or sealed acoustic suspension speakers needing 12dB per octave filtering, we have you covered. The infinitely variable phase correction and choice of cross-over points also provide for much better integration with the main speakers.
X-Over - control of Low Pass and High Pass Filters (LPF/HPF), double tap (or tap & hold on > 1S) on the slope to select one, slide left/right to control a frequency (20:500Hz), and up/down to control an 'Slope" order (2:4:8 or 12/24/48 dB/oct Butterworth). Use this to match your main speakers with the subwoofer
The LPF/HPF frequencies limit the frequency range for Room Correction (Pro App only).
The Xover menu also controls up to 25 bands of fully Parametric Equalization
The built-in 25-band digital parametric equalization allows you to correct for frequency response dips and peaks caused by positioning and room reflections. You can do this by ear, or use a free frequency response app, or upgrade to the ProApp (IOS only)and simply use your phones microphone to measure the frequency response and then start making up to 25 different equalization adjustments until the response curve has been corrected. For iPhone users you can run auto-room equalization/correction, allowing the Pro App to create the EQ filters needed to deal with Room Acoustics issues.

Equalizer (PEQ), to add a new PEQ tap to "+" icon, to delete select "Trash" icon. Slide curve right/left to set a frequency, up/down to set a gain (db), zoom in/zoom out to control a Q factor (PEQ bandwidth), double tap (or tap&hold on > 1S) on PEQ line to select it.
Options Menu
Name: By default the Name field filled with UDID, you may rename it there. UDID shows the MAC address of the connected iWoofer Hardware.
Restore Factory Setting: In case you want to reset all parameters to defaults. Be aware that this defaults is not exactly the same as was preset by the manufacturer of your subwoofer. As mentioned before, the very first connected iWoofer hardware will offer app to import preset from DSP, this one is the manufacturer's default preset.
Change Pairing Code: let you to set a password to you subwoofer/app. In case if the password is forgotten, please press and hold the Pair button on the rear panel of your subwoofer during 3Sec. The subwoofer password will be reset to zero. Preset Manager allow you to save/load and export presets. Please note that only after saving a preset the subwoofer will memorize a new parameters. Without saving a preset, subwoofer loses a new parameters after turn Off. Export presets carried out thru the IOS email account, but the import could work by hyperlink on website.
Preset Manager: allows you to save/load and export presets. Please note that only after saving a preset the subwoofer will memorize a new parameter. Without saving a preset, the subwoofer loses the new parameters after turn-off. Exporting presets is carried out thru the IOS email account, but the import could work by hyperlink.
HW Controllers (not recommended)
Hardware controller options lets you to adjust or deactivate up to four knobs or switches on the rear panel of your subwoofer. For a full control by app please switch off all controllers, otherwise turning Off/On of the subwoofer will return the control to the rear panel knobs.
Auto On/Off allows you to adjust auto On threshold in mVRMS units, and hold On time in minutes. 10mVRMS and 2 minutes are default values.
Gain Slider
The volume slider with Input Level indication (gray/green/red means, signal is less/more than Auto On Threshold, or input clipped).
SHS
The ability to restore sub harmonics that have lost or not been included in early recordings. All musical notes consist of the original note and a series of harmonics or fundamentals of that frequency, combined, they produce the note you hear. Sub Harmonic Synthesizing (SHS) restores those lost harmonics. Sub Harmonic Synthesizer (old tracks bass restoration, a good example is Jackson Sisters - I Believe In Miracles or Diana Krall - Temptation). Ideal for sealed subwoofers.
Delay Controls
2.5:65mS or 5:67.5mS for the FIR room correction mode (latency 2.5/5mS). Sometimes needed to match the delay with full range speakers (if delayed).
Phase
The 1st order all pass filter F 10:10000Hz. Sometimes needed to match the phase of the main speakers in the cross-over region.

Documents / Resources
References
Download manual
Here you can download full pdf version of manual, it may contain additional safety instructions, warranty information, FCC rules, etc.
Advertisement


Need help?
Do you have a question about the TREVOCE15 EQ DSP and is the answer not in the manual?
Questions and answers