Advertisement
Tools Needed
- Trench Spade/Shovel
- Wire Cutter
- Measuring Tape
- Direct Burial Cables
- Silicon Cable Connectors (Optional)
- Outdoor Volume Control (Optional)
Pre Installation
- Where is the best place to install the speakers?
- Where will the speakers sound the best?
- Place the speakers in a location where they will blend in best with their surroundings.
Speaker Wire
To determine the length and the gauge of speaker wire, you will need to measure the distance between your receiver/amplifier and the speakers.
- Always buy more than you think you would need.
- Equal wire lengths should always be used to maintain an equal balance in sound volume.
- Sound quality is lost when using thin wire gauge over a long distance.
18 AWG minimum - for distances up to: 10 ft
16-2 AWG - from: 10 to 50 ft
14-4 AWG - from: 50 to 100ft
12-2 AWG - from: 50 to 100ft
Step 1
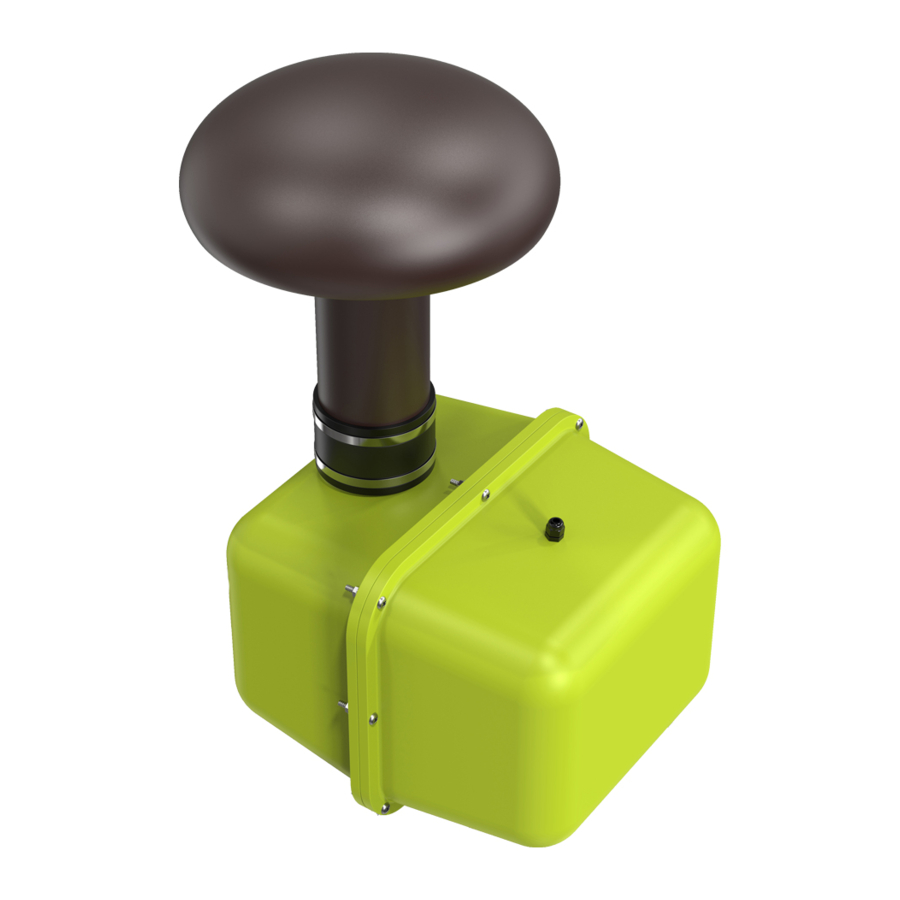
Designate the general area where the subwoofer would be most ideal. The subwoofer should be placed with in 20 feet of the general listening area for optimum performance. (See Diagram1) The shape and finish would blend particularly well in your landscape if it is placed near landscape lighting, water fountain, open planter or swimming pool.

Step 2
Measure the distance from the designated speaker location to your stereo receiver. Try to minimize your distance without compromising on your overall appeal and safety concern. Once the route is determined, use your spade and trench to dig the hole for the subwoofer and a wire route between 8"-12" deep once the trench route is completed, lay the cable in the route. If using the PVC pipe, cut the pipe to length, ensure all electrical connections are watertight with silicone burial connectors. Once the cable layout is done, connect the subwoofer & refill the trench & subwoofer hole. (See Diagram 2)

Step 3
Connect to a Mono Subwoofer Amplifier such as the OSD SMP250. Please note, the red lead indicates positive signal (+) and the black indicates negative signal (-). Connecting the positive and negative leads incorrectly will cause it to be out of phase and will result in weaker bass response. (See Diagram 3) Remove 2"- 3" of the outer layer of the speaker wire. Carefully strip ½" of the insulation covering the speaker conductors within the outer layer and connect to the speaker outputs on the amplifier.

System Diagrams
For optimum performance combine the GLS8 with our LS2 landscape satellite speakers. Create an unobtrusive stealthy outdoor sound system with the following system diagrams. Additional system configurations can be created for up to 8 pairs of speakers using multichannel amplifiers and or series parallel wiring.
Note: Please consult your electronics manual for Impedance and Power Rating before wiring a multi speaker system.

Specifications

Woofer: 8" Polypropylene Cone With Rubber Surround
Power: 500 Watts Max
Freq Response: 28 - 200Hz
Sensitivity: 84 dB
Impedance: 8 Ohm
Dimensions: (HxWxD) 28.0" x 19.75" x 15.5" inch
Weight: 32 lbs
Warranty Information
All OSD AUDIO outdoor speakers have (1) year Limited Warranty against defects in materials and workmanship. Proof of purchase must accompany all claims. During the warranty period OSD AUDIO will replace any defective part and correct any defect in workmanship without charge for either parts or labor
For this warranty to apply, the unit must be installed and used according to its written instructions. If necessary, repairs must be performed by OSD AUDIO. The unit must be returned to OSD AUDIO at the owner's expense and with prior written permission. Accidental damage and shipping damage are not considered defects, nor is damaged resulting from abuse or from servicing performed by an agency or person not specifically authorized in writing by OSD Audio
Damage to or destruction of components due to application of excessive power voids the warranty on those parts. In these cases, repairs will be made on the basis of the retail value of the parts and labor. To return for repairs, you must email customer service at RMA@audiogeargroup.com for a Returned Merchandise Authorization (RMA) number then the unit must be shipped to OSD AUDIO at the owner's expense, along with a note explaining the nature of service required. Be sure to pack the product(s) in a corrugated container with at least 3 inches of resilient material to protect the unit from damage in transit.
OSD Audio | Brea, CA | osdaudio.com

Documents / Resources
References
Download manual
Here you can download full pdf version of manual, it may contain additional safety instructions, warranty information, FCC rules, etc.
Advertisement


Need help?
Do you have a question about the GLS8 and is the answer not in the manual?
Questions and answers