Table of Contents
Advertisement
Quick Links
Advertisement
Table of Contents

Subscribe to Our Youtube Channel
Related Manuals for Instant Pot DUO CRISP 9-IN-1


Summary of Contents for Instant Pot DUO CRISP 9-IN-1
- Page 1 INSTANT POT CRISP 9-IN-1 ™ ® INSTANT POT CRISP 9-IN-1 ®...
-
Page 2: Important Safeguards
Duo Crisp ™ air fryer lid with the Instant Pot Duo Crisp cooker base. Using any other pressure cooking lids or air fryer lids may cause injury and/or damage. 03 To reduce the risk of pressure leakage, cook only in an authorized stainless-steel Instant Pot inner pot. - Page 3 IMPORTANT SAFEGUARDS Do not place the appliance on or in close proximity to a hot gas or electric burner, or a heated oven. Heat from an external source will damage the appliance. Failure to follow these instructions may result in injury or property damage. Do not use the appliance near water or flame.
- Page 4 IMPORTANT SAFEGUARDS 18 Do not use this appliance for deep frying or pressure frying with oil. 19 Do not lean over or place your hands or face over the steam release valve or float valve when the appliance is in operation or has residual pressure.
- Page 5 Children should not play with this appliance. 37 To prevent personal injury and damage to the appliance, only replace the sealing ring with an authorized Instant Pot sealing ring. Visit our online store for purchasing details. WARNING Read this manual carefully and completely and retain for future reference.
- Page 6 IMPORTANT SAFEGUARDS 38 The use of accessory attachments not recommended by the appliance manufacturer may cause injuries. 39 Proper maintenance is recommended after each use. Refer to Care, Cleaning and Storage. Let the appliance cool to room temperature before cleaning or storage. 40 When using the air fryer lid, do not overfill the air fryer basket.
- Page 7 IMPORTANT SAFEGUARDS Extreme caution must be used when the inner pot contains hot food, hot oil or other hot liquids. Improper use, including moving the air fryer lid or cooker base, may result in personal injury. Do not move the appliance while it is in use. 48 Oversized foods and/or metal utensils must not be inserted into the inner pot or air fryer basket as they may cause risk of fire and/or personal injury.
- Page 8 IMPORTANT SAFEGUARDS WARNING To avoid injury, read and understand the instructions in this user manual before attempting to use this appliance. WARNING Electrical shock hazard. Use grounded outlet only. • DO NOT remove ground. • DO NOT use an adapter. •...
- Page 9 Product, parts and accessories See Care, cleaning and storage: Removing and installing parts to find out how everything fits together. Top of pressure cooking lid Float valve Steam release valve Easy-release switch Handle Duo Crisp Lid fins Lid position marker Steam release handle Float valve Crisp...
- Page 10 Product, parts and accessories Cooker base Power and sensor connector Condensation collector Outer pot (Rear) Condensation rim Cooker handles Heating element (Interior) Control panel Power cord (Rear) Air fryer lid Accessories Lid handle Air fryer basket Lid position marker Lid fins Back Air fryer basket base (Duo Crisp)
-
Page 11: Get Started
Get started 01 Pull that Duo Crisp out of the box! Always use a stainless-steel inner pot, not the non-stick ceramic coated variety, with the air fryer lid. 02 Remove the packaging material and accessories from in and around the cooker and make sure all the parts are accounted for. - Page 12 Get started Initial test run (water test) 09 Follow instructions for a Quick Release in Releasing pressure: Venting Do you have to do the water test? No — methods. but getting to know the ins and outs of Pressurized steam your Duo Crisp prepares you for success releases through the top of the steam in the kitchen! Take a few minutes to get...
- Page 13 Frozen foods have the longest pre- heating time. For the fastest results, thaw your food before cooking it. While the cooker pre-heats, it vaporizes The time it takes the Instant Pot to liquid to create steam. pressurize depends on the amount The display shows On.
-
Page 14: Releasing Pressure
Releasing pressure You must release pressure after pressure cooking before attempting to open the lid. Follow your recipe’s instructions to choose a venting method. Venting methods Natural Release (NR or NPR) Cooking stops gradually. As the temperature within the cooker drops, the cooker depressurizes naturally over time. - Page 15 Releasing pressure Easy-Release Switch for Quick Release (QR or QPR) Stops cooking quickly and prevents overcooking. Perfect for quick-cooking vegetables and delicate seafood! What to do What to expect When pressed down, a jet of steam ejects through the top of the steam release valve. Press the quick release button down until it clicks and This is normal! locks into the Vent position.
-
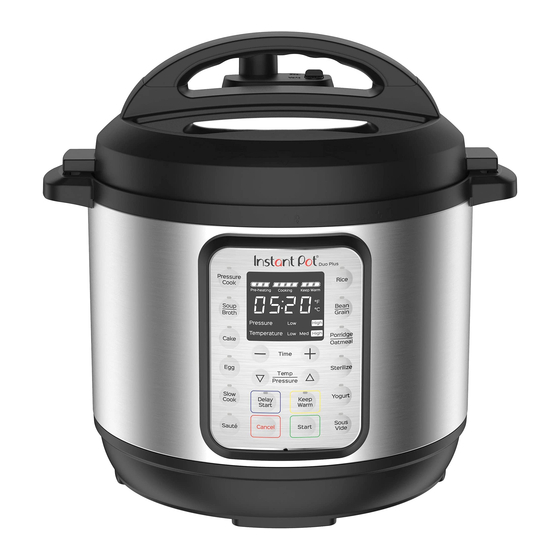
Page 16: Control Panel
Control Panel Pressure cooking lid Air fryer lid • Pressure Cook • Steam • Air Fry • Rice • Roast Smart Programs • Oatmeal • Bake • Saute • Broil • Slow Cook • Keep Warm The time display shows the time in HH:MM format. Counts up or Time display down, depending on the Smart Program. - Page 17 Pressure control features See Care, cleaning and storage for installation and removal of parts. Pressure cooking lid What we love about it What you should know about it The lid is removable during non-pressure When you close it, it sets to Seal cooking so you can taste-test as you go.
- Page 18 Pressure control features Quick release button The quick release button controls the steam release valve — the part controls whether pressure is released or not. Duo Crisp Quick Release Button Seal position Vent position Flick to seal. Press to vent. What we love about it What you should know about it The lid says Turn to Seal, but it’s more...
- Page 19 Pressure control features Steam release valve The steam release valve sits loosely on the steam release pipe. When the cooker releases pressure, steam ejects from the top of the steam release valve. The steam release valve is integral to product safety and necessary for pressure cooking. Duo Crisp Crisp Sealing ring...
- Page 20 The float valve and silicone cap work together to seal in pressurized steam. These parts must be installed before use. Do not attempt to operate the Instant Pot without the float valve properly installed. Do not touch the float valve during use.
- Page 21 Pressure control features Float Valve Crisp DANGER DO NOT attempt to remove the lid while the float valve is up and NEVER attempt to force the lid open. Contents are under extreme pressure. Float valve must be down before attempting to remove the lid. Failure to follow these instructions may result in serious personal injury and/or property damage.
- Page 22 Cooking The Duo Crisp is super versatile in the kitchen — whether you want to pressure cook first and use the air fryer lid to crisp up your dish, or if you’d prefer to cook your meal just using the air fryer lid — you can! Pressure cooking lid Air fryer lid •...
- Page 23 • To avoid personal injury or damage to the appliance, replace the inner pot if it is dented, deformed or damaged. • Use only authorized Instant Pot inner pots made for this model when cooking. Always make sure the heating element is clean and dry before inserting the inner pot into the cooker base.
- Page 24 Cooking To get pressure cooking, follow the same basic steps as you did in the Initial test run (water test) — but add food this time! Instant Tip: Using the multi-functional rack will ensure your food items are steamed and not boiled. It helps heat food evenly, prevents nutrients from leeching into the cooking liquid, and stops food items from scorching on the bottom of the inner pot.
- Page 25 Cooking Sauté Sauté can be used in place of a frying pan, griddle or flat-top grill. Sautéing meat and vegetables before pressure cooking is the perfect way to boost flavors. Temperature Suggested use Notes The display switches from Simmer, reduce and On to Hot when the inner Lo (Low) caramelize.
- Page 26 Cooking Air Fry, Roast, Bake, and Broil Using the air fryer lid is an amazing way to ramp up your meal's flavor and texture. NOTICE If the Food burn error appears while using the air fryer lid, deglaze the bottom of the inner pot as necessary, according to Cooking: Sauté...
- Page 27 Cooking Air Fry, Roast, Bake, and Broil Insert food into the multi-level air fryer basket, oven-safe cookware, or directly into the inner pot, according to your recipe. If using an accessory, insert the 05 Press Start. accessory into the inner pot. The display shows On as the air fryer 01 Insert the stainless-steel inner pot into lid Preheats.
- Page 28 Settings To do this Do this When in standby, press and hold + above Time until display indicates S On (sound on) or SOFF (sound off). Turn sound on/off. Audible safety and error message alerts cannot be turned off. Press and hold + above Temp until the Change display temperature ºC / ºF.
-
Page 29: Status Messages
Status messages The Duo Crisp is in standby mode. May indicate that the lid is missing, not properly secured, or that the wrong lid is being used for the Smart Program selected. The cooker is pre-heating. The Sauté Smart Program has reached cooking temperature and food may be added to the inner pot. -
Page 30: Care, Cleaning And Storage
Always unplug your cooker and let it cool to room temperature before cleaning. Never use metal scouring pads, abrasive powders or harsh chemical detergents on any of the Instant Pot’s parts or accessories. Let all surfaces dry thoroughly before use, and before storage. -
Page 31: Removing And Installing Parts
Care, cleaning and storage WARNING The Instant Pot cooker base contains electrical components. To avoid fire, electric leakage or personal injury, make sure the cooker base stays dry. • DO NOT immerse the cooker base in water or other liquid, or attempt to cycle it through the dishwasher. - Page 32 Care, cleaning and storage Steam release valve Steam release handle Remove the steam release valve Remove the steam release handle Pull the steam release valve up and off the steam release pipe. The steam release valve must be installed before using the cooker. Duo Crisp Crisp Install the steam release handle...
- Page 33 Care, cleaning and storage Anti-block shield Float valve and silicone cap Remove the anti-block shield Remove the float valve from the lid Grip the lid like a steering wheel and use Place one finger on the flat top of float your thumbs to press firmly against the valve, then turn the lid over.
- Page 34 Care, cleaning and Storage Condensation collector The condensation collector sits at the back of the cooker base and catches any overflow from the condensation rim. It should be installed before cooking, then emptied and rinsed out after each use. Remove the condensation collector Pull the condensation collector away from the cooker base;...
-
Page 35: Troubleshooting
Troubleshooting Register your Duo Crisp today at instanthome.com/register. Get in touch with a Customer Care Advisor by email at support@instanthome.com or by phone at 1-800-828-7280. View the full Troubleshooting table online at instanthome.com. Problem Possible reason Try this Inspect power cord for damage. If damage is noticed, contact Customer Care. - Page 36 Troubleshooting Problem Possible reason Try this Cancel the Smart Program, unplug the cooker and allow it to cool to room temperature. Choose a neutral oil with a high smoke point, Using an oil with a low smoke point. such as Canola, Avocado, Soybean, Safflower, or Rice Bran.
-
Page 37: Warranty
Warranty Warranty One (1) Year Limited Warranty This One (1) Year Limited Warranty applies to purchases made from authorized retailers of Instant Brands Inc. (“Instant Brands”) by the original appliance owner and is not transferable. Proof of original purchase date and, if requested by Instant Brands, return of your appliance, is required to obtain service under this Limited Warranty. - Page 38 Warranty Some states or provinces do not allow for: (1) the exclusion of implied warranties of merchantability or fitness; (2) limitations on how long an implied warranty lasts; and/or (3) the exclusion or limitation of incidental or consequential damages; so these limitations may not apply to you. In these states and provinces, you have only the implied warranties that are expressly required to be provided in accordance with applicable law.
- Page 39 instanthome.com | 39...
- Page 40 Instant Brands Inc. 495 March Road, Suite 200 Kanata, Ontario, K2K 3G1 Canada instanthome.com © 2021 Instant Brands Inc. 140-0045-01-0301...
Need help?
Do you have a question about the DUO CRISP 9-IN-1 and is the answer not in the manual?
Questions and answers