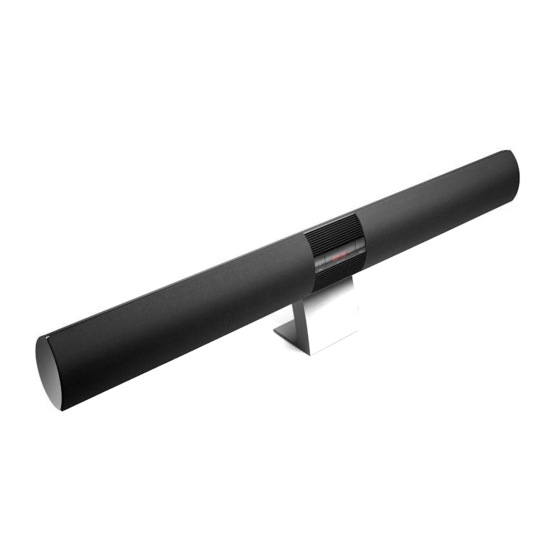
Bang & Olufsen BeoLab 3500 - Speakers Manual
- User manual (25 pages) ,
- Manual (28 pages)
Advertisement
Safety


To reduce the risk of electric shock, do not remove cover (or back). No User-serviceable parts inside. Refer servicing to qualified service personnel.

To reduce the risk of fire or electric shock, do not expose this appliance to rain or moisture. Do not expose this equipment to dripping or splashing and ensure that no objects filled with liquids, such as vases, are placed on the equipment. To completely disconnect this equipment from the AC Mains, disconnect the mains plug from the wall socket. The disconnect device shall remain readily operable.
 The lightning flash with arrowhead symbol within an equilateral triangle, is intended to alert the user to the presence of uninsulated "dangerous voltage" within the product's enclosure that may be of sufficient magnitude to constitute a risk of electric shock to persons.
 The exclamation point within an equilateral triangle is intended to alert the user to the presence of important operating and maintenance (servicing) instructions in the literature accompanying the product.
Introducing BeoLab 3500
This chapter provides you with an overview of how to use sources in your main room audio or video system and listen to them on BeoLab 3500 in another room.
BeoLab 3500 gives your main Bang & Olufsen system an extra dimension. You can play any source you like in your main room audio or video system and listen to it – via your BeoLink installation – in the room with your BeoLab 3500. BeoLab 3500 can be operated both close-up and with the Beo4 remote control. However, Beo4 gives you the full benefit of your link system. Using Beo4, you can control playback functions in your main room system, as well as make BeoLab 3500 wake you up in the morning.

Close-up operation...
- Switch on the radio in your main room system, or listen-in on a source that is currently playing.
- Include BeoLab 3500 in a Timer Play programming made on your main room system. Timer Play switches your system on at a certain time with a certain source, and is programmed on your main room system.
Using Beo4...
- Switch on any source you like in your main room system via BeoLab 3500.
- Operate all the daily playback functions for the source that is currently playing via BeoLab 3500.
- Adjust the sound in BeoLab 3500.
- Make a Wake-up Timer on your BeoLab 3500.

The main room is the room in which you have placed the audio and/or video system – complete with their various sources (the main system).
The link room is where you have BeoLab 3500 installed. From this room you are able to control and listen to the sources from the main system.
There are two different BeoLink distribution systems available:
- A cable based Master Link (ML) system.
- A wireless system based on BeoLink Wireless 1.
BeoLab 3500 can be used in either system.
For information about installation refer to 'Set up BeoLab 3500' (pp. 16–22) in this Guide.
Note: Although BeoLab 3500 has a Power Link socket, it can not be used as an ordinary Power Link loudspeaker in a audio or video system!
Close-up operation
Find out how to switch on the Timer Play function and 'listen in' on a source playing on the main room system.
You can use the close-up operation panel to include or exclude BeoLab 3500 in a Timer Play you have programmed on your main audio or video system. You can also listen in on a source currently playing on the main room system.
The Timer Play function is not available in all Bang & Olufsen systems. Please refer to the Guide for your main system.

The BeoLab 3500 display and close-up operation panel. If BeoLab 3500 is included in a Timer Play function, it is indicated by a small red light in the TIMER key to the left on the display panel.
Listen in and mute the sound
The key marked MUTE • enables you to listen in on a source that is currently playing in your main system. When you switch BeoLab 3500 on in this way, you only get sound in BeoLab 3500 – the loudspeakers in the main system are not cut in.
- If no source is playing when you touch MUTE •, BeoLab 3500 switches on the radio in your main system.
- Touch MUTE • again briefly, and BeoLab 3500 switches off (a red standby indicator appears in the display). If you keep your finger on the key for two seconds, both BeoLab 3500 and your main system switch off simultaneously.
Timer Play control
If you have programmed the main system to start playing automatically (Timer Play), BeoLab 3500 can be included as well. You can activate or deactivate the Timer Play function on the close-up operation panel.
- Touch the TIMER key and you see the current Timer setting of BeoLab 3500 in the display.
- While the current setting is displayed, touch the TIMER key again to change the function from TIMER (Timer Play) to NO TIMER (no Timer Play), or vice versa.
Remote control of Timer Play
When BeoLab 3500 is in standby, you can use Beo4 to exclude or include BeoLab 3500 in a Timer Play programming.
- Press LIST repeatedly until SHIFT is shown in the display.
- Press 0 to change between TIMER ON and NO TIMER.
In order to display SHIFT, you must first add it to the Beo4 list of functions. Refer to 'Customising your Beo4' in the Beo4 Guide.
Information in the BeoLab 3500 display
TIMER ON
The display shows that BeoLab 3500 is included in a Timer Play programming.
NO TIMER
The display shows that BeoLab 3500 is excluded from a Timer Play programming – it will not start up automatically as programmed on your main system.
The Beo4 remote control enables you to switch on the source you wish to listen to from your main room audio or video system, and to control functions for that source – just as if you were operating your main system directly.
With Beo4, you can make a separate Wake-up Timer on BeoLab 3500, and adjust sound settings for the link speaker.
Functions mentioned on these pages are only available via BeoLab 3500 if the source in question is present in your Bang & Olufsen system and the source supports the function.
To switch on an Audio source...
- Press RADIO to listen to a radio programme.
- Press CD to listen to a CD.
- Press A MEM (A TAPE) to listen to an audio recording.
To switch on a Video source...
- Press TV to listen to TV.
- Press DTV (SAT) to listen to digital TV.
- Press V MEM (V TAPE) to listen to a video recording.
- Press DVD to listen to a DVD.
To switch on additional sources...
- Press LIST to display additional sources, such as N.MUSIC (music stored on a PC), and then press GO to switch on a source.

The Beo4 remote control is available as an optional extra from your Bang & Olufsen retailer.
Examples of source functions...
- Press the number buttons to enter the program, track or disc number you want to hear.
- Press
![]() or
or ![]() to step through programs, recordings or tracks.
to step through programs, recordings or tracks. - Press
![]() or
or ![]() to search through a CD in a single CD player, or step between CDs in a multi-CD player.
to search through a CD in a single CD player, or step between CDs in a multi-CD player. - Press the yellow button to search forward through a CD in a multiCD player.
- Press the green button to search backward through a CD in a multi-CD player
- Press STOP to pause playback. Press a second time to stop playback completely
- Press GO to resume playback
- Press
![]() to switch off the link speaker. Press and hold to switch off your Bang & Olufsen system as well.
to switch off the link speaker. Press and hold to switch off your Bang & Olufsen system as well.
Refer to the Guide enclosed with your main system for further information about source functions.
Additional functions with Beo4...
Mute ... Pressing the middle of the volume button while BeoLab 3500 is in standby, corresponds to touching MUTE • directly on BeoLab 3500.
Playback ... To start playback on a secondary video recorder or DVD player in your main system, press LIST to display DVD2* (V.TAPE2) and then GO.
BeoLab 3500 and the main system in one room...
When BeoLab 3500 is set up in the same room as the main system, and you press a source button, such as RADIO, CD or TV, the sound is reproduced through the loudspeakers in the main system.
However, if you want the sound reproduced through BeoLab 3500 instead, press LIST to display LINK* and then a source button, such as RADIO, CD or TV.
BeoLab 3500 must be set to Option 4 as explained in 'Ready for use...'.
*NOTE! In order to display these functions, you must first add them to the Beo4 list of functions. Refer to the chapter 'Customising your Beo4' in the Beo4 Guide.
Adjust sound with Beo4
With the Beo4 remote control you can adjust the sound coming out of BeoLab 3500.
All sound levels are reset to their original values when you switch off BeoLab 3500 – unless you store them permanently.
All the current sound levels, including volume level, are stored simultaneously.
The BeoLab 3500 sound is adjusted independently from your main audio or video system.
To adjust sound volume or mute the sound...
Press ![]() or
or ![]() to adjust the sound volume up or down.
to adjust the sound volume up or down.
Press the middle of the 
 button to mute the sound, and press or to restore the sound.
To adjust speaker balance...
- Press LIST repeatedly until SPEAKER* is shown in the display.
- Press
![]() or
or ![]() to adjust balance left or right.
to adjust balance left or right.
 or
or  to adjust balance left or right.
*NOTE! In order to display these functions, you must first add them to the Beo4 list of functions. Refer to the chapter 'Customising your Beo4' in the Beo4 Guide.
To adjust bass, treble or loudness...
- Press LIST repeatedly until A.SETUP* (or V.SETUP* for a video source) is shown in the display.
- Press GO to be able to adjust settings.
- Press LIST repeatedly until BASS, TREBLE or LOUDNESS is shown in the display.
![]() Press
Press ![]() or to adjust the setting.
or to adjust the setting.- Press GO to select the setting.
 Press
Press  or to adjust the setting.
To store sound settings permanently – making a new preset start-up sound level...
- Press LIST repeatedly until S.STORE* is shown in the display.
- Press GO to store settings permanently.
Information in the display
VOL 36
The current volume level. Volume can be adjusted in steps of two within a range of 00 to 72.
BALANCE
The current balance setting – here neutral. Balance can be adjusted within a range of 7 to either side.
BASS 0
The current bass level – here neutral. Bass can be adjusted within a range of -7 to +7.
TREBLE 0
The current treble level – here neutral. Treble can be adjusted within a range of -7 to +7.
LOUDNESS
The display shows the current loudness setting – shining steadily for 'on', blinking 'LOUDNESS' and 'OFF' for 'off'.
Make a Wake-up Timer
A Wake-up Timer is a once-only Timer, and is deleted once it has been executed. You can also delete a Wake-up Timer yourself. Choose the time and a specific source, such as CD, for your Wake-up Timer. specify differently, the Wake-up Timer starts on the last played radio station. To make BeoLab 3500 wake you up every morning, for example, program your main audio or video system for Timer Play. For further information, refer to the Guide included with your main system – and in this Guide.
To make a Wake-up Timer...
- Press MENU on Beo4.
- Press the button for the source you wish to use, such as RADIO or CD. If you choose CD as your source, make sure that a CD is loaded in the audio system.
- If necessary, use the number buttons to enter a program number and press GO.
- Using the number buttons, enter the wake-up time. > If you change your mind, press EXIT to cancel the Wake-up Timer. Otherwise...
- ...press GO to store the Wakeup Timer.
Once you have made one Wake-up Timer, BeoLab 3500 automatically suggests the time you entered for the last Wake-up Timer in the display, when you start to make a new timer.
To delete a Wake-up Timer...
- Press MENU to view your Wakeup Timer.
- Press STOP to delete the Timer.
- Press GO to confirm.
Information in the display
ON –:– –
BeoLab 3500 is ready for you to key in a time for your Wake-up Timer.
STORED
You have now stored your Wakeup Timer.
DELETED
You have now deleted your Wakeup Timer.
ILLEGAL
The time you entered is not correct, simply key in a different time.
About the Wake-up Timer and Timer Play
A Wake-up Timer you make on BeoLab 3500 may overrule a Timer Play you have programmed on your main room system.
For example: If your Timer Play is set to start at seven o'clock in the morning and you set the Wake-up Timer for nine o'clock in the morning, then your Timer Play is overruled.
However, if you set your Wake-up Timer to start at five o'clock in the morning and your Timer Play is set to start at seven o'clock, then both Timers will be executed.
Information in the display
The red display on BeoLab 3500 adjusts automatically to the surrounding light. This makes the display easy to read in all lighting conditions.
The display can be set up to give you information about the source you are listening to. In addition, if the main system has a clock function, BeoLab 3500 can be set to show the time.
Display settings
NO CLOCK
No time indication in the display – in standby the display only shows the red standby light. When BeoLab 3500 is in use, the display shows the current source. Select this option if your main system does not support the clock function.
CLOCK 1 •
In standby the display shows the time and the red standby light. When BeoLab 3500 is in use, the display shows the current source.
CLOCK 2 •
In standby the display shows the time and the red standby light. The time indication remains on when BeoLab 3500 is in use, but whenever you operate BeoLab 3500 (either close-up or by remote control), the display briefly shows the status of the operation. This is the factory setup.
To select display setting...
- While touching the TIMER key, touch the MUTE • key briefly. The display first shows the cue for the current setting.
- Touch MUTE • again, and the cue in the display changes.
- Keep touching MUTE • in this way until the cue for the setting you want is displayed.
- Let go of both keys.
If you select either CLOCK 1 or CLOCK 2 in a Wireless 1 setup, set the time on the main system afterwards – in order to force an update of the clock display.
Additional status displays
A.MEM 1
You are listening to track number 1 in your audio recorder.
A.MEM < >
The two arrows pointing left and right (< >) indicate that the source has stopped. They also appear with V.MEM and CD.
A.MEM <<
The double arrows pointing left (<<) indicate that the recording is being rewound. They also appear with V.MEM and CD.
A.MEM >>
The double arrows pointing right (>>) indicate that the recording is being fast forwarded. They also appear with V.MEM and CD.
CD 12
You are listening to track number 12 on a CD in a single CD player.
CD3 4
You are listening to disc number 3 and track number 4 on a CD in a multi-CD player.
DTV 12
You are listening to your digital TV program number 12.
DVD 1
You are listening to chapter number 1 on a DVD.
DVD2 1
You are listening to chapter number 1 on DVD2.
LOAD
If there is no disc in your CD player, DVD player, audio or video tape recorder when you press the source button, the display reminds you to load it by flashing LOAD three times.
N.MUSIC
You are listening to N.MUSIC – the Bang & Olufsen term for music stored on a PC – on BeoLink PC2/ BeoPort.
N.RADIO
You are listening to N.RADIO – the Bang & Olufsen term for Internet radio programs – on BeoLink PC2/ BeoPort.
RADIO 3
You are listening to your radio program number 3.
RECORD
RECORD blinks three times in the display to inform you that a recording is progressing. In order not to spoil the recording, the system automatically switches to the source that is being recorded instead, and you hear it on the link speaker.
TV 3
You are listening to your TV program number 3.
V.MEM 1
You are listening to recording number 1 on your video recorder.
Set up BeoLab 3500
On the next pages is explained how to install BeoLab 3500 in a cable based Master Link system or in a wireless Master Link system.
We recommend that you follow this procedure:
- Disconnect the entire system from the mains supply.
- Run a Master Link cable from the main system to the link room (or install BeoLink Wireless 1 as explained in the Guide enclosed with Wireless 1).
- Connect BeoLab 3500 as explained in 'Cable connections'.
- Connect the entire system to the mains supply again, and set BeoLab 3500 to the correct Option setting. This is explained in 'Ready for use...' (p. 22).

BeoLab 3500 must be placed horizontally on the wall, or fastened to the optional table stand. Plug in the cables before you fasten BeoLab 3500 to the wall or table stand.

- Make sure that BeoLab 3500 is placed and connected in accordance with the instructions in this Guide. To prevent injury, use Bang & Olufsen approved stands and wall brackets only!
- BeoLab 3500 can only be switched off completely by disconnecting it from the wall socket.
- Do not attempt to open BeoLab 3500. Leave such operations to qualified service personnel!
- BeoLab 3500 is designed for indoor use in dry, domestic environments only, and for use within a temperature range of 10–40º C (50–105º F).
- Do not place BeoLab 3500 in direct sunlight or direct artificial light (a spotlight, for example), or near objects generating electrical noise (light dimmers, for example), as this may reduce the sensitivity of the remote control receiver.
- For optimum sound quality, do not place BeoLab 3500 enclosed in, for example, a shallow bookcase. Leave a minimum of 20 cm (8") free space at the sides, and never place anything directly in front of BeoLab 3500.

Wall bracket: A wall bracket for fastening BeoLab 3500 to a wall is included in the package. We recommend that you place BeoLab 3500 in a suitable height above the floor to facilitate closeup operation and the use of the status display.
To allow for placement at different heights, BeoLab 3500 can be tilted to aim the sound towards your listening position (for example, if BeoLab 3500 is mounted in a high position, tilt it downwards).

Table stand: As an alternative to the wall bracket, you may use the optional stand – which makes placement of BeoLab 3500 even more flexible.
To allow for placement at different heights, the stand has been furnished with two sets of holes. Using the lower set of holes will tilt BeoLab 3500 upwards, and vice versa.
To fasten BeoLab 3500 on a solid wall:

- Mark and drill the holes in the wall, using the bracket as a template.
- Fasten the bracket to the wall. Use the correct size and type of screws and wall anchors, taking into account the construction and condition of the wall. Use three screws and wall anchors each with a minimum load rating of 13 kg (29 lbs). Level the bracket before tightening the screws (A).
- Detach the grey plastic cover (B) from the wall mount and connect the cables.
- Hang BeoLab 3500 on the bracket by inserting the two plastic pegs into the holes on the upper edge of the wall bracket.
- Secure BeoLab 3500 to the bracket with the two screws (C), and attach the grey plastic cover again (B).
To fasten the bracket on a light partition wall:

Light partition walls are often constructed of gypsum panels – known as drywall or wall board – secured to vertical studs. Gypsum is not a satisfactory material to support the weight of BeoLab 3500! If you wish to hang BeoLab 3500 on a gypsum wall, using the standard wall bracket, use one round-headed lag screw (ø 4.5 mm – 0.18"), which penetrate the gypsum and are screwed a minimum of 25 mm (1") into a vertical stud. Furthermore, use two additional screws of a type intended for gypsum walls.

If you want to place BeoLab 3500 between studs, fasten the additional wall plate to a vertical stud in each end, using the appropriate type of screw. Then fasten the standard wall bracket to the plate, using the three screws provided.
The dimensions of the additional wall plate is adapted specially for use in the USA.
To fasten BeoLab 3500 on a table stand:

Unscrew the spring loaded screws on the rear of BeoLab 3500 in order to detach the grey plastic wall mount.
Attach BeoLab 3500 to the stand using the two small screws enclosed with the stand.
Cable connections...
... In a cable based Master Link system
Follow the instructions on this page, if you are going to connect BeoLab 3500 to the main room with a Master Link cable.
In the link room: Connect the Master Link cable (flat multi-pin plug) to the Master Link socket on BeoLab 3500, and run the cable to the ML junction box.
In the main room: Connect the Master Link cable (flat multi-pin plug) to the Master Link socket on the main system, and then run the cable to the ML junction box.
Inside the junction box, join the cables as explained in the guide enclosed with the box. This guide contains information about the many possibilities of the box and how to join the cables.

Finally connect BeoLab 3500 to the mains supply – and turn on the power for your main system.
For further information about other accessories, cables, cable covers, etc., contact your Bang & Olufsen retailer.
... In a wireless Master Link system

Follow the instructions on this page, if you are going to connect BeoLab 3500 to the main room via a BeoLink Wireless 1 system.

In the main room: Connect the Wireless 1 unit you have assigned as transmitter to the Master Link socket on the main system.
In the link room: Connect the Wireless 1 you have assigned as receiver to the Master Link socket on BeoLab 3500. Connect BeoLab 3500 and Wireless 1 to the mains supply. For information about how to set up the BeoLink Wireless 1 units, refer to the Guide enclosed with Wireless 1.
Ready for use...

For further information about the display, refer to 'Information in the display' in this Guide.
When you have finished setting-up BeoLab 3500, connect it to the mains supply. Then switch on the power for the main system. When first switched on, the red stand-by indicator in the display will light up and, after a while, the clock will be shown in the display. However, if your main system is of a type without the clock option, the display will only show:
Option settings
BeoLab 3500 can be set to the following Options:
Option 0: Used if you want to disable remote control operation.
Option 4: Used if you install BeoLab 3500 in the same room as your main system (for example in a large L-shaped room with two separate listening positions).

Option 5: Used if you set up a Bang & Olufsen television in the same room as BeoLab 3500.

Option 6: Used in a setup with the main system in one room, and BeoLab 3500 in another – as described in this guide (this is the factory setting).

Use a Beo4 remote control to set the Option. The entire system must be switched to stand-by.
- While holding down the • button, press LIST.
- Let go of both buttons.
- Press LIST repeatedly until OPTION? is shown in the Beo4 display, and press GO.
- Press LIST repeatedly until L.OPT is shown in the Beo4 display, and then key in the appropriate number (0, 4, 5 or 6).
Cleaning BeoLab 3500
Never use alcohol or other solvents to clean any parts of BeoLab 3500.
Clean the metal surfaces using a dry, soft cloth. If necessary, remove grease stains or persistent dirt with a lint-free, firmly wrung cloth, dipped in a solution of water containing only a few drops of mild detergent, such as washing-up liquid. The centre part of BeoLab 3500 (display and buttons), is coated with a special 'self-healing' protective varnish. This means that minor scratches will 'heal' by themselves. Only a dry cloth must be used to clean this part.
The front cloth may be cleaned with a vacuum cleaner with a soft brush nozzle, and set to the lowest suction level.

Documents / ResourcesDownload manual
Here you can download full pdf version of manual, it may contain additional safety instructions, warranty information, FCC rules, etc.
Advertisement


Need help?
Do you have a question about the BeoLab 3500 and is the answer not in the manual?
Questions and answers