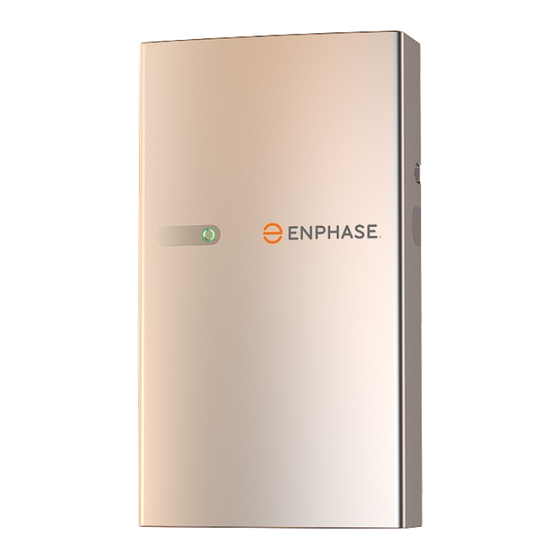
enphase IQ Battery 5P Quick Install Manual
Hide thumbs
Also See for IQ Battery 5P:
- Quick install manual (48 pages) ,
- Owner's manual (25 pages) ,
- Technical brief (19 pages)

Related Manuals for enphase IQ Battery 5P


Summary of Contents for enphase IQ Battery 5P
- Page 1 M ODE L I QB AT TER Y-5P-1P-N A V E R SI O N 3. 0 J U N E 2 0 23 P R E L I M I N A R Y IQ Battery 5P Quick Install Guide...
- Page 2 To install the Enphase IQ Battery 5P and the wall-mount bracket, read and follow all warnings and instructions in this guide. Safety warnings are listed at the end of this guide. These instructions are not meant to be a complete explanation of how to design and install an energy storage system.
-
Page 3: Table Of Contents
Revision history Installing IQ Battery 5P Step 1: Prepare to install IQ Battery 5P on mounting bracket Step 2: Prepare for field wiring Section C Wiring Install conduit/raceway adapter and field wiring Control (CTRL) Wiring between system components IQ Battery 5P Quick Install Guide... -
Page 4: What's In The Box
Q U A N T I T Y IQ Battery 5P B05-T02-US00-1-3 ID cover, two conduit covers B05-CX-0550-O Bottom mounting bracket & top shield B05-WB-0543-O M5 Seismic screw M4 Grounding screw M5 ID Cover Grounding screw Quick Install Guide IQ Battery 5P Quick Install Guide... -
Page 5: Tools/Additional Items Required
Provided by Installer (Min. 6) (Min. 6) Washers As required Provided by Installer IQ Battery 5P lifting handles. Includes one left side and one Enphase store/ right side lifting handle (IQBATTERY-HNDL-5) provided by Installer IQ Battery 5P Quick Install Guide... - Page 6 The IQ Battery 5P and IQ System Controller are both connected to the IQ Gateway and communicate using communication control cables. The Enphase PV system communicates to the IQ Gateway using power-line communication. Verify that main service is 120/240 VAC, and not 208/120 VAC.
-
Page 7: Unboxing Iq Battery 5P
IQ Battery 5P Before you unbox IQ Battery 5P, check the “Energize By” label on Do not lift the IQ Battery 5P using microinverters or the the shipping box to verify that the IQ Battery(ies) will be installed by plastic behind the microinverters. This may damage the unit the date shown. -
Page 8: Section A
No. 22 - 8 AWG. • Enphase IQ Batteries have been evaluated by UL solutions to UL9540A standard for outdoor and non- habitable indoor residential installations. Installations in finished, non-habitable indoor spaces (such as detached and attached garages, utility closets, basements, and storage or utility spaces) shall be permitted. -
Page 9: Step 1: Minimum Clearance
Minimum clearance The mounting instructions that follow are for the included wall-mount If mounted in the path of a motor vehicle, Enphase bracket only. If you wish to install IQ Battery 5P in a floor-mount recommends a minimum mounting height of 91 cm (36 in) configuration, order the pedestal accessory (B05-PI-0550-O) and above the floor. -
Page 10: Step 2: Mounting Surface
NOTE: If the variation of the flatness is more than 2 mm, the battery might not properly sit on the bottom mounting bracket through keyholes. Use spacers if the variation is more than 2 mm. IQ Battery 5P Quick Install Guide... - Page 11 The bottom mounting bracket carries the weight of IQ Battery 5P • Use 1/4 in screws to fasten the top shield to the wall. and the Top shield covers the back of the IQ Battery 5P. • Use #20 (5/16 in) screws/lag bolts (or masonry attachments for masonry wall) to attach the bottom mounting bracket using Risk of injury and equipment damage.
- Page 12 Tighten all screws to manufacturer’s specified torque values. 450 mm 450 mm The bottom mounting bracket can accommodate a slight offset in stud positioning with respect to the battery unit with pre-drilled holes/slots as shown in the image. IQ Battery 5P Quick Install Guide...
- Page 13 It can be fastened to the Fasten the top shield to the bottom mounting bracket at the ground supporting wall with the pre-drilled holes if studs are not contact flange. aligned. IQ Battery 5P Quick Install Guide...
- Page 14 Fasten the top shield using the mounting holes. Use minimum six screws for dual stud mounting to fasten the top shield six screws for single stud mounting to fasten the top shield to the wall. to the wall. IQ Battery 5P Quick Install Guide...
-
Page 15: Section B
Lift IQ Battery 5P from the packaging using the handles and make sure the battery’s front side is facing toward you. Do not lift the IQ Battery 5P using microinverters or the plastic behind the microinverters. This may damage the unit permanently. - Page 16 Only Right Back Conduit Only left back conduit* Only right back conduit* * One-side conduit configuration is supported only if system has one IQ Battery 5P or for the unit last in the daisy chain farthest from the IQ System Controller. IQ Battery 5P Quick Install Guide...
- Page 17 1/2 in (13 mm) to 1-1/4 in (32 mm). Decide the required conductor size for L1, L2, GND and cutout diameter based on the conduit selected. NOTE: Drill the appropriate cutout before mounting the unit on the wall. Not doing so will void the warranty. IQ Battery 5P Quick Install Guide...
- Page 18 NOTE: Use lift assist to avoid any mishap during lifting. To remove the installation handles, pull the plunger outward to unlock them. Then, slide the handle down and pull it away from the unit to remove it. IQ Battery 5P Quick Install Guide...
- Page 19 Vents or drain holes The vent or drain holes provided at the back of the unit serve the dual purpose of natural ventilation and condensation drainage. Blocking these holes can affect the functionality of the product. IQ Battery 5P Quick Install Guide...
-
Page 20: Step 2: Prepare For Field Wiring
Select the control switch available at site based on below images and cut the cable ties on the wiring cover to access the control switch cable. IQ Battery 5P Quick Install Guide... - Page 21 Section B - Installing IQ Battery 5P Fasten the 11 captive screws at the wiring cover as shown. Use electric drive; do not use impact drives/impact drills. Captive screws torque to 1.5 N m IQ Battery 5P Quick Install Guide...
-
Page 22: Section C
Use a raceway adapter between units only if the distance between units is ≤ 165 mm (6.5 in) and they are at the same level. Raceway adapters can be provided by Enphase (sold separately) and have the following configuration: NOTE: If you are planning to use raceway adaptor or rigid conduits, follow these steps: a. - Page 23 1.5 N m (13.2 lb-in). NOTE: Do not disturb the factory termination connections on terminal blocks during field wiring. CTRL Ground From To IQ Battery 5P unit IQ System Controller or IQ System Controller or IQ Battery 5P unit IQ Battery 5P Quick Install Guide...
- Page 24 2 3/4" each IQ Battery 5P. 4 3/4" for RHS drain wire or 2 1/8" for LHS wire Control connector Termination resistor on control connector Terminated with resistor for last unit in a daisy chain IQ Battery 5P Quick Install Guide...
-
Page 25: Control (Ctrl) Wiring Between System Components
Section C - Wiring Control (CTRL) Wiring between system components: Control wiring guidance for the Enphase Energy System Refer to the following wiring sequences to understand the position of header with termination resistor, wiring order, and drain wire termination location... - Page 26 NOTE: Total length of CTRL wiring across the system cannot exceed 250 feet to ensure system operates as per specifications. Sequence 2: IQ Combiner 5/5C → IQ Battery(s) 5P → IQ System Controller 3/3G NOTE: Total length of CTRL wiring across the system cannot exceed 250 feet to ensure system operates as per specifications. IQ Battery 5P Quick Install Guide...
- Page 27 IQ Combiner 5/5C → IQ System Controller 3 → IQ Battery(s) 5P 2. Last IQ Battery 5P in the daisy chain (this last battery can be on either DER circuit for IQ Battery or generator) 1. IQ Combiner 5/5C IQ Combiner 5/5C → IQ Battery(s) 5P → IQ System Controller 3/3G 2. IQ System Controller 3/3G 1. IQ System Controller 3/3G IQ System Controller 3/3G → IQ Combiner 5/5C → IQ Battery(s) 5P 2. Last IQ Battery 5P in the daisy chain IQ Battery 5P Quick Install Guide...
- Page 28 L1 and L2 on the terminal blocks of each IQ Battery 5P unit measures 240 VAC. If the voltage is within the range as required by local codes, turn off the AC power supply. IQ Battery 5P Quick Install Guide...
-
Page 29: Section D
NOTE: Ensure the serial number label on the ID cover matches on the latch in the IQ Battery 5P chassis. with that on the heatsink before assembling ID cover. IQ Battery 5P Quick Install Guide... - Page 30 Can access the screws at an angle. at an angle. Fasten cover to the extension backplate. To fasten cover to the extension backplate when two IQ Battery 5P units are placed close to each other, refer to the table. IQ Battery 5P Quick Install Guide...
- Page 31 Do not leave the DC control switch in ON position without AC power supply available. This will deplete the battery and may lead to a condition where battery cannot be turned ON and cannot be commissioned. IQ Battery 5P Quick Install Guide...
-
Page 32: Disassembly Of Iq Battery 5P Cover
2x M5 ID Cover grounding screws Remove the two M5 ID Cover grounding screws that are Remove the conduit covers from both sides of the IQ Battery 5P cover. used to affix the cover to the extension backplate. IQ Battery 5P Quick Install Guide... - Page 33 Unlock the top plastic cover from the ribs as shown in the step 4. Make sure the cover is slightly inclined after this step. Pull the cover off in the indicated direction. IQ Battery 5P Quick Install Guide...
-
Page 34: Configure And Activate
Use the Enphase Installer App to commission the IQ Battery(ies). Peel off the sticker after functional test is complete. Once connected to the IQ Gateway, refer to the Enphase Installer App help topics for more information. After the IQ Gateway has detected the IQ Battery(ies), the IQ Battery 5P LEDs operate as... -
Page 35: Operation
Solid yellow Not operating due to high temperature. See “Troubleshooting” Solid blue or green Idle. Color transitions from blue to green as state of charge increases. Check Enphase Installer Platform for charge status Soft pulse blue Discharging Soft pulse green... - Page 36 Operation Operating mode and set points IQ Battery 5P supports multiple storage interactive system modes based on usage. Using Enphase App, select “Menu” > “Settings” > “Battery Storage”. Select one of three battery modes: • Self-consumption mode (default, no setting change required) •...
-
Page 37: Troubleshooting
NOTE: During a brownout or blackout, IQ Battery 5P powers down automatically. This is normal. When power is restored, it automatically starts up again. If you do not see IQ Battery 5P information in the Enphase App, check that the IQ Gateway and the internet connection are working. -
Page 38: Safety
Safety IMPORTANT SAFETY INSTRUCTIONS. SAVE THESE INSTRUCTIONS. This guide contains important instructions that you must follow during installation and maintenance of the Enphase IQ Battery(ies). Failing to follow any of these instructions may void the warranty (enphase.com/warranty). Safety Instructions In Case of Fire or Other Emergency In all cases: DANGER: Risk of electric shock. - Page 39 (enphase.com/warranty). WARNING: Do not install or use the IQ Battery(ies) if it has been damaged in any NOTE: When replacing Enphase IQ Battery(ies), you must replace with an way. IQ Battery(ies) of the same type, with the same AC current rating. WARNING: Do not exceed the maximum number (1) of IQ Batteries in a 20 A AC NOTE: When disconnected and stored, no automatic charge of the battery branch circuit.
-
Page 40: Revision History
Added “Control (CTRL) Wiring between system components” section. Updated 140-00279-03 April 2023 images (minimum clearance, mounting the bottom mounting bracket, and ID cover). May 2023 Updated control sequence diagrams. June 2023 Updated document revision date. Previous releases IQ Battery 5P Quick Install Guide... - Page 41 Installer notes IQ Battery 5P Quick Install Guide...
- Page 42 Installer notes IQ Battery 5P Quick Install Guide...
- Page 43 Installer notes IQ Battery 5P Quick Install Guide...
- Page 44 © 2023 Enphase Energy. All rights reserved. Enphase, the e and CC logos, IQ, and certain other marks listed at https:/ /enphase.com/trademark-usage-guidelines are trademarks of Enphase Energy, Inc. in the US and other countries. Data subject to change. IQ Battery 5P Quick Install Guide...
Need help?
Do you have a question about the IQ Battery 5P and is the answer not in the manual?
Questions and answers