Table of Contents
Advertisement
Quick Links
Advertisement
Table of Contents

Related Manuals for CONSTRUCTA CF7322.4


Summary of Contents for CONSTRUCTA CF7322.4
- Page 1 [en] Instruction manual Built-in oven CF7322.4...
-
Page 2: Table Of Contents
Table of contents Ú [ e n ] I n s t r u c t i o n m a n u a l Important safety information ............ 2 Roasting..................10 Environmentally-friendly disposal ........... 3 Grilling ..................12 Your new appliance ..............4 Defrost .................. -
Page 3: Environmentally-Friendly Disposal
accessories or ovenware from the cooking Before replacing the bulb, unplug the compartment. appliance from the mains or switch off the circuit breaker in the fuse box. Alcoholic vapours may catch fire in the hot Risk of burns! ■ cooking compartment. Never prepare food A defective appliance may cause electric Risk of electric shock! ■... -
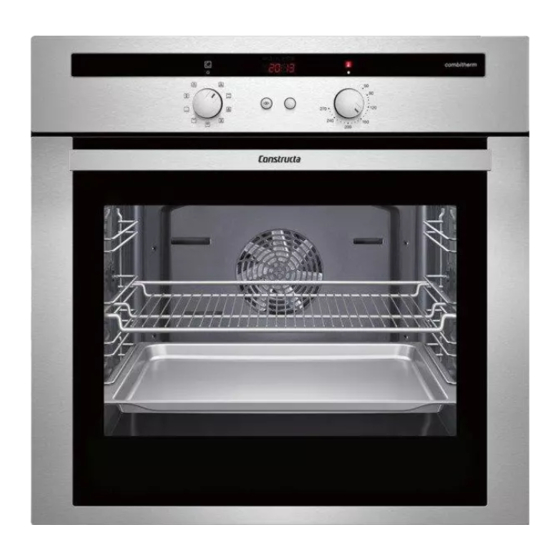
Page 4: Your New Appliance
Your new appliance In this section, you will find information about the appliance. Control panel Control element Oven Operating mode selector Selects operating mode (see section: Operating the appliance) Temperature selector indicator The indicator light lights up when the appliance is heating up and during any subse- light quent heating Temperature selector... -
Page 5: Your Accessories
Your accessories In this section, you will find information about the accessories, that the lug (a) is in the rear part of the of the accessory ■ the right way to insert them into the cooking compartment, the that the sloping edge of the accessory faces towards the ■... -
Page 6: Operating The Appliance
button repeatedly until the KJ and 3 symbols light up again. Change the time with the rotary selector. Cleaning the appliance Clean your appliance before using it for the first time. Remove accessories and any remaining packaging from the cooking compartment. Clean the accessories and cooking compartment with hot soapy water (see section: Cleaning and care). - Page 7 symbol flashes. To cancel the audible signal before it ends, End of operation press the KJ clock function button. Automatic switch-off at a set time. Briefly press the KJ clock function button to select a clock ■ Set the operating mode and temperature. function.
-
Page 8: Baking
Checking, correcting or deleting settings To check your settings, press the KJ clock function button repeatedly until the corresponding symbol lights up. If necessary, you can correct your setting using the rotary selector. If you wish to cancel your setting, turn the rotary selector anti- clockwise to the original value. - Page 9 3 2D-Hot air % Top/bottom heat Basic dough Shelf Tempera- Baking time in Shelf Tempera- height ture in °C minutes height ture in °C Yeast dough Tray bake with dry topping, e.g. crumble 160 - 180 40 - 55 180 - 200 1 + 3 170 - 180 45 - 60...
-
Page 10: Roasting
2D-Hot air 3 Top/bottom heat % Meals Shelf posi- Tempera- Baking time in Shelf posi- Tempera- tion ture in °C minutes tion ture in °C Pizza, fresh 180 - 190 20 - 30 210 - 230* 1 + 3 180 - 190 30 - 40 Savoury flan 190 - 200*... - Page 11 Open roasting Roasting with a lid For open roasting, a roasting dish without a lid is used. Roasting dishes with lids are used for this kind of roasting. This method is particularly suitable for pot roasts. Add liquid to the roasting dish if required. During roasting, the liquid in the roasting dish will evaporate.
-
Page 12: Grilling
Grilling Turn the items after half to two-thirds of the grilling time. Caution! Material damage due to effect of heat: The temperature Pierce duck and goose skin under the wings and legs to allow generated in the cooking compartment is very high. Keep the the fat to escape. -
Page 13: Defrost
Grilled food Shelf posi- Tempera- Grilling time Notes tion ture in °C in minutes Lamb Fillets 8 - 12 Grilling times can be increased or reduced, depend- ing on how well cooked the food should be Chops 10 - 15 Poultry Chicken legs 25 - 30... -
Page 14: Cleaning And Care
Cleaning and care Risk of short circuit! Appliance part Cleaning agent/aid Do not use high-pressure cleaners or steam jet cleaners to Telescopic Hot soapy water: clean your appliance. shelves Clean with a dish cloth or a brush. Do not remove the lubricant while the pull- Caution! out rails are pulled out –... -
Page 15: Faults And Repairs
Fitting the appliance door Fitting the door panel Insert the hinges in the left and right-hand holders (figure C). Insert the door panel at an angle towards the back into both brackets as far as it will go. The smooth surface must face The notch on both hinges must engage. - Page 16 circuit breaker or remove the fuse from your household fuse Risk of electric shock! box. Work on the appliance electronics may only be performed by ■ a specialist. Always disconnect the appliance from the power supply ■ when work is carried out on the electronics. Switch off the Problem Possible cause Remedial action...
-
Page 17: Test Dishes
Note: You will be charged for calling the after-sales service Additional information on products, accessories, replacement Produktinfo regarding an operating error. parts and services can be found at www.constructa.de and in When contacting the after-sales service, please specify the E- the online shop www.constructa-eshop.com number and FD number. - Page 20 *9001138267* 9001138267 Constructa-Neff Vertriebs-GmbH Carl-Wery-Straße 34 81739 München GERMANY (950723)
Need help?
Do you have a question about the CF7322.4 and is the answer not in the manual?
Questions and answers