Advertisement
Advertisement

Subscribe to Our Youtube Channel
Related Manuals for Creality CR-Scan Ferret


Summary of Contents for Creality CR-Scan Ferret
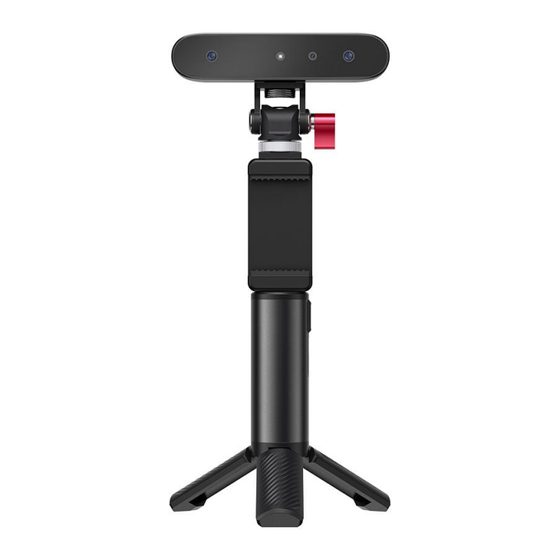
- Page 1 使用说明书详细 EN CR-Scan Ferret 3D Scanner User Manual Small Build Great Capture...
-
Page 2: Table Of Contents
Table of Content 1. Introduction3 2. Packing List3 3. Specification4 4.Hardware Connection4 5. Software Installation5 6. Workflows6 7. Guide for Scanning7 Scan objects7 Feature type7 Optimization mode:8 Color map:8 8.Guide for APP :9 Preview10 Scanning10 Optimization12 Mesh13 Color Mapping13 9. Guide for PC Software14 10. -
Page 3: Introduction3
1. Introduction CR-Scan Ferret is a revolutionary 3D scanner that offers versatility and convenience. Using it with the mobile APP or desktop software, the scanner will provide you with a high-quality models under both indoor and outdoor lighting conditions. The scanner comes equipped with a special depth calculation chip developed by our company, reducing the computational requirements for both mobile phones and PCs. -
Page 4: Packing List3
Output Format PLY, OBJ, STL 3D Printing Compatible 3. Packing List 4. Hardware Connection Smart phone connection... -
Page 5: Software Installation5
Make sure to connect the scanner, Android mobile phone and handle correctly. Showed as the picture above, D1, D2, D3 should be connected to the scanner,the mobile phone, and the handle respectively. Computer Connection CR-Scan Ferret can be driven directly by computer. Make sure the scanner is connected to a USB 2.0 or above port. - Page 6 10 pro Find X6 Pro S21FE Pixel 7 Edge 30 fusion X90 pro redmagic 8 Pro+ S21 + Pixel 6 Pro Edge + X80 pro S21 Ultra Pixel 6 Pixel 5 S22+ Pixel 5a S22Ultra S23+ S23 Ultra Software&firmware link: https://www.creality.com/pages/download-cr-scan-ferret...
-
Page 7: Workflows6
6. Workflows... -
Page 8: Guide For Scanning7
Guide for Scanning Scan objects In order to ensure model quality, the scan-suitable objects are divided to 5 types according to their dimensions shown as the table below. 50cm<Large 25cm<Medium 15cm<Small Face Body objects<200cm object<50cm objects<25cm Feature type ○ Geometry: This scanning mode is ideal for capturing objects with intricate geometric details and irregular shapes. - Page 9 Color map ○ Map/Color: The final processed result of the model is attached with a color map (Creality Scan can only export color objects in the .PLY & .OBJ file formats) ○ No map/No Color: The final processed model appears as a solid color without any color information, only the shape information is captured.
- Page 10 Setting Page Entry ● Setting Button In the setting page, information of scanner is delivered to help better utilization. Meanwhile, any question can be asked on Facebook when Creality icon is Used to retrieve the corresponding name clicked. Page Entry Search Box of the model;...
- Page 11 Start Scanning Function Used to initiate scanning based on information. the parameters set in the scanning configuration item. Please ensure that the scanner is connected Preview and has sufficient storage space before starting the scan. The preview phase mainly provides RGB images/depth images, IR images, and real-time point clouds for preview, alignment, and judgment of the current point cloud quality.
- Page 12 Overexposure Normal exposure...
- Page 13 Under-exposure The RGB/depth preview window supports adjusting the RGB exposure mode (automatic/manual, default automatic). If you find that RGB is overexposed or too dark, you can appropriately adjust the exposure level. This preview window also supports the display of depth images, which can be superimposed on RGB images by adjusting the depth translucency.
- Page 14 Scanning The main body of the page is a 3D rendering area, and the scanning phase is used to display a point cloud. The point cloud is divided into two parts, one is the current frame, and the other is the scanned point cloud. The current frame in red indicates poor point cloud quality, and the current frame in green indicates successful tracking and registration.
- Page 15 Reminder area, displaying guidance that includes using distance reminders, keeping the scanner scanning at the reminder "Perfect". Area D mainly displays the control area of scanning. : Click to start (continue) / pause scanning; Refresh button, click to clear all the scanned point cloud and restart a new scan. Back to the right button, click to initialize the object rendering scale and display it in the center.
- Page 16 Poor scanning indicated by Quality spectrum Optimization This stage is used to optimize scanned point clouds and display them. Point cloud optimization and subsequent stages automatically save model related results. The 3D rendering area is used to display the model. The display mode supports solid color display mode, and the delivery method is the same as described in the scanning section.
- Page 17 Mesh This stage is used to demonstrate the model after meshing. If use choose no color mode, this stage is the last stage of the process. Color Mapping The last step of the scanning process is generation and display of the mapped model.
- Page 18 ① Guide for Beginner: Display the guidance for a beginner to use the scanner. Confirm "Device is connected" After opening Creality Scan, confirm the device connection status: If the device is connected successfully, the popup displays: Device is connected. Do you want to start...
- Page 19 Otherwise, please check the connection. When launch the Creality Scan software , the device UI is shown to users. ① Main Menu: The 'Device' command display the information of the scanner. The 'Scan' command brings up the Scan UI. The 'Process' command brings up the Process UI.
- Page 20 Click "system setting" on the Device page, than click "firmware" . Download the right firmware from the download link and click "upgrade" to finish the operation. "MX6600_CRScan_Ferret_App+Cfg_V1.1.6.bin" firmware is needed for current PC software version. Setting before scan Once connected successfully, the device is ready to scan. Press "Yes" on popup or on Device page to enter the Project setting page.
- Page 21 ② Folder Path: Display the file folder of the model to be saved. Change as needed. ③ Project Settings ④ Import an external model: Import a 3D model in .PLY, .OBJ or .STL formats into Creality Scan to continue scanning and capture more details.
- Page 22 Icon : Exclude the point cloud on a flat base during scanning. Icon : Stop the current scanning project and processing the point clouds on the Process UI. ⑤ Prompt: Display some prompts during scanning. ⑥ Function Buttons: Icon : Start / pause scanning. Icon : Stop the current scanning project and processing the point clouds on the Process UI.
- Page 23 turns green. If the point cloud is desired, click Complete icon , then click "Yes" button in the popup to complete scanning. After this, users will enter the Process page to further process the data. Fuse Point Cloud The next step is to fuse the scanned 3D point clouds to obtain a better point cloud model. There are two ways to achieve this function.
- Page 24 ① 3D Model Preview Window: Display the 3D model data that will be captured when scanning starts or all of the data that has been captured after scanning has started. The view of the model may be dragged or zoomed in the 3D Model preview area by the mouse (Left Mouse Button: Rotate the model; Wheel: Zoom in/out).
- Page 25 Edit Point Cloud ① Tools Bar: Display the edit tools. Icon lasso select. Icon rectangle select. Icon delete. Delete the points which are selected. Icon Undo. Recover the points which are deleted. Prompt: Display the mouse operation prompt. ② Meshing Click to start converting the scanned point cloud data into a mesh.
- Page 26 Texturing The Texture function only applies to scan mode with the "Color" option selected. Click to apply texture to the model.
- Page 27 Export Click to export the 3D model. Select a file name and. a file format (.PLY, .OBJ & .STL, are supported). 10. Tips Scan targets Suitable object: human face, parts, sculpture, cultural relic, garage kit, toy, shoes, body. Unsuitable object: super large object such as wall, room; micro parts; jewelry; ductile objects Specail treatment objects: transparent objects, metals, high reflective objects Target size...
- Page 28 How to obtain a high quality model? Use USB 3.0 or above port; Hi-Quality mode should be chosen; Move your hand or rotate the turntable slowly during scanning; Keep perfect distance according to the prompt during scanning; Adjust the exposure yourself to avoid red or blue part appearing in IR image; Keep scanning until all the parts you want are adequately scanned (the quality map turns green in quality mode);...
- Page 29 9. What are the influences of scanning effect? ① The model itself is too thin or too narrow with holes. There are reflective and transparent parts on the model. ② If there are other objects around during preview, remove the obstacles and rescan. 10.
Need help?
Do you have a question about the CR-Scan Ferret and is the answer not in the manual?
Questions and answers