Table of Contents
Advertisement
Quick Links
Advertisement
Table of Contents

Subscribe to Our Youtube Channel
Related Manuals for AEG HVB75450IB


Summary of Contents for AEG HVB75450IB
- Page 1 HVB75450IB User Manual USER MANUAL...
-
Page 2: Table Of Contents
10. ENERGY EFFICIENCY..................... 26 FOR PERFECT RESULTS Thank you for choosing this AEG product. We have created it to give you impeccable performance for many years, with innovative technologies that help make life simpler features you might not find on ordinary appliances. Please spend a few minutes reading to get the very best from it. - Page 3 ENGLISH usage. Always keep the instructions in a safe and accessible location for future reference. 1.1 Children and vulnerable people safety This appliance can be used by children aged from 8 • years and above and persons with reduced physical, sensory or mental capabilities or lack of experience and knowledge if they have been given supervision or instruction concerning the use of the appliance in a...
- Page 4 CAUTION: The cooking process has to be supervised. • A short term cooking process has to be supervised continuously. WARNING: Danger of fire: Do not store items on the • cooking surfaces. Metallic objects such as knives, forks, spoons and lids •...
-
Page 5: Safety Instructions
ENGLISH for use as suitable or hob guards incorporated in the appliance. The use of inappropriate guards can cause accidents. 2. SAFETY INSTRUCTIONS • The panel must be removable for This appliance is suitable for the servicing. Screws used to fix the panel following markets: GB IE must be accessible after installation. - Page 6 • Make sure that the ventilation without tools. openings are not blocked. • Connect the mains plug to the mains • Do not let the appliance stay socket only at the end of the unattended during operation.
-
Page 7: Installation
ENGLISH • Use only stable cookware with the • Deactivate the appliance and let it correct shape and diameter larger cool down before you clean it. than the dimensions of the burners. • Disconnect the appliance from the • Make sure cookware is centrally electrical supply before maintenance. - Page 8 3.3 Gas Connection For appliances installed in the Republic of Ireland please refer to NSAI- Domestic Gas Installation I.S. 813 Current Editions WARNING! and the ETCI Rules for Electrical Any gas installation must be Installations. carried out by a GAS SAFE REGISTER installer.
- Page 9 ENGLISH 4. Assemble the parts, follow the same CAUTION! procedure backwards. It is important to install the 5. Replace the rating plate (it is near the elbow correctly, with the gas supply pipe) with the one for the shoulder on the end of the new type of gas supply.
- Page 10 National Inspection Council for Electrical 6. Touch Installation Contracting [NICEIC]). To increase or decrease the value and adjust the minimum level. The manufacturer refuses 7. Wait 5 seconds. to be held responsible, if To send the selected value to power these safety measures are board.
- Page 11 ENGLISH 3.8 Replacement of the 3.9 Assembly connection cable The replacement of electric cable must be carried out exclusively by the service force centre or by personnel with similar competencies, in accordance with the current min. regulations. 650mm min. 150mm To replace the connection cable use only H05SS-F T180 or equivalent type.
- Page 12 2 mm min. 12 mm min. 2 mm > 20 mm min. 500 mm 12 mm 57 mm 28 mm 41 mm 38 mm 31 mm min. 38 mm min. 2 mm...
- Page 13 ENGLISH 3.10 Installing hob under the hood If you install the hob under a hood, please see the installation instructions of the hood for the minimum distance between the appliances. 3.11 Possibilities for insertion The panel installed below the hob must be easy to remove and let an easy access in case a technical assistance intervention is necessary.
-
Page 14: Product Description
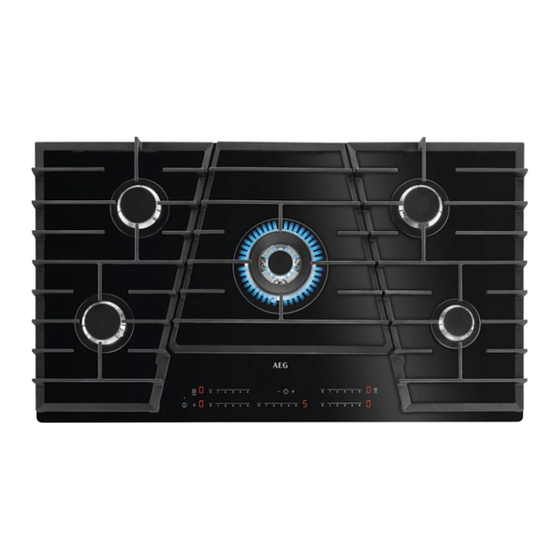
4. PRODUCT DESCRIPTION 4.1 Cooking surface layout Semi-rapid burner Multi Crown burner Auxiliary burner Control panel 4.2 Control panel layout Use the sensor fields to operate the appliance. The displays, indicators and sounds tell which functions operate. Sensor Function... -
Page 15: Daily Use
ENGLISH Sensor Function Comment field To increase or decrease the time. Area for Hob²Hood infra- To hood communication. red signal Control bar To set the heat setting for the burner. 4.3 Heat setting displays Display Description Burner is deactivated. Burner operates. There is a fault. - Page 16 5.1 Burner overview After 20 seconds of non-use, the hob deactivates. 2. After light animation, when you see on display, touch the control bar at the correct heat setting or move your finger along the control bar until you reach the correct heat setting.
- Page 17 ENGLISH deactivates. Remove the object or 2. Touch for 3 seconds. clean the control panel. appears on the display of the • you do not deactivate a burner or burner. change the heat setting. After some 4. Set the heat setting. time comes on and the hob 5.
- Page 18 The maximum duration of The hob automatically sets the timer functions is 00-99 the speed of the fan minutes. Check the minute according to the cooking minder instructions (missing process. timer adjustment). Automatic modes 5.8 OffSound Control Mode Mode de-...
-
Page 19: Hints And Tips
ENGLISH 6. HINTS AND TIPS 6.3 Hints and Tips for WARNING! Hob²Hood Refer to Safety chapters. When you operate the hob with the 6.1 Cookware function: • Protect the hood panel from direct CAUTION! sunlight. Do not use cast iron pans, •... - Page 20 6.4 Examples of cooking with the values suggested in the table. applications Cooking method symbols used in the table: The data in the table shows examples of the heat setting and cooking times for gentle and heavy frying, and delicate Heat up the oil cooking.
-
Page 21: Care And Cleaning
ENGLISH Rice por- 10-20 30-40 ridg 1) Stirring continuously 2) Without lid 7. CARE AND CLEANING Be very careful when you WARNING! replace the pan supports Refer to Safety chapters. to prevent the hob top from damage. 7.1 General information 2. -
Page 22: Troubleshooting
The shape of pan supports and the Do not lift the pan supports amount of burners can be different in at an angle, as this will put other models of the appliance. strain on the metal pins. This can cause damage to the 7.4 Cleaning the hob... - Page 23 ENGLISH 8.1 What to do if... Problem Possible cause Remedy You cannot activate or oper- The hob is not connected to Check if the hob is correctly ate the hob. an electrical supply or it is connected to the electrical connected incorrectly.
- Page 24 Problem Possible cause Remedy There is a fault. To reset the fault, deactivate comes on. and activate the hob, after light animation, when appears, touch and then within 3 seconds. When you see the fault is reset. Make sure that the crown...
-
Page 25: Technical Data
ENGLISH 8.3 Labels supplied with the accessories bag Stick the adhesive labels as indicated below: MOD. MOD. MOD. TYPE PROD.NO. IP20 PROD.NO. PROD.NO. SER.NO. 0049 SER.NO SER.NO 03 IT DATA DATA MADE IN ITALY A. Stick it on Guarantee Card and send C. -
Page 26: Energy Efficiency
Multi Crown Semi-rapid 0,75 Auxiliary 0,47 10. ENERGY EFFICIENCY 10.1 Product information according to EU 66/2014 Model identification HVB75450IB Type of hob Built-in hob Number of gas burners Left rear - Semi-rapid 57.5% Right rear - Semi-rapid 57.5% Energy efficiency per gas burner Middle - Multi Crown 54.7%... - Page 27 ENGLISH • Use cookware with diameters applicable to the size of burners. • Center the pot on the burner. • When you heat up water, use only the amount you need. • If it is possible, always put the lids on the cookware. •...
- Page 28 www.aeg.com/shop...
Need help?
Do you have a question about the HVB75450IB and is the answer not in the manual?
Questions and answers