Table of Contents
Advertisement
Quick Links
Advertisement
Table of Contents

Subscribe to Our Youtube Channel
Related Manuals for BenQ FP785+


Summary of Contents for BenQ FP785+
- Page 1 FP785+ LCD Color Monitor 17.0" LCD Panel Size User Manual Welcome...
- Page 2 Copyright Copyright © 2006 by BenQ Corporation. All rights reserved. No part of this publication may be reproduced, transmitted, transcribed, stored in a retrieval system or translated into any language or computer language, in any form or by any means, electronic, mechanical, magnetic, optical, chemical, manual or otherwise, without the prior written permission of BenQ Corporation.
-
Page 3: Table Of Contents
Assembling your monitor hardware ..................8 Adjusting the viewing angle ..................10 Getting the most from your BenQ monitor ..............11 How to install the monitor on a new computer ............12 How to upgrade the monitor on an existing computer ..........13 How to install on Windows XP system ..............14... -
Page 4: Getting Started
1. Getting started When unpacking please check you have the following items. If any are missing or damaged, please contact the place of purchase for a replacement. BenQ LCD Monitor Quick Start Guide CD-ROM Disk Power Cord Power Adapter Signal Cable: D-Sub... - Page 5 Signal Cable: DVI-D Audio Cable Consider keeping the box and packaging in storage for use in the future when you may need to transport the monitor. The fitted foam packing is ideal for protecting the monitor during transport. Pictures in this manual may differ from product supplied in your region. Getting started...
-
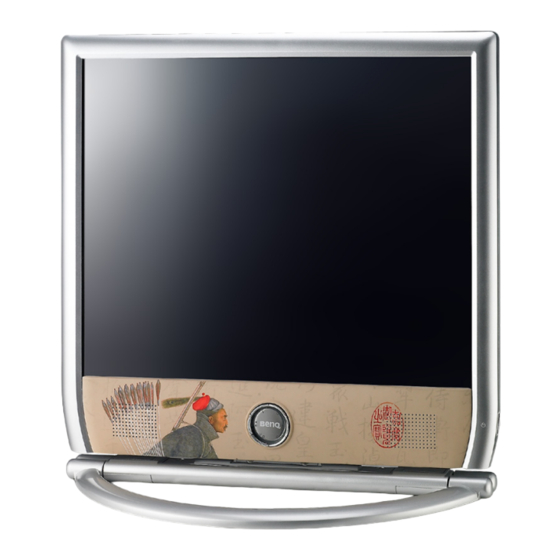
Page 6: Getting To Know Your Monitor
2. Getting to know your monitor Front view 1. “Mode” key (Right) key 3. "Enter" key 4. “Exit” key (Left) key 6. “i key” For more information about these keys, please refer to Chapter 8 - “How to adjust your monitor on page 22.”... -
Page 7: Back View
Back view Back View (2): Locations of plugs & sockets 1. Audio cable socket 2. DC12V input socket for monitor power 3. DVI-D input socket 4. D-Sub input socket Getting to know your monitor... -
Page 8: Assembling Your Monitor Hardware
3. Assembling your monitor hardware If the computer is turned on you must turn it off before continuing. Do not plug-in or turn-on the power to the monitor until instructed to do so. 1. Unpack the monitor and remove the stuff filling in the seams. - Page 9 3. Connect the other end of the signal cable to your computer as shown. 4. Connect the power adaptor plug to your monitor as shown. 5. Connet your monitor and computer with the audio cable. 6. Put the back cover back and then separate the legs of the stand and place the monitor on a stable surface.
-
Page 10: Adjusting The Viewing Angle
7. Connect the power cord to the power adaptor then plug the other end into a nearby wall socket. (Use only power supplies listed in the user manual) 8. Press the Power button on the side panel of the monitor. The power indicator will light up. Adjusting the viewing angle Your LCD monitor is designed with a tilt feature that allows you to achieve your optimal viewing angle. -
Page 11: Getting The Most From Your Benq Monitor
4. Getting the most from your BenQ monitor To gain the most benefit from your new BenQ color LCD flat screen monitor, you should install the custom BenQ LCD Monitor driver software as provided on the BenQ LCD Monitor CD-ROM. -
Page 12: How To Install The Monitor On A New Computer
BenQ LCD Monitor is the first ever monitor to be connected to it. If you are adding the BenQ LCD Monitor to an existing computer that has already had another monitor connected to it (and has monitor driver software installed), you should not be following these instructions. -
Page 13: How To Upgrade The Monitor On An Existing Computer
The BenQ LCD Monitor driver for your model may well function perfectly with other versions of Windows, however, as at the time of writing, BenQ has done no testing of this driver on other versions of Windows and cannot guarantee its operation on those systems. -
Page 14: How To Install On Windows Xp System
The Monitor Properties window will display. If the driver provider is listed as BenQ, and the model matches that of your new monitor, the proper drivers are already installed, and you need do nothing further. Cancel out of these property windows. - Page 15 11. Click Close, OK, and OK. This will close the Display Properties windows. You do not need to restart Windows XP, as the BenQ LCD monitor drivers will operate immediately with no further action required by you. Getting the most from your BenQ monitor...
-
Page 16: How To Install On Windows 2000 System
The Monitor Properties window will display. 4. In Windows 2000, click the Driver tab and the Update Driver button. The Upgrade Device Driver Wizard will display. How to complete the Windows Upgrade Device Driver Wizard on page Getting the most from your BenQ monitor... -
Page 17: How To Complete The Windows Upgrade Device Driver Wizard
The contents of the ‘Driver’ folder will display. 7. Click the Open button. This will return you to the Install from Disk window, and it will have entered the address to the BenQ LCD Monitor CD ‘Driver’ folder into the field titled ‘Copy manufacturer’s files from:’ . - Page 18 This will close the Display Properties window, and if you made any changes to the screen resolution, Windows 2000 will prompt you for confirmation to effect the changes, and further confirmation to accept the changes. Click OK and Yes respectively. Getting the most from your BenQ monitor...
-
Page 19: How To Adjust The Screen Resolution
5. How to adjust the screen resolution Due to the nature of liquid crystal display (LCD) technology, the picture resolution is always fixed. The best possible picture for your FP785+ is achieved with a resolution of 1280 x 1024. This is called “Native Resolution”... -
Page 20: How To Adjust The Screen Refresh Rate
6. How to adjust the screen refresh rate You don’t have to choose the highest possible refresh rate on an LCD display, because it is not technically possible for an LCD display to flicker. The best results are obtained by using the factory modes already set in your computer. -
Page 21: Picture Optimization
If you wish, you can always adjust the screen geometric settings manually using geometry menu items. To assist you in this endeavour, BenQ has provided a screen test image utility which you can use to check for screen color, grayscale and line gradient display. -
Page 22: How To Adjust Your Monitor
8. How to adjust your monitor The control panel There are 6 keys for user’s control including “Mode”, “ ” , “Enter” , “Exit” , “ ” , and “i key” . The following descriptions are the introduction of these keys & switch. 1. -
Page 23: Hot Key Mode
Hot Key Mode Mode hot key Select your desired mode from these four options: Standard, Movie 1, Movie 2, and Photo. The specified mode will optimise the image properties to best suit the image type. Standard mode is suggested for basic PC application;... -
Page 24: Main Menu Mode
Main Menu Mode You can use the OSD (On Screen Display) menu to adjust all the settings on your monitor. Press the Enter key to display the following main OSD menu. Luminance sub menu Press the key to adjust the degree of Brightness, press Exit to return to the previous menu. - Page 25 Geometry sub menu Press the key to adjust the Horizontal Position, press Exit to return to the previous menu. Press the key to adjust the Vertical Position, press Exit to return to the previous menu Press the key to adjust the value of the Pixel Clock, press Exit to return to the previous menu.
- Page 26 Color sub menu User Preset: User Preset is provided so you can tailor the image color tint to suit your liking. The blend of the Red, Green and Blue primary colors can be altered to change the color tint of the image. The default start setting is 50.
- Page 27 OSD sub menu Press the key to adjust the horizontal position of the OSD, press Exit to return to the previous menu. Press the key to adjust the vertical position of the OSD, press Exit to return to the previous menu. Press the key to adjust the display time of the OSD, press Exit to return to the previous...
- Page 28 Language sub menu Press the keys to select a language to have the OSD display menus in that language. Press the Exit key to return to previous menu. How to adjust your monitor...
- Page 29 Recall sub menu Press the key to confirm Mode Recall. When you choose Yes, it will recall the current mode to default settings. Pressing Exit will return to the previous menu. Press the key to confirm Color Recall. When you choose Yes, it will recall the current color settings to default settings.
- Page 30 Miscellaneous sub menu Mode: Select your desired mode from these four options: Standard, Movie 1, Movie 2, and Photo. The specified mode will optimise the image properties to best suit the image type. Standard mode is suggested for basic PC application;...
- Page 31 Sharpness: Press key to adjust the degree of Sharpness and activate the new settings. Display Information: Select Display Information to display the current monitor property settings. Press the Exit key to return to previous menu. How to adjust your monitor...
- Page 32 Audio sub menu Volume: Press the key to adjust the degree of Volume. SRS: Press the key to select ON or OFF for SRS function. Mute: Press the key to select ON or OFF for Mute. How to adjust your monitor...
-
Page 33: Troubleshooting
9. Troubleshooting Frequently asked questions (FAQ) The image is blurred: Read the section, and then select the correct How to adjust the screen resolution on page 19 resolution, refresh rate and make adjustments based on these instructions. How do you use a VGA extension cable? Remove the extension cable for the test. -
Page 34: Need More Help
How to adjust the screen resolution on page 19 resolution, refresh rate and make adjustments based on these instructions. Need more help? If your problems remain after checking this manual, please contact your place of purchase or e-mail us at: Support@BenQ.com Troubleshooting... -
Page 35: Supported Pc Timings
10. Supported PC Timings Incoming display mode (Input timing) Resolution Horizontal Vertical Pixel Comment Frequency (KHz) Frequency (Hz) Frequency (MHz) 640x350 31.47(P) 70.08(N) 25.17 720x400 31.47(N) 70.08(P) 28.32 640x480 31.47(N) 60.00(N) 25.18 640x480 35.00(N) 67.00(N) 30.24 Macintosh 640x480 37.86(N) 72.80(N) 31.50 VESA 640x480... -
Page 36: Specifications
(8 language OSD), OSD position, status indicator, display-mode availability Power Adapter BenQ ADP-50SH Rev. B. Power Management VESA DPMS, EPA Max. power consumption 50 Watt Max (with speaker) DC input voltage... - Page 37 Input signal RGB analog 0.7 Vpp/75 Ohm positive Digital: DVI-D Speaker 2W x 2 is a trademark of SRS Labs, Inc. SRS technology is incorporated under license from SRS Labs, Inc. Synchronisation TTL separate signal connection 15-pin mini D-sub cable Temperature (operating) 0 °C - 40 °C Air humidity (operating)
Need help?
Do you have a question about the FP785+ and is the answer not in the manual?
Questions and answers