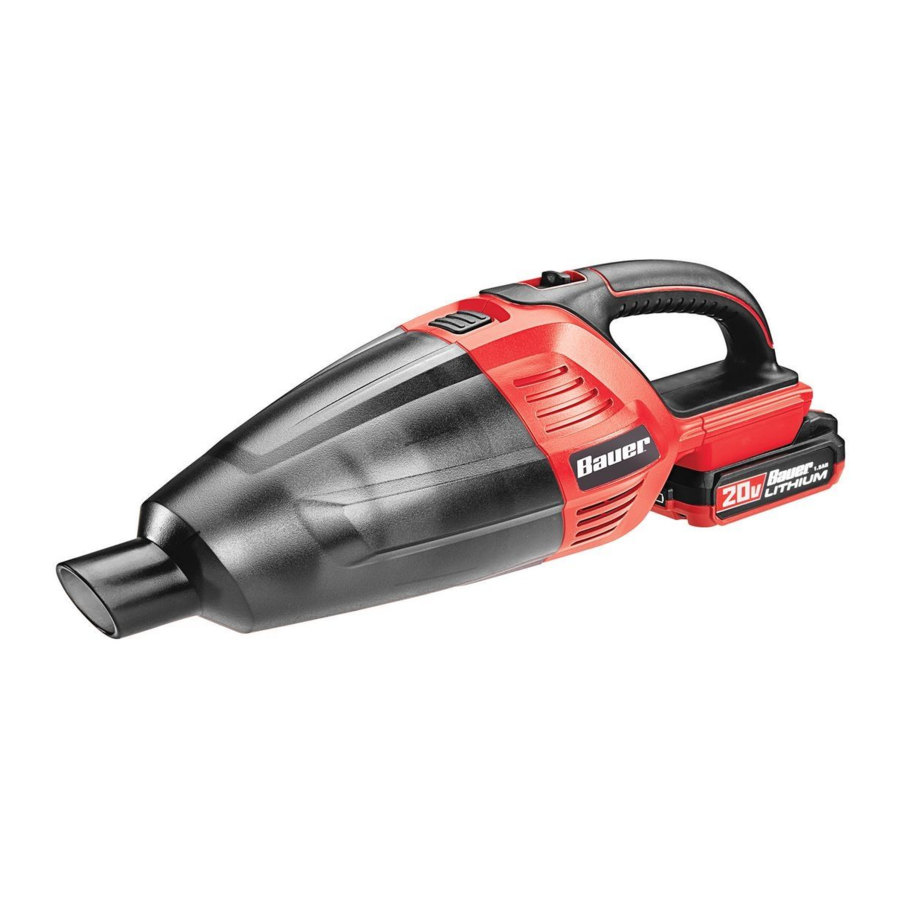
Bauer 1852C-B, 64148 - Cordless Hand Vacuum with Floor Manual
- Owner's manual & safety instructions (12 pages)
Advertisement
WARNING SYMBOLS AND DEFINITIONS
 | This is the safety alert symbol. It is used to alert you to potential personal injury hazards. Obey all safety messages that follow this symbol to avoid possible injury or death. |
 | Indicates a hazardous situation which, if not avoided, will result in death or serious injury. |
 | Indicates a hazardous situation which, if not avoided, could result in death or serious injury. |
 | Indicates a hazardous situation which, if not avoided, could result in minor or moderate injury. |
| NOTICE | Addresses practices not related to personal injury. |
IMPORTANT SAFETY INSTRUCTIONS
When using an electrical appliance, basic precautions should always be followed, including the following:
READ ALL INSTRUCTIONS BEFORE USING THIS APPLIANCE


To reduce the risk of fire, electric shock, or injury:
- Do not leave appliance when Battery Pack is connected. Remove Battery Pack when not in use and before servicing.
- Do not use outdoors or on wet surfaces.
- Do not allow to be used as a toy. Close attention is necessary when used by or near children.
- Use only as described in this manual. Use only manufacturer's recommended attachments.
- Do not use with damaged Battery Pack. If appliance is not working as it should, has been dropped, damaged, left outdoors, or dropped into water, return it to a service center.
- Do not handle appliance with wet hands.
- Do not put any object into openings. Do not use with any opening blocked; keep free of dust, lint, hair, and anything that may reduce air flow.
- Keep hair, loose clothing, fingers, and all parts of body away from openings and moving parts.
- Turn off all controls before removing Battery Pack.
- Use extra care when cleaning on stairs.
- Do not use to pick up flammable or combustible liquids, such as gasoline, or use in areas where they may be present.
- Do not pick up anything that is burning or smoking, such as cigarettes, matches, or hot ashes.
- Do not use without dust bag and/or filters in place.
- FOR HOUSEHOLD USE ONLY.
- Stay alert, watch what you are doing and use common sense when operating an appliance. Do not use an appliance while you are tired or under the influence of drugs, alcohol or medication. A moment of inattention while operating appliances may result in serious personal injury.
- Maintain labels and nameplates on the appliance. These carry important safety information. If unreadable or missing, contact Harbor Freight Tools for a replacement.
- People with pacemakers should consult their physician(s) before use. Electromagnetic fields in close proximity to heart pacemaker could cause pacemaker interference or pacemaker failure.
- The warnings, precautions, and instructions discussed in this instruction manual cannot cover all possible conditions and situations that may occur. It must be understood by the operator that common sense and caution are factors which cannot be built into this product, but must be supplied by the operator
- Battery appliance use and care
- Prevent unintentional starting. Ensure the switch is in the off-position before connecting to battery pack, picking up or carrying the appliance. Carrying the appliance with your finger on the switch or energizing appliance that have the switch on invites accidents.
![burn hazard]() Recharge only with the charger specified by the manufacturer. A charger that is suitable for one type of battery pack may create a risk of fire when used with another battery pack.
Recharge only with the charger specified by the manufacturer. A charger that is suitable for one type of battery pack may create a risk of fire when used with another battery pack.![burn hazard]() Use appliances only with specifically designated battery packs. Use of any other battery packs may create a risk of injury and fire.
Use appliances only with specifically designated battery packs. Use of any other battery packs may create a risk of injury and fire.![]()
When battery pack is not in use, keep it away from other metal objects, like paper clips, coins, keys, nails, screws or other small metal objects, that can make a connection from one terminal to another. Shorting the battery terminals together may cause burns or a fire.![]()
Under abusive conditions, liquid may be ejected from the battery; avoid contact. If contact accidentally occurs, flush with water. If liquid contacts eyes, additionally seek medical help. Liquid ejected from the battery may cause irritation or burns.![burn hazard]() Do not use a battery pack or appliance that is damaged or modified. Damaged or modified batteries may exhibit unpredictable behavior resulting in fire, explosion or risk of injury.
Do not use a battery pack or appliance that is damaged or modified. Damaged or modified batteries may exhibit unpredictable behavior resulting in fire, explosion or risk of injury.![burn hazard]() Do not expose a battery pack or appliance to fire or excessive temperature. Exposure to fire or temperature above 265°F may cause explosion.
Do not expose a battery pack or appliance to fire or excessive temperature. Exposure to fire or temperature above 265°F may cause explosion.![burn hazard]() Follow all charging instructions and do not charge the battery pack or appliance outside of the temperature range specified in the instructions. Charging improperly or at temperatures outside of the specified range may damage the battery and increase the risk of fire.
Follow all charging instructions and do not charge the battery pack or appliance outside of the temperature range specified in the instructions. Charging improperly or at temperatures outside of the specified range may damage the battery and increase the risk of fire.- Have servicing performed by a qualified repair person using only identical replacement parts. This will ensure that the safety of the product is maintained.
- Do not modify or attempt to repair the appliance or the battery pack except as indicated in the instructions for use and care.
![]()
The battery Charger gets hot during use. The Charger's heat can build up to unsafe levels and create a fire hazard if it does not receive adequate ventilation, due to an electrical fault, or if it is used in a hot environment. Do not place the Charger on a flammable surface. Do not obstruct any vents on the Charger. Especially avoid placing the charger on carpets and rugs; they are not only flammable, but they also obstruct vents under the charger. Place the Charger on a stable, solid, nonflammable surface (such as a stable metal workbench or concrete floor) at least 1 foot away from all flammable objects, such as drapes or walls. Keep a fire extinguisher and a smoke detector in the area. Frequently monitor the Charger and Battery Pack while charging.
![burn hazard]() Lithium Battery Safety Warnings
Lithium Battery Safety Warnings
LITHIUM BATTERIES STORE A LARGE AMOUNT OF ENERGY AND WILL VENT FIRE OR EXPLODE IF MISTREATED:
![]()
- Keep Battery pack dry.
- DO NOT DO ANY OF THE FOLLOWING TO THE BATTERY PACK:
- Open,
- Drop,
- Short-circuit,
- Puncture,
- Incinerate, or
- Expose to temperatures greater than 265°F.


- Charge Battery Pack only according to its Charger's instructions.
- Inspect Battery Pack before every use; do not use or charge if damaged.
- Li-ion BATTERY MUST BE RECYCLED OR DISPOSED OF PROPERLY.
Specifications
| Battery Type | Bauer 20V Li-ion (sold separately) |
| Flow Rate | 210 CFM |
Setup - Before Use
Read the ENTIRE IMPORTANT SAFETY INFORMATION section at the beginning of this manual including all text under subheadings therein before set up or use of this product.
TO PREVENT SERIOUS INJURY FROM ACCIDENTAL OPERATION
Turn the power Switch of the appliance off and remove Battery pack before performing any procedure in this section.
Note: For additional information regarding the parts listed in the following pages, refer to the Assembly Diagram near the end of this manual.
Installation
- Remove any stored parts from the Dust Cup before use.
- Use of the Extension tube is optional. The Crevice Nozzle, Brush Nozzle, and Floor Brush may be connected directly to the Dust Cup.
Charging Battery Pack
Refer to Charger's manual for instructions.
Functions

Operating Instructions
Read the ENTIRE IMPORTANT SAFETY INFORMATION section at the beginning of this manual including all text under subheadings therein before set up or use of this product.
Vacuum Operation
TO PREVENT SERIOUS INJURY FROM ACCIDENTAL OPERATION:
Turn the Switch off and remove the Battery pack.
- Make sure the Filter is installed and assembled correctly in the Dust Cup.
- Install the Battery Pack:
Using gentle force, slide the Battery Pack into Motor Housing so that the Battery Lock Button latches it in place.

- Attach the desired accessory (Crevice Nozzle, Brush Nozzle, or Floor Brush) to the end of Dust Cup.
- Optionally, slide the Extension Tube onto the Dust Cup first and then the accessory to the end of the Extension Tube.
- Turn on the Vacuum by moving the On/Off Switch to the ON position.

Note: The Vacuum is equipped with an automatic shut-off. If the Vacuum shuts itself off while you are using it, follow steps in Troubleshooting.
- To prevent accidents, turn off the Vacuum by moving the On/Off switch to the OFF position and remove Battery Pack after use. Clean Filter and Dust Cup. Clean external surfaces of the tool with clean and dry cloth. Store the tool indoors out of children's reach.
User-Maintenance and Storage
Procedures not specifically explained in this manual must be performed only by a qualified technician.
TO PREVENT SERIOUS INJURY FROM ACCIDENTAL OPERATION:
Turn the power Switch of the appliance off and disconnect the Battery pack before performing any procedure in this section.
TO PREVENT SERIOUS INJURY FROM APPLIANCE FAILURE:
Do not use damaged equipment. if abnormal noise or vibration occurs, have the problem corrected before further use.
Cleaning, Maintenance, and Lubrication
- BEFORE EACH USE, inspect the general condition of the appliance. Check for:
- loose hardware,
- misalignment or binding of moving parts,
- cracked or broken parts,
- clogged ventilation holes,
- dirty filter,
- damaged electrical wiring, and
- any other condition that may affect its safe operation.
- Only use an undamaged filter. Replace a damaged filter immediately.
- AFTER USE, wipe external surfaces of the appliance with clean cloth.
- Use a moist cloth to clean the vacuum cleaner's housing.
- Use a dry cloth to clean battery contacts.
- Store in an indoor dry area out of reach of children.
- All parts are permanently lubricated. Do not use additional lubrication.
- AFTER EACH USE, empty and clean the Dust Cup and Filter (see Cleaning Dust cup and Filter),
- Li-ion BATTERY MUST BE RECYCLED OR DISPOSED OF PROPERLY.
Do not short, incinerate or open battery.
Removing Battery Pack

Press down on the Battery Lock Button and pull Battery Pack out.
Cleaning Dust Cup and Filter
To ensure proper operation, clean the Dust cup and cloth Filter regularly. Damaged Filters should be replaced. Disconnect Battery pack before cleaning Vacuum.
DUST CUP:
- Press the Release Button to separate the Dust Cup from the Motor Housing.
![]()
- Remove the Filter Assembly from the Dust Cup.
![]()
- Shake the Dust Cup over a waste bin and, if dirty, wipe it with a moist clean cloth. Allow it to dry before reassembling the Vacuum.
- Empty the Filter contents into a waste bin.
- Inspect and, if needed, clean the Filter by following steps 3-10 in FILTER
- Insert the clean Filter Assembly into the Dust Cup and reattach the Motor Housing to the Dust Cup by pressing them together until the Release Button engages.


FILTER:
- Press the Release Button to separate the Dust Cup from the Motor Housing.
- Remove the Filter Assembly from the Dust Cup.
- Remove the Filter Cover from the Filter Seal by twisting them apart as shown.
![]()
- Remove the Cloth Filter along with its Filter Basket from the Filter Cover and clean with a soft brush.
![]()
- If needed, the Cloth Filter and Filter Basket can be separated, and washed in mild soap and water.
![]()
- Rinse all soap and dust out thoroughly.
- Allow the Cloth Filter to dry for at least one day before reinstalling.
![]()
Installing a wet Cloth Filter will increase the risk of electric shock and may damage the vacuum. - To reinstall the Filter, insert the Filter Basket into the Cloth Filter and then both items into the Filter Cover. Be sure the Cloth Filter covers the Filter Cover completely.
- Attach the Filter Seal to the Filter Cover by twisting them together as shown. The Filler Seal should be on snug but do not over-tighten.
- Insert the clean Filter Assembly into the Dust Cup and reattach the Motor Housing to the Dust Cup by pressing them together until the Release Button engages.


Troubleshooting
| Problem | Possible Causes | Likely Solutions |
Tool will not start |
|
|
Tool operates slowly |
|
|
Performance decreases over time | Motor worn or damaged. | Have qualified technician replace motor. |
Excessive noise or rattling | Internal damage or wear. (Motor or bearings, for example.) | Have technician service tool. |
Low suction |
|
|
Turns itself off |
|
|
Overheating |
|
|
| Follow all safety precautions whenever diagnosing or servicing the tool. Disconnect Battery pack before service. | ||
For technical questions, please call 1-888-866-5797.
Visit our website at: http://www.harborfreight.com
Email our technical support at: productsupport@harborfreight.com
Copyright © 2018 by Harbor Freight Tools. All rights reserved. No portion of this manual or any artwork contained herein may be reproduced in any shape or form without the express written consent of Harbor Freight Tools. Diagrams within this manual may not be drawn proportionally. Due to continuing improvements, actual product may differ slightly from the product described herein. Tools required for assembly and service may not be included.

Documents / Resources
References
Download manual
Here you can download full pdf version of manual, it may contain additional safety instructions, warranty information, FCC rules, etc.
Download Bauer 1852C-B, 64148 - Cordless Hand Vacuum with Floor Manual
Advertisement


Need help?
Do you have a question about the 1852C-B and is the answer not in the manual?
Questions and answers