Table of Contents
Advertisement
Available languages
Available languages
Quick Links
Fax +1 305 430 9692
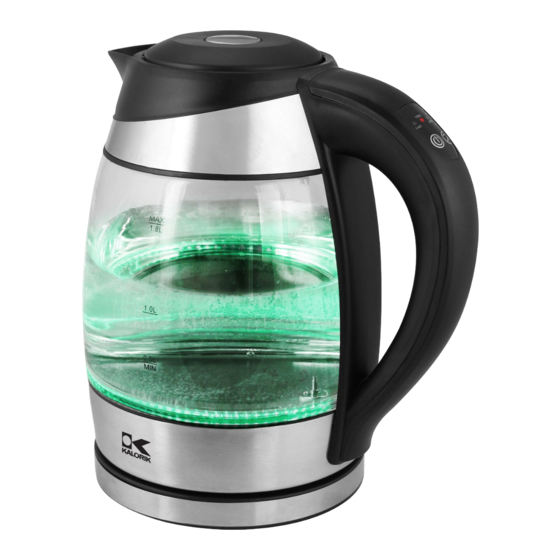
Glass Water kettle
With Digital Temperature Control
Hervidor con jarra
de cristal
Y Control De Temperatura Digital
Bouilloire électrique
en verre
Avec Contrôle Electronique De
La Température
www.KALORIK.com
Copies of the I/B. Please reproduce them without any
changes
except
under
International USA. The pages must be reproduced and folded
in order to obtain a booklet A5 (+/- 148.5 mm width x 210 mm
height). When folding, make sure you keep the good
numbering when you turn the pages of the I/B. Don't change
the page numbering. Keep the language integrity.
what is inside the
frame.
120V~60Hz 1500W (12.5A)
Front cover page (first page)
Assembly page 1/32
special
instruction
from
Team
Print only
JK 42656
Advertisement
Table of Contents

Related Manuals for Kalorik JK 42656


Summary of Contents for Kalorik JK 42656
- Page 1 Glass Water kettle With Digital Temperature Control Hervidor con jarra de cristal Y Control De Temperatura Digital Bouilloire électrique en verre Avec Contrôle Electronique De La Température JK 42656 120V~60Hz 1500W (12.5A) www.KALORIK.com Front cover page (first page) Assembly page 1/32...
-
Page 2: Important Safeguards
..., when it is in use as they might catch fire. 16. When removing mineral deposit, only use special products formulated for the removal of mineral deposit (decalcifying JK 42656 - 120501 Assembly page 2/32... - Page 3 33. NEVER put any part of the hand or body near the appliance when switched on. Steam is invisible and will cause scalding or injury. 34. NEVER use the appliance if it has been dropped on the floor or damaged in any way. JK 42656 - 120501 Assembly page 3/32...
-
Page 4: Short Cord Instructions
The resulting extended cord should be arranged so that it will not • drape over the counter top or tabletop where it can be pulled on by children or tripped over. JK 42656 - 120501 Assembly page 4/32... -
Page 5: Part Description
For the perfect taste, operate the cordless water kettle with fresh water in order to clean any residue left from the manufacturing process. When the appliance has cooled down, repeat the process 3 times with fresh water, before rinsing. JK 42656 - 120501 Assembly page 5/32... -
Page 6: Operation
Failure to do so will cause the kettle not to switch off! For instant re-boiling, wait until water has cooled down and • switch on the appliance again. JK 42656 - 120501 Assembly page 6/32... -
Page 7: Safety Cut-Out
Before attempting any cleaning operation, make sure the • appliance is unplugged from the supply socket and fully cooled down. To clean the exterior surfaces, simply wipe over with a soft, damp • cloth and dry thoroughly. JK 42656 - 120501 Assembly page 7/32... - Page 8 • clean regularly. For this, press the filter out, rinse under water, and put it back into position once clean. Please clean the filter on a regular basis, to avoid mineral deposit. • JK 42656 - 120501 Assembly page 8/32...
-
Page 9: Warranty
You can also fill out this warranty card online, at the following address: www.KALORIK.com This KALORIK product is warranted in the U.S.A. for 1 year from the date of purchase against defects in material and workmanship. This warranty is not transferable. - Page 10 If this is the case, bring the product, or send it, postage prepaid by the user (all Kalorik customers are responsible for the initial shipment back to the warranty center), along with proof of purchase and a return authorization number indicated on the outer package, given by our Customer Service Representatives.
-
Page 11: Consejos De Seguridad
14. Pueden ocurrir quemaduras si se levanta la tapa durante el ciclo de calentamiento. 15. Procure que el aparato no entre en contacto con materiales fácilmente inflamables como cortinas, tejidos, etc. …, cuando esté en funcionamiento, ya que podría provocar un incendio. JK 42656 - 120501 Assembly page 11/32... - Page 12 30. ADVERTENCIA: el hervidor sin cable NUNCA debe ser llenado sobre la base. 31. No utilice NUNCA el hervidor para hervir cualquier otro líquido o cosa que no sea agua. 32. No use NUNCA cerca del fuego o sobre superficies calientes. JK 42656 - 120501 Assembly page 12/32...
- Page 13 Para evitar riesgos colocar de forma tal que los niños no puedan • jalarlo o tropezar con él. Que no arrastre nunca por el suelo. JK 42656 - 120501 Assembly page 13/32...
-
Page 14: Antes De La Primera Utilización
Para ello, eche agua fría y ponga el aparato en funcionamiento. Después de la ebullición, tire el agua, deje enfriar el hervidor y páselo por agua. Repita esta operación 2 o 3 veces utilizando sólo agua limpia. JK 42656 - 120501 Assembly page 14/32... - Page 15 Para volver a hervir agua después de la parada automática del • hervidor, espere hasta que el agua se haya enfriado y vuelva a poner su aparato en marcha con el interruptor colocando el interruptor en la posición “encendido”. JK 42656 - 120501 Assembly page 15/32...
-
Page 16: Protección Contra Sobrecalentamiento
Si le ocurre esto, apague el aparato con el interruptor y • desenchúfelo. Espere 10 minutos antes de ponerlo de nuevo en marcha. Ello basta para desbloquear el sistema de protección. El hervidor puede utilizarse otra vez de forma normal. • JK 42656 - 120501 Assembly page 16/32... - Page 17 Cuando el hervidor esté abierto, se puede quitar el filtro de la • boquilla y limpiarlo con agua. Colóquelo de nuevo tras su limpieza. Es necesario limpiar el filtro de manera regular. Limpiar el filtro regularmente, para evitar depósitos de minerales. • JK 42656 - 120501 Assembly page 17/32...
- Page 18 KALORIK, o por un uso con fines comerciales. No existe garantía por las partes de cristal, jarras de cristal, filtros, cestos, cuchillas y accesorios en general.
- Page 19 1400 N.W 159th Street, Suite 102 Miami Gardens, FL 33169 USA O llame gratuitamente (U.S.A.) al +1 888-521-TEAM / +1 888-KALORIK Las cartas se aceptan solamente en la dirección anteriormente mencionada. Los envíos y paquetes que no tengan número de autorización de devolución serán rechazados...
-
Page 20: Consignes De Securite
14. Des brûlures peuvent être occasionnées si le couvercle est soulevé durant le cycle de chauffe. 15. Veillez à ce que l’appareil n’entre pas en contact avec des matériaux facilement inflammables comme les rideaux, les JK 42656 - 120501 Assembly page 20/32... - Page 21 être éjectée, causant brulures et blessures. 28. Si vous versez une large quantité d’eau bouillante, versez doucement et n’inclinez pas la bouilloire en dépassant la position où la bouilloire se trouve à l’horizontale, afin d’éviter brûlures ou blessures. JK 42656 - 120501 Assembly page 21/32...
- Page 22 Le cordon d’alimentation de l’appareil est un cordon de type court, et ce afin de diminuer les risques d’accidents (chute si vous marchez sur le cordon...). Vous pouvez toutefois utiliser une rallonge si nécessaire mais: JK 42656 - 120501 Assembly page 22/32...
- Page 23 6. Bec verseur avec filtre 7. Corps en verre 8. Anneau lumineux 9. Range-câble dans la base a. Diodes de température b. Bouton « Bouillir/Arrêt/ Garde au Chaud » c. Bouton d’ajustement de la température JK 42656 - 120501 Assembly page 23/32...
-
Page 24: Avant La Premiere Utilisation
Si le voyant lumineux (8) ne s’allume pas, vérifiez que la bouilloire • est bien positionnée sur sa base, et que la base est bien connectée au réseau électrique. N’ouvrez pas le couvercle pendant que la bouilloire chauffe ou • que l’eau bout. JK 42656 - 120501 Assembly page 24/32... - Page 25 Pour annuler la fonction de garde au chaud, éteignez • simplement la bouilloire, ou sélectionnez une température différente, ou encore soulevez la bouilloire de sa base. La bouilloire peut être laissée sur sa base quand elle n’est pas en • fonction. JK 42656 - 120501 Assembly page 25/32...
-
Page 26: Nettoyage Et Entretien
Utilisez des produits de détartrage indiqués pour les bouilloires ou les machines à café. Suivez les instructions du fabricant de la solution anticalcaire. Rincez profusément. JK 42656 - 120501 Assembly page 26/32... - Page 27 à l'eau courante. Remettez le filtre en place après chaque nettoyage Il est nécessaire de laver ce filtre de façon régulière pour le • débarrasser notamment des dépôts de calcaire. JK 42656 - 120501 Assembly page 27/32...
-
Page 28: Garantie
à l’adresse suivante : www.KALORIK.com. A compter de la date d’achat, ce produit KALORIK est garanti un an, sur le territoire des Etats-Unis, contre les défauts matériels et de fabrication. Cette garantie n’est pas transférable. Conservez la preuve d’achat originelle. - Page 29 KALORIK agrée (visitez notre site internet www.KALORIK.com ou appelez notre département Service Clientèle pour obtenir l’adresse du service après-vente KALORIK agréé).
- Page 30 When folding, make sure you keep the good numbering when you turn the pages of the I/B. Don’t change Fax +1 305 430 9692 the page numbering. Keep the language integrity. Print only what is inside the frame. NOTES : JK 42656 - 120501 Assembly page 30/32...
- Page 31 When folding, make sure you keep the good numbering when you turn the pages of the I/B. Don’t change Fax +1 305 430 9692 the page numbering. Keep the language integrity. Print only what is inside the frame. NOTES : JK 42656 - 120501 Assembly page 31/32...
- Page 32 I/B. Don’t change Fax +1 305 430 9692 the page numbering. Keep the language integrity. Print only what is inside the frame. NOTES : www.KALORIK.com K120501 JK 42656 - 120501 Assembly page 32/32...
Need help?
Do you have a question about the JK 42656 and is the answer not in the manual?
Questions and answers