Advertisement
Quick Links
This product can be setup using
any current Web browser, i.e.,
Internet Explorer 6 or Netscape
Navigator 7.0
Before You Begin:
You will need an Ethernet-enabled device, such as a laptop or desktop computer and
a USB or LPT printer that will connect to the DP-G321.
IMPORTANT: TURN OFF the power to the printer BEFORE installing the DP-G321
Check Your Package Contents
If any of the above items are missing, please contact your reseller.
©2004 D-Link Systems, Inc. All rights reserved. Trademarks or registered trademarks are the property of their respective holders.
All manuals and user guides at all-guides.com
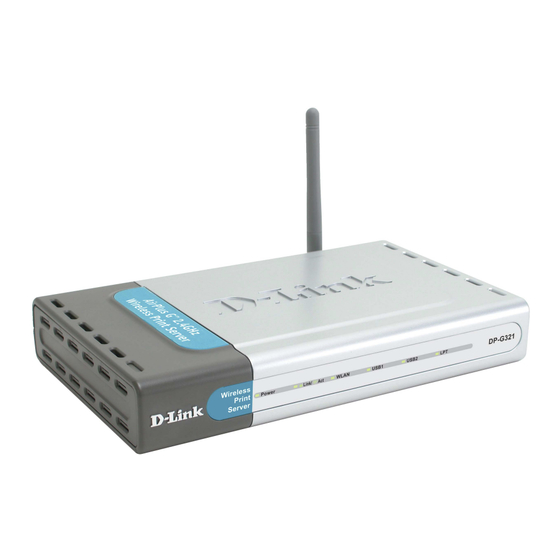
DP-G321 AirPlus G Wireless Multi-Port Print Server
CD-ROM (Software, Manual and Warranty)
5V DC, 2.5A Power Adapter
Software and specifications subject to change without notice. DP-G321.06152004
AirPlus
TM
d i f f e r e n t v o l t a g e
rating will damage this
product and void its
warranty.
DP-G321
G 802.11g/2.4GHz
™
Wireless Multi-Port
Print Server
Using a power
supply with a
Advertisement

Subscribe to Our Youtube Channel
Related Manuals for D-Link AirPlus G DP-G321


Summary of Contents for D-Link AirPlus G DP-G321
- Page 1 If any of the above items are missing, please contact your reseller. ©2004 D-Link Systems, Inc. All rights reserved. Trademarks or registered trademarks are the property of their respective holders. Software and specifications subject to change without notice. DP-G321.06152004...
- Page 2 All manuals and user guides at all-guides.com Connecting the DP-G321 to Your Network LAN Port: Connects Antenna: Used to wirelessly to a router or switch. connect to 802.11b/g adapters. USB Ports: Used to connect USB printers. Power Receptor: LPT Port: Used to Connects the AC connect a standard Power Adapter...
- Page 3 All manuals and user guides at all-guides.com Connecting the DP-G321 to Your Network (continued) Note: Don’t connect the power cord to the DP-G321 until you are advised to do so. For Mac OS printing, please refer to manual (.pdf) located on the CD-ROM. A.
- Page 4 All manuals and user guides at all-guides.com Configuring the DP-G321 (continued) Input a static IP address in the same range as the print server. (192.168.0.xx) Select Use the following IP address IP address: 192.168.0.28 Subnet mask: 255.255.255.0 Click Click to apply the new settings Open your Web browser and type...
- Page 5 All manuals and user guides at all-guides.com Configuring the DP-G321 (continued) The IP address of the DP-G321 can be modified from the Network option under the Configuration tab. This Quick Installation Guide will use the Print Server’s default IP address in all examples.
- Page 6 All manuals and user guides at all-guides.com Configuring the DP-G321 (continued) A list of available wireless networks will appear. If you do not see the network you are looking for, click Rescan at the bottom of the page. Click Select This screen only appears if you selected a wireless network with WEP enabled.
-
Page 7: The Add Printer Wizard
All manuals and user guides at all-guides.com The Add Printer Wizard For Windows XP: Go to the Start menu> Printers and Faxes> Add a Printer Double-click on the Add Printer icon Click Next Select Local Printer uncheck Automatically detect and install my Plug an Play printer. - Page 8 All manuals and user guides at all-guides.com The Add Printer Wizard (continued) Select Create a new port Standard TCP/IP Port choose from the drop-down menu. Click Next Click Next Type 192.168.0.10 The Port Name will fill in automatically. Click Next...
- Page 9 All manuals and user guides at all-guides.com The Add Printer Wizard (continued) Select Custom and click the Settings button Select Enter the Port name for the port the printer is attached to. Default port names differ with the device MAC ID: PS-xxxxxx-U1 (for USB Port 1) PS-xxxxxx-U2 (for USB Port 2) PS-xxxxxx-P3 (for LPT Port)
- Page 10 All manuals and user guides at all-guides.com The Add Printer Wizard (continued) Click Finish In this window, scroll down and select your printer manufacturer and model. (If it is not listed, insert the driver CD or diskette that came with your printer and click Have Disk.) Click Next...
- Page 11 All manuals and user guides at all-guides.com The Add Printer Wizard (continued) By opting to not share the printer, each system will print directly to the print server. Select Do not share this printer Click Next Select to print a test page If the test page doesn’t print successfully, please check the Frequently Asked Questions in the...
-
Page 12: Technical Support
All manuals and user guides at all-guides.com Technical Support You can find software updates and user documentation on the D-Link website. D-Link provides free technical support for customers within the United States and within Canada for the duration of the warranty period on this product.
Need help?
Do you have a question about the AirPlus G DP-G321 and is the answer not in the manual?
Questions and answers