Table of Contents

Subscribe to Our Youtube Channel
Related Manuals for Gymstick HOME GYM 4.0


Summary of Contents for Gymstick HOME GYM 4.0
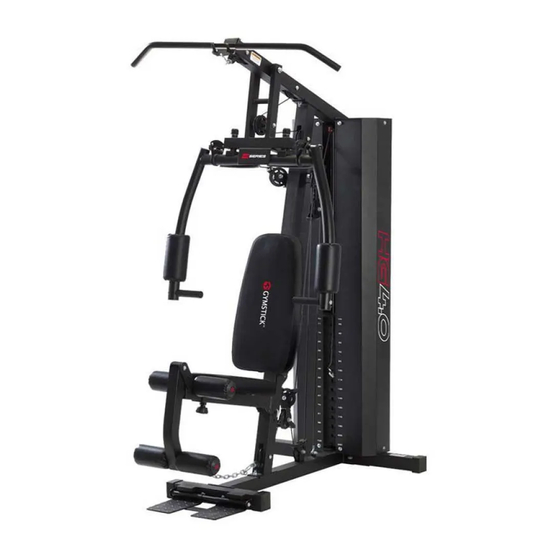
- Page 1 HOME GYM 4.0 USER MANUAL IMPORTANT: Read all instructions carefully before using this product. Retain this owner’s manual for future reference. The specifications of this product may vary from this photo, subject to change without notice.
-
Page 2: Table Of Contents
BEFORE YOU BEGIN Thank you for choosing Gymstick Home Gym 4.0. We take great pride in producing this quality product and hope it will provide many hours of effective exercise to make you feel better, look better and enjoy life to its fullest. -
Page 3: Safety Instructions
18. Maximum user weight 135 kg. WARNING! BEFORE BEGINNING THIS OR ANY EXERCISE PROGRAM, CONSULT YOUR PHYSICIAN FIRST. THIS IS ESPECIALLY IMPORTANT FOR INDIVIDUALS OVER THE AGE OF 35 OR PERSONS WITH PRE-EXISTING HEALTH PROBLEMS. HOME GYM 4.0... - Page 4 Free area around the machine must be greater than 0.6 meters in each direction from where the machine is accessed. The area must also include a safe way for emergency dismount. Where equipment is positioned adjacent to each other, the valua of the free area may be shared. HOME GYM 4.0...
-
Page 5: Exploded Drawing
EXPLODED DRAWING HOME GYM 4.0... -
Page 6: Parts List
Shiver Bar Quick Release Lock Pin Rotate Ring Ø32x Ø20 Bushing Swivel Pulley Bracket Ø50x Ø16 Bushing Foam Roll Tube Plastic Cover Weight Stack Cover Ø32x 20 Bushing Double Floating Pulley Bracket Ø32x 35 Bushing Bracket Spacer HOME GYM 4.0... - Page 7 Ø25 x 1.5 End Cap Dome End Cap Combination Lock Ø 16xM10x169 Axle Ø 16xM10x56 Axle 7# Gourd Hook 15 Joint Chain 10 Joint Chain Ø4×15 Clinch Bolt M10 x 85 Carriage Bolt M10x 150 Allen Bolt M10x 85 Allen Bolt HOME GYM 4.0...
-
Page 8: Components
COMPONENTS Please check you have all parts listed below. Note: Some of the smaller components may be pre-fitted to larger components. HOME GYM 4.0... - Page 9 COMPONENTS HOME GYM 4.0...
- Page 10 COMPONENTS HOME GYM 4.0...
-
Page 11: Assembly Instructions
C. Attach the Front Stabilizer (13) to the Main Base Frame (3), Secure them with 1 pc Bracket (31), 2 pcs M10×85 Carriage Bolts (85), 2 pcs Ø10 Washer (100) and 2 pcs M10 Aircraft Nut (102). HOME GYM 4.0... - Page 12 M10×85 Carriage Bolts (85), 1 pc Bracket (31), 2 pcs Ø10 Washer (100) and 2 pcs M10 Aircraft Nut (102). B. Attach the Seat Pad Support (9) to the Front Vertical Frame (1) and secure them with M10*93 Lock Knob (98) and 1 pc L Shape Lock Pin (88). HOME GYM 4.0...
- Page 13 B. Attach the Foot Plate (14) to the Front Stabilizer (13), Secure them with 2 pcs M10*20 Allen Bolt (92), 2 pcs Ø10 Washer (100) and 1 pc Foot Plate Tube (18). Make sure that all the grooves face downwards and front HOME GYM 4.0...
- Page 14 Place the Upper Frame (4) onto the Front Vertical Frame (1) and 2 pcs Guide Rods (5). Carefully align the holes and secure them with 2 pcs M10*20 Allen Bolt (92), 2 pcs Ø10 Washers (100). 2 pcs M10*85 Carriage Bolts (85), 1 pc Bracket (31), 2 pcs Ø10 Washers (100) and 2 pcs M10 Aircraft Nuts (102). HOME GYM 4.0...
- Page 15 B. Fix the Swivel Pulley Bracket (25) as the diagram shows with 1 pc M10*65 Allen Bolt (89), 2 pcs Ø 10 Washers (100) and 1 pc M10 Aircraft Nut (102). Install another one the same way. HOME GYM 4.0...
- Page 16 Lock Knob (51). C. Attach the Leg Developer (10) to the bracket as the diagram shows. Secure them with 1 pc Ø16*M10*56 Axle (80), 2 pcs M10*20 Allen Bolt (92) and 2 pcs Ø10 Washers (100). HOME GYM 4.0...
- Page 17 F. Attach 1 pc Butterfly Foam Roll (50) to the right butterfly foam the bottom as the diagram shows. G. Attach the Butterfly Handle (16) to the right butterfly and secure them with 1 pc M10*20 Allen Bolt (92) and 1 pc Ø10 Washers (100). H. Install the Left Butterfly (7) the same way. HOME GYM 4.0...
- Page 18 H. Draw the cable around the pulley and down. Attach the end bolt to the top of selector rod. Thread at least 5 laps to ensure the safety. (See next pages for diagrams.) HOME GYM 4.0...
- Page 19 ASSEMBLY INSTRUCTIONS STEP 7. HOME GYM 4.0...
- Page 20 ASSEMBLY INSTRUCTIONS STEP 7. L: 3140mm HOME GYM 4.0...
- Page 21 Angled Floating Pulley Bracket (15) the same way as in A. (See diagram B) C. Draw the cable upwards and repeat the procedure A to fix another end of cable to the post of Left Butterfly Adjustment Frame (20). L: 2950mm HOME GYM 4.0...
- Page 22 ASSEMBLY INSTRUCTIONS STEP 9. (See next page.) L: 3280mm HOME GYM 4.0...
- Page 23 E. Draw the cable around the pulley and downwards. Secure the end with 1 pc M10*30 Allen Bolt (91), 2 pcs Ø10 Washers (100) and 1 pc M10 Aircraft Nut (102). F. Connect the Leg Developer (10) and the end of lower cable with 2 pcs 7# Gourd Hook (81) and 1 pc 15-Joint Chain (82). HOME GYM 4.0...
- Page 24 Allen Bolt (97). C. Insert the 2 pcs Foam Roll Tube (26) into the holes halfway, and then push the 4pcs Foam Rolls (49) from both ends seperately, and then push the Foam Roll End Cap (48). HOME GYM 4.0...
- Page 25 STEP 11. Attach the 2 pcs Weight Stack Covers (27) onto the Rear Stabilizer (2) and secure them with 12 pcs M10X16 Allen Bolt (93), 12 pcs Ø10 Washer (100) and 2 pcs Weight Stack Cover Bracket (30). HOME GYM 4.0...
- Page 26 Gourd Hook (81) and 1 pc 10-Joint Chain (83). Connect the Shiver Bar (23) or Single Strap (46) or Ankle Strap (45) to the end of the lower cable when exercising. C. Please place all the Nut Covers (42) on the bolts. HOME GYM 4.0...
-
Page 27: Care And Maintenance
After each exercise, ensure that the machine is wiped down and any sweat is removed from the unit. The machine can be cleaned with a soft cloth and mild detergent. Do not use abrasives or solvents. Store the machine in a clean and dry indoor environment. Keep out of direct sunlight. RESISTANCE CHART HOME GYM 4.0... -
Page 28: Exercising Information
140 beats per minute. (A six-second count is used because your heart rate will drop rapidly when you stop exercising.) Adjust the intensity of your exercise until your heart rate is at the proper level. HOME GYM 4.0... - Page 29 Targeted Muscle Groups The exercise routine that is performed on the Men’s Health Home Gym will develop the upper and lower body or combined total body muscle groups. These muscle groups are highlighted on the muscle chart below. HOME GYM 4.0...
-
Page 30: Warm Up And Cool Down Routine
Open your arms to the side and lift them until they are over your head. Reach your right arm as far toward the ceiling as you can for one count. Repeat this action with your left arm. HOME GYM 4.0... - Page 31 Keep you r right leg straight and the left foot on the floor; then bend the left leg and lean forward by moving your hips toward the wall. Hold, then repeat on the other side for 15 counts. HOME GYM 4.0...
-
Page 32: Implied Warranty
Devices marked with this symbol must be disposed of separately from your household waste, as they contain valuab- le materials which can be recycled. Proper disposal protects the environment and human health. Your local authority or retailer can provide information on the matter. HOME GYM 4.0...
Need help?
Do you have a question about the HOME GYM 4.0 and is the answer not in the manual?
Questions and answers