
Subscribe to Our Youtube Channel
Related Manuals for Toshiba MV13L2


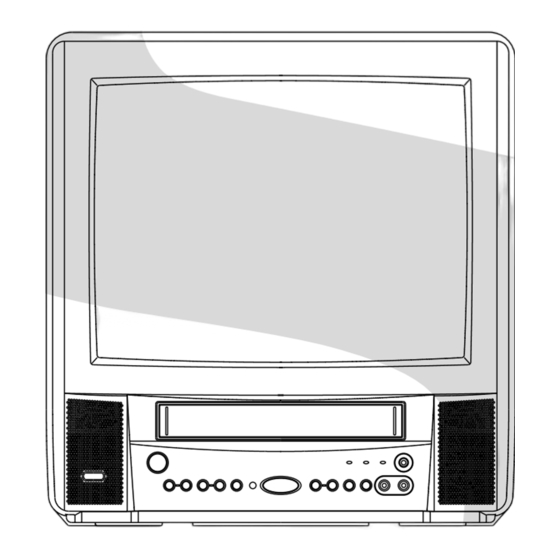
Summary of Contents for Toshiba MV13L2
- Page 1 FILE NO. 140-200102 SERVICE MANUAL COLOR TELEVISION/ VIDEO CASSETTE RECORDER MV13L2...
-
Page 2: Servicing Notices On Checking
SERVICING NOTICES ON CHECKING 1. KEEP THE NOTICES 6. AVOID AN X-RAY As for the places which need special attentions, Safety is secured against an X-ray by consider- they are indicated with the labels or seals on the ing about the cathode-ray tube and the high cabinet, chassis and parts. -
Page 3: General Specifications
GENERAL SPECIFICATIONS CRT Size / Visual Size 13 inch / 335.4mmV System CRT Type Normal Deflection degree Magnetic Field BV/BH +0.45G / 0.18G Color System NTSC Speaker 1Speaker Position Front Size x 2.5 Inch Impedance Sound Output 10%(Typical) System System Player / Recorder Video System NTSC... - Page 4 GENERAL SPECIFICATIONS On Screen Menu Display Menu Type Character Timer Rec Set Channel Setup TV/CATV Auto ch Memory Add/Delete Guide ch Set TV Setup V-chip Set On/Off Timer Set Picture Audio Sap On/Off Auto Repeat On/Off System Setup Clock Set Language Auto Clock On/Off Standard Time...
- Page 5 GENERAL SPECIFICATIONS G-12 Remote Unit RC-DQ Control Glow in Dark Remocon Format Custom Code 40-BFh , 44-BBh Power Source Voltage(D.C) UM size x pcs UM-4 x 2 pcs Total Keys Keys Keys Power CH Up CH Down Volume Up Volume Down Input Select Play F.Fwd...
-
Page 6: Canada V-Chip
GENERAL SPECIFICATIONS G-13 Features Auto Head Cleaning Auto Tracking HQ (VHS Standard High Quality) Auto Power On, Auto Play, Auto Rewind, Auto Eject VIDEO PLUS+(SHOWVIEW,G-CODE) Auto Clock Forward / Reverse Picture Search One Touch Playback Auto CH Memory Closed Caption TV Auto Shut off Function End Call Index Search... - Page 7 GENERAL SPECIFICATIONS G-15 Interface Switch Power Play Pause/Still System Select One Touch Playback Channel Up Channel Down F.FWD/Cue Eject/Stop Main Power SW Volume Up Volume Down Rew/Rev Rec/OTR Input Select Indicator Power Rec/OTR T-Rec On Timer Key Light up Rec/OTR One Touch Playback Play Terminals...
-
Page 8: Removal Of Mechanical Parts And P.c. Boards
DISASSEMBLY INSTRUCTIONS 1. REMOVAL OF MECHANICAL PARTS 1-3: TV/VCR BLOCK (Refer to Fig. 1-3) Remove the 2 screws 1. AND P.C. BOARDS Disconnect the following connectors: 1-1: BACK CABINET (Refer to Fig. 1-1) (CP352, CP353, CP354, CP401 and CP502). Remove the 4 screws 1. Unlock the support 2. -
Page 9: Removal Of Deck Parts
DISASSEMBLY INSTRUCTIONS 2. REMOVAL OF DECK PARTS NOTE When you install the Tape Guide L, install as shown in the 2-1: TOP BRACKET (Refer to Fig. 2-1) circle of Fig. 2-3-B. (Refer to Fig. 2-3-B) Remove the 2 screws 1. Slide the 2 supports 2 and remove the Top Bracket. - Page 10 DISASSEMBLY INSTRUCTIONS 2-6: LINK UNIT (Refer to Fig. 2-6) 2-9: TENSION ASS'Y (Refer to Fig. 2-9-A) Set the Link Unit to the Eject position. Move the Inclined S Ass'y to the back side. Remove the (A) side of the Link Unit first, then remove Remove the Tension Spring.
- Page 11 DISASSEMBLY INSTRUCTIONS 2-11: S REEL/T REEL (Refer to Fig. 2-11) NOTE Remove the S Reel and T Reel. Do not touch the Pinch Roller. (Use gloves.) Remove the 2 Polyslider Washers 1. When you install the Pinch Roller Block, install as shown in the circle of Fig.
- Page 12 DISASSEMBLY INSTRUCTIONS 2-15: AHC ASS'Y/CYLINDER UNIT ASS'Y (Refer to Fig. 2-15) Middle Gear Unlock the support 1 and remove the AHC Ass'y. E-Ring Remove the 3 screws 2. Remove the Cylinder Unit Ass'y. Main Cam NOTE Pinch Roller Cam When you install the Cylinder Unit Ass'y, tighten the screws from (1) to (3) in order while pulling the Ass'y Joint Gear toward the left front direction.
- Page 13 DISASSEMBLY INSTRUCTIONS 2-19: LOADING GEAR S/T ASS'Y (Refer to Fig. 2-19-A) 2. When you install the Clutch Actuator, install as shown in the circle of Fig. 2-19-C. (Refer to Fig. 2-19-C) Remove the E-Ring 1 and remove the Main Loading Gear.
-
Page 14: Removal Of Anode Cap
DISASSEMBLY INSTRUCTIONS 3. REMOVAL OF ANODE CAP 3. After one side is removed, pull in the opposite direction to remove the other. Read the following NOTED items before starting work. NOTE After turning the power off there might still be a potential Take care not to damage the Rubber Cap. -
Page 15: Key To Abbreviations
KEY TO ABBREVIATIONS Audio/Control H.SW Head Switch Automatic Color Control Hertz Audio Erase Integrated Circuit Automatic Frequency Control Intermediate Frequency Automatic Fine Tuning Indicator AFT DET Automatic Fine Tuning Detect Inverter Automatic Gain Control Killer Amplifier Left Antenna Light Emitting Diode A.PB Audio Playback LIMIT AMP... - Page 16 KEY TO ABBREVIATIONS SYNC Synchronization SYNC SEP Sync Separator, Separation Transistor TRAC Tracking TRICK PB Trick Playback Test Point UNREG Unregulated Volt Voltage Controlled Oscillator Video Intermediate Frequency Vertical Pulse, Voltage Display V.PB Video Playback Variable Resistor V.REC Video Recording Visual Search Fast Forward Visual Search Rewind Voltage Super Source...
-
Page 17: Service Mode List
SERVICE MODE LIST This unit provided with the following SERVICE MODES so you can repair, examine and adjust easily. To enter SERVICE MODE, unplug AC cord till lost actual clock time. Then press and hold Vol (-) button of main unit and remocon key simultaneously. -
Page 18: Preventive Checks And Service Intervals
PREVENTIVE CHECKS AND SERVICE INTERVALS The following standard table depends on environmental conditions and usage. Unless maintenance is properly carried out, the following service intervals may be quite shortened as harmful effects may be had on other parts. Also, long term storage or misuse may cause transformation and aging of rubber parts. Time 1,000 1,500... -
Page 19: Audio Control Head
PREVENTIVE CHECKS AND SERVICE INTERVALS CLEANING NOTE 2. TAPE RUNNING SYSTEM After cleaning the heads with isopropyl alcohol, do not When cleaning the tape transport system, use the run a tape until the heads dry completely. If the heads gauze moistened with isopropyl alcohol. are not completely dry and alcohol gets on the tape, 3. -
Page 20: Note For The Replacing Of Memory Ic
NOTE FOR THE REPLACING OF MEMORY IC If a service repair is undertaken where it has been required to change the MEMORY IC, the following steps should be taken to ensure correct data settings while making reference to TABLE 1. NOTE: Initial Data setting will not be possible if clock has been set. -
Page 21: Servicing Fixtures And Tools
SERVICING FIXTURES AND TOOLS Alignment Tape Back tension cassette gauge Torque cassette gauge Taper nut driver (KT-300NR) ST-N5 ST-NF 70909103 70909199 70909228 VTR cleaning kit VTR lubrication kit Grease JG002B Adapter JG002E Dial Torque Gauge (10~90gf•cm) JG002F (60~600gf•cm) JG022 Master Plane JG024A Reel Disk Height JG153 X Value Adjustment JG154 Cable... -
Page 22: Confirmation And Adjustment
MECHANICAL ADJUSTMENTS 1. CONFIRMATION AND ADJUSTMENT 1-2: CONFIRMATION AND ADJUSTMENT OF TENSION POST POSITION Read the following NOTES before starting work. Set to the PLAY mode. • Place an object which weighs between 450g~500g on Adjust the Tension Adjust until the edge of the Tension the Cassette Tape to keep it steady when you want to Arm is positioning within 0.5mm range from the make the tape run without the Cassette Holder. -
Page 23: Confirmation And Adjustment Of Tape Running Mechanism
MECHANICAL ADJUSTMENTS 1-4: CONFIRMATION OF VSR TORQUE 2. CONFIRMATION AND ADJUSTMENT OF TAPE RUNNING MECHANISM Operate within 4~5 seconds after the reel disk begins to turn. Tape Running Mechanism is adjusted precisely at the Install the Torque Gauge (JG002F) and Adapter (JG002B) factory. - Page 24 MECHANICAL ADJUSTMENTS 2-2: CONFIRMATION AND ADJUSTMENT OF AUDIO/ 2-3: TAPE RUNNING ADJUSTMENT CONTROL HEAD (X VALUE ADJUSTMENT) When the Tape Running Mechanism does not work well, Confirm and adjust the height of the Reel Disk. adjust the following items. (Refer to item 1-1) Confirm and adjust the position of the Tension Post.
-
Page 25: Mechanism Adjustment Parts Location Guide
MECHANICAL ADJUSTMENTS 3. MECHANISM ADJUSTMENT PARTS LOCATION GUIDE 1. Tension Adjust X value adjustment driver hole 2. Tension Arm P4 Post 3. Guide Roller T Brake Spring 4. P1 Post T Reel 5. Audio/Control Head S Reel... -
Page 26: Before Making Electrical Adjustments
ELECTRICAL ADJUSTMENTS BEFORE MAKING ELECTRICAL 2. BASIC ADJUSTMENTS ADJUSTMENTS (VCR SECTION) Read and perform these adjustments when repairing the 2-1: PG SHIFTER circuits or replacing electrical parts or PCB assemblies. Connect CH-1 on the oscilloscope to TP1002 and CH-2 CAUTION to pin 4 of CP1003. - Page 27 ELECTRICAL ADJUSTMENTS 2-3: RF AGC 2-8: HORIZONTAL PHASE Receive the VHF HIGH (63dB). Receive the monoscope pattern. Connect the digital voltmeter between the pin 5 of Using the remote control, set the brightness and CP351 and the pin 1 (GND) of CP351. contrast to normal position.
- Page 28 ELECTRICAL ADJUSTMENTS 2-13: SUB TINT 2-15: OSD HORIZONTAL Receive the color bar pattern. (RF Input) Activate the adjustment mode display of Fig. 1-1. Connect the synchro scope to TP801. Press the VOL. UP/DOWN button on the remote Using the remote control, set the brightness, contrast, control until the difference of A and B becomes color and tint to normal position.
-
Page 29: Electrical Adjustment Parts Location Guide
ELECTRICAL ADJUSTMENTS 3. ELECTRICAL ADJUSTMENT PARTS LOCATION GUIDE TP1001 CP1003 TP4001 TP1002 FH503 VR502 TU601 FB401 CP351 FOCUS VOLUME SCREEN VOLUME SYSCON TP801 TP803 J801... -
Page 30: Purity And Convergence Adjustments
ELECTRICAL ADJUSTMENTS 4-3: STATIC CONVERGENCE 4. PURITY AND CONVERGENCE ADJUSTMENTS NOTE Adjust after performing adjustments in section 4-2. NOTE Receive the crosshatch pattern from the color bar Turn the unit on and let it warm up for at least 30 generator. -
Page 31: Tv Block Diagram
TV BLOCK DIAGRAM V. OUTPUT IC IC401 AN5522 MICON/ POWER/ THERMAL OPERATION/ PROTECTION DECK Q602, Q603 Q606 P. CON+8V AT+5V REG. REG. AT+25V PUMP Q604, Q605 TU_AUDIO Y/C/AUDIO/ AT+5V REG. CCD/ TU_VIDEO HEAD AMP/ Y/C_AUDIO IN/OUT Q406 CHROMA_VIDEO Q405 CHROMA IC IC601 M61206FP H. - Page 32 Y/C/AUDIO/CCD/HEAD AMP/IN/OUT BLOCK DIAGRAM X4001 3.579545MHz Q4012 Q4010 BUFFER Y/C/AUDIO/CCD/HEAD AMP IC BUFFER IC4001 LA71201M-MPB VX01 3.58M BPF2 CP4001 CLAMP AUTO-BIAS Main CONV Y/C_CLK SP-CH2 (L) SERAIL MICON/ POWER/ Y/C_DATA OPERATION/ DECK DECODER SP_COM Y/C_CS B-UP SP-CH1 (R) C-LPF 3.58M BPF1 VIDEO SYNC...
- Page 33 MICON/POWER/OPERATION/DECK BLOCK DIAGRAM SW1001 TIMER SYSCON MICON IC IC1001 OEC7059A SYSTEM RESET IC RESET-L 3 OUT IC1003 TAB SW R3111N311A/C POWER FAIL2 AT+5.6V POWER_FAIL_L MSSEN-A P. CON+5V X-OUT(12MHz) Q1023 MS_SEN A J701 X1001 Q1009 12MHz AUDIO L X_RAY_SW X-IN(12MHz) FRONT_VIDEO XC-OUT(32KHz) MSSEN-B X1002...
-
Page 34: Printed Circuit Boards
PRINTED CIRCUIT BOARDS OPERATION SOLDER SIDE D791 R761 R754 W001 W811 R350 R351 W002 J701 CD351_1 C701 DECK SOLDER SIDE CP101 S105 S101 S104 S103 Q101 S102... - Page 35 PRINTED CIRCUIT BOARDS SYSCON/CRT (INSERTED PARTS) SOLDER SIDE W813 W014 R450 L801 W063 W849 CP1006 S801Y S801 S113Y D405 W060 R820 W059 Q806_1 W058 TP802 TP801 C1064 TP803 D614 D618 R1064 C402 CP1005 W892 D803 W209 W012 Q805_1 IC1004 Q405 W053 D613 W011...
- Page 36 PRINTED CIRCUIT BOARDS SYSCON/CRT (CHIP MOUNTED PARTS) SOLDER SIDE W918 R352 R357 C301 R353 R4201 Q4201 Q1006 W900 Q4202 R359 R1058 R4043 R4041 Q4012 R1046 R1060 R4054 R1047 R4042 W818 R4038 Q4010 W833 R4044 R4053 C4015 IC4001 Q4009 C4019 Q4007 R4026 C4043 R4052...
-
Page 37: Y/C/Audio/Ccd/Head Amp Schematic Diagram
Y/C/AUDIO/CCD/HEAD AMP SCHEMATIC DIAGRAM (SYSCON PCB) BUFFER Q4012 2SC2412K R4041 1.8K FROM/TO TV POWER P.CON+5V W858 C4058 W818 6.3V C4059 FROM/TO I/O 0.1 F FRONT_AUDIO FRONT_VIDEO Y/C_AUDIO R4038 C4061 Y/C_VIDEO 680K 0.01 F FROM/TO MICON Y/C_CLK Y/C_DATA C4016 COMP OUT ALWAYS 4Fsc CLOCK... -
Page 38: Micon Schematic Diagram
MICON SCHEMATIC DIAGRAM (SYSCON PCB) FROM/TO TV POWER POWER_FAIL2 SERVICE R1032 C1056 P.CON+5V TP1001 AT+12V 0.1 F MOTOR_GND W919 H_GND C1034 B1001 CYL/LOADING MOTOR DRIVER BL01RN1-A63 0.1 F IC1004 LB11880 C1035 C1078 R1029 C1007 220P CH 0.1 F 4.7K 0.1 F CYL_DRIVE PC OUT C1080... -
Page 39: In/Out Schematic Diagram
IN/OUT SCHEMATIC DIAGRAM (SYSCON PCB) L1002 100uH Vout OS1001 PIC-37243SR FROM/TO SOUND AMP R1057 R1058 R1059 R1060 SOUND_GND 1.5K SOUND+ SP_OUT FROM/TO CHROMA/IF R1062 R1065 R1067 R1068 R1069 AT+5V 5.6K 2.7K 1.5K INT-MONI B.OUT FROM/TO MICON IIC_OFF W916 T-REC LED SW(TO) T-REC_LED Q4202 (T0) -
Page 40: Chroma/If Schematic Diagram
CHROMA/IF SCHEMATIC DIAGRAM (SYSCON PCB) 11.0 FROM/TO MICON REG. R632 Q606 SPOT_H 220 2W AT+5V REG. KTC3203_Y Q603 AT+5V D608 KTC3203_Y AT+5V_BACKUP REG. REG. SB10-03A3 REG. Q602 Q605 Q604 OSD_R KTC3203_Y 2SD400E 2SD400E OSD_G W895 OSD_B W801 OSD_BLK TU_VIDEO B604 FROM/TO Y/C/A/H.AMP R620 CF604... -
Page 41: Sound Amp Schematic Diagram
SOUND AMP SCHEMATIC DIAGRAM (SYSCON PCB) FROM/TO I/O SPEAKER CP352 B2B-EH-A SP351 SP_OUT SP OUT SG04D11BNA SOUND GND SOUND+ 8 OHM CD353 SOUND_GND CH12426A FROM/TO MICON R359 TV_A_MUTE R353 TV_POWER_H C301 0.022 B FROM/TO TV POWER SOUND+B W814 SOUND_GND FROM/TO CHROMA/IF C355 R357 AUDIO_OUT... -
Page 42: Power Schematic Diagram
POWER SCHEMATIC DIAGRAM (SYSCON PCB) CAUTION: FOR CONTINUED PROTECTION AGAINST FIRE HAZARD, REPLACE ONLY WITH THE SAME TYPE FUSE 5A 125V (F501). 5A 125V ATTENTION: POUR UNE PROTECTION CONTINUE LES RISQUES D’INCEIE N’UTILISER QUE DES FUSIBLE DE MEME TYPE 5A 125V (F501). TP601 CP503 RE-H022TD-1130... -
Page 43: Deflection Schematic Diagram
DEFLECTION SCHEMATIC DIAGRAM (SYSCON PCB) V.OUTPUT IC IC401 AN5522 THERMAL PROTECTION PUMP UP 25.9 12.5 26.3 W862 DRIVER Q402 KTA1281_Y D402 26.0 26.0 RMPG06J 25.0 TO DY CP401 B05B-DVS R401 W857 SWITCHING Q401 R413 R416 KRC103RTK FROM/TO MICON 1.8K TV_POWER_H H_GND R424 2.2K 1/2W... -
Page 44: Crt Schematic Diagram
CRT SCHEMATIC DIAGRAM (CRT PCB) TP801 BLUE AMP R802 Q804_1 2SC4217 132.5 12K 1W 126.5 104.1 R807 127.5 127.5 2.7K 1/4W J801_1 HPS3200-010501 FROM CHROMA/IF CP851B (CP851A) 51048-1000 R811 CUT_OFF CUT OFF C809 TP802 G.OUT G.OUT B.OUT 680P B B.OUT R805 GREEN AMP R.OUT... - Page 45 JACK/LED SCHEMATIC DIAGRAM (OPERATION PCB) J351 HTJ-035-28A R350 R351_1 22 1/2W W805 22 1/4W FROM/TO I/O CD351_1 (CP353) CH27091A FRONT VIDEO IN C701 FRONT A IN L L004 0.001 B SOUND GND HF57T18.5*10*10 SOUND OUT L SP OUT L POWER/PLAY R761 270 1/4W D792...
-
Page 46: Deck Schematic Diagram
DECK SCHEMATIC DIAGRAM (DECK PCB) LOADING MOTOR M101 S105 BOT SENSOR Q101 S106 RPT-38PB113 S101 S102 S103 S104 FROM/TO MICON (CP1006) CP101 52044-0445 LDM+ LDM- PCB550 VE8851 NOTE: THIS SCHEMATIC DIAGRAM IS THE LATEST AT THE TIME NOTE: THE DC VOLTAGE AT EACH PART WAS CAUTION: SINCE THESE PARTS MARKED BY ATTENTION:... -
Page 47: Interconnection Diagram
INTERCONNECTION DIAGRAM OPERATION PCB HEADPHONE JACK PCB030 J351 TE9A16 J701 HALL MAIN ROTOR SENSOR COIL MAGNET FG SENSOR TM101 HALL HALL SWITCH LOGIC CP1004 SPEAKER CP352 SP OUT MOTOR GND SOUND GND I LIMIT Vout CD353 SP351 8 OHM OS1001 CAP/M/F/R AC120V 60Hz CAPSTAN DD UNIT... -
Page 48: Y/C/Audio/Ccd/Head Amp
WAVEFORMS Y/C/AUDIO/CCD/HEAD AMP MICON POWER ON 11 PB 0.5V 20µs/div 1.0V 20µs/div 0.5V 0.5ms/div POWER ON 12 PB POWER ON 0.5V 10ms/div 1.0V 0.5ms/div 100mV 0.1µs/div POWER ON 13 PB 1.0V 10µs/div 10mV 20us/div 1.0V 5ms/div POWER 15 5.0V 20ms/div 0.5V 1ms/div 1.0V 10ms/div 16 500mV 5µs/div... - Page 49 WAVEFORMS DEFLECTION 22 50.0V 20µs/div 17 0.5V 5ms/div 10.0V 5ms/div 50.0V 20µs/div 19 2.0V 20µs/div 20 200mV 20µs/div 21 50.0V 20µs/div NOTE: The following waveforms were measured at the point of the corresponding balloon number in the schematic diagram.
-
Page 50: Mechanical Exploded View
MECHANICAL EXPLODED VIEW J801 PCB110 (CRT PCB) L503 V801 PCB030 (OPERATION PCB) SP351... - Page 51 MECHANICAL EXPLODED VIEW FB401 PCB800 (SYSCON PCB)
-
Page 52: Chassis Exploded View (Top View)
CHASSIS EXPLODED VIEW (TOP VIEW) M2003 UN4001 H5001 H5002 M101 PCB550 (DECK PCB ASS'Y) NOTE: Applying positions AA and BA for the grease or CLASS MARK oil are displayed for this section. GREASE Check if the correct grease or oil is applied for each position. -
Page 53: Chassis Exploded View (Bottom View)
CHASSIS EXPLODED VIEW (BOTTOM VIEW) M2001 NOTE: Applying positions AA and BA for the grease or CLASS MARK oil are displayed for this section. GREASE Check if the correct grease or oil is applied for each position. -
Page 54: Mechanical Replacement Parts List
MECHANICAL REPLACEMENT PARTS LIST Location No. TSB P/N Reference No. Description BZ610156 A57808A720 CABINET,FRONT ASSY BZ710328 752WSA0209 SHIELD,CASE HEAD AMP BZ710270 753WSA0130 SHIELD,COVER HEAD AMP BZ710329 761WPAA045 HOLDER,DECK BZ710331 753WUAA006 SPRING,EARTH HEAD AMP BZ710260 899HV3T000 HOLDER,ANODE WIRE BZ710178 85OP700036 HOLDER,EOT SENSOR BZ710349 701WPJ1032 CABINET,FRONT... -
Page 55: Chassis Replacement Parts List
CHASSIS REPLACEMENT PARTS LIST Location No. TSB P/N Reference No. Description BZ610157 A57808A420K DECK ASSY A57808A420K BZ710073 85OA500022 AHC ASS'Y BZ710193 85OP200290 BELT,CAPSTAN (S) BZ710132 85OP900710 LEVER,REC BZ710094 85OP500083 BASE,AC HEAD BZ710112 85OP800324 SPRING,AC HEAD BZ710354 85OA000449 MAIN CHASSIS ASS'Y (3V) BZ710195 85OA200082 CLUTCH ASS'Y(S2) - Page 56 CHASSIS REPLACEMENT PARTS LIST Location No. TSB P/N Reference No. Description BZ710048 8107126A04 SCREW,TAP TITE(S) PAN 2.6x10 BZ710049 8107226804 SCREW,TAP TITE(S) BIND 2.6x8 BZ710017 8107226604 SCREW,TAP TITE(S) BIND 2.6x6 BZ710050 8109126604 SCREW,TAP TITE(B) PAN 2.6x6 BZ710058 83ETW30000 E-RING BZ710371 8107226404 SCREW,TAP TITE(S) BIND 2.6x4 BZ710046...
-
Page 57: Electrical Replacement Parts List
ELECTRICAL REPLACEMENT PARTS LIST Location No. TSB P/N Reference No. Description RESISTORS ! R415 BZ210053 R002T22R2J 2.2 OHM 1/2W ! R420 BZ210070 R801R7822F 8.2K OHM 1/10W ! R439 BZ210072 R801R7223F 22K OHM 1/10W ! R440 BZ210142 R903N8513J 51K OHM 1/8W ! R441 BZ210143 R903N8563J... - Page 58 ELECTRICAL REPLACEMENT PARTS LIST Location No. TSB P/N Reference No. Description DIODES D605 BZ410059 D2WT11ES10 DIODE,SILICON 11ES1-EIC D608 BZ410008 D23U1003A3 DIODE SCHOTTKY SB10-03A3 D609 BZ410022 D97U06R81B DIODE,ZENER MTZJ6.8B T-77 D610 BZ410022 D97U06R81B DIODE,ZENER MTZJ6.8B T-77 D611 BZ410022 D97U06R81B DIODE,ZENER MTZJ6.8B T-77 D612 BZ410006 D1VT001330...
- Page 59 ELECTRICAL REPLACEMENT PARTS LIST Location No. TSB P/N Reference No. Description TRANSISTORS Q4202 BZ510071 TNAAB05003 COMPOUND TRANSISTOR KRC102RTK COILS &TRANSFORMERS L401 BZ310004 021679472K COIL 4.7 MH ! L502 BZ310099 029T000092 COIL,LINE FILTER 1R0A103F24 ! L503 BZ310076 028R140031 COIL,DEGAUSS 8R140031 L601 BZ310101 0216A61R2K COIL...
- Page 60 ELECTRICAL REPLACEMENT PARTS LIST Location No. TSB P/N Reference No. Description MISCELLANEOUS CP1003 BZ614138 0694240139 CONNECTOR PCB SIDE 173979-4 CP1004 BZ614010 0697280590 CONNECTOR PCB SIDE TMC-J08P-B1 CP1005 BZ614086 069J770029 CONNECTOR PCB SIDE IMSA-9604S-07Z14 CP1006 BZ614014 069J740029 CONNECTOR PCB SIDE IMSA-9604S-04Z14 CP4001 BZ614054 0697240600...
- Page 61 TOSHIBA VIDEO PRODUCTS PTE. LTD. 438B ALEXANDRA ROAD, BLOCK B #06-01 ALEXANDRA TECHNOPARK SINGAPORE 119968...
Need help?
Do you have a question about the MV13L2 and is the answer not in the manual?
Questions and answers