Table of Contents
Advertisement
Quick Links
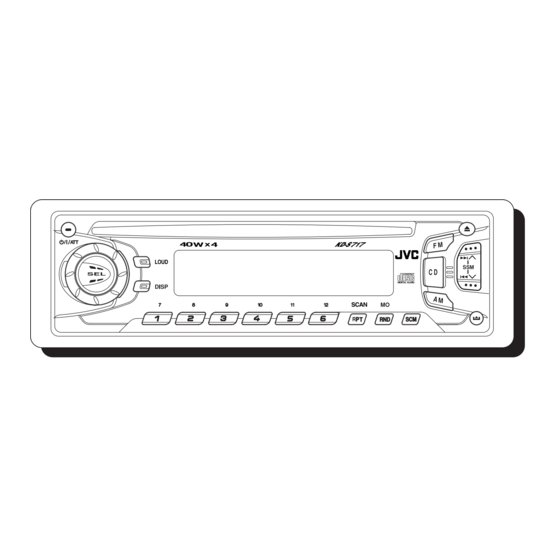
CD RECEIVER
РЕСИВЕР С ПРОИГРЫВАТЕЛЕМ КОМПАКТ-ДИСКОВ
KD-S717
COMPACT
DIGITAL AUDIO
For installation and
connections, refer to the
separate manual.
Указания по установке и
выполнению соединений
приводятся в отдельной
инструкции.
В соответствии с Законом Российской Федерации "О защите
прав потребителей" срок службы (годности) данного товара "по
истечении которого он может представлять опасность для жизни,
здоровья потребителя, причинять вред его имуществу или
окружающей среде" составляет семь (7) лет со дня производства.
Этот срок является временем, в течение которого потребитель
данного товара может безопасно им пользоваться при условии
соблюдения инструкции по эксплуатации данного товара, проводя
необходимое обслуживание, включающее замену расходных
материалов и/или соответствующее ремонтное обеспечение в
специализированном сервисном центре.
Дополнительные косметические материалы к данному товару,
поставляемые вместе с ним, могут храниться в течение двух (2) лет
со дня его производства.
Срок службы (годности), кроме срока хранения дополнительных
косметических материалов, упомянутых в предыдущих двух пунктах,
не затрагивает никаких других прав потребителя, в частности,
гарантийного свидетельства JVC, которое он может получить в
соответствии с законом о правах потребителя или других законов,
связанных с ним.
INSTRUCTIONS
ИНСТРУКЦИИ ПО ЭКСПЛУАТАЦИИ
GET0014-001A
[EE]
Advertisement
Table of Contents

Related Manuals for JVC KD-S717


Summary of Contents for JVC KD-S717
- Page 1 Указания по установке и косметических материалов, упомянутых в предыдущих двух пунктах, выполнению соединений не затрагивает никаких других прав потребителя, в частности, гарантийного свидетельства JVC, которое он может получить в приводятся в отдельной соответствии с законом о правах потребителя или других законов, инструкции.
- Page 2 Position And Reproduction Of Labels / Расположение и внешний вид маркировок Bottom panel of the main unit Дно основного устройства ADVARSEL: Usynlig laser- DANGER: Invisible laser VARNING: Osynlig laser- VARO: Avattaessa ja suo- radiation when open and stråling ved åbning, når strålning när denna del jalukitus ohitettaessa olet interlock failed or defeated.
-
Page 3: How To Reset Your Unit
How to reset your unit / Перезагрузка Вашего устройства Press and hold both the SEL (select) and (standby/on/attenuator) buttons at the same time for several seconds. This will reset the built-in microcomputer. Одновременно нажмите кнопки SEL (выбор) и (ожидание/включено/приглушение) и удерживайте нажатыми в течение нескольких секунд. Это... -
Page 4: Table Of Contents
Thank you for purchasing a JVC product. Please read all instructions carefully before operation, to ensure your complete understanding and to obtain the best possible performance from the unit. CONTENTS SOUND ADJUSTMENTS ....12 How to reset your unit ....... -
Page 5: Location Of The Buttons
LOCATION OF THE BUTTONS Control panel ; a s Display window Display window (standby/on/attenuator) button 2 Control dial y Volume (or audio) level indicator 3 LOUD button Equalization Pattern indicator 4 AM button u Tuner reception indicators 5 CD button MO, ST 6 FM button i RND (random) indicator... -
Page 6: Basic Operations
BASIC OPERATIONS Turning on the power Adjust the sound as you want (see page 13.) Turn on the power. To drop the volume in a moment Press briefly while listening to any source. “ATT” starts flashing on the display, and Note on One-Touch Operation: the volume level will drop in a moment. -
Page 7: Radio Basic Operations
RADIO BASIC OPERATIONS To stop searching before a station is received, Listening to the radio press the same button you have pressed for searching. You can use either automatic searching or manual searching to tune into a particular station. Searching a station manually: Searching a station automatically: Manual search Auto search... -
Page 8: Storing Stations In Memory
Storing stations in memory Tune into a station you want while “M” is flashing. You can use one of the following two methods to store broadcasting stations in memory. Press ¢ to search • Automatic preset of FM stations: SSM stations of higher frequencies. -
Page 9: Tuning Into A Preset Station
Manual preset Notes: • A previously preset station is erased when a new You can preset up to 6 stations in each band station is stored in the same preset number. (FM1, FM2, FM3 and AM) manually. • Preset stations are erased when the power supply to the memory circuit is interrupted (for example, during Ex: Storing an FM station of 88.3 MHz into the battery replacement). -
Page 10: Cd Operations
CD OPERATIONS Playing a CD Notes: • When a CD is inserted upside down, the CD automatically ejects. Insert a disc into the loading slot. The unit turns on, draws a CD and starts To stop play and eject the CD playback automatically. -
Page 11: Locating A Track Or A Particular Portion On A Cd
Locating a track or a particular Selecting CD playback modes portion on a CD To play back tracks at random (Random Play) You can play back all tracks on the CD at random. To fast-forward or reverse the track Each time you press MO RND (monaural/random) Press and hold ¢... -
Page 12: Sound Adjustments
SOUND ADJUSTMENTS Turning on/off the loudness Adjust the level. function To increase the level. The human ear is less sensitive to low and high frequencies at low volumes. The loudness function can boost these To decrease the level. frequencies to produce a well-balanced sound at low volume levels. -
Page 13: Storing Your Own Sound Adjustments
Storing your own sound • When “SCM LINK” is set to “LINK ON”, the selected sound mode can be stored in memory adjustments for the current source and the effect applies only to the current source. Each time you change the playback source, the SCM indicator You can adjust the sound modes (BEAT, SOFT, flashes on the display. -
Page 14: Other Main Functions
OTHER MAIN FUNCTIONS Setting the clock Changing the general settings (PSM) Press and hold SEL (select) for more than 2 seconds so that one of the You can change the items listed on the next page PSM items appears on the display. by using the PSM (Preferred Setting Mode) (See page 15.) control. - Page 15 Preferred Setting Mode (PSM) items Factory- Set. preset page settings Counter- Hold. clockwise Clockwise Select. CLOCK H Hour adjustment Back Advance 0:00 CLOCK M Minute adjustment Back Advance 12,13, SCM LINK Sound control LINK OFF LINK ON LINK ON memory linkage LEVEL Level display AUDIO 1...
-
Page 16: Detaching The Control Panel
Detaching the control panel Attaching the control panel Insert the left side of the control You can detach the control panel when leaving panel into the groove on the panel the car. holder. When detaching or attaching the control panel, be careful not to damage the connectors on the back of the control panel and on the panel holder. -
Page 17: Troubleshooting
TROUBLESHOOTING What appears to be trouble is not always serious. Check the following points before calling a service center. Symptoms Causes Remedies • CD cannot be played back. CD is inserted upside down. Insert the CD correctly. • CD sound is sometimes You are driving on rough roads. -
Page 18: Maintenance
MAINTENANCE Handling CDs Moisture condensation Moisture may condense on the lens inside the CD player in the following cases: This unit has been designed only to reproduce • After starting the heater in the car. the CDs bearing the following marks. •... -
Page 19: Specifications
SPECIFICATIONS AUDIO AMPLIFIER SECTION [MW Tuner] Sensitivity: 20 µV Maximum Power Output: Selectivity: 35 dB Front: 40 W per channel Rear: 40 W per channel [LW Tuner] Continuous Power Output (RMS): Sensitivity: 50 µV 16 W per channel into 4 Ω, 40 Hz Front: to 20 000 Hz at no more than 0.8% total harmonic distortion. - Page 20 Having TROUBLE with operation? Please reset your unit Refer to page of How to reset your unit Затруднения при эксплуатации? Пожалуйста, перезагрузите Ваше устройство Для получения информации о перезагрузке Вашего устройства обратитесь на соответствующую страницу VICTOR COMPANY OF JAPAN, LIMITED EN, RU 0101AOMCAPJES...
- Page 21 If you have any questions or require information regarding • На следующих иллюстрациях показана типовая установка. Тем не менее, Вы должны installation kits, consult your JVC IN-CAR ENTERTAINMENT dealer or a company supplying kits. сделать поправки в соответствии с типом Вашего автомобиля. Если у Вас есть какие- либо...
- Page 22 • When using the optional stay • When installing the unit without using the sleeve • При использовании дополнительной стойки • При установке устройства без использования муфты In a Toyota for example, first remove the car radio and install the unit in its place. В...
- Page 23 ENTERTAINMENT dealers. напряжения, который может быть приобретен у дилера JVC IN-CAR ENTERTAINMENT. • Replace the fuse with one of the specified rating. If the fuse blows frequently, consult your JVC IN- • Заменяйте предохранитель другим предохранителем указанного класса. Если CAR ENTERTAINMENT dealer.
- Page 24 Y-connector (not supplied with this unit) this unit, place this unit UNDER the Провод внешнего устройства Разъем Y (не входит в комплект) other equipment. INPUT JVC Amplifier JVC Amplifier • Для предотвращения перегрева Усилитель JVC этого устройства поместите это устройство ПОД прочее...
Need help?
Do you have a question about the KD-S717 and is the answer not in the manual?
Questions and answers