Sophos XG 115 Quick Start Manual
Hide thumbs
Also See for XG 115:
- Quick start manual (32 pages) ,
- Operating instructions manual (9 pages) ,
- Mounting instructions (2 pages)
Advertisement
Available languages
Available languages
Quick Links
Advertisement

Related Manuals for Sophos XG 115


Summary of Contents for Sophos XG 115
- Page 1 Quick Start Guide XG 115(w)/125(w)/135(w) XG 106(w) Rev. 3, Rev. 1...
- Page 2 1. Before Deploying Congratulations on the purchase of your Sophos XG device. This Quick Start Guide describes in short steps how to connect your device and explains how to open the web-based Admin Console from your administration PC. The Admin Console allows you to configure every aspect of the device.
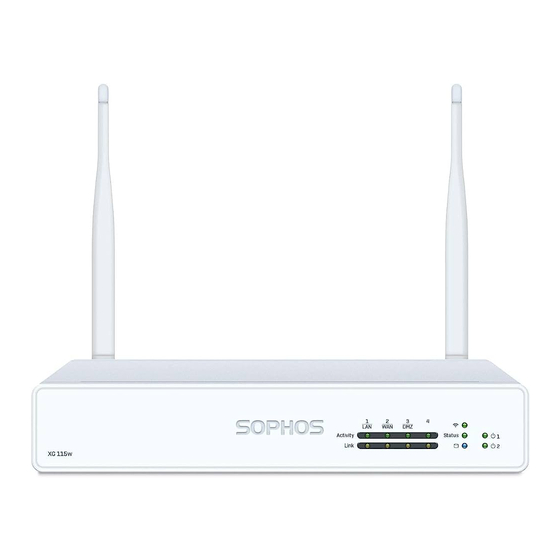
- Page 3 Connector for optional 2 redundant power supply * The displayed front image is of the XG 115 and XG 135 device and the back is of the XG 115w and XG 135w. Quick Start Guide XG 115(w)/125(w)/135(w) Rev. 3, XG 106(w) Rev. 1...
- Page 4 DHCP Enabled Enabled Mount the appliance to the rack If you want to mount the device within a rack please use the optionally available rackmount kit for this device. Quick Start Guide XG 115(w)/125(w)/135(w) Rev. 3, XG 106(w) Rev. 1...
-
Page 5: Power Up The Device
Start the browser and enter the management IP address of the device’s LAN port that your PC is connected to: https:/ /172.16.16.16:4444 (Port 1) Login with the default details below: Username: admin Password: admin Quick Start Guide XG 115(w)/125(w)/135(w) Rev. 3, XG 106(w) Rev. 1... -
Page 6: Setup The Device
Sophos ID, enter your login credentials under “Sign in with your Sophos ID”. Register Device If you are a new user, sign up for a Sophos ID by entering the details under “Create Sophos ID”. Click “Continue” to complete the registration process. Please wait while the process completes –... -
Page 7: Support And Documentation
Power adapter 2 in normal operation Constantly Power adapter 2 failed or disconnected 6. Support and Documentation For more information and technical support, please visit www.sophos.com/en-us/ support or contact your local Sophos reseller. Quick Start Guide XG 115(w)/125(w)/135(w) Rev. 3, XG 106(w) Rev. 1... - Page 8 1. Vorbereitung Herzlichen Glückwunsch zum Kauf dieser Sophos XG Appliance. Diese Kurzanleitung beschreibt schrittweise, wie Sie die Appliance verbinden, und erläutert, wie Sie über Ihren Administrations-PC die webbasierte Admin Console öffnen. Über die Admin Console können Sie jeden Aspekt der Appliance konfigurieren.
- Page 9 2 Antennen) zweite redundante Stromversorgung Stromversorgung * Die Abbildung der Vorderseite bezieht sich auf die XG 115 und XG 135 Appliance und die der Rückseite auf die XG 115w und XG 135w. Kurzanleitung XG 115(w)/125(w)/135(w) Rev. 3, XG 106(w) Rev. 1...
- Page 10 Standard-Gateway DNS-Proxy DHCP-Dienst DHCP Aktiviert Aktiviert Appliance im Rack montieren Wenn Sie die Appliance in einem Rack montieren möchten, verwenden Sie das für dieses Gerät optional erhältliche Rackmontage-Kit. Kurzanleitung XG 115(w)/125(w)/135(w) Rev. 3, XG 106(w) Rev. 1...
- Page 11 Öffnen Sie den Browser und geben Sie die Verwaltungs-IP-Adresse des LAN-Ports der Appliance ein, mit dem Ihr PC verbunden ist: https:/ /172.16.16.16:4444 (Port 1) Melden Sie sich mit den nachfolgenden Standarddaten an: Benutzername: admin Kennwort: admin Kurzanleitung XG 115(w)/125(w)/135(w) Rev. 3, XG 106(w) Rev. 1...
-
Page 12: Gerät Konfigurieren
Device Management a) Das Gerät registrieren Welcome Falls Sie Ihre Appliance noch nicht unter Ihrer Sophos ID registriert haben, wird To your Sophos Device ein Bildschirm zur Registrierung angezeigt. Für die Registrierung unter Ihrer To get started register your device below. Until you register you may only access and edit settings in “Basic Setup”... - Page 13 Netzadapter 2 funktioniert nicht oder ist nicht verbunden 6. Support und Dokumentation Für weitere Informationen und technischen Support gehen Sie auf die Website www.sophos.com/de-de/support oder wenden Sie sich an Ihren Sophos Vertriebspartner vor Ort. Kurzanleitung XG 115(w)/125(w)/135(w) Rev. 3, XG 106(w) Rev. 1...
- Page 14 デバイスの詳細については、 QR コードを読み取るか www.sophos.com/get-started-xg をご覧ください。 1.はじめに Sophos XG デバイスをご購入いただきありがとうございます。 このクイック スタート ガイドでは、 デバイスの接続方法と、 お客様の管理 PC から Web ベースの管理コンソールを開く方法について説明しています。 管理コンソールでは、 デバイスに関するあらゆる設定が可能です。 作業を始める前に、 有効なインターネッ ト接続と ISP から提供されたアカウン ト情報があることを確認して ください。 製品に含まれる内容 XG 106(w)/115(w)/125(w)/135(w) 本書クイック スタート ガイドおよびセキュリテ Micro USB ケーブル ィ ノート RJ45 イーサネッ トケーブル...
- Page 15 HDMI USB 2.0 GbE copper 拡張ベイ ポート x 8 (ここではアンテナ 2本 を含むオプションのモ ジュールを搭載) オプションの冗長電源接続口 * 表示されている前面イメージは XG 115 および XG 135 デバイスで、 背面イメージ XG 115w および XG 135w です。 クイック スタート ガイド XG 115(w)/125(w)/135(w) Rev. 3, XG 106(w) Rev. 1...
- Page 16 イーサネッ トポート IP アドレス ゾーン 172.16.16.16/255.255.255.0 DHCP 管理コンソールのユーザー名 管理コンソールのパスワード CLI コンソールのパスワード admin admin admin デフ ォルトゲートウェイ DNS プロキシ DHCP サービス DHCP 有効 有効 アプライアンスをラックに取り付ける デバイスをラック内に取り付ける場合、 このデバイスにオプションで提供される ラック取り付け用のキッ トを使用して ください。 クイック スタート ガイド XG 115(w)/125(w)/135(w) Rev. 3, XG 106(w) Rev. 1...
- Page 17 PC / ノート PC をデバイスの Port 1/LAN ポートに接続する ブラウザを起動し、 お客様の PC が接続しているデバイスの LAN ポートの管理 IP アドレ ス: https://172.16.16.16:4444 (Port 1) を入力します。 以下のデフ ォルトの値でログインします。 ユーザー名 : admin パスワード : admin クイック スタート ガイド XG 115(w)/125(w)/135(w) Rev. 3, XG 106(w) Rev. 1...
- Page 18 Serial Number XXXXXXXXXXXXXXX 「デバイスの登録」 をクリ ックすると Sophos.com にリダイレク トされます。 Basic Setup Sophos ID を既にお持ちの場合、 「 Sophos ID を使ってログインして ください。 」 の下でログ インアカウン ト情報を入力しますお客様が新規ユーザーの場合、 「 Sophos ID の作成」 の Register Device 下で詳細情報を入力して Sophos ID を作成して ください。 「続行」 をクリ ックして登録処理を完了します。 処理が完了するまで数秒間待ちます。 登録...
- Page 19 緑 点灯 電源アダプタ 1 が通常に作動中 赤 点灯 電源アダプタ 1 が失敗または切断 電源 2 緑 点灯 電源アダプタ 2 が通常に作動中 赤 点灯 電源アダプタ 2 が失敗または切断 6.サポートおよびドキュメン ト 詳細情報およびテクニカルサポートについては、 www.sophos.com/ja-jp/support また はソフ ォス営業部にお問い合わせください。 クイック スタート ガイド XG 115(w)/125(w)/135(w) Rev. 3, XG 106(w) Rev. 1...
- Page 20 1.部署前 恭喜您购买了Sophos XG设备。 本快速入门指南简要描述了设备的连接步骤, 并解释了如何从您的管理计算机打开基于Web的管理控 制台。 管理控制台让您可以配置设备的各个方面。 开始前, 请确认您有有效的Internet连接, 并确保您的ISP所提供的帐户信息可用。 包装清单 XG 106(w)/115(w)/125(w)/135(w) 快速入门指南和安全说明 Micro USB 电缆 RJ45网线 XG 106w/115w - 2 根天线; 电源适配器 (特定于区域) XG 125w/135w - 3 根天线 快速入门指南 XG 115(w)/125(w)/135(w) Rev. 3, XG 106(w) Rev. 1...
- Page 21 1 x GbE 8 x GbE 扩展机架 供给 HDMI USB 2.0 copper端口 (显示了包括 2 根天线的 可选模块) 可选的第 2 冗余电源连接器 * 显示的是 XG 115 和 XG 135 设备的前面图以及 XG 115w 和 XG 135w 的后面图。 快速入门指南 XG 115(w)/125(w)/135(w) Rev. 3, XG 106(w) Rev. 1...
- Page 22 DSL调制解调器 注意: 出于电磁兼容性原因, 请仅使用屏蔽RJ45乙太网络电缆 端口 1/LAN XG设备附带以下默认设置: 以太网端口 IP地址 区域 开关 172.16.16.16/255.255.255.0 内部网络 管理客 DHCP 户端PC 管理控制台的用户名 管理控制台的密码 CLI控制台密码 admin admin admin 默认网关 DNS代理 DHCP服务 DHCP 启用 启用 将设备安装在机架上 如果要将设备安装到机架内, 请使用为此设备提供的可选配机架安装工具。 快速入门指南 XG 115(w)/125(w)/135(w) Rev. 3, XG 106(w) Rev. 1...
- Page 23 Ì DNS 服务器: 启用此选项, 并输入内部网卡的 IP 地址 (端口 1/LAN) : 172.16.16.16 Ì 将您的 PC/笔记本连接到设备的端口 1/LAN 端口: 启动浏览器, 并输入您的计算机连接的设备 LAN 端口的管理 IP 地 址: https://172.16.16.16:4444 (端口 1) 使用以下默认的详细信息登录: 用户名: admin 密码: admin 快速入门指南 XG 115(w)/125(w)/135(w) Rev. 3, XG 106(w) Rev. 1...
- Page 24 To get started register your device below. Until you register you may only access 置, 使设备可以连接到Internet。 and edit settings in “Basic Setup” and your device will remain unactivated. 单击 “注册设备” 后, 将跳转到 Sophos.com。 如果您已经有 Sophos ID, 请在 “使用您的 Serial Number XXXXXXXXXXXXXXX Sophos ID 登录”...
- Page 25 无线网有效的 关 无线网无效的 电源 1 绿色 持续 电源适配器 1 正常运行 红色 持续 电源适配器 1 故障或未连接 电源 2 绿色 持续 电源适配器 2 正常运行 红色 持续 电源适配器 2 故障或未连接 6.支持和文档 有关详细信息和技术支持, 请访问www.sophos.com/zh-cn/support或联系您的本地 Sophos分销商。 快速入门指南 XG 115(w)/125(w)/135(w) Rev. 3, XG 106(w) Rev. 1...
- Page 26 如欲了解更多關於您的設備 , 請掃瞄二維碼或造訪 www.sophos.com/get-started-xg 1.在部署前 恭喜您購買 Sophos XG 裝置 。 本 《快速入門指南》 簡短描述了連接裝置的步驟 , 並說明如何從管理電腦開啟網頁式 Admin 主控 台 。 Admin 主控台可讓您設定裝置的各個層面 。 在開始之前 , 請確認您可以連線至網際網路 , 並確定您擁有 ISP 提供的帳戶資訊 。 這盒的內容 XG 106(w)/115(w)/125(w)/135(w) 本快速入門指南和安全注意事項 Micro USB 纜線 RJ45 乙太網路纜線 XG 106w/115w - 2 個天線 ;...
- Page 27 8 x GbE 銅 擴充槽 應器 HDMI USB 2.0 軸埠 (與選用模組一起顯示 , 包 含 2 個天線) 選用第 2 個備援電源供應器 的連接器 * 顯示的正面圖像屬於 SG 115 和 SG 135 裝置 , 而背面圖像是屬於 XG 115w和XG 135w 。 快速入門指南 XG 115(w)/125(w)/135(w) Rev. 3, XG 106(w) Rev. 1...
- Page 28 乙太網路連接埠 IP 位址 區域 內部網路 管理員用 172.16.16.16/255.255.255.0 戶端電腦 DHCP Admin 主控台使用者名稱 Admin 主控台密碼 CLI 主控台密碼 admin admin admin 預設閘道 DNS Proxy DHCP 服務 DHCP 啟用 啟用 將設備掛載到機架 如果您想要在機架內掛載裝置 , 請使用此裝置可選用的機架掛載套件 。 快速入門指南 XG 115(w)/125(w)/135(w) Rev. 3, XG 106(w) Rev. 1...
- Page 29 的 IP 位址 (連接埠 1/LAN) : 172.16.16.16 將您的電腦/筆記型電腦連接至裝置的連接埠 1/LAN 埠 : 啟動瀏覽器 , 然後輸入與您電腦連接之裝置 LAN 埠的管理 IP 位 址 : https://172.16.16.16:4444 (連接埠 1) 使用以下的預設詳細資料登入 : 使用者名稱 : admin 密碼 : admin 快速入門指南 XG 115(w)/125(w)/135(w) Rev. 3, XG 106(w) Rev. 1...
- Page 30 按一下 「註冊裝置」 之後 , 系統會將您重新導向至 Sophos.com 。 如果您已經有 Sophos Serial Number XXXXXXXXXXXXXXX ID , 請在 「使用您的 Sophos ID 登入」 底下 , 輸入您的登入認證 。 如果您是新使用者 , 請在 「 Basic Setup 建立 Sophos ID」 底下輸入詳細資料 , 藉此註冊一個 Sophos ID 。 Register Device 按一下...
- Page 31 恆亮 變壓器 1 正常運作 紅色 恆亮 變壓器 1 故障或中斷連線 電源 2 綠色 恆亮 變壓器 2 正常運作 紅色 恆亮 變壓器 2 故障或中斷連線 6.支援和文件 如需詳細資訊和技術支援 , 請造訪 www.sophos.com/zh-cn/support , 或與當地的 Sophos 經銷商連絡 。 快速入門指南 XG 115(w)/125(w)/135(w) Rev. 3, XG 106(w) Rev. 1...
- Page 32 1. Antes de implementar Parabéns pela aquisição do seu dispositivo Sophos XG. Este Guia de início rápido descreve, em passos sucintos, como conectar o seu dispositivo e explica como abrir o Painel de Controle do Administrador online a partir do seu PC de administração. O Painel de Controle do Administrador lhe permite configurar todos os aspectos do dispositivo.
- Page 33 * A imagem exibida na parte dianteira pertence ao dispositivo XG 115 e XG 135, a na parte traseira, ao XG 115w e XG 135w. Guia de início rápido XG 115(w)/125(w)/135(w) Rev. 3, XG 106(w) Rev. 1...
- Page 34 DHCP Habilitado Habilitado Montar o dispositivo no rack Caso deseje montar o dispositivo em um rack, use o kit de montagem em rack opcionalmente disponível para este dispositivo. Guia de início rápido XG 115(w)/125(w)/135(w) Rev. 3, XG 106(w) Rev. 1...
-
Page 35: Ligar O Dispositivo
Inicie o navegador e insira o endereço de IP de gerenciamento da porta LAN do dispositivo à qual o seu PC está conectado: https:/ /172.16.16.16:4444 (Porta 1) Faça login com os detalhes default abaixo: Nome de usuário: admin Senha: admin Guia de início rápido XG 115(w)/125(w)/135(w) Rev. 3, XG 106(w) Rev. 1... - Page 36 To get started register your device below. Until you register you may only access and edit settings in “Basic Setup” and your device will remain unactivated. ser registrado com a sua Sophos ID. É possível ajustar as configurações de rede das interfaces do dispositivo ao clicar em “Configuração Básica” para que, assim, o...
- Page 37 Vermelho Constantemente Falha ou desconexão do adaptador elétrico 1 Alimentação 2 Verde Constantemente O adaptador elétrico 2 está operando normalmente Vermelho Constantemente Falha ou desconexão do adaptador elétrico 2 Guia de início rápido XG 115(w)/125(w)/135(w) Rev. 3, XG 106(w) Rev. 1...
- Page 38 6. Suporte e Documentação Para obter mais informações e suporte técnico, visite www.sophos.com/pt-br/ support ou entre em contato com o revendedor local da Sophos. Guia de início rápido XG 115(w)/125(w)/135(w) Rev. 3, XG 106(w) Rev. 1...
- Page 39 Email: nasales@sophos.com Email: sales@sophos.com.au © Copyright 2019. Sophos Ltd. All rights reserved. Registered in England and Wales No. 2096520, The Pentagon, Abingdon Science Park, Abingdon, OX14 3YP, UK Sophos is the registered trademark of Sophos Ltd. All other product and company names mentioned are trademarks or registered trademarks of their respective owners.
Need help?
Do you have a question about the XG 115 and is the answer not in the manual?
Questions and answers