Download Print this page
DARCHE KOZI Series Instruction Manual

DARCHE KOZI Series Instruction Manual

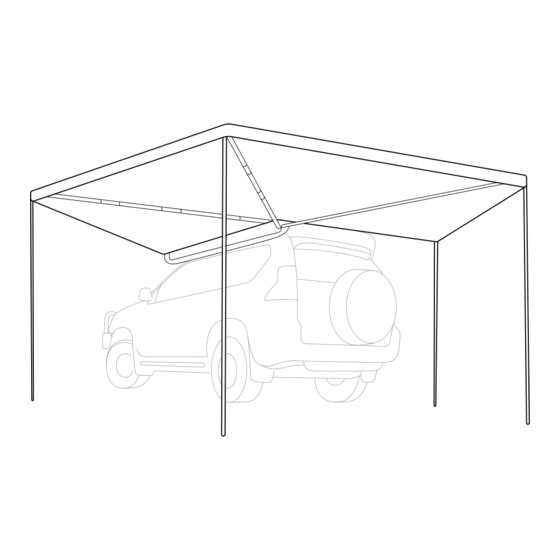
270 awning
Hide thumbs Also See for KOZI Series:

Advertisement

Quick Links

2 7 0 °
A W N I N G
I N S T R U C T I O N M A N U A L
K S A 2 0 0 0
D A R C H E . C O M . A U

Advertisement

loading
Need help?

Need help?

Do you have a question about the KOZI Series and is the answer not in the manual?

Questions and answers

Summary of Contents for DARCHE KOZI Series

  • Page 1 2 7 0 ° A W N I N G I N S T R U C T I O N M A N U A L K S A 2 0 0 0 D A R C H E . C O M . A U...
  • Page 2 1 x Tension strap Before installing and using your awning please read the instructions and warnings below. Should you have any questions or require assistance, please contact your Darche retailer or call our customer service line: 1300 367 695 Familiarise yourself with the awning; we recommend that you unpack and set up this awning at home before use.
  • Page 3 ATTACHING AWNING TO L-MOUNTING BRACKETS It is recommended that this awning is set up with 2 people. Darche recommends using an experienced after-market 4x4 Accessories fitter to mount the 270° Awning to your vehicle. Fasteners and fixing connections should be checked regularly on both the awning and roof rack to ensure the awning is always mounted securely to your vehicle roof rack.
  • Page 4 ATTACHING BRACKET TO ROOF RACK Your Darche Kozi Series 270 Awning has been designed for a universal fit on most common roof rack and roof bar systems. It is advisable that you contact the manufacturer of the roof rack or roof bar system on your vehicle for the recommended attachments required for fitting this 270 Awning.
  • Page 5: Awning Set Up

    AWNING SET UP Step 1 - Open/unzip the cover Unzip the transit cover and fold it back over the awning body. Step 2 - Release awning Release the three hook and loop fasteners and allow canvas to drape. Step 3 - Open and secure This awning will self-support during set up only.
  • Page 6 I N S T R U C T I O N M A N U A L Step 4 - Pole set up Undo the hook and loop fasteners that support each leg, taking care to support each leg as they pivot down to a vertical position.
  • Page 7 AWNING PACK DOWN Step 1 Undo all pegs and roll up each of the guy ropes. Step 2 Retract each of the legs, fold and stow away using the hook and loop fasteners. Step 3 Release the rear tension strap. Step 4 Retract the awning back, ensuring the top rafters are stacked on top of the bottom rafter poles.
  • Page 8: Care Instructions

    I N S T R U C T I O N M A N U A L USING OPTIONAL AWNING WALLS A 270 Awning Wall (sold separately) is available to use with this awning and can be installed by attaching the hook and loop fasteners on each of the wall sides plus and the top section of the wall to the awning.
  • Page 9: Weather Resistance

    This awning is designed as a temporary shelter, not a permanent structure. Do not leave up for extended periods and do not leave unattended. To avoid the chance of personal injury and or property damage, Darche recommends this awning should not be erected or used in extreme weather conditions.
  • Page 10 I N S T R U C T I O N M A N U A L NOTES...
  • Page 11 NOTES D A R C H E . C O M . A U...
  • Page 12 M A N U A L Designed and tested in Australia for Australian conditions. A brand by Charles Parsons. Telephone 1300 367 695 l Email: info@DARCHE.com.au 75 Heyington Avenue, Thomastown VIC 3074, Australia. DARCHE: LEADERS IN OUTDOOR DESIGN. PROUDLY AUSTRALIAN.

This manual is also suitable for:

Ksa2000