Table of Contents
Advertisement
Quick Links
Advertisement
Table of Contents

Related Manuals for Indesit IS67G1PMW/UK


Summary of Contents for Indesit IS67G1PMW/UK
- Page 1 IS67G1PMW/UK...
- Page 2 ENGLISH Health and Safety guide Quick guide Installation guide...
-
Page 3: Safety Instructions
hazards involved. Children must not play with the appliance. Cleaning and user maintenance must SAFETY INSTRUCTIONS not be carried out by children without supervision. CAUTION : In case of hotplate glass breakage:- IMPORTANT TO BE READ AND OBSERVED shut immediately off all burners and any electrical These instructions are valid if the country heating element and isolate the appliance from symbol appears on the appliance. -
Page 4: Gas Connection
Do not store explosive or flammable The air circulation system may take air directly substances (e.g. gasoline or aerosol cans) inside or from the outside by means of a pipe with an inner near the appliance - risk of fire. cross section of at least 100 cm²;... - Page 5 In order to adapt the appliance to a type of gas must be installed and connected in accordance with current installation regulations. Particular other than the type for which it was manufactured attention must be paid to the relevant (indicated on the rating label), follow the dedicated requirements regarding ventilation.
-
Page 6: Disposal Of Packaging Materials
DISPOSAL OF PACKAGING MATERIALS The packaging material is 100% recyclable and is marked with the recycle symbol . The various parts of the packaging must therefore be disposed of responsibly and in full compliance with local authority regulations governing waste disposal. DISPOSAL OF HOUSEHOLD APPLIANCES This appliance is manufactured with recyclable or reusable materials. -
Page 7: Product Description
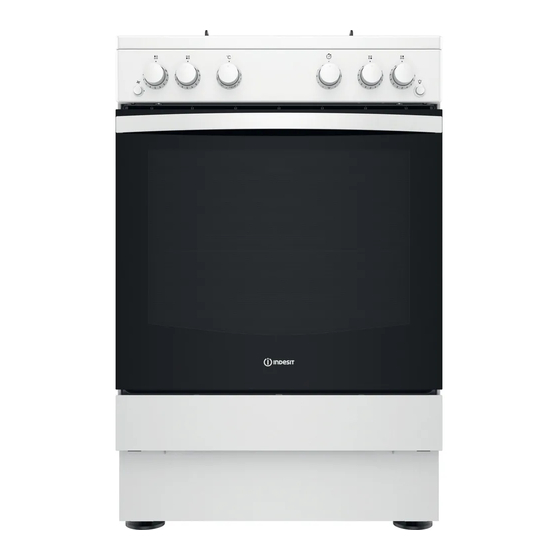
PRODUCT DESCRIPTION 1.Hob Grid 2.Control panel 3.Whireshelf 4.Baking tray 5.Door 6.GUIDE RAILS for the sliding racks 7.position 1 8.position 2 9.position 3 10.position 4 11.position 5 CONTROL PANEL Burner Ignition Oven lamp Left rear Left front Right front Right rear hob burner hob burner hob burner... -
Page 8: Installation
WARNING : This operation must be perfomed by a qualified technician INSTALLATION INSTALLATION INSTALLATION INSTALLATION INSTALLATION Before moving your cooker check that it is cool, and switched Before operating your new appliance please read this instruction booklet carefully. It contains off at the cooker control unit. - Page 9 Adjusting the hob burners’ minimum setting: Gas connection 1. Turn the tap to the minimum position. 2. Remove the knob and adjust the regulatory screw, which is The cooker should be connected to the gas-supply by a gas positioned inside or next to the tap pin, until the flame is small safe registered installer.
- Page 10 Adjusting the gas oven burner’s minimum setting: ! Should the gas pressure used be different (or vary slightly) from the recommended pressure, a suitable 1. Light the burner ( see Start-up and Use ). pressure regulator must be fitted to the inlet hose in 2.
-
Page 11: Using The Hob
FIRST TIME USE DAILY USE Using the hob Flame adjustment according to levels Lighting the burners the burner flame intensity can be adjusted with the For each BURNER knob there is a complete ring knob according to 10 power levels, from maximum showing the strength of the flame for the relevant to minimum with 5 intermediate positions: burner. - Page 12 USING THE OVEN FIRST TIME AND DAILY USE ! The first time you use your appliance, heat the empty Timer oven with its door closed at its maximum temperature To activate the Timer proceed as follows: for at least half an hour. Ensure that the room is well ventilated before switching the oven off and opening 1.
- Page 13 ACCESSORIES BAKING TRAY BAKING TRAY BAKING TRAY GRID DRIP TRAY KIT TURNSPIT KIT TURNSPIT KIT TURNSPIT The number and type of accessories may vary depending on which model The number and type of accessories may vary depending on which model is purchased.
- Page 14 The table lists the best function, accessories and level to use to cook various types of food. Cooking times start from the moment food is placed in the oven, excluding preheating (where required). Cooking temperatures and times are approximate and depend on the amount of food and type of accessory used. Use the lowest recommended settings to begin with and,if the food is not cooked enough, then switch to higher settings.
-
Page 15: Switching The Appliance Off
CLEANING AND MAINTENANCE TURN OFF THE MAIN SWITCH AND ENSURE THE COOKER IS COLD BEFORE CLEANING. BEFORE SWITCHING ON AGAIN, ENSURE THAT ALL CONTROLS ARE IN THE OFF POSITION. Do not use wire wool, abrasive Carry out the required Do not use steam cleaning scourers or abrasive/corrosive operations when the oven is cold. - Page 16 ~15° ~60° www.indesit.com...
- Page 17 Min. 750 mm Min. 420 mm max. 15 mm...
- Page 18 >50°C...
- Page 20 Whirlpool Management EMEA Srl W11639856 09/2022 - XEROX FABRIANO Via Pisacane 1, 20016 Pero (MI), Italy www.whirlpool.com...
Need help?
Do you have a question about the IS67G1PMW/UK and is the answer not in the manual?
Questions and answers