Sage the Nutri Juicer BJE410 / SJE410 - Juicer Manual
- Quick manual (28 pages)
Advertisement
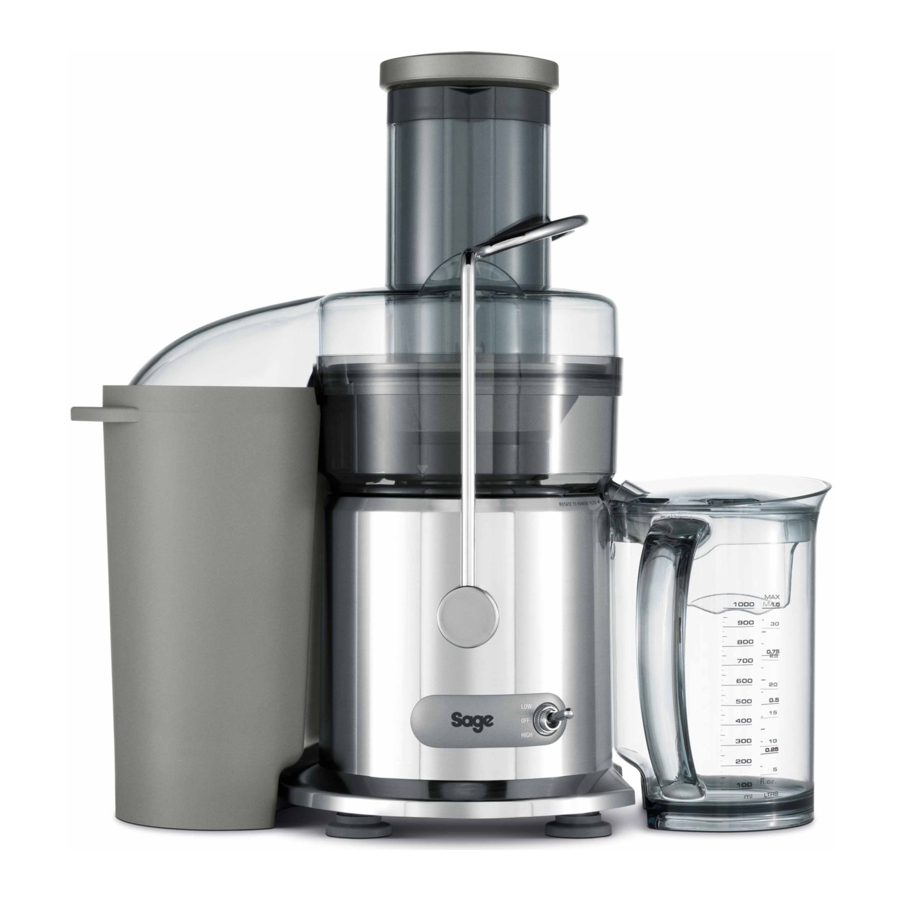
COMPONENTS

- Food pusher
- Unique Direct Central Feed System
- Extra wide 84mm feed chute
- Stainless steel titanium reinforced micro mesh filter basket
- Large capacity pulp container (dishwasher safe).
- Heavy duty 1200 watt motor
- Cord storage
- Interlocking safety arm
- Juicer cover (not dishwasher safe).
- Filter bowl surround (dishwasher safe).
- 1 litre juice jug and lid (dishwasher safe).
- 2 speed electronic control ON / OFF switch

Rating Information
220–240V~ 50/60Hz 1050–1250W
ASSEMBLY
BEFORE FIRST USE
Before using your juicer for the first time, remove and safely discard any packaging materials and promotional stickers and labels.
Ensure the appliance is switched off at the power outlet and the power cord is unplugged.
Wash the filter bowl surround, filter basket, juicer cover, food pusher, pulp container and juice jug and lid in warm, soapy water with a soft cloth. Rinse and dry thoroughly. The motor base can be wiped with a damp cloth. Dry thoroughly.
- Place motor base on a flat, dry surface such as a bench top. Ensure that the motor base is switched OFF at the control panel, then switch the appliance off at the power outlet and unplug the power cord.

- Place filter bowl surround on top of the motor base.

- Align the arrows at the base of the stainless steel filter basket with the arrows on the motor drive coupling and push down until it clicks into place. Ensure the stainless steel filter basket is fitted securely inside the filter bowl surround and onto the motor base.

- Place the juicer cover over the filter bowl surround, positioning the feed chute over the stainless steel filter basket and lower into position.

- Raise the safety locking arm up and locate into the two grooves on either side of the juice cover.

The safety locking arm should now be in a vertical position and locked into place on top of the juice cover.

- Slide the food pusher down the food chute by aligning the groove in the food pusher, with the small protrusion on the inside of the top of the feed tube.

Continue to slide the food pusher down on the feed chute.

- Place the pulp container into position by tilting the motor base slightly to the right. Insert the pulp container under the juicer cover on the left hand side ensuring it is supported by the juicer cover and motor base.

NOTE To minimise cleaning, line the pulp container with a plastic freezer bag to collect the pulp. Pulp can be used in other dishes, or as a compost for the garden or discarded. - Place the juicer jug under the juice spout on the right hand side of the juicer. The juice jug lid can be used to avoid any splatter.


OPERATION
- Wash your selection of fruit and vegetables to be juiced.
- Ensure the juicer is correctly assembled. Refer to Assembling your Sage® juicer. Ensure the juicer jug is placed under the juice spout and pulp container is in position before commencing juicing.
- Plug the power cord into a 220–240V power outlet. Turn the power ON at the power outlet. Adjust the speed to the desired setting. Push the two speed switch either up for low speed or down for high speed depending on the type of fruit or vegetable being juiced. Use the speed selector as a guide for juicing different fruits and vegetables.
SPEED SELECTOR TABLE Apples High Apricots (stone removed) Low Beetroot (trimmed) High Blueberries Low Broccoli Low Brussels sprouts (trimmed) High Cabbage Low Carrots High Cauliflower Low Celery High Cucumber (peeled) Low Cucumber, soft skinned High Fennel High Grapes (seedless) Low Kiwi Fruit (peeled) Low Mangoes (peeled, stone removed) Low Melons (peeled) Low Nectarines (stone removed) Low Oranges (peeled) High or Low Peaches (stone removed) Low Pears (stalks removed) High for hard or Low for soft Pineapple (peeled) High Plums (stone removed) Low Raspberries Low Tomatoes Low Watermelon (peeled) Low - With the motor running, place food into the feed chute and use the food pusher to gently guide food down. To extract the maximum amount of juice, always push the food pusher down slowly.
NOTE The motor must be running prior to loading the feed chute.

Never use fingers to push food down the feed chute or to clear the feed chute. Always use the food pusher provided.
The stainless steel filter basket contains small sharp blades to cut and process fruit and vegetables. Avoid touching the blades when handling the filter basket.

CARE & CLEANING
Ensure the juicer is turned off by switching the ON / OFF button on the control panel to OFF. Then switch the appliance off at the power outlet and unplug the power cord.
Ensure the juicer is correctly disassembled. Refer to Disassembling your new appliance.
FOR EASIER CLEANING
- Clean as you go and avoid dried on juice or pulp residue.
- Immediately after each use, rinse removable parts in hot water to remove wet pulp. Allow parts to air dry.
| NOTE |
| To minimise cleaning, line the pulp container with a plastic freezer bag to collect the pulp. Pulp can then be used for other dishes, or as compost for the garden or discarded. |

CLEANING THE MOTOR BASE
- Wipe the motor base with a soft, damp cloth then dry thoroughly.
- Wipe any excess food particles from the power cord.
| NOTE |
| Do not use abrasive scouring pads or cleaners when cleaning the parts or motor base as they may scratch the surface. |
CLEANING THE FILTER BOWL SURROUND, JUICER COVER, FOOD PUSHER, PULP CONTAINER
Wash all parts in warm soapy water with a soft cloth. Rinse and dry thoroughly.
| NOTE |
| The filter bowl surround, juicing jug and lid, food pusher and pulp container, are dishwasher safe (top shelf only). The juice cover is not dishwasher safe. |
CLEANING THE FILTER BASKET
- For consistent juicing results always ensure that the stainless steel filter basket is thoroughly cleaned using the supplied cleaning brush. It is important to do this immediately after use.
- Soak the stainless steel filter basket in hot soapy water for approximately 10 minutes immediately after juicing is completed. If pulp is left to dry on the filter it may clog the fine pores of the filter mesh thereby lessening the effectiveness of the juicer.
- Using the cleaning brush, hold the filter basket under running water and brush from the inside of the basket to the outer rim. Avoid touching the small sharp blades in the centre of the filter basket. Repeat this process on the outside of the basket. After cleaning the filter basket, hold it up towards a light to ensure the fine mesh holes are not blocked. If the holes are blocked, soak the filter basket in hot water with 10% lemon juice to loosen the blocked holes. Repeat the cleaning process using the cleaning brush. Alternatively, wash the filter basket in the dishwasher.

Do not soak the stainless steel filter basket in bleach or other abrasive cleansers.
Always treat the filter basket with care as it can be easily damaged.

| NOTE |
| The stainless steel filter basket is dishwasher safe (top shelf only). |
CLEANING THE JUICE JUG
- Rinse the juice jug and lid with froth attachment under running water.
- Wash both parts in warm soapy water with a soft cloth. Rinse and dry thoroughly.
| NOTE |
| The juice jug and lid are dishwasher safe (top shelf only). |
REMOVING STUBBORN OR STRONG FOOD STAINS AND ODOURS
Discolouration of the plastic may occur with strongly coloured fruit and vegetables. To help prevent this, wash parts immediately after use. If discolouration does occur, the plastic parts can be soaked in water with 10% lemon juice or they can be cleaned with a non abrasive cleaner.
The juicer is constructed with a heavy duty 1200 watt motor. So heavy duty, we have given the motor a 5–year guarantee against faulty materials or manufacture. This warranty is an extension of the 12–month replacement guarantee and covers the motor only. The warranty does not cover damage caused by accident, misuse, or being used in a manner not stated in the instruction book.
Do not immerse the motor base in water or any other liquid. The centre of the filter basket and feed chute contains small sharp blades to process fruit and vegetables during the juicing function. Do not touch blades when handling the filter basket or feed chute.
TROUBLESHOOTING
| POSSIBLE PROBLEM | EASY SOLUTION |
| Machine will not work when switched ON |
|
| Motor appears to stall when juicing |
|
| Excess pulp building up in the stainless steel filter basket |
|
| Pulp too wet and reduced extracted juice |
|
| Juice leaks between the rim of the Juicer and the juicer cover |
|
| Juice sprays out from spout |
|
| Overheating with excessive loads. |
|

Documents / ResourcesDownload manual
Here you can download full pdf version of manual, it may contain additional safety instructions, warranty information, FCC rules, etc.
Download Sage the Nutri Juicer BJE410 / SJE410 - Juicer Manual
Advertisement


Need help?
Do you have a question about the the Nutri Juicer BJE410 and is the answer not in the manual?
Questions and answers