Table of Contents
Advertisement
Quick Links
Advertisement
Table of Contents

Related Manuals for Akai A58065


Summary of Contents for Akai A58065
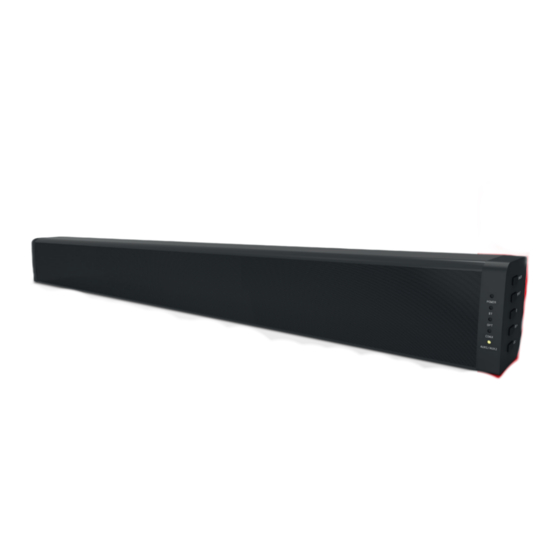
- Page 1 INSTRUCTION MANUAL 2.1 BLUETOOTH 100W SOUNDBAR MODEL: A58065...
-
Page 2: Technical Data
TECHNICAL DATA MODEL NO: A58065 POWER INPUT: 100-240V ~50/60HZ AUDIO OUTPUT: 20W X 2 + 60W, TOTAL 100W AT 10% THD SPEAKER UNITS: 3” (L/R CHANNEL) X 2+3” X 2 (WOOFER) DECLARATION OF CONFORMITY We declare that this product conforms to the following product legislation in accordance... -
Page 3: Safety Information
IMPORTANT INFORMATION - RETAIN FOR FUTURE USE SAFETY INFORMATION Important safety instructions – read carefully before use. It is important that this instruction manual should be retained with the appliance for future reference. These warnings have been provided in the interest of safety. You MUST read them carefully before installation or use. - Page 4 IMPORTANT INFORMATION - RETAIN FOR FUTURE USE • Use of an extension cord with this appliance is not recommended. However, if it is necessary to use an extension lead, ensure that the lead is suited to the power consumption of the appliance to avoid overheating of extension cord, appliance or plug point.
-
Page 5: Features And Controls
FEATURES AND CONTROLS IN THE BOX INSTRUCTION MANUAL 3.5MM TO 3.5MM AUDIO CABLE REMOTE CONTROL POWER ADAPTER RCA STEREO AUDIO CABLE WALL MOUNTING BRACKETS SIDE PANEL POWER BUTTON MODE BUTTON EQUALIZER BUTTON VOLUME INCREASE VOLUME DECREASE POWER LIGHT BLUTOOTH LIGHT OPTICAL LIGHT COAX LIGHT 10. -
Page 6: Using Your Appliance
USING YOUR APPLIANCE BEFORE YOUR FIRST USE: Remove the product from the box. Remove all packaging from the product. Please retain all packaging after you have checked and counted all the parts and the contents against the list. Dispose of the packaging in a responsible manner. CONNECTING TO THE MAINS SUPPLY: •... -
Page 7: Setting Up Your Appliance
CONNECTIONS: HDMI(ARC) AUX2 AUX1 OPTICAL DC 22V AUX2 analogue audio in (Stereo 3.5mm) (L/R) analogue audio in (Stereo RCA) HDMI(ARC) in Digital optical audio in Power port SETTING UP YOUR APPLIANCE: When placing the Sound Bar on an entertainment centre, bookshelf or any type of enclosed space, be sure to allow space around the unit for ventilation. -
Page 8: Indicator Light Status
USING YOUR APPLIANCE INDICATOR LIGHT STATUS: STATUS INDICATOR LIGHTS Power Off Optical Mode White HDMI (ARC) Bluish Green AUX 1 Mode Orange AUX2 mode Green Bluetooth Ready Flashing Blue Bluetooth Connected Blue USING THE AUX CONNECTION: Use the RCA Stereo Audio Cable to connect the Soundbar to the TV’s stereo RCA [L/R] socket. -
Page 9: Using The Optical Input
USING THE OPTICAL INPUT: You will need: An audio source with an Optical Audio Output and a Digital Optical Audio cable (not included). Connect the Digital Optical Audio cable to the optical output on the audio source and to the Optical Input on the speaker bar. Press the POWER button on side panel or POWER button directly on the remote control to switch on the unit. -
Page 10: Using The Mp3 Link Connection (Line In)
USING YOUR APPLIANCE USING THE MP3 LINK CONNECTION (LINE IN): Plug one end of a 3.5mm audio input cable (included) into the Line In Port. Before use, disconnect cables connected to the Stereo RCA Inputs. Plug the other end of the cable into the audio output/headphone output on an MP3 player or other audio source. - Page 11 Select and press the BT button directly on the remote control or press the SOURCE button repeatedly to enter Bluetooth mode, indicated by a flashing blue light. Using the native controls on your Bluetooth device, select ‘A58065’ in your Bluetooth settings to pair.
-
Page 12: Wall Mounting Your Soundbar
USING YOUR APPLIANCE WALL MOUNTING YOUR SOUNDBAR: REMOTE CONTROL BATTERY INSTALLATION AND REPLACEMENT: Remove the battery compartment located on the back of the remote control The unit comes as standard with a battery installed. To avoid discharging it, it is locked with a plastic. -
Page 13: Troubleshooting
TROUBLESHOOTING PROBLEM POSSIBLE CAUSE/SOLUTIONS No power function. Check whether the power is switched on or off at the wall. Check whether the power adaptor is properly connected to the power outlet. No sound. Checks whether unit is set to MUTE. Check whether MODE is correctly selected. -
Page 14: Electrical Safety
ELECTRICAL SAFETY IMPORTANT As the colours in the Non-Rewireable Mains Plug mains lead of this If your appliance is supplied with a appliance may not non-rewireable plug fitted to the mains correspond with the lead and should the fuse need replacing, coloured markings you must use an ASTA approved one identifying the terminals... -
Page 15: Disposal Of The Unit
RECYCLING DISPOSAL OF THE UNIT Appliances bearing the symbol shown here may not be disposed of in domestic rubbish. You are required to dispose of old electrical and electronic appliances like this separately. Please visit www.recycle-more.co.uk or www.recyclenow.co.uk for access to information about the recycling of electrical items. - Page 16 Call:+44 (0)333 220 6042 8.30am to 6.00pm Monday-Friday Visit: www.akaionline.co Distributed throughout the UK by RK Wholesale LTD *REGISTER YOUR PRODUCT ONLINE AT WWW.AKAIONLINE.CO AND ENJOY 3 YEARS PEACE OF MIND AKAI CUSTOMER SUPPORT TEAM +44 (0) 333 220 6042 0218.V1...
Need help?
Do you have a question about the A58065 and is the answer not in the manual?
Questions and answers