Table of Contents
Advertisement
Advertisement
Table of Contents

Subscribe to Our Youtube Channel
Related Manuals for High tech health Transcend TR-2

Summary of Contents for High tech health Transcend TR-2
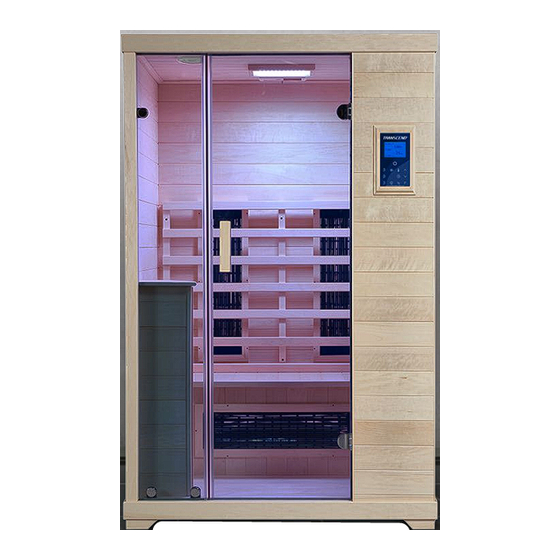
- Page 1 ® Model TR-2 Two Person Sauna OWNER’S MANUAL & Model TR-3 Three Person Sauna...
-
Page 2: Table Of Contents
WARRANTY ........................... 39 CLEANING & MAINTENANCE ....................40 STORAGE ..........................40 SPECIFICATIONS ........................40 CERTIFICATIONS ........................41 CORRECT DISPOSAL OF THIS PRODUCT ................. 42 HIGH TECH HEALTH CUSTOMER SERVICE ............... 42 © 2022, 2023 High Tech Health International, Inc. MTR23-20230209A... -
Page 3: Safety Instructions / Warnings
15. Do not use the unit during an electrical storm, as there is a remote risk of shock. 16. Altering or tampering with any electrical connections on the power supply will void the manufacturer’s warranty. © 2022, 2023 High Tech Health International, Inc. MTR23-20230209A... - Page 4 30. Do not directly touch the heater with hands or body. 31. No sauna session should exceed one hour. 32. It is not recommended that sauna temperature exceed 150°F (65 °C) unless approved by your doctor. © 2022, 2023 High Tech Health International, Inc. MTR23-20230209A...
-
Page 5: Important Safeguards
16. Safety Check – Upon completion of any service or repairs to this product by a service technician, ask the service technician to perform safety checks to determine that the product is in proper operating condition. © 2022, 2023 High Tech Health International, Inc. MTR23-20230209A... -
Page 6: Contents Of Shipping Boxes
Box 3 of 4: • Backrest • Bench Top • Bench Heater • Small Parts Box • Roof Panel • Floor Panel Box 4 of 4: • Right Front Heater • Left Front Heater © 2022, 2023 High Tech Health International, Inc. MTR23-20230209A... -
Page 7: Small Parts List
• Bag with Wood Covers for Screw Holes (optional) • Bag with Allen Key and Screws (for the Brackets for the Glass) • Bag with Square Wood Cover (optional) • Door Handles © 2022, 2023 High Tech Health International, Inc. MTR23-20230209A... -
Page 8: Read Before Installation
If the surface is not level you may need to shim the bottom panel to make it level.) The side with the metal box goes in back. © 2022, 2023 High Tech Health International, Inc. MTR23-20230209A... - Page 9 Feed the power cord coming from the metal control box at the floor panel through the hole in the floor panel. Now is a great time to confirm that the power cord will reach your intended power outlet (do not plug in the sauna yet): © 2022, 2023 High Tech Health International, Inc. MTR23-20230209A...
- Page 10 Place the back panel onto the floor panel. The end with the cables is at the bottom. Make sure that there is equal space on the left and right side of the back panel for later when you add the side panels. © 2022, 2023 High Tech Health International, Inc. MTR23-20230209A...
- Page 11 Place the left side panel onto the floor panel. A tongue runs down the edge of the side panel and it will need to be inserted into the groove in the back panel. Close the 3 latches on the back panel that lock the side panel in place. © 2022, 2023 High Tech Health International, Inc. MTR23-20230209A...
- Page 12 Connect the two cables coming out of the floor panel in front of the control box to the control box (match ‘A’ on the cable to ‘A’ as marked on the back of the control box): © 2022, 2023 High Tech Health International, Inc. MTR23-20230209A...
- Page 13 Note that 2 of the cables are similar, but one is black and the other is white. The black one connects to the receptacle labeled “RT”. The white one connects to the receptacle labeled “LIGHT”. © 2022, 2023 High Tech Health International, Inc. MTR23-20230209A...
- Page 14 Place it on the left side of the left front window (the side that has the bracket). Start at the top, leaving a space of about ¼ inch (about half a centimeter) and work your way down: © 2022, 2023 High Tech Health International, Inc. MTR23-20230209A...
- Page 15 There are 2 “L” brackets that secure the glass to the floor panel, and 1 “L” bracket that secures the glass to the left side panel. Use the 3 screws that are in the bag with the Allen key – be careful not to over tighten the screws: © 2022, 2023 High Tech Health International, Inc. MTR23-20230209A...
- Page 16 Attach the cable from the heater to the cable from the floor panel: Push the excess cable into the floor so that it will not get in the way when the heater is installed. © 2022, 2023 High Tech Health International, Inc. MTR23-20230209A...
- Page 17 Use these two hooks to secure the heater to the left side panel. The easiest way to accomplish this is to align the heater against the left side panel about an inch or two above its final position and then lower it into place: © 2022, 2023 High Tech Health International, Inc. MTR23-20230209A...
- Page 18 Attach the right side panel just like you attached the left side panel. Close the 3 latches on the back panel to secure the right side panel in place. 9. BENCH HEATER a) Slide the bench heater down into place. © 2022, 2023 High Tech Health International, Inc. MTR23-20230209A...
- Page 19 Attach the cable from the back of the bench heater, labled “B” to the top of the control box at a receptacle labeled “B”. © 2022, 2023 High Tech Health International, Inc. MTR23-20230209A...
- Page 20 Then add 6 screws from the screws bag to the holes in the backrest to secure it to the back panel. Be careful not to over-tighten the screws. © 2022, 2023 High Tech Health International, Inc. MTR23-20230209A...
- Page 21 Move cables on the floor out of the way. TIP: It is easier to move the front panel to the sauna by opening the door all the way and carrying it this way: © 2022, 2023 High Tech Health International, Inc. MTR23-20230209A...
- Page 22 With the glass door still folded over the wood side of the front panel, place the bottom of the wood side of the front panel into the floor panel: © 2022, 2023 High Tech Health International, Inc. MTR23-20230209A...
- Page 23 You can then complete the connection by tapping down the connection mechanism with a hammer -- have a second person hold the front wall panel while you do this to prevent the front panel from falling. © 2022, 2023 High Tech Health International, Inc. MTR23-20230209A...
- Page 24 On the inside of the sauna, connect the cable with the white connector from the floor panel at the front of the sauna to the white connector at the bottom of the front right heater. © 2022, 2023 High Tech Health International, Inc. MTR23-20230209A...
- Page 25 Pass the gray cable from the front panel through the side of the heater and out the bottom of the heater. Connect that cable to the gray cable from the floor panel. Tuck as much of the extra cable length with the connectors into the floor panel. © 2022, 2023 High Tech Health International, Inc. MTR23-20230209A...
- Page 26 Before adding the roof panel, notice the labels on the connections at the top of the back panel. The bottom right one in the picture below says “FAN DC 12V”. We will be connecting the wires labeled “12V” to that connection. © 2022, 2023 High Tech Health International, Inc. MTR23-20230209A...
- Page 27 15. CONNECT THE CABLES FROM THE ROOF TO THE BACK PANEL Located at the back right corner on top of the roof are 4 connections to be made: © 2022, 2023 High Tech Health International, Inc. MTR23-20230209A...
- Page 28 Two of the cables are the same size with 2 possible locations to connect them. The cable labeled “12V” will connect to the receptacle that is closest to the outside corner of the sauna. © 2022, 2023 High Tech Health International, Inc. MTR23-20230209A...
- Page 29 The handle with holes that do not go all the way through is for the outside. Insert 2 bolts from the bag with bolts – be careful not to over-tighten. 17. DOOR MAGNETS Retrieve the 2 door magnets from the long thin box: © 2022, 2023 High Tech Health International, Inc. MTR23-20230209A...
- Page 30 Push the magnet onto the door starting at the top and making your way down. © 2022, 2023 High Tech Health International, Inc. MTR23-20230209A...
- Page 31 Before using your sauna for the first time, wipe down the inside of the sauna with a damp cloth to remove sawdust. You will have leftover screws – those are extras. Congratulations on completing the installation! © 2022, 2023 High Tech Health International, Inc. MTR23-20230209A...
-
Page 32: Using Your Sauna
4. Drink mineral-rich water to help maintain electrolytes in the body that are lost with the sweat, as well as promote increased toxin excretion via the urine and stool. © 2022, 2023 High Tech Health International, Inc. MTR23-20230209A... - Page 33 Still others find sauna sessions energizing and find using them first thing in the morning to be most beneficial. Experiment to find out what is best for you. © 2022, 2023 High Tech Health International, Inc. MTR23-20230209A...
-
Page 34: Operating Instructions - Control Panel
1. If it is currently heating, press the power button once to stop the sauna session. 2. Press and hold down the power button for several seconds to turn off the heating and © 2022, 2023 High Tech Health International, Inc. MTR23-20230209A... - Page 35 This will set the sauna to a 30-minute session at your already-set maximum temperature. If you press the “P” button a fourth time, it will take your sauna out of the programmed modes and back to regular function. © 2022, 2023 High Tech Health International, Inc. MTR23-20230209A...
- Page 36 100% à 75% à 50% à 25% à 0% à and back to 100%. Pressing the middle heater button changes the heater power to the bench heater. Pressing the lower heater button changes the heater power to the front heaters. © 2022, 2023 High Tech Health International, Inc. MTR23-20230209A...
-
Page 37: Operating Instructions - Lights
There is an accessory shelf separately available for purchase that can hang from the front right corner of the top of your sauna to hold your phone or tablet device while it is connected to your sauna. © 2022, 2023 High Tech Health International, Inc. MTR23-20230209A... -
Page 38: Troubleshooting Guide
“BT” (Bluetooth) connection. For the fan, confirm that the “12V” cable is fully connected to the “FAN” connector. Please note that the “FAN” and temperature sensor connectors are the exact same size and could be accidentally swapped, causing the malfunction. © 2022, 2023 High Tech Health International, Inc. MTR23-20230209A... - Page 39 Please note that the “FAN” and temperature sensor connectors are the exact same size and could be swapped, causing the malfunction. © 2022, 2023 High Tech Health International, Inc. MTR23-20230209A...
-
Page 40: Warranty
WARRANTY Your High Tech Health Transcend® Sauna is warranted to be free from manufacturing defects in material and workmanship: 1) Heaters: 5 years from date of purchase 2) Electronics (not related to the stereo): 5 years from date of purchase... -
Page 41: Cleaning & Maintenance
67 ¾ in. (W) * 46 ¼ in. (D) * 77 in. (H) Weight 515 lbs (234 kg) Power Supply AC 120V Power 1920W Consumption Triple Antifield Patent US 9,770,386 & Patent US 10,765,597 Heaters © 2022, 2023 High Tech Health International, Inc. MTR23-20230209A... - Page 42 Date of Purchase: ____________________________ Supplier’s Declaration of Conformity 47 CFR § 2.1077 Compliance Information Unique Identifiers: High Tech Health® Transcend® TR-2,High Tech Health Transcend TR-3 Responsible Party – U.S. Contact Information: High Tech Health International, Inc. 2770 Arapahoe Rd. Ste. 132-639...
-
Page 43: Certifications
HIGH TECH HEALTH CUSTOMER SERVICE In the United States: 1-888-878-8300 Outside of the United States: +1 303-413-8500 Email: cs@hightechhealth.com www.hightechhealth.com © 2022, 2023 High Tech Health International, Inc. MTR23-20230209A... - Page 44 Hi g h T e c h He a l t h I n t e r n a t i o n a l , I n c . + 1 . 3 0 3 . 4 1 3 . 8 5 0 0 T o l l F r e e i n t h e Un i t e d S t a t e s : 8 0 0 .
Need help?
Do you have a question about the Transcend TR-2 and is the answer not in the manual?
Questions and answers