Table of Contents
Advertisement
Advertisement
Table of Contents

Subscribe to Our Youtube Channel
Related Manuals for Vivitek DW2650Z


Summary of Contents for Vivitek DW2650Z
- Page 1 DW2650Z DH2660Z DH2661Z User Manual www.vivitekcorp.com...
- Page 2 Notice To ensure safe use of this product, please read the user manual for details before you operate your projector. Risk Group 2 Laser Caution 1. According to the classification of This product belongs to CLASS 1 consumer laser product and complies with IEC 60825- photobiological safety of light 1:2014, EN 60825-1:2014/A11:2021 and EN sources and light source...
- Page 3 Warning Labels Safety Hazard and Warning information Labels are placed at the following locations: 1. Laser Warning Label 2. RG2 Logo 3. APERTURE Label...
- Page 4 FCC notice This equipment has been tested and found to comply with the limits for a Class B digital device, pursuant to part 15 of the FCC Rules. These limits are designed to provide reasonable protection against harmful interference in residential installation. This equipment generates, uses and can radiate radio frequency energy and if not installed and used in accordance with the instructions, may cause harmful interference to radio communications.
- Page 5 Safety instructions Read all of these instructions before you operate your projector and save for future reference. 1. Read instructions All the safety and operating instructions should be read before the appliance is operated. 2. Notes and warnings All notes and warnings in the operating instructions should be adhered to. 3.
- Page 6 Notes on the AC power cord AC Power Cord must meet the requirement of countries where you use this projector. Please confirm your AC plug type with the graphics below and ensure that the proper AC Power Cord is used. If the supplied AC Power Cord does not match your AC outlet, please contact your sales dealer.
-
Page 7: Table Of Contents
Table of contents Introduction ................7 Projector features ......................7 Package contents ......................8 Product overview ......................9 Installation ................12 Connecting to the projector ..................12 Powering on/off the projector ..................14 Adjusting the projector height ..................15 Adjusting the projector focus ..................16 Adjusting projection image size .................17 User Controls ................ -
Page 8: Introduction
Introduction Projector features The projector integrates high-performance optical engine projection and a user - friendly design to deliver high reliability and ease of use. The projector offers the following features: • Laser-phosphor light source free from replacement • Short throw (ST) projection lens delivers large images from a short projection distance •... -
Page 9: Package Contents
Package contents When you unpack the projector, make sure you have all these components: Auto Sync HDMI Video Color Source Mode Enter Menu Exit Button Magnify Lock Volume Freeze Pattern Blank Timer Aspect Remote control (IR) & Projector AC power cord batteries (AAA *2 PCS) VGA cable (D-SUB to D-SUB) Quick start guide... -
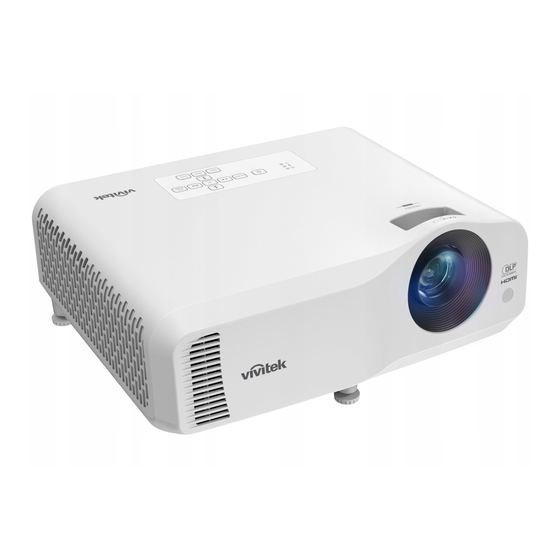
Page 10: Product Overview
Product overview Projector outlook Front and top Standard projector Short-Throw projector 1. Lens 2. IR remote control sensor 3. Focus switch 4. Zoom ring 5. Control panel... - Page 11 Bottom and side 1. Adjustment feet 2. Ceiling mount holes 3. Ventilation holes (airflow out) 4. Speaker 5. Ventilation holes (airflow in)
- Page 12 Rear DW2660Z/DW2350Z-ST/DH2660Z/DH2360Z-ST (w/o RJ45) DH2661Z/DH2361Z-ST (with RJ45) 7 10 RJ45 1. Audio input jack 2. Audio output jack 3. RS232 control port 4. RGB (PC)/Component video (YPbPr) signal input jack 5. Mini-USB jack for service 6. HDMI 1/HDMI 2 input jack 7.
-
Page 13: Installation
Installation Connecting to the projector Connecting a Computer/Notebook 1. Power cord 2. Audio Out cable 3. Audio In cable 4. VGA cable (D-Sub to D-Sub) 5. HDMI cable 6. Mini-USB cable... - Page 14 Connecting a Video source DVD player, Blu-ray player, Set-top box, HDTV receiver 1. Power cord 2. 3 RCA to mini D-sub 15 pin cable 3. HDMI cable 4. USB cable for charging device...
-
Page 15: Powering On/Off The Projector
Powering on/off the projector Powering on the projector: 1. Complete the AC power cord and peripheral signal cable(s) connections. 2. Press to turn on the projector. The projector takes a minute or so to warm up. • If the projector is still hot from previous activity, it will run the cooling fan for approximately 60 seconds before energizing the light. -
Page 16: Adjusting The Projector Height
Adjusting the projector height Adjustment feet The projector is equipped with 3 adjustment feet to adjust the image height. To raise or lower the image, turn the adjustment feet to fine-tune the height. Note • To avoid damaging the projector, make sure that the adjustment feet are fully retracted before placing the projector in its carrying case. -
Page 17: Adjusting The Projector Focus
Adjusting the projector focus Focus switch Short-Throw projector Zoom Focus switch switch Standard projector To focus the image, slide the focus switch until the image is clear. • Standard throw series (WXGA): The projector will focus at distance from 1.31 to 10.21m (From a projecting surface to the rear of the unit). -
Page 18: Adjusting Projection Image Size
Adjusting projection image size Diagonal Diagonal Screen Center of lens Vertical offset Projection distance D: Projection image size H: Distance from a floor to the bottom of a projection image WXGA (Standard Throw) Distance from the lens Height Screen Throw Ratio front to screen Projected In case the... - Page 19 WXGA (Short Throw) Distance from Wide Screen screen Throw Ratio Diagonal Size Width Height Wide inch inch inch inch 42.4 26.5 0.53 0.491 46.6 29.1 0.58 0.491 47.5 29.7 0.59 0.491 50.9 31.8 0.63 0.491 55.1 34.4 0.69 0.491 59.4 37.1 0.74 0.491...
- Page 20 1080p (Standard Throw) Height Screen Distance from screen Projected Throw Ratio Diagonal Width Height Wide Tele Image (Hd) Size inch inch inch inch inch inch Wide Tele 34.9 19.6 1.28 1.53 1.447 1.731 52.3 29.4 1.96 2.33 1.475 1.753 69.7 39.2 2.64 3.12...
-
Page 21: User Controls
User Controls Control panel & remote control Control panel 7 8 6 10 7 Power LED indicator Refer to “LED Indicator Messages”. Temperature LED indicator Refer to “LED Indicator Messages”. Light LED indicator Refer to “LED Indicator Messages”. 4. Power Turn the projector on or off. - Page 22 11. Menu Display or exit the on-screen display menus. 12. Back Goes back to previous OSD menu, exits and saves menu settings.
- Page 23 Remote control Auto Sync HDMI Video Color Source Mode Enter Menu Exit Button Magnify Lock Volume Freeze Pattern Blank Timer Aspect Power Turn the projector on or off. 2. VGA Display Computer signal. 3. Source Display the source selection bar. Keystone buttons Manually corrects distorted images resulting from an angled projection.
- Page 24 (Timer) No function. 15. Auto Sync Automatically determines the best picture timings for the displayed image. 16. Video No function. 17. HDMI Switch HDMI signal between HDMI1 and HDMI2. 18. Color Mode Select the picture setup mode. 19. Enter Enacts the selected On-Screen Display (OSD) menu item. 20.
- Page 25 Installing the batteries 1. Open the battery cover in the direction shown. 2. Install batteries as indicated by the diagram inside the compartment. 3. Close the battery cover into position. Caution • Risk of explosion if battery is replaced by an incorrect type. •...
- Page 26 Remote control operation Point the remote control at the infrared remote sensor and press a button. • Operating the projector from the front. Note • The remote control may not operate when there is sunlight or other strong light such as a fluorescent light shining on the remote sensor.
-
Page 27: Securing The Projector
Securing the projector Setting a password 1. Open the OSD menu and go to the Settings 2 > Advanced > Security Settings menu. Press Enter. The Security Settings page displays. 2. Highlight Change Password and press Enter. 3. According to the password you desire to set, press the arrow keys to enter six digits for the password. -
Page 28: Locking Control Keys
Disabling the password function To disable password protection, go back to Settings 2 > Advanced > Security Settings > Power Lock menu, and press Enter. You will be asked to input password. Once the password is set, the OSD menu returns to the Power Lock. Select Off by pressing / . -
Page 29: Using The Projector In Standby Mode
Using the projector in standby mode Some of the projector functions are available in standby mode (plugged in but not turned on). To use these functions, be sure you have turned on the corresponding menus under Source > Standby Setting, and the cable connections are correctly made. -
Page 30: On-Screen Display Menus
On-screen display menus The projector has multilingual on-screen display menus that allow you to make image adjustments and change a variety of settings. How to operate 1. Press Menu to open the OSD menu. 2. When OSD is displayed, use to select any feature in the main menu. -
Page 31: Menu Tree
Menu tree Main Menu Sub Menu Settings Screen Color Off / Blackboard / Greenboard / Whiteboard Auto / 4:3 / 16:9 / Panorama / Anamorphic / 2.35:1 Aspect Ratio / 16:10 / 16:6 H: -30 - 30 Keystone V: -30 - 30 Corner Adj. - Page 32 Auto Source Off / On Auto Top-Bottom 3D Format 3D Settings Frame Sequential Frame Packing Side By Side 3D Sync Invert Off / On Active Audio out Off / On Standby Setting LAN Control Off / On Computer Off / On Source Auto Power On Direct Power On Off / On...
- Page 33 High Altitude Off / On Mode Mute Off / On Audio Volume 0 - 20 Audio Setting Power On/Off On / Off Ring Tone Light Mode Normal / ECO Settings 2 Light Setting Reset Light Reset / Cancel Hours Change Password Security Settings Advanced Power Lock...
- Page 34 Display Screen Color The Screen Color feature can help correct the projected picture’s colors to prevent possible color difference between the source and projected pictures. There are several precalibrated colors to choose from: Whiteboard, Greenboard, and Blackboard. Aspect Ratio Select how the picture fits on the screen: •...
- Page 35 Corner Adj. Manually adjust four corners of the image by setting the horizontal and vertical values. 1. Press / / / to select one of the four corners and press Enter. 2. Press to adjust vertical values. 3. Press to adjust horizontal values. Auto Keystone Automatically corrects distorted images resulting from an angled projection.
- Page 36 Image Color Mode There are many factory presets optimized for various types of images. • Bright: Maximizes the brightness of the projected image. This mode is suitable for environments where extra-high brightness is required. • Presentation: Is designed for presentations under daylight environment to match PC and notebook coloring.
- Page 37 HDMI Range • Auto: Automatically selects the range for HDMI output signal. • Enhanced : The range for HDMI output signal is from 0 - 255. • Normal: The range for HDMI output signal is from 16 - 235. Advanced Sharpness Adjusts the image to make it look sharper or softer.
- Page 38 Source Auto Source Automatically scan through all the input source if the function in the OSD menu is On. The function will stop the signal auto scan process and fix the signal source you preferred if you turn Off the Auto Source. 3D Settings This projector features a 3D function which enables you to enjoy the 3D movies, videos, and sporting events in a more realistic way by presenting the depth of the...
- Page 39 Power Saving Auto Power Off The projector lowers the projector power if no input source is detected after 5 minutes to prevent unnecessary waste of light life. You can further decide if you would like the projector to turn off automatically after a set period of time. When Disable is selected, the projector power will be reduced to 30% after no signal is detected for 5 minutes.
- Page 40 Settings 1 Language Select the language used by the on-screen menu. Projection Adjust the picture to match the orientation of the projector: upright or upside-down, in front of or behind the screen. Invert or reverse the image accordingly. Menu Settings Menu Display Time Duration of OSD menu display countly starts (at idle state by second).
- Page 41 Settings 2 High Altitude Mode Use this function to allow the fans operates at full speed continuously to achieve proper high altitude cooling of the projector. If the projector is installed a filter cover, make sure that High Altitude Mode is set to On. Audio Setting "Adjusting the sound"...
- Page 42 Information Source Shows the current signal source. Color Mode Shows the selected mode in the Color Mode menu. Resolution Shows the native resolution of the input signal. Color System Shows input system format: RGB or YUV. Light Hours Displays the number of hours the light has been used. IP Address Display the IP address.
-
Page 43: Using Network Features (Only For Dh2661Z And Dh2361Z-St)
Using network features (Only for DH2661Z and DH2361Z-ST) You can manage and control the projector from one or more remote computers when they are properly connected to the same local area network. Internet IP Router If you are in a DHCP on environment: 1. - Page 44 Important • If the RJ45 cables are not properly connected, the IP Address, Subnet Mask, Default Gateway and DNS Server settings will display 0.0.0.0. Make sure the cables are properly connected and perform the procedures above again. • If you wish to connect to the projector in its standby mode, be sure you have selected RJ45 and obtained the IP Address, Subnet Mask, Default Gateway and DNS Server information when the projector is on.
- Page 45 Crestron RoomView On the “Edit Room” page, enter the IP Address (or hostname) as shown on the projector’s on-screen display (OSD) menu, and “02” for IPID, “41794” for the reserved Crestron control port.
-
Page 46: Maintenance
Maintenance The projector needs proper maintenance. You should keep the lens clean as dust, dirt or spots will project on the screen and diminish image quality. If any other parts need replacing, contact your dealer or qualified service personnel. When cleaning any part of the projector, always switch off and unplug the projector first. -
Page 47: Specifications
Specifications Model name DW2650Z DW2650Z-ST DH2660Z DH2660Z-ST DH2661Z DH2361Z-ST 0.65" WXGA, 0.65" 1080p, Native resolution 1280x800(S450) 1920x1080(S600) Aspect ratio Native 16:10 Native 16:9 1.544 - 1.475 - 1.475 - Throw ratio 0.492 0.48 0.48 1.860 1.753 1.753 Zoom ratio 1.2X 1.2X... - Page 48 Standby power < 0.5W consumption Operating 0 - 40°C temperature Note: Design and Specifications are subject to change without prior notice.
-
Page 49: Dimensions
Dimensions Standard projector: 354.3 mm (W) x 294.49 mm (D) x 142.99 mm (H) Short-Throw projector: 354.3 mm (W) x 294.49 mm (D) x 142.99 mm (H) -
Page 50: Ceiling Mount Installation
Ceiling mount installation Standard projector Ceiling mount screws: 3 PCS Screws specs: Φ=4mm L=10mm Short-Throw projector Ceiling mount screws: 3 PCS Screws specs: Φ=4mm L=10mm... -
Page 51: Appendices
Appendices LED indicator messages LED Type Color Status Meaning Power LED Amber Flash Temp LED Normal power of standby mode. Light LED Power LED Amber Flash Temp LED Low power of standby mode. Light LED Power LED Amber Flash Temp LED Powering up Light LED Power LED... -
Page 52: Compatibility Modes
Compatibility modes 1. VGA Analog Supported timing for PC input Horizontal Vertical Pixel Resolution Timing Frequency Frequency Frequency (KHz) (Hz) (MHz) VGA_60 59.94 31.469 25.175 ◎ ◎ ◎ VGA_72 72.809 37.861 31.500 640 x 480 VGA_75 37.5 31.500 VGA_85 85.008 43.269 36.000 720 x... - Page 53 1360 x 1360 x 768 60.015 47.712 85.5 ◎ ◎ 768_60 1440 x 900 WXGA+_60 59.887 55.935 106.500 ◎ ◎ 1400 x SXGA+_60 59.978 65.317 121.750 ◎ ◎ 1050 1600 x UXGA 162.000 ◎ ◎ 1200 1680 x 1680 x 59.954 65.29 146.25...
- Page 54 2. HDMI Digital Supported timing for PC input Horizontal Vertical Pixel Resolution Timing Frequency Frequency Frequency (KHz) (Hz) (MHz) VGA_60 59.94 31.469 25.175 ◎ ◎ ◎ VGA_72 72.809 37.861 31.500 640 x 480 VGA_75 37.5 31.500 VGA_85 85.008 43.269 36.000 720 x 720 x 400 70.087...
- Page 55 67.5 2160_30 3840 x 3840 x 2160* 2160_60 • The timings showing above may not be supported due to EDID file and VGA graphic card limitations. It is possible that some timings cannot be chosen. • *DW2650Z is not supported.
- Page 56 56.25 148.5 ◎ ◎ 1080/60P 1920 x 1080 67.5 148.5 ◎ ◎ 2160/24P* 3840 x 2160 2160/25P* 56.25 3840 x 2160 2160/30P* 67.5 3840 x 2160 2160/50P* 112.5 3840 x 2160 2160/60P* 3840 x 2160 • *DW2650Z is not supported.
-
Page 57: Troubleshooting
Troubleshooting Refer to the symptoms and measures listed below before sending the projector for repairs. If the problem persists, contact your local reseller or service center. Please refer to "LED Indicator Messages" as well. Start-up problems If no lights turn on: •... -
Page 58: Rs-232 Command And Configuration
RS-232 command and configuration D-Sub 9 pin Wire List 1 CD COLOR Black Brown Orange Yellow Green Blue Purple White SHELL SHELL You can use the serial control command to input commands for projector control or retrieve its operational data through Windows client terminal software. Item Parameter Baud Rate... - Page 59 Types of setup strings Characters of settings Description Query current setup Question mark "?" indicates querying current setup Setup = <settings> Syntax: Symbol "=" suffixed with setup values Query current setup Some settings are changed in steps. Symbol "+" indicates changing one step up Decrease setup order Some settings are changed in steps.
- Page 60 Function Operation Dec EXE Values 0 = Off 1 = BlackBoard Screen Color blankscreen.color 2 = GreenBoard 3 = WhiteBoard 0 = Auto 1 = 4:3 2 = 16:9 3 = Panorama Aspect Ratio aspect 4 = Anamorphic 5 = 2.35:1 6 = 16:10 7 = 16 :6 v.keystone...
- Page 61 0 : Auto hdr.control 1 : On 2 : Off 0 : Auto HDMI Range hdmi.range 1 : Enhance 2 : Normal Sharpness sharp 0 ~ 31 Gamma gamma 1 ~ 5 Brilliant Color bri.color 0 =Off, 1~ 10 Noise Reduction noise.reduce 0 ~ 31 Color Manager/...
- Page 62 0 : Frame Sequential 1 : Top / Bottom 2 : Side by side 3D Format threed.format 3 : Frame Packing 4 : Off 5: Auto 0 = Off 3D Sync Invert threed.syncinvert 1 = On 0 : Off Standby Setting standby.power 1 : Active Audio Out 2 : LAN Control...
- Page 63 0 = English 1 = French 2 = German 3 = Spanish 4 = Portugues 5 = Simplified Chinese 6 = Traditional Chinese 7 = Italian 8 = Norwegian 9 = Swedish Language lang 10 = Dutch 11 = Russian 12 = Polish 13 = Finnish 15 = Korean...
- Page 64 High Altitude 0 : Off fanspeed Mode 1 : On 0 : Off Mute mute 1 : On Audio Volume volume 0 ~ 20 0 : Off Ring Tone ringtone 1 : On 0 : ECO Light Settings light.mode 1 : Normal Light Hours light1.hours <string>...
-
Page 65: Service Information
Service information Europe, Middle East and Africa Vivitek Service & Support Zandsteen 15 2132 MZ Hoofddorp The Netherlands Tel: Monday - Friday 09:00 - 18:00 English (UK): 0333 0031993 Germany: 0231 7266 9190 France: 018 514 8582 Russian: +7 (495) 276-22-11 International: +31 (0) 20 721 9318 Email: support@vivitek.eu... - Page 66 Visit www.vivitekcorp.com for more product info Copyright (c) 2023 Delta Electronics, Inc. All Rights Reserved...
Need help?
Do you have a question about the DW2650Z and is the answer not in the manual?
Questions and answers