Advertisement
WHAT'S IN THE BOX
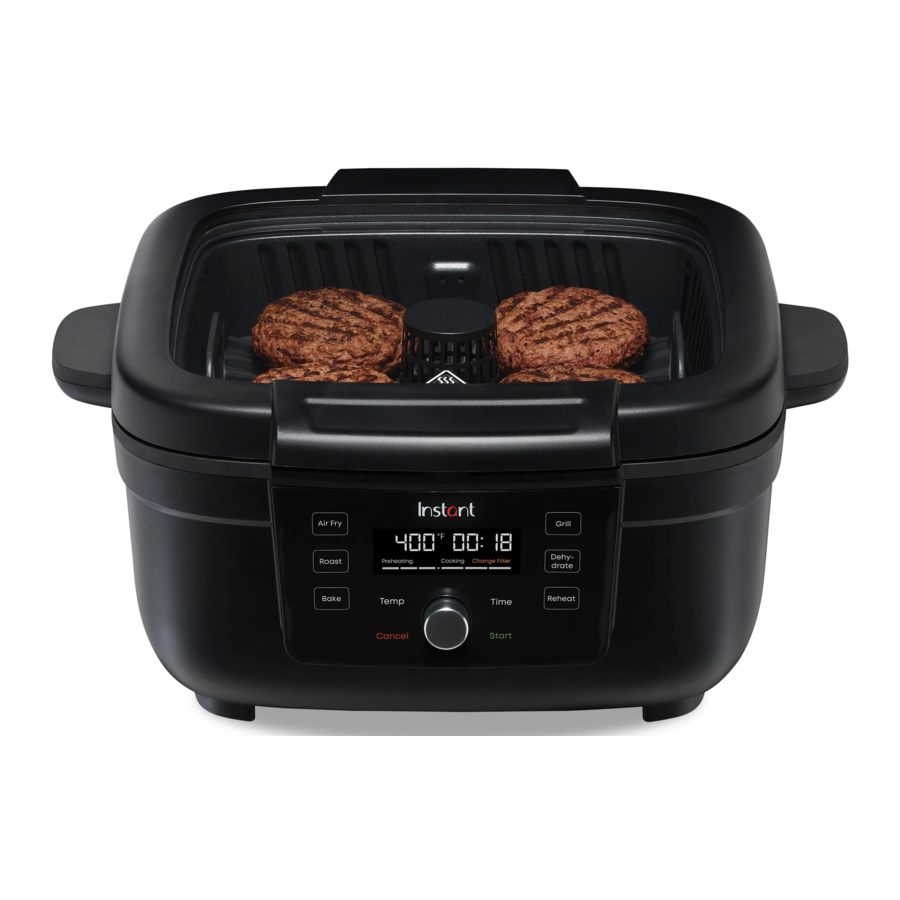
Indoor Grill

Parts and accessories

Illustrations are for reference only and may differ from the actual product.
Remember to recycle! We designed this packaging with sustainability in mind. Please recycle everything that can be recycled where you live.
INITIAL SET UP
Unpack
- Remove your new Grill from the box.
- Remove all the packaging material from in and around the grill.
- Make sure to remove all the accessories from inside the grill chamber.
- Don't remove the safety warning stickers or the rating label from the grill.
Clean before use
- Wipe the interior with a damp cloth. Use a clean, soft cloth to dry.
- Wash the accessories with hot water and dish soap. Rinse with warm, clear water and use a soft cloth to dry.
Placement
- Place your Grill on a stable, level surface, away from combustible material and external heat sources. Do not place your Grill on top of another appliance.
- Make sure to leave at least 5" / 13 cm of space above and around all sides of the appliance to allow for sufficient air flow.
Turn on the Grill
- Plug the Grill into an electric outlet. The Control Panel will light up.
- When the display shows Off, the unit is ready for cooking.
If your Instant Grill is left inactive for over 2 minutes, the display will dim. Press any button or the Control Dial to return to ready mode.
USING YOUR GRILL
Control panel
We've designed the control panel to be simple to use and easy to read.

- Smart Program buttons
- Air Fry
- Roast
- Bake
- Grill
- Dehydrate
- Reheat
- Time/Temperature
- Cooking time
- Cooking temperature
- Fahrenheit/Celsius indicator
- Status Bar
- Cooking status
- Change filter alert
- Temp button
- Time button
- Control Dial
- Used to select time and temperature
- Cancel button
- Start button
Turning sound On/Off
- While the display shows OFF, press and hold Time and Temp for 5 seconds.
Audible safety alerts (beeps) cannot be turned off.
Choosing temperature unit
Choose which cooking temperature unit you would like to use, Fahrenheit or Celsius.
- While the display shows OFF, press and hold Temp for 5 seconds, until display shows either °F or °C.
Reset Smart Programs to original settings
Reset individual Smart Programs
- While the display shows OFF or is in cooking mode, press and hold one of the Smart Program buttons for 3+ seconds.
The Smart Program's cooking time and temperature are restored to the factory default setting.
Reset all Smart Programs
- While the display shows OFF, press and hold the Control Dial for 3+ seconds.
All Smart Program cooking times and temperatures are restored to the factory default setting.
Cancel active cooking program
You can cancel any cooking program at any time.
- While in Standby, Preheating or active cooking program, press Cancel. Depending on the temperature of the unit, the internal fan may keep running to cool the unit.
Change the OdorErase™ filter
When the display shows Change Filter, it's time to replace the filter. Visit instanthome.com to purchase compatible filters, designed to work with your unit
- Make sure the unit is not in use and turned off.
- Open the filter panel door and carefully remove the old filter.
- Remove a new filter from its packaging.
- Insert the new filter into the filter housing and close the panel door.
- Press Bake and Reheat together for 3 seconds to reset the filter sensor. The display should no longer show Change Filter.
- The OdorErase filter will automatically begin removing odors while you cook.
Empty the oil collector
Each time you cook with the Indoor Grill, you'll need to check the oil collector and empty it.
- Make sure the unit is not in use and turned off.
- Carefully remove the oil collector.
- Empty any oil out of the collector and properly dispose of the oil.
- Clean the oil collector in the dishwasher or by hand with mild dish soap. Dry thoroughly.
- Carefully replace the oil collector into the grill base.
GRILL
You can grill meats and veggies for delicious results with less smoke and mess.
The Grill Smart Program is set to the following default cooking settings. You can change the cooking time and temperature according to your recipe if you want.
| Setting | Default | Minimum | Maximum |
| Temperature | Level 5 | Level 1 | Level 5 |
| Cooking Time | 15 minutes (00:15) | 1 minute (00:01) | 1 hour (01:00) |
Cooking Timetable
| Frozen/ Fresh | Food | Item | Amount | Temperature | Time | Internal Temp |
| Canned | Fruit | Pineapple | 1 can or 8–10 slices | L 5 (500°F) | 8–10 min | n/a |
| Fresh | Fruit | Pineapple | 1-1/2 lb or 4–5 slices | L 5 (500°F) | 10–12 min | n/a |
| Fresh | Fruit | Melon | 1/2 lb or 4–6 slices | L 5 (500°F) | 3–5 min | n/a |
| Fresh | Vegetable | Cauliflower | 1 lb (florets) | L 5 (500°F) | 12–15 min | n/a |
| Fresh | Vegetable | Broccoli | 1 lb (florets) | L 5 (500°F) | 5–8 min | n/a |
| Fresh | Vegetable | Asparagus | 1 lb | L 5 (500°F) | 2–4 min | n/a |
| Fresh | Vegetable | Portobello mushroom | 4 | L 5 (500°F) | 8–10 min | n/a |
| Fresh | Vegetable | Corn on the cob | 4 | L 5 (500°F) | 13–15 min | n/a |
| Fresh | Vegetable | Zucchini | 1 lb or 6–8 slices | L 5 (500°F) | 8–10 min | n/a |
| Fresh | Cheese | Cheese halloumi | 1/2 lb or 6–8 slices | L 5 (500°F) | 2–3 min | n/a |
| Fresh | Pork | Baby back ribs | 1-1/2 lb | L 4 (475°F) | 30–45 min | 190°F |
| Fresh | Pork | Pork chops | 1 lb | L 4 (475°F) | 5–8 min | 145°F |
| Fresh | Pork | Pork skewers | 320 g or 4 skewers | L 4 (475°F) | 10–12 min | 145°F |
| Fresh | Pork | Sausage | 500 g or 5 pcs | L 2 (425°F) | 10–12 min | 160°F |
| Fresh | Pork | Chorizo | 500 g or 5 pcs | L 4 (475°F) | 12–15 min | 160°F |
| Fresh | Poultry | 1/4 chicken | 2 pcs | L 4 (475°F) | 30–35 min | 165°F |
| Fresh | Poultry | Chicken breast | 1 lb or 3–4 pcs | L 4 (475°F) | 12–15 min | 165°F |
| Frozen | Poultry | Chicken breast | 1-1/2 lb or 5 pcs | L 3 (450°F) | 20–25 min | 165°F |
| Frozen | Poultry | Chicken kebab | 320 g or 4 skewers | L 3 (450°F) | 10–12 min | 165°F |
| Fresh | Poultry | Chicken kebab | 320 g or 4 skewers | L 5 (500°F) | 8–10 min | 165°F |
| Fresh | Beef | Hot dogs | 1 lb or 6 hot dogs | L 5 (500°F) | 5 min | 160°F |
| Fresh | Beef | Tenderloin | 1 lb or 2 steaks (1.25-in thick) | L 5 (500°F) | 7–8 min | Medium-rare |
| Fresh | Beef | Sirloin | 580–600 g or 2 steaks (1-in thick) | L 5 (500°F) | 11–12 min 14–15 min | Medium-rare Well done |
| Fresh | Beef | Rib-eye steak | 2 lb or 2 steaks (1-in thick) | L 5 (500°F) | 7–8 min | Medium-rare |
| Fresh | Beef | Burger patties | 4 pcs | L 5 (500°F) | 5–6 min | 160°F |
| Frozen | Beef | Burger patties | 4 pcs | L 5 (500°F) | 12–13 min | 160°F |
| Fresh | Beef | Beef medallions | 4 pcs (1.5– in thick) | L 5 (500°F) | 8–9 min | Medium-rare |
| Fresh | Seafood | Salmon | 1 lb or 4–6 pcs | L 5 (500°F) | 10–12 min | 145°F |
| Frozen | Seafood | Salmon | 1 lb or 4–5 pcs | L 4 (475°F) | 12–15 min | 145°F |
| Fresh | Seafood | Shrimp | 1 lb | L 5 (500°F) | 2–3 min | n/a |
| Frozen | Seafood | Shrimp | 1 lb | L 5 (500°F) | 3–5 min | n/a |
To grill
Prep
- Cut, chop, season or marinate the ingredients according to your recipe.
Cook
- Insert the cooking basket and grill plate into the cooking chamber and close the lid.
- Select Grill by pressing its button. The Grill button flashes and the display shows the default time and temperature settings.
- If you want to change the cooking settings, press Temp or Time and use the Control Dial to adjust the temperature and cooking time.
- Press Start to begin. The cooking program starts and the Status Bar shows Preheating.
- When the cooker reaches the target temperature, the display shows Add Food.
- Open the lid, place the food onto the grill plate, and close the lid.
Turn
- Part way through the cooking cycle the display shows Turn Food.
- Open the lid and carefully turn, flip, or rotate your food.
If you do not remove the lid after Turn Food displays, cooking will proceed after 10 seconds. - Close the lid. Cooking continues.
Finish
- When the Smart Program completes, the lid beeps, and the display shows End.
The grill beeps every minute for 10 minutes to remind you that cooking has completed You will still hear the fan running for up to 5 minutes after grilling in order to cool the surface.
AIR FRY
You can air fry foods like fries, cauliflower bites, wings, nuggets and more.
The Air Fry Smart Program is set to the following default cooking settings. You can change the cooking time and temperature according to your recipe if you want.
| Setting | Default | Minimum | Maximum |
| Temperature | 400°F / 205°C | 180°F / 82°C | 400°F / 205°C |
| Cooking Time | 18 minutes (00:18) | 1 minute (00:01) | 1 hour (01:00) |
Cooking Timetable
| Frozen/ Fresh | Food | Item | Amount | Temperature | Time | Internal Temp |
| Frozen | Vegetable | Falafel | 1 lb | 400°F | 8–10 min | n/a |
| Frozen | Vegetable | French fries | 1 lb | 400°F | 14–16 min | n/a |
| Frozen | Vegetable | French fries | 1.5 lb | 400°F | 18–20 min | n/a |
| Frozen | Cheese | Mozzarella sticks | 1 lb | 400°F | 8–10 min | n/a |
| Fresh | Cheese | Nachos | 400°F | 3–5 min | n/a | |
| Fresh | Poultry | Chicken wings | 1 lb | 400°F | 23–25 min | 165°F |
| Fresh | Poultry | Chicken wings | 2 lb | 400°F | 28–30 min | 165°F |
| Frozen | Poultry | Chicken nuggets | 1 lb | 400°F | 10–12 min | 165°F |
| Frozen | Poultry | Chicken strips | 1 lb | 400°F | 12–15 min | 165°F |
| Frozen | Poultry | Chicken wings (breaded) | 1 lb | 400°F | 15–17 min | 165°F |
| Frozen | Poultry | Chicken wings | 1 lb | 400°F | 25 min | 165°F |
| Frozen | Poultry | Chicken wings | 2 lb | 400°F | 30 min | 165°F |
| Fresh | Pork | Bacon | 4–6 strips | 380°F | 12–15 min | 145°F |
| Frozen | Seafood | Fish sticks | 1 lb | 400°F | 10–12 min | 165°F |
| Frozen | Snack | Pizza pockets | 4 pcs | 400°F | 23–25 min | n/a |
| Frozen | Snack | Mini pizza | 4 pcs | 400°F | 12 min | n/a |
To air fry
Prep
- Cut, chop, season, marinate or batter the ingredients according to your recipe.
Cook
- Place the food into the cooking basket with the air frying tray and set aside.
- Select Air Fry by pressing its button. The Air Fry button flashes and the display shows the default time and temperature settings.
- If you want to change the cooking settings, press Temp or Time and use the Control Dial to adjust the temperature and cooking time.
- Press Start to begin. The cooking program starts and the Status Bar shows Preheating.
- When the cooker reaches the target temperature, the display shows Add Food.
- Open the lid, insert the air fry basket, and close the lid.
Turn
- Part way through the cooking cycle the display shows Turn Food.
- Open the lid and carefully turn, flip, or rotate your food.
If you do not remove the lid after Turn Food displays, cooking will proceed after 10 seconds. - Close the lid. Cooking continues.
Finish
- When the Smart Program completes, the lid beeps, and the display shows End.
The grill beeps every minute for 10 minutes to remind you that cooking has completed.
ROAST
You can roast foods like beef, lamb, pork, poultry, vegetables and scalloped potatoes, for a deliciously tender inside and browned outside.
The Roast Smart Program is set to the following default cooking settings. You can change the cooking time and temperature according to your recipe if you want.
| Setting | Default | Minimum | Maximum |
| Temperature | 380°F / 193°C | 180°F / 82°C | 400°F / 205°C |
| Cooking Time | 40 minutes (00:40) | 1 minute (00:01) | 1 hour (01:00) |
Cooking Timetable
| Frozen/ Fresh | Food | Item | Amount | Temperature | Time | Internal Temp |
| Fresh | Vegetable | Cauliflower (florets) | 1 lb | 380°F | 15 min | n/a |
| Fresh | Vegetable | Mini potatoes | 1 lb | 385°F | 20–22 min | n/a |
| Fresh | Vegetable | Broccoli (florets) | 1 lb | 400°F | 5–7 min | n/a |
| Fresh | Poultry | Drumsticks | 1 lb or 4–5 pcs | 380°F | 37 min | 165°F |
| Fresh | Poultry | Drumsticks | 2 lb or 8–10 pcs | 380°F | 42 min | 165°F |
| Fresh | Poultry | Chicken | whole (divided in 2) | 370°F | 45–60 min | 165°F |
| Fresh | Seafood | Salmon | 1 lb or 4–5 pcs | 400°F | 15–18 min | 145°F |
To roast
Prep
- Cut, chop, season or marinate the ingredients according to your recipe.
Cook
- Insert the cooking basket with the air frying tray into the cooking chamber and close the lid.
- Select Roast by pressing its button. The Roast button flashes and the display shows the default time and temperature settings.
- If you want to change the cooking settings, press Temp or Time and use the Control Dial to adjust the temperature and cooking time.
- Press Start to begin. The cooking program starts and the Status Bar shows Preheating.
- When the cooker reaches the target temperature, the display shows Add Food.
- Open the lid, place the food onto the grill plate, and close the lid.
Finish
- When the Smart Program completes, the lid beeps, and the display shows End.
The grill beeps every minute for 10 minutes to remind you that cooking has completed.
BAKE
You can bake foods like breads, cakes, pastries and buns, with the Grill as your own "mini oven".
The Bake Smart Program is set to the following default cooking settings. You can change the cooking time and temperature according to your recipe if you want.
| Setting | Default | Minimum | Maximum |
| Temperature | 350°F / 176°C | 180°F / 82°C | 400°F / 205°C |
| Cooking Time | 30 minutes (00:30) | 1 minute (00:01) | 1 hour (01:00) |
Cooking Timetable
| Frozen/ Fresh | Food | Item | Amount | Temperature | Time | Internal Temp |
| Fresh | Bread | Brioche, sandwich loaf | 2 (8 in x 4 in x 2.5 in) loaf pans, 300–320 g dough per each pan | 350°F | 30 min | 190°F–200°F |
| Fresh | Bread | Banana bread | 2 (7.3 in x 5.4 in x 2 in) loaf pans, 330–340 g batter per each pan | 350°F | 40 min | n/a |
| Fresh | Cake | Carrot cake loaf | 2 (8 in x 4 in x 2.5 in) loaf pans, 400 g batter per each pan | 350°F | 40 min | n/a |
| Fresh | Cake | Box cake | 2 (8 in x 4 in x 2.5 in) loaf pans, 400 g batter per each pan | 350°F | 30 min | n/a |
| Fresh | Muffin | Banana blueberry muffins | 6 (ramequins) | 350°F | 15 min | n/a |
| Fresh | Cookie | Chocolate cookies | 6 to 8 (15–20 g each) (directly on the bottom of the basket) | 350°F | 12–14 min | n/a |
| Frozen | Pastry | Spanakopita | 6 pcs | 380°F | 10–12 min | n/a |
What to bake in
You can bake many foods right in the cooking basket. For foods that require a pan, you can use an aluminum foil pan that fits inside the cooking chamber.
To bake
Prep
- Prepare the ingredients according to your recipe.
- Place your food into the cooking basket or an aluminum foil pan.
If you're using a pan, make sure there is approximately 1"/ 2.5 cm of space between the pan and the sides of the cooking chamber to allow heat to circulate evenly.
Cook
- Select Bake by pressing its button. The Bake button flashes and the display shows the default time and temperature settings.
- If you want to change the cooking settings, press Temp or Time and use the Control Dial to adjust the temperature and cooking time.
- Press Start to begin. The cooking program starts and the Status Bar shows Preheating.
- When the cooker reaches the target temperature, the display shows Add Food.
- Open the lid, insert the cooking basket or aluminum cooking pan into the cooking chamber and close the lid.
Finish
- When the Smart Program completes, the lid beeps, and the display shows End.
The grill beeps every minute for 10 minutes to remind you that cooking has completed.
REHEAT
Bring the crisp and crunch back to leftover fries and pizza in just a few minutes.
The Reheat Smart Program is set to the following default cooking settings. You can change the cooking time and temperature according to your recipe if you want.
| Setting | Default | Minimum | Maximum |
| Temperature | 300°F / 148°C | 300°F / 148°C | 400°F / 205°C |
| Cooking Time | 5 minutes (00:05) | 1 minute (00:01) | 30 minutes (00:30) |
Cooking Timetable
| Frozen/ Fresh | Food | Item | Amount | Temperature | Time | Internal Temp |
| Fresh | Poultry | Drumsticks | 2 lb or 8–10 pcs | 300°F | 20 min | n/a |
| Fresh | Poultry | Chicken | half | 300°F | 15 min | 165°F |
| Fresh | Seafood | Shrimp | 1 lb | 300°F | 8 min | 165°F |
| Fresh | Snack | Pizza | 2–4 slices | 300°F | 10 min | n/a |
To reheat
Cook
- Place the food in the cooking basket with air frying tray, insert it into the cooking chamber, and close the lid.
- Select Reheat by pressing its button. The display shows the default time and temperature settings.
- If you want to change the cooking settings, press Temp or Time and use the Control Dial to adjust the temperature and cooking time. Then press Start to accept the new settings.
Finish
- When the Smart Program completes, the lid beeps, and the display shows End.
The grill beeps every minute for 10 minutes to remind you that cooking has completed.
DEHYDRATE
Prepare jerky, dried fruit and fruit chips or even veggie sticks.
The Dehydrate Smart Program is set to the following default cooking settings. You can change the cooking time and temperature according to your recipe if you want.
| Setting | Default | Minimum | Maximum |
| Temperature | 125°F / 52°C | 105°F / 41°C | 165°F / 74°C |
| Cooking Time | 7 hours (07:00) | 1 hour (01:00) | 72 hours (72:00) |
Cooking Timetable
| Frozen/ Fresh | Food | Item | Amount | Temperature | Time |
| Fresh | Fruit | Apple chips | 1/2 apple (2 mm thick) | 125°F | 7–8 hours |
| Fresh | Fruit | Mango chips | 1/2 mango (2 mm thick) | 150°F | 6–7 hours |
| Fresh | Fruit | Banana | 2 bananas (0.8 in thick) | 150°F | 6 hours |
| Fresh | Vegetable | Kale | 2 bundles (max) | 125°F | 2 hours |
| Fresh | Meat | Beef jerky | 300 g (1/8 in thick) | 165°F | 5–6 hours |
To dehydrate
Cook
- Place the food in the cooking basket with air frying tray, insert it into the cooking chamber, and close the lid.
- Select Dehydrate by pressing its button. The display shows the default time and temperature settings.
- If you want to change the cooking settings, press Temp or Time and use the Control Dial to adjust the temperature and cooking time. Then press Start to accept the new settings.
Finish
- When the Smart Program completes, the lid beeps, and the display shows End.
The grill beeps every minute for 10 minutes to remind you that cooking has completed.
CLEANING
Clean your Instant Grill after each use. Always unplug the unit and let all parts cool to room temperature before cleaning. Before using or storing, make sure all surfaces are dry.

DO NOT immerse power cord, plug or the appliance in water or other liquid, which may result in electric shock.
| Part | Cleaning instructions |
| Cooking basket Air frying tray Air vent cover Oil collector |
|
| Removable glass lid |
|
| Cooking chamber |
|
| Exterior of cooker |
|
| Power cord |
|
ERROR CODES
| Problem | Cause | Solution |
| E1 | Temperature sensor issue | Contact Consumer Care. |
| E2 | Temperature sensor short circuit | Contact Consumer Care. |
LEARN MORE
There's a whole world of Instant Grill information and help just waiting for you. Here are some of the most helpful resources.
Register your product
Contact Consumer Care
Instanthome.com/customer-care-center
support@instanthome.com
Instant Brands® Connect App with 1000+ recipes
Instanthome.com
iOS and Android app stores
Cooking charts and more recipes
How-to videos, tips and more
Replacement parts and accessories
Join the community

Product specifications
| Model | Volume | Wattage | Power | Weight | Dimensions |
| IDGR1000 | 4 Quarts 3.8 Litres | 1700 W | 120V/ 60 Hz | 18.7 lb 8.5 kg | in: 18.1 L x 18.8 W x 8.7 H cm: 46.1 L x 42.8 W x 22.2 H |

Documents / Resources
References
![instanthome.com]() Instant Brands Product Registration | Instant Home
Instant Brands Product Registration | Instant Home![instanthome.com]() Customer care center | Instant Home
Customer care center | Instant Home![instanthome.com]() Shop Instant Pot & Instant Appliances | Official Website | Instant Home
Shop Instant Pot & Instant Appliances | Official Website | Instant Home
Download manual
Here you can download full pdf version of manual, it may contain additional safety instructions, warranty information, FCC rules, etc.
Advertisement


Need help?
Do you have a question about the INDOOR GRILL and is the answer not in the manual?
Questions and answers