Instant VORTEX PLUS User Manual
10 quart air fryer oven
Hide thumbs
Also See for VORTEX PLUS:
- Quick start manual ,
- User manual (32 pages) ,
- Get started (24 pages)
Advertisement
Table of Contents
- 1 Important Safeguards
- 2 Special Cord Set Instructions
- 3 Product Specifications
- 4 Initial Setup
- 5 Product Overview
- 6 Control Panel
- 7 More Controls
- 8 Display Messages
- 9 Rotisserie Cooking
- 10 Cooking Timetable
- 11 Cooking Tips
- 12 Care and Cleaning
- 13 Remove the Oven Door
- 14 Troubleshooting
- 15 Warranty
- Download this manual
Advertisement
Table of Contents

Subscribe to Our Youtube Channel
Related Manuals for Instant VORTEX PLUS


Summary of Contents for Instant VORTEX PLUS
- Page 1 VORTEX PLUS 10 Quart Air Fryer Oven User Manual Welcome Important Safeguards Initial Setup Product Overview Control Panel Initial Test Run Smart Programs Rotisserie Cooking Timetable Care & Cleaning Troubleshooting Warranty Support & Contact Information...
- Page 2 Welcome to the world of Instant cooking. Hello! Thank you for welcoming us into your kitchen. Having families ourselves, we developed the Instant Vortex Air Fryer Oven to allow busy families and professionals alike to cook healthy, delicious meals more easily and in less time.
-
Page 3: Important Safeguards
Always operate the appliance on a stable, non-combustible, level surface. The appliance’s outer surfaces may become hot during use. Do not touch hot surfaces. Wear Instant Pot® mini mitts or oven mitts when opening the oven door and handling hot components. Extreme caution must be used when moving the appliance. - Page 4 IMPORTANT SAFEGUARDS 13. Do not place the appliance on any kind of stovetop, or in a heated oven; heat from an external source will damage the appliance. 14. Do not let power cord contact hot surfaces or open flame, including a stovetop.
- Page 5 IMPORTANT SAFEGUARDS 26. When in operation, hot air is released through the air vents. Keep your hands and face at a safe distance from the air vents and take extreme caution when removing the accessories from the appliance. 27. Should the unit emit black smoke, press Cancel and unplug the appliance immediately.
-
Page 6: Special Cord Set Instructions
(earthed) electrical outlet that is easily accessible. Product Specifications 16.94 lb in: 13.23L × 13.23W × 14.37H Vortex Plus 10 10 Quart 1500W 120V~60 Hz 7.7 kg cm: 33.6L × 33.6W × 36.5H Read this manual carefully and completely, and retain for future reference. -
Page 7: Initial Setup
Initial Setup • Remove all packaging material from, in and around the oven, as well as all accessories from inside the oven chamber. • Follow Care & Cleaning instructions in this manual to clean the oven before first use. • Place the oven on a stable, level surface, away from combustible material and external heat sources. -
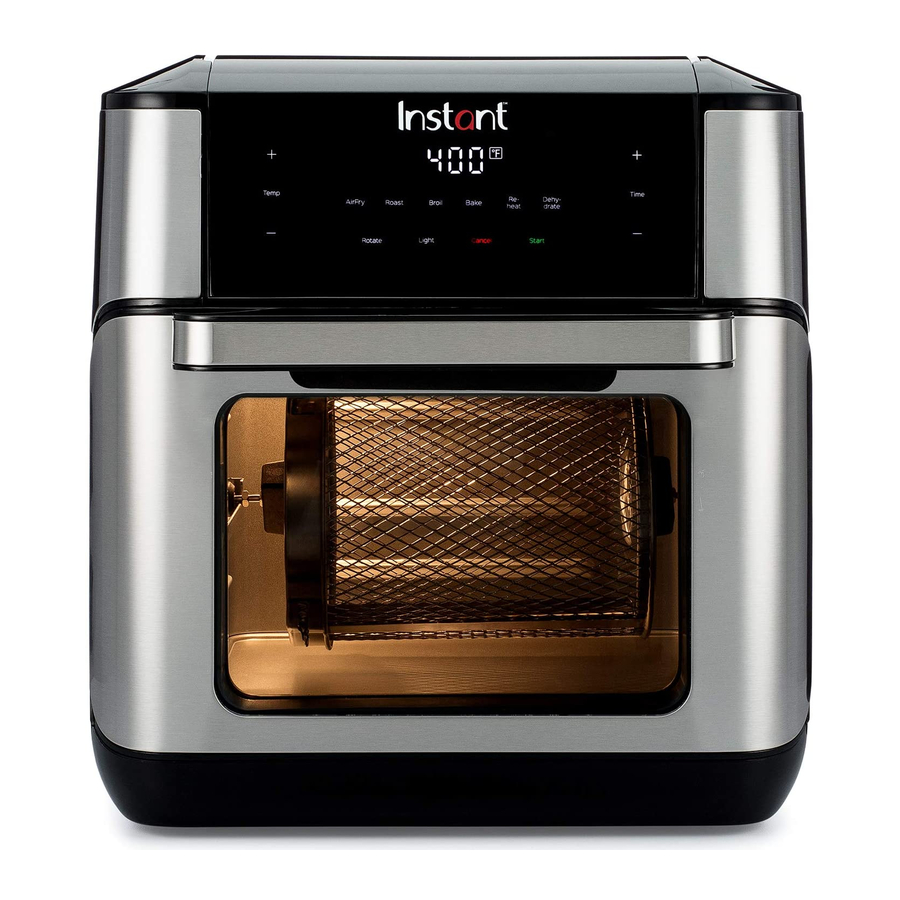
Page 8: Product Overview
Product Overview The Vortex Plus Air Fryer Oven uses rapid air circulation to cook food, giving your meals all the crispy rich flavor of deep frying with little or no oil. Air Fryer Oven Images are for reference only. Refer to actual product. - Page 9 Product Overview Air Fryer Oven Accessories Drip Pan Cooking Tray (x2) Rotisserie Basket Rotisserie Fork Rotisserie Spit Rotisserie Lift Images are for reference only. Refer to actual product.
-
Page 10: Control Panel
Control Panel The Vortex Plus Air Fryer Oven Control Panel features intuitive touch screen controls and an LED Display. Display Adjust Time Shows cooking time, cooking Touch the Time [+] or [-] signs to temperature, reminders and error adjust the cooking time. Touch and messages. -
Page 11: More Controls
More Controls Smart Program Reset When in Standby, touch and hold the Smart Program you wish to reset for 3 seconds. The Smart Program cooking time and temperature is restored to the default setting. Full Reset When in Standby, touch and hold both the Temp and Time plus [+] signs at the same time for 3 seconds. -
Page 12: Display Messages
Display Messages OFF indicates that the Air Fryer is in Standby mode. On indicates that the Air Fryer is in Preheating mode. Add food indicates that the oven has reached desired temperature and food can be added 00:00 indicates that the Smart Program is running. The time indicator will count down while your food is cooking. - Page 13 “Add Food”. For this test run, do not add food to the cooking chamber. 7. Open oven door. Use Instant Pot® mini-mitts or oven mitts and carefully insert both cooking trays into the heated cooking chamber. Close door.
- Page 14 Smart Program ends. The oven will be hot during and after cooking. Do not touch hot surfaces. Always use CAUTION Instant Pot Mini Mitts or oven mitts to remove cooking trays. Allow the oven to cool to ®...
- Page 15 Smart Program Settings Default Vortex Plus 10 Smart Program Time and Temperature settings are as shown in the table below. Smart Default Available Time Default Cooking Available Temperature Program Cooking Time Range Temperature Range* 18 minutes 1 – 60 minutes 400°F / 205°C...
- Page 16 Using the Rotisserie Accessory Always insert rotisserie accessories and food before preheating the oven. To use the Rotisserie Basket Place food items in the rotisserie basket. Align the tab on the rotisserie Turn the lid clockwise to secure it. basket with the notch in the lid then place the lid.
- Page 17 Using the Rotisserie Accessory Always insert rotisserie accessories and food before preheating the oven. To use the Rotisserie Spit & Forks Unscrew the 2 set screws. Remove the forks from the spit. Ensure the food item is able to rotate freely. Do not allow food items to make contact CAUTION with the heating coil.
- Page 18 Using the Rotisserie Accessory Push the food item onto the spit. Slide the forks onto both ends of the spit, ensuring the prongs are inserted into the food item. Tighten the set screw to secure the forks. Ensure the food item is able to rotate freely. Do not allow food items to make contact CAUTION with the heating coil.
-
Page 19: Rotisserie Cooking
Using the Rotisserie Accessory Always insert rotisserie accessories and food before preheating the oven. Rotisserie Cooking With the oven door open, slide the basket accessory or rotisserie spit into the guides into the cooking chamber. Both the basket and rotisserie spit install and remove the same way. - Page 20 Using the Rotisserie Accessory Close the oven door. Select Air Fry Use the Temp Touch Start. Touch Rotate. or Roast. and Time [+ / −] controls to adjust cooking temperature and time as desired.
- Page 21 Rotisserie spit, forks, and basket will be hot during and after cooking. Always use the WARNING rotisserie lift to remove rotisserie accessories, and exercise extreme caution when removing hot accessories from the cooking chamber. Always use Instant Pot Mini Mitts or oven mitts when ®...
-
Page 22: Cooking Timetable
Cooking Timetable Cooking Food Setting Cooking Time* Accessory & Placement Temperature* Thin-cut fries Air Fry / Roast 14 – 18 minutes 400°F / 205°C Rotisserie Basket (Frozen) Thin-cut fries Air Fry / Roast 18 – 20 minutes 400°F / 205°C Rotisserie Basket (Fresh) Thick-cut fries Air Fry / Roast... -
Page 23: Cooking Tips
Cooking Tips Instant Air Fryer Ovens can cook all your favorite fresh and frozen oven-baked, and deep-fried snacks—fast! • Use the Smart Programs as a starting point and experiment with cooking times, and temperatures to get the results your prefer. - Page 24 Cooking Tips • Find dozens of easy to follow recipes at: recipes.instantpot.com Download the Instant Pot app at: instantpot.com/instant-pot-recipe-app-free-recipes/ CAUTION Do not spray cooking oil into the cooking chamber.
-
Page 25: Care And Cleaning
Care & Cleaning Always unplug your Vortex Plus Air Fryer Oven and let it cool to room temperature before cleaning. Never use harsh chemical detergents, scouring pads, or powders on any of the parts or components. Part / Accessory Instruction Cleaning Method Clean after each use. -
Page 26: Remove The Oven Door
Care & Cleaning Remove the Oven Door 1. Place one hand on top of the Air Fryer Oven to hold it firmly in place. 2. Open the door to a 45º angle from the oven. 3. Pull the door up from the right side until it pops out of its track Reinstall the Oven Door 1. -
Page 27: Troubleshooting
Troubleshooting Register your product today at instantappliances.com/support/register. Problem Possible Reason Try This Cancel the Smart Program, unplug the oven and allow it to cool to room temperature. Choose Using an oil with a low a neutral oil with a high smoke point, such as smoke point Virgin or Extra Virgin Olive Oil, Avocado, Canola, Soybean, Safflower, or Rice Bran. -
Page 28: Warranty
Instant Brands representative. Limitation and Exclusions The liability of Instant Brands, if any, for any allegedly defective appliance or part shall in no circumstances exceed the purchase price of a comparable replacement appliance. This Limited Warranty does not cover:... - Page 29 Warranty Disclaimer of Implied Warranties EXCEPT AS EXPRESSLY PROVIDED HEREIN AND TO THE EXTENT PERMITTED BY LAW, INSTANT BRANDS MAKES NO WARRANTIES, CONDITIONS OR REPRESENTATIONS, EXPRESS OR IMPLIED, BY STATUTE, USAGE, CUSTOM OF TRADE OR OTHERWISE WITH RESPECT TO THE APPLIANCES OR PARTS COVERED BY THIS WARRANTY, INCLUDING BUT NOT LIMITED TO, WARRANTIES, CONDITIONS, OR REPRESENTATIONS OF WORKMANSHIP, MERCHANTABILITY, MERCHANTABLE QUALITY, FITNESS FOR A PARTICULAR PURPOSE OR DURABILITY.
- Page 30 Instant Brands Inc. 11 - 300 Earl Grey Dr., Suite 383 Ottawa, Ontario K2T 1C1 Canada Register your product today instantappliances.com/support/register Contact Customer Care: 1-800-828-7280 support@instantappliances.com instantappliances.com/#Chat instantappliances.com store.instantappliances.com Copyright © 2019 Instant Brands™ Inc 686-0101-51...
Need help?
Do you have a question about the VORTEX PLUS and is the answer not in the manual?
Questions and answers
Seasoned Fish fillets with liquid
To cook seasoned fish fillets with liquid in an Instant Vortex Plus air fryer:
1. Coat the fish fillets with a liquid seasoning (e.g., olive oil or hot sauce).
2. Add dry seasoning on top (e.g., vegetable seasoning, Cajun seasoning, or cornmeal mix).
3. Place the seasoned fillets in the air fryer basket.
4. Cook at the recommended temperature (typically around 375°F) for about 7 minutes.
5. Check for doneness and cook longer if needed.
This answer is automatically generated
Can the light in the control panel be replaced
The control panel light itself is not mentioned as replaceable. However, access to internal components like the light bulb compartment is possible by removing screws and the top cover. The process involves disconnecting a ribbon cable connected to the display circuit board. There is no specific mention of replacing just the control panel light.
This answer is automatically generated
How to defrost frozen meatballs in vortex plus
To cook frozen meatballs in the Instant Vortex Plus, you do not need to defrost them. Place the frozen meatballs directly in the air fryer basket, making sure they are not stacked or touching for best results. Cook at 400°F for 14–15 minutes, increasing the time slightly if needed.
This answer is automatically generated
My door is locked ****, and I can’t open it. How do I open it?