Table of Contents
Advertisement
Quick Links
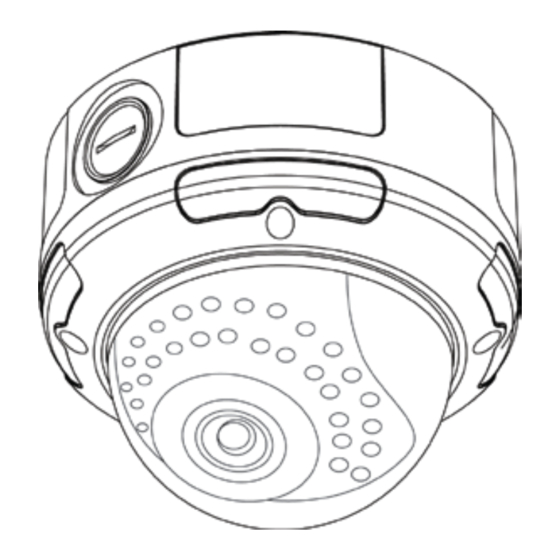
SDNI36-870AI-VD
700 TVL DNR Super Low Lux OSD
36 IR ICR Vandal Dome Camera
FEATURES
• 700 TV Lines
• 1/3" Sony Exview CCD II
• 2.8mm~12.0mm Auto Iris Lens
• 0.00039 (Sens-up, 256X) / 0.1 Lux (50 IRE @ F1.4)
• 36 IR LED; IR Distance up to 100ft / 30m
• RCA Video Output for Service Monitor
• RS485 Output for OSD Control
• 770mA
• Dual Power 12V DC / 24V AC
• IP66 Rating
Copyright © 2013. All Rights Reserved.
USER MANUAL
D
N
igital
oise
** Replacing SEIRX30-768AI-VDD
PAL Version Also Available
R
eduction
Advertisement
Table of Contents

Related Manuals for Okina USA SDNI36-870AI-VD


Summary of Contents for Okina USA SDNI36-870AI-VD
- Page 1 SDNI36-870AI-VD igital oise eduction 700 TVL DNR Super Low Lux OSD 36 IR ICR Vandal Dome Camera USER MANUAL FEATURES • 700 TV Lines • 1/3” Sony Exview CCD II • 2.8mm~12.0mm Auto Iris Lens • 0.00039 (Sens-up, 256X) / 0.1 Lux (50 IRE @ F1.4) •...
- Page 2 Please read the M anual before attem pting to use this product. Specifications and appearance are subject to change without notice. Disposal of Old Electrical & Electronic Equipment (Applicable in the European Union and other European countries with separate collection systems).
-
Page 3: Limited Warranty
When the video product exhibits a distinct change in performance. LIMITED WARRANTY OKINA USA products are covered under warranty for one (1) year from the date of purchase. The warranty will automatically be voided if any of the following occurs: 1. -
Page 4: Package Contents
PACKAGE CONTENTS One (1) DNR 36 IR Vandal Proof Dome Camera with power/video cable One (1) Allen Wrench Four (4) Mounting Screws Four (4) Wall Anchors Four (4) Screw Washers One (1) Mounting Sticker Template One (1) User Manual * For any returns, please include all components listed above with original packaging in Resalable Condition. -
Page 5: Operation
OPERATION Once camera is installed, make sure the focal length and focus is properly adjusted before configuring the camera through on-screen display (OSD). The Main menu provides access to the camera configuration options. The on-screen display (OSD) is only available in multi languages, such as English, Korean, Traditional Chinese, Simplified Chinese, Japanese, Russian, French, Spanish, Italian, Portuguese, Dutch, German, Polish, Turkish, Hebrew, Arabic. - Page 6 To access the Setup menu: Press the OSD control pad (Enter) or Coaxial Control Enter button to access the Main menu and its submenus. Push the pad up, down, left and right or Coaxial Control TELE,WIDE, NEAR, and FAR button to move between menu options. Press the OSD control pad Coaxial Control Enter button to select an option.
-
Page 7: Set Backlight
AGC: Adjust the maximum automatic gain control level, used in low-light conditions with the iris fully open. The values range from OFF to High. SENS-UP: The setting refers to the amount of light being allowed to load on the sensor from 2-times the "normal" light up to 256-times the "normal" light. This method can allow for brilliant, clear color images to be taken in nearly total darkness. -
Page 8: Set White Balance
HSBLC: HSBLC (high spotlight backlight compensation) masks strong light sources, giving darker areas more detail. It is often used to help identify vehicle license plate numbers, for example. Especially users can adjust and select the special requirement area to observe the target object under the strong spots of light exist. HSBLC 1. -
Page 9: Set Image Noise Reduction
D&N Auto Mode: Select Auto so that the camera can automatically switch between day (color) and night (black and white) mode. D & N AUTO 1. DELAY 2. D→N(AGC) 3. N→D(AGC) 4. RETURN RET↵ Delay: This is the time in seconds before Day↔Night switches. A long delay response would be used, for example, to avoid switching from Night to Day mode when car headlights pass in front of the camera. - Page 10 In the Main menu, select SMART 3DNR to set up noise reduction. SMART 3DNR 1. VALUE 2. SMART NR 3. SMART LEVEL 4. SENSITIVITY 5. RETURN RET↵ Value: Set the desired 3DNR value. The values range from 1 to 200. The higher is the value, the bigger is each pixel.
- Page 11 De-fog manual mode: DE-FOG MANUAL 1. LEVEL 2. COLOR GAIN 3. EDGE GAIN 4. GAMMA 0.55 5. RETURN RET↵↵ Level: Set the level of de-fog. The values range from 0 to 31. Color gain: Set the level of color gain. The values range from 0 to 10 Edge gain: Set the level of edge gain.
-
Page 12: Set Motion Detection
Main menu description Menu Item Description Motion Set the motion detection Privacy Set the privacy mask D-effect Set digital effect Image adj Set the image adjustment Comm adj Set the communication protocol settings Sync Set the synchronization Language Set the OSD language OSD color Set the OSD color Return... - Page 13 Area: Select the privacy mask (AREA1 to AREA8) that you want to configure. Each privacy mask is already associated with a pre-selected color which you can change using the COLOR setting. Area display: Choose whether to enable the selected privacy mask. If enabled, you can also customize the position and size of the privacy mask.
- Page 14 D-Zoom: When the digital zoom is enabled, in live video the camera will zoom in then zoom out on a specific area chosen by user. Range: digital zoom in / out. The values range from x1 to x32 Pan: Set pan location when D-zoom is activated. The values range from -100 to +100 Tilt: Set tilt location when D-zoom is activated.
-
Page 15: Neg. Image
NEG. IMAGE: The NEG IMAGE Display the image in a negative exposed format. SET UP IMAGE ADJUSTMENT The figure below shows the different options available. IMAGE ADJ 1. SHARPNESS 2. MONITOR CRT↵ 3. LENS SHADING ↵ 4. DEFECT 5. RETURN RET↵... -
Page 16: Monitor Lcd
MONITOR LCD 1. GAMMA 2. PED LEVEL 3. COLOR GAIN i. Gama: Controls and adjusts the overall brightness of an image for consistency. The values range from 0.0 to 1.0. ii. PED Level: Defines the master pedestal level value. The values range from 0 to 63. - Page 17 Sens-up: Adjust the magnification of existing light sources to make it easier for the camera to pick up defective pixels. If set too strong, the camera can pick up regular noise and mistaken it as defective pixels. The values range from x4 to x128.
- Page 18 SYNC INT is only in 12V DC power source. SYNC INT and L/L (line lock) are in 24V AC. The key combination to enter the camera’s OSD menu with OKINA USA’s RS485 PTZ controller PTZ-KB250X is SET + 95 + PRESET and for PTZ-KB050X is PRESET+95+ENTER.
- Page 19 DISPLAY THE SYNCHRONIZATION MODE Use the Sync menu to display the current synchronization mode. Only one option is available: Internal (DC 12V). Line Lock mode is available if the power input is AC 24V. SET UP OSD LANGUAGE Use this menu to select the OSD language. There are 16 languages available, press RIGHT or LEFT to choose the language.
-
Page 20: Specification
SPECIFICATION Model SDNI36-870AI-VD System NTSC Image Sensor 1/3” Sony Exview CCD II NVP2190 / High End ASIC Solution Total Pixel 1028(H) x 508(V) Synchronizing Internal / Line Lock System Resolution 700 TV Lines Scanning System 2:1 Interlace Minimum 0.00039 (Sens-up, 256X) ; 0.1 Lux (50 IRE @ F1.4) - Page 21 RELATED PRODUCT 700TVL DNR Super Low Lux OSD ICR Vandal Dome Camera SDNX-870AI-VD • 700 TV Lines • 1/3” Sony Exview CCD II • 2.8mm~12.0mm Auto Iris Lens • 0.00039 Lux (Sens-up, 256X) / 0.1 Lux (50 IRE @ F1.4) •...
- Page 22 680 TVL DNR Super Low Lux OSD Indoor Dome Camera SDNX-868AI • 680 TV Lines • 1/3” Sony CCD II • 2.8mm~12.0mm Auto Iris Lens • 36 IR LED • 0.00039 (Sens-up, 256X) / 0.1 Lux (50 IRE @ F1.4) •...
- Page 24 www.okinausa.com MADE IN TAIWAN Copyright © 2013. All Rights Reserved. I-375 www.okinausa.com R201311-V01...
Need help?
Do you have a question about the SDNI36-870AI-VD and is the answer not in the manual?
Questions and answers