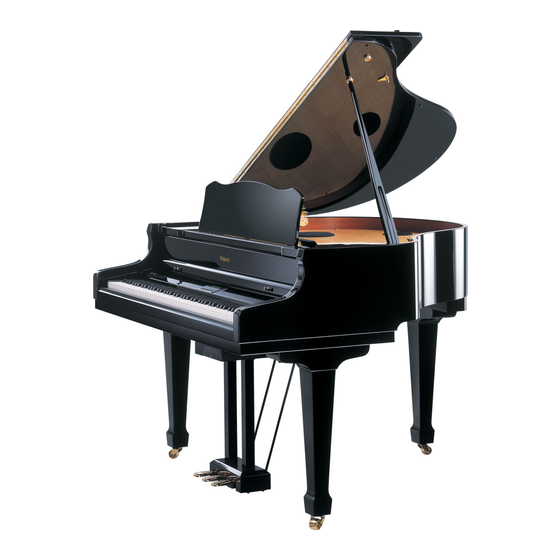
Roland RG-7 Owner's Manual
Digital grand
Hide thumbs
Also See for RG-7:
- Operating manual (4 pages) ,
- Installer's manual (2 pages) ,
- Midi implementation manual (32 pages)
Table of Contents
Advertisement
Quick Links
Download this manual
See also:
Operating Manual
Advertisement
Table of Contents

Related Manuals for Roland RG-7


Summary of Contents for Roland RG-7
- Page 3 The manual should be saved and kept on hand as a convenient reference. Copyright © 2005 ROLAND CORPORATION All rights reserved. No part of this publication may be reproduced in any form without the written permission of ROLAND CORPORATION.
-
Page 4: Important Safety Instructions
WARNING: To reduce the risk of fire or electric shock, do not expose this apparatus to rain or moisture. CAUTION RISK OF ELECTRIC SHOCK DO NOT OPEN ATTENTION : RISQUE DE CHOC ELECTRIQUE NE PAS OUVRIR CAUTION: TO REDUCE THE RISK OF ELECTRIC SHOCK, DO NOT REMOVE COVER (OR BACK). -
Page 5: Using The Unit Safely
• Do not attempt to repair the unit, or replace parts within it (except when this manual provides specific instructions directing you to do so). Refer all servicing to your retailer, the nearest Roland Service Center, or an authorized Roland distributor, as listed on the “Information” page. - Page 6 • Before using the unit in a foreign country, consult with your retailer, the nearest Roland Service Center, or an authorized Roland distributor, as listed on the “Information” page.
-
Page 7: Removable Parts
118c • Always keep the following parts including with the RG-7 and small components that may be removed out of the reach of small children to avoid accidental ingestion of these parts. Included Parts •... -
Page 8: Important Notes
During repairs, due care is taken to avoid the loss of data. However, in certain cases (such as when circuitry related to memory itself is out of order), we regret that it may not be possible to restore the data, and Roland assumes no liability concerning such loss of data. -
Page 9: Using Usb Memory
• Do not apply undue force to the music stand while it is in use. • Use a cable from Roland to make the connection. If using some other make of connection cable, please note the following precautions. - Page 10 • Do not bend the disc. Bending discs may prevent proper reading and writing of data, and may further result in malfunction. * GS ( ) is a registered trademark of Roland Corpo- ration. * Mac OS is a trademark of Apple Computer, Inc. * XG lite ( ) is a registered trademark of Yamaha Corporation.
-
Page 11: Introduction
Full Complement of Player Piano Functions The RG-7 comes programmed with song data in jazz and classical styles. You can also use the CD drive to play back a wide variety of music on the CD included with the instrument as well as songs on CD-ROMs containing saved SMF files, player piano CDs, and audio CDs. -
Page 12: Conventions Used In This Manual
Connect External Speakers to Produce Concert Hall Presence You can connect an amp and speakers to the RG-7 and play the sounds of the reverb and accompaniment through the external speakers to produce the effect of being enveloped by an orchestra. -
Page 13: Table Of Contents
Main Screens ... 23 Adjusting the Contrast of the Screen... 23 Chapter 1. Playing Back Songs ...24 Look at What You Can Do with the RG-7! ... 24 Listening to Songs ... 25 [Song] Button Functions... 25 Listening to the Tone Demos... 26 Listening to the Internal Songs... - Page 14 Contents Connecting a Television ... 49 Making the Connections ... 49 Switching Television Formats ... 49 Selecting What is To Be Displayed on the External Display or Television... 50 Displaying Favorite Images on an External Display or Television (Slide Show) ... 51 Changing the Background for the Lyrics Screen ...
- Page 15 Parameters Stored in the User Program ... 109 Music Files That the RG-7 Can Use ... 110 The RG-7 allows you to use the following music files... 110 About the RG-7 Sound Generator ... 110 MIDI Implementation Chart ... 111 Main Specifications ...
-
Page 16: Panel Descriptions
Tone and song names and the values of various settings are displayed here (p. 23). [Function] (Exit) button This switches the RG-7 to the Function screen (p. 88). You can make various different settings in the Function screen, including settings for the master tuning and temperaments. -
Page 17: Jack Panel (Left Side Of Bottom Panel)
Aux Input jack You can connect other sound generating devices or audio equipment here and have their sound be played through the RG-7’s speakers (p. 36). MIDI Out/In connectors Connect to external MIDI devices to exchange performance data (p. 99). -
Page 18: Cd Drive (Right Side Of Bottom Panel)
(p. 29). Eject Button Press this button to eject the CD (p. 29). * You cannot eject the CD unless the RG-7’s power is turned Infrared Receiver Point the remote control at this sensor when using the remote control to operate the RG-7 (p. 33). -
Page 19: Before You Start Playing
About the Topsticks and Topslip The RG-7 has two topsticks, each a different length. You can use the different topsticks to change the amount the top is left open. -
Page 20: Raising The Music Rest
Before You Start Playing Raising the Music Rest fig. Open the front top (p. 17). Hold the music rest with both hands, then raise it forward. While supporting the music rest with one hand, adjust the angle of the music rest with the brace behind the music rest. -
Page 21: Connect The Pedal Cord
To turn the power on, turn the [Volume] knob all the way down, and then press the [Power] switch. When you turn on the power to the RG-7, the front panel display appears as shown below. After a few seconds, you will be able to play the keyboard to produce sound. -
Page 22: Adjusting The Sound's Volume And Brilliance
The RG-7 simulates this Damper Resonance. You can change the amount of resonance applied with the damper pedal. Please refer to “Producing the Resonance of the Strings When the Keys Are Played (Damper Resonance)”... -
Page 23: Connecting Headphones
Connect a microphone (sold separately) to the Mic jack located in the jack panel on the lower left of the RG-7. Rotate the Mic Volume knob in front of the Mic jack to adjust the volume level for the microphone. -
Page 24: Connecting Usb Memory
• Play back songs stored on the USB memory device. • Save songs recorded on the RG-7 to the USB memory device. • Copy songs in the USB memory device to the RG-7’s User memory, allowing the songs to be called up simply and easily. -
Page 25: About The Screens
Secure the anti-theft lock with the screws as shown below. NOTE Be sure to replace removed screws when securing the anti-theft lock. About the Screens Immediately after the power is turned on, the Song Select screen like the one below is displayed. ■... -
Page 26: Chapter 1. Playing Back Songs
RG-7 to the USB memory. Store Songs in the “Favorites” The RG-7 is set at the factory with tone demos registered in the “Favorites.” Listen to the tone demos to check out the special characteristics of each tone. -
Page 27: Listening To Songs
The RG-7 features a variety of internal songs. The internal songs are categorized into “Jazz” and “Classical” genres. You can also use the RG-7’s CD drive to play back the included CD, CD-ROMs with songs saved in SMF format, commercially available audio CDs, and player piano CDs. -
Page 28: Listening To The Tone Demos
After all of the songs in the genre have been played, playback automatically resumes from the first song in the genre. When the RG-7 is set to play back a single song (p. 27), playback stops automatically when the song is finished. - Page 29 Chapter 1. Playing Back Songs ] (Select +) button to display ] (Select +) button to get the ] (Value +) button to select Description You can save this setting in the RG-7’s memory using the Memory Backup function (p. 72).
-
Page 30: Listening To Songs On Cds
• CD-R/RW discs to which audio tracks have been added, and CDs with mixed audio tracks and data will not play back properly. • The RG-7 is capable of playing back only commercial CDs that conform the official standards-those that carry the “COMPACT DISC DIGITAL AUDIO”... -
Page 31: If A Disc Tray Does Not Open
Playing Back Songs on CDs You can play back the CD included with the RG-7, CDs with player piano CDs, audio CDs, and CD-ROMs to which SMF music files are saved. Place the CD you want to play in the CD drive. - Page 32 After all of the songs on the CD have been played, playback automatically resumes from the beginning of the CD. When the RG-7 is set to play back a single song (p. 27), playback stops automatically when the song is finished.
-
Page 33: Playing Back Songs From Usb Memory
The songs stored in the USB memory are played. When the RG-7 is set to play back all songs (p. 27), once the song currently being played back is finished, the next song starts playing automatically. After all of the songs on the USB memory have been played, playback automatically resumes from the beginning of the USB memory. -
Page 34: Using The Remote Control
You can use the included remote control to easily start and stop performances and switch songs. You can also use the remote control to select what is to be displayed on an external screen or television set connected to the RG-7 and assign functions to the buttons used in operating the remote control. -
Page 35: How To Use The Remote Control
■ How to Use the Remote Control When using the remote control, aim the remote control at the infrared receiver, keeping in mind the range of operation (below). Front View Infrared Receiver Top View Range of operation Distance: 4 m (approximately 13 feet) Angle: 40 degrees to the left and right of the receiver. -
Page 36: About The Remote Control
Chapter 1. Playing Back Songs ■ About the Remote Control Adding Effects to Mic Vocals Switches the Surround Function Settings Selecting the Song Genre Muting the Sound Using the Function Assigned to the Buttons Button TRANSFORM HARMONY Infrared Emitter Explanation This changes the vocals from the microphone. - Page 37 Button Selects the internal song genre. INTERNAL The internal song genre selection changes when the [INTERNAL] button is pressed. “Jazz” → “Classical” → “Jazz” ... Selects the “Favorites” genre. FAVORITES * This group cannot be selected if no songs have been saved to the “Favorites.” Selects the “CD”...
-
Page 38: Using The Aux Input Jack
] (Select +) button to get the ] (Value +) button to change ] (Select +) button to get the ] (Value +) button to change the You can save this setting in the RG-7’s memory using the Memory Backup function (p. 72). -
Page 39: Changing The Song Tempo
Holding down the button makes the tempo change (slow down) continuously. Using the Karaoke Feature You can connect a microphone to the RG-7 and enjoy singing along as the music data is played back. Connect the USB memory device containing the songs you want to play to the Ext Memory port (p. -
Page 40: Changing The Key Of The Song Being Played (Playback Transpose)
Chapter 1. Playing Back Songs ■ Changing the Key of the Song Being Played (Playback Transpose) SMF Music files or a performance that you recorded can be transposed for playback. When using the karaoke feature, you can raise or lower the key of the song to match your own pitch. -
Page 41: Adding Echo To The Mic Vocals (Mic Echo)
■ Adding Echo to the Mic Vocals (Mic Echo) This adjusts the microphone echo when a microphone is connected to the RG-7. Press the [Function] (Exit) button so the indicator is lit. Press the [Song] (Select -) button or [ the MIC ECHO screen. -
Page 42: Adding Harmonies To The Mic Vocals (Harmony)
Chapter 1. Playing Back Songs ■ Adding Harmonies to the Mic Vocals (Harmony) You can sing with a harmony accompaniment, even when you’re playing solo. This is called the “Harmony” function. Press the [Function] (Exit) button so the indicator is lit. Press the [Song] (Select -) button or [ the VOCAL screen. -
Page 43: Altering Vocals (Transformer)
■ Altering Vocals (Transformer) You can modify the way your voice sounds through the microphone. This is called the “Voice Transformer” function. Press the [Function] (Exit) button so the indicator is lit. Press the [Song] (Select -) button or [ the VOCAL screen. -
Page 44: Copying Songs
Copying Songs You can copy performances recorded with the RG-7, songs saved on CD-ROMs, songs on USB memory connected to the RG-7’s Ext Memory port, and other songs to the RG-7’s “Favorites.” Copying songs to the “Favorites” enables you to access these songs easily by pressing the [Song] button to select the “Favorites”... - Page 45 Press the [ ] (Value -) button or [ “COPY From” setting. Value Internal songs in the “Jazz” genre are copied to the Jazz “Favorites.” Internal songs in the “Classical” genre are copied to the Classical “Favorites.” Songs in the CD-ROM are copied to the USB memory or the “Favorites.”...
- Page 46 Chapter 1. Playing Back Songs Press the [Song] (Select -) button or [ “COPY To” song number is flashing. fig. Press the [ ] (Value -) button or [ copy-destination number. Press the [Moving Key] (Enter) button. A confirmation message appears in the screen. To return to the original screen without copying the song, press the [Function] (Exit) button.
-
Page 47: Deleting Songs Saved To The "Favorites" Or Usb Memory
Deleting Songs Saved to the “Favorites” or USB Memory This deletes songs saved to USB Memory (sold separately) and the “Favorites.” If deleting songs saved to USB Memory, connect the USB memory device to the Ext Memory port. Press the [Function] (Exit) button so the indicator is lit. Press the [Song] (Select -) button or [ the FILE screen. - Page 48 Chapter 1. Playing Back Songs Press the [ ] (Value -) button or [ “Saved Song to Delete.” Value Deletes the songs in the “Favorites.” Favorites Ext Memory Deletes the songs in the USB memory. Press the [Song] (Select -) button or [ “song number”...
-
Page 49: Chapter 2. Using The Rg-7 With An External Display Or Television
You cannot simultaneously use both an external display and a television with the RG-7. Moreover, neither the external display nor the television will be able to display properly if both are connected at the same time. -
Page 50: Turning The Power Off
Chapter 2. Using the RG-7 with an External Display or Television Switch on the RG-7. Switch on the connected display. Turning the Power Off After use, turn off the power using the following procedure. Turn the volume all the way down on the RG-7. -
Page 51: Connecting A Television
Turn off the power to the RG-7 and the television to be connected. Use a video cable (sold separately) to connect the RG-7’s Video Out jack with the television’s video input jack. -
Page 52: Selecting What Is To Be Displayed On The External Display Or Television
Chapter 2. Using the RG-7 with an External Display or Television Selecting What is To Be Displayed on the External Display or Television Here’s how you can specify what it is that you want to have displayed on the external display or television connected to the RG-7. -
Page 53: Displaying Favorite Images On An External Display Or Television (Slide Show)
Displaying Favorite Images on an External Display or Television (Slide Show) With the RG-7, you can take desired image data saved in USB memory and display it on a connected external display or television set. First, you will need to have saved the image data and connected the USB memory to the Ext Memory port. -
Page 54: Changing The Background For The Lyrics Screen
Running Slide Shows Through a Connected External Display or Television Make sure the power to the RG-7 is turned off, then connect the external display or television (p. 47, p. 49). Turn on the power to the RG-7 and the external display (or television). -
Page 55: Chapter 3. Performance
Chapter 3. Performance Performing with a Variety of Sounds The RG-7 contains 20 different internal tones. The tones are organized into five tone groups, which are assigned to the Tone buttons. fig.01- Selecting a Tone Group Press any Tone button. -
Page 56: Changing The Volume Balance Of The Layered Tones (Layer Balance)
Chapter 3. Performance ■ Changing the Volume Balance of the Layered Tones (Layer Balance) Some tones enable you to perform with two tones layered together. These are called “Layer tones.” When you select a Layer tone, you can also change the balance in the volume of the two Layer tones. -
Page 57: Making Fine Adjustments To The Piano Sound
] (Select +) button to display ] (Select +) button to get the ] (Value +) button to change the Settings Chapter 3. Performance You can save this setting in the RG-7’s memory using the Memory Backup function (p. 72). -
Page 58: Changing The Timing Of Sounds According To The Force Used To Press The Keys (Hammer Response)
Press the [Function] (Exit) button so the indicator goes out. ] (Select +) button to display ] (Select +) button to get the ] (Value +) button to change the value. Description You can save this setting in the RG-7’s memory using the Memory Backup function (p. 72). -
Page 59: Playing Sounds When The Keys Are Released (Key Off Resonance)
This setting is enabled only with the piano tones (Superior Grand, Natural Grand) and harpsichord tones (Harpsichord, Coupled Harpsichord). You cannot set this for other tones. You can save this setting in the RG-7’s memory using the Memory Backup function (p. 72). -
Page 60: Producing The Resonance Of The Strings When The Keys Are Played (String Resonance)
] (Value +) button to change the value. Description NOTE This setting is enabled only with the piano tones. You cannot set this for other tones. You can save this setting in the RG-7’s memory using the Memory Backup function (p. 72). -
Page 61: Producing The Resonance Of The Strings When The Keys Are Played (Damper Resonance)
On an acoustic piano, depressing the damper pedal makes the notes you play resonate with other strings, adding rich reverberations and fatness to the sound. The damper pedal on the RG-7 recreates this resonance (Damper Resonance) when depressed. Press the [Function] (Exit) button, getting its indicator to light. -
Page 62: Adjusting The Sound To Achieve The Preferred Tone Quality (Equalizer)
■ Adjusting the Sound to Achieve the Preferred Tone Quality (Equalizer) The RG-7 features a built-in, three-band digital equalizer. An equalizer boosts or cuts specific sound pitches (frequency ranges) to adjust the sound balance for the overall performance. For example, you can boost the highs to get a crisper sound, or boost the low end for a more powerful sound. -
Page 63: Changing The Pitch Of The Keyboard Sound (Transpose)
Changing the Pitch of the Keyboard Sound (Transpose) By using the “Transpose function,” you can transpose your performance without changing the notes you play. For example, even if the song is in a difficult key with numerous sharps ( ) or flats ( to play. -
Page 64: Tuning To Other Instruments' Pitches (Master Tuning)
Value: 415.3 Hz–440.0 Hz–466.2 Hz This is set to “440.0” when the power to the RG-7 is switched on. Press the [Function] (Exit) button so the indicator goes out. ] (Value +) buttons simultaneously ] (Select +) button to display... -
Page 65: Setting The Tuning Curve (Stretch Tuning)
This tuning curve expands the bass and treble ends somewhat. It is suitable for performances such as piano solos. This is set to “2” when the power to the RG-7 is switched on. Press the [Function] (Exit) button so the indicator goes out. Chapter 3. Performance... -
Page 66: Changing The Tuning
] (Select +) button to display ] (Select +) button to get the ] (Value +) button to select the Qualities You can save this setting in the RG-7’s memory using the Memory Backup function (p. 72). -
Page 67: Setting The Tonic
Tune the RG-7 to the fundamental pitch of the other instruments. You can save this setting in the RG-7’s memory using the Memory Backup function (p. -
Page 68: Playing Different Tones With The Left And Right Hands (Split Performance)
Chapter 3. Performance Playing Different Tones with the Left and Right Hands (Split Performance) Dividing the keyboard into right-hand and left-hand areas, then playing different sounds in each is called “Split performance.” The boundary key is called the “split point.” The split point key is included in the left-hand keyboard area. -
Page 69: Changing The Keyboard's Split Point
You can set the split point within a range of B1 to B6. This is set to “F 3” when the power to the RG-7 is switched on. Press the [Function] (Exit) button so the indicator goes out. ] (Select +) button to display... -
Page 70: Adding Reverberation To The Sound (Reverb)
Adding Reverberation to the Sound (Reverb) Apply a reverb effect to the notes you play with the RG-7. Reverb makes it sound as if you are playing in a concert hall. Press the [Function] (Exit) button so the indicator is lit. -
Page 71: Assigning Functions To Pedals
Assigning Functions to Pedals You can assign a variety of functions to the left and center pedals. You can call up the assigned functions just by pressing the corresponding pedal. Press the [Function] (Exit) button so the indicator is lit. Press the [Song] (Select -) button or [ the PEDAL screen. - Page 72 Chapter 3. Performance Value If you have a Layer tone (p. 54) selected, the original tone is played whenever the pedal is not being pressed as you perform. When you perform while pressing the pedal, an layer tone is played together with the original tone. The volume of the layer tone is adjusted according to how much you press the pedal.
-
Page 73: Changing The Volume Balance Of The Accompaniment And The Keyboard
Changing the Volume Balance of the Accompaniment and the Keyboard You can also change the balance in the volume of songs or accompaniment and the volume of the keyboard as you play. Press the [Function] (Exit) button so the indicator is lit. Press the [Song] (Select -) button or [ the BALANCE screen. -
Page 74: Remembering The Settings Even When The Power Is Turned Off (Memory Backup)
For more on the settings stored using Memory Backup, refer to “Parameters Stored in Memory Backup” (p. 109). NOTE Never turn off the power while “Executing...” is displayed in the screen. Doing so may corrupt the RG-7’s memory and render it unusable. -
Page 75: Restoring The Factory Settings (Factory Reset)
7’s User memory to the factory condition, refer to “Initializing the User Memory or USB Memory” (p. 92). NOTE Never turn off the power while “Executing...” is displayed in the screen. Doing so may corrupt the RG-7’s memory and render it unusable. -
Page 76: Chapter 4. Recording The Performance
You can store your recorded performances to the “Favorites” (p. 25). If not first saved to the “Favorites,” recorded performances are erased when the RG-7’s power is turned off. If you want to retain such performances, be sure to save them to the “Favorites.”... -
Page 77: Stopping Recording
If it is OK to erase the performance, press the [Moving Key] (Enter) button. If you do not want to erase the performance, press the [Function] (Exit) button. Chapter 4. Recording the Performance ] button, and playback will stop. You can save recordings or your performances to the RG-7 itself (p. 76). -
Page 78: Saving Recorded Performances
Chapter 4. Recording the Performance Saving Recorded Performances If not first saved to the “Favorites” in the RG-7’s memory or to USB memory, recorded performances are erased when the RG-7’s power is turned off. If you want to retain such performances, be sure to save them to the “Favorites” or to USB memory. -
Page 79: Deleting Performances Saved To The "Favorites" Or Usb Memory
Press the [ ] (Value -) button or [ “save-destination number.” When a performance has already been saved to a number, the name of the performance is indicated. When a number has no performance assigned to it, this is indicated in the display in the following form: “1: (Empty).”... -
Page 80: Chapter 5. User Program Registration
31 32 33 34 35 36 36 User Programs (1 User Program Set) Save Load RG-7 User Memory 1 2 3 4 5 6 1 2 3 4 5 6 1 2 3 4 5 6 Save 1 2 3 4 5 6... -
Page 81: Saving Performance Settings (User Program)
Saving Performance Settings (User Program) You can register up to 36 User Programs to the RG-7. Set the Tone, and other data until the settings are the way you want them. Press the [Function] (Exit) button, getting its indicator to light. -
Page 82: Calling Up Saved User Programs
Chapter 5. User Program Registration Calling Up Saved User Programs You can easily call up User Programs. Press the [Function] (Exit) button so the indicator goes out. Hold down the [Function] (Exit) button and press the [ button or [ ] (Value +) button to select the User Program you want to call up. -
Page 83: Saving The User Program Sets
Saving the User Program Sets The 36 separate configurations of User Programs registered in the RG-7 can be saved as sets in User Memory (p. 25) or to USB memory (sold separately). When saving the settings to USB memory, connect the USB memory to the Ext Memory port (p. - Page 84 Chapter 5. User Program Registration Press the [Song] (Select -) button or [ “User Program save-destination number” is flashing. fig. Press the [ ] (Value -) button or [ “User Program save-destination number.” Value: UPG Set 01-UPG Set 99 To return to the original screen without saving the User Program, press the [Function] (Exit) button.
-
Page 85: Loading Saved User Program Sets
Loading Saved User Program Sets You can load sets of User Programs saved in User Memory (p. 25) or to USB memory (sold separately) individually to the RG-7. When loading User Programs from USB memory, connect the USB memory to the Ext Memory port (p. - Page 86 To return to the original screen without loading the User Program, press the [Function] (Exit) button. Press the [Function] (Exit) button so the indicator goes out. The selected User Program is loaded to the RG-7. ] (Value +) button to select the Description...
-
Page 87: Deleting Saved User Program Sets
Deleting Saved User Program Sets You can delete individual User Program sets saved to USB memory (sold separately) or in user memory (p. 25). When deleting User Programs from USB memory, connect the USB memory to the Ext Memory port (p. 22). Press the [Function] (Exit) button, getting its indicator to light. - Page 88 Chapter 5. User Program Registration Press the [ ] (Value -) button or [ “save-destination of the User Program to be deleted.” Display Deletes the User Programs saved in the User Memory. User Memory Ext Memory Deletes the User Programs saved in USB Memory. Press the [Song] (Select -) button or [ number of the User Program to be deleted.”...
-
Page 89: Using The Pedal To Switch User Programs
Using the Pedal to Switch User Programs You can use the Pedal as a dedicated switch for selecting User Programs in order. The User Programs are switched each time the pedal is pressed. Each press of the pedal takes you to the next higher numbered User Program until you reach number 36, whereby pressing the pedal again cycles you back to number 1. -
Page 90: Chapter 6. Changing Various Settings
Changing the Moving Key Settings ■ Stopping the Keyboard Movement Although you can have the keys of the RG-7’s keyboard move in correspondence with songs as they are played back, you can also temporarily stop the movement of the keyboard. -
Page 91: Changing The Part That Makes The Keys Move
Changing the Part That Makes the Keys Move With the RG-7, you can set the part to which the keyboard’s movement is to be linked when the keyboard moves automatically along with a song. SMF music files and other such songs are composed of 16 parts (channels), with various performances recorded to the different parts. -
Page 92: Changing The Functions Of The Remote Control's Buttons
You can change the functions assigned to the remote control’s buttons. → You can use the Memory Backup function to store these settings to the RG-7 (p. 72). Press the [Function] (Exit) button, getting its indicator to light. Press the [Song] (Select -) button or [ button to display the REMOTE screen. -
Page 93: Changing The Cd Settings
] (Select +) out. ■ Setting the Type of CD To Be Played Back The RG-7 may be unable to correctly recognize the type of CD being used. In such instances, you can specify the type of CD manually. ] (Select +) Press the [Function] (Exit) button, getting its indicator to light. -
Page 94: Initializing The User Memory Or Usb Memory
You can completely erase the content of the User Memory or USB memory and restore the original default factory settings (initializing). The RG-7 contains an internal memory area to which you can save recorded performances and other data. This area is called the “User Memory.”... -
Page 95: Playing The Automatic Demos
Song Select screen and Tone screen. Playing the Automatic Demos You can set the RG-7 so that it automatically starts a demo performance when you turn it on. You also can have a slide show of your favorite images play simultaneously in the connected external display or television. -
Page 96: Changing The Notation Display Settings
The muted part is indicated by a square brackets ([ ]) next to the part number. Performances recorded on the RG-7 are saved to Part 1. In Split performances, however, the right-hand performance is recorded to Part “4,” while the left hand is recorded to Part “3.”... -
Page 97: Setting The Part To Which Harmonies Are Added (Harmony Part)
Menu Value Description AUTO Display is switched automatically. The left-hand part appears in the G Clef L (treble) clef staff. The left-hand part appears in the F (bass) clef staff. AUTO Display is switched automatically. The right-hand part appears in the Clef R G (treble) clef staff. -
Page 98: Changing The Infrared Transmission Function Settings
Changing the Infrared Transmission Function Settings Some digital devices equipped with an IrDA (infrared) port are able to transfer song data in SMF format to the RG-7. For more detailed information, refer to the owner’s manual for the digital device. -
Page 99: Chapter 7. Connecting External Devices
RG-7. If the output of the connected device is monaural, you must use the L (Mono) jack. * You cannot use the RG-7 to adjust the volume of the connected sound generating device. About the Output jack This instrument is equipped with balanced (XLR) type jacks. -
Page 100: Turning Off The Power
Turn on the RG-7. Adjust the volume level on the RG-7 and the connected device. * You cannot use the RG-7 to adjust the volume of the connected sound generating device. Turning off the power Set the volume of the RG-7 and of the connected devices to the minimum position. -
Page 101: Setup Examples With Aux Output Set To "Surround
The RG-7 is equipped with MIDI connectors to let it exchange performance data with external devices. These connectors can be used to connect the RG-7 to an external device for even greater versatility. * A separate publication titled “MIDI Implementation” is also available. -
Page 102: Making The Connections
Roland MT Series MIDI Jack Panel of the RG-7 * When the RG-7 is connected to a MIDI sequencer, set it to Local OFF. Refer to “Disconnecting the Internal Sound Generator and Keyboard (Local Control)” (p. 101). Connecting with a MIDI Sound Module... -
Page 103: Disconnecting The Internal Sound Generator And Keyboard (Local Control)
Sound Generator and Keyboard (Local Control) When connecting a MIDI sequencer, set Local Control to “OFF.” The setting is at “Local Control ON” when the RG-7 is powered up. As illustrated, information describing what has been played on the keyboard is passed to the sound module over two different routes, (1) and (2). -
Page 104: Sending Recorded Performance Data To A Midi Device (Composer Midi Out)
When you turn on the power, this is set to “Off” (data is not ] (Select +) sent). If you want to transmit a performance recorded on the RG-7 to an external MIDI device or computer, turn this setting “On.” If this is “Off,” the data will not be transmitted. -
Page 105: Connecting To The Computer
* Turn on the power to the RG-7 before starting up MIDI applications on the computer. Do not turn the RG-7 on or off while any MIDI application is running. * If not using USB, disconnect the USB cable from the RG-7. -
Page 106: Troubleshooting
Case Cause/Remedy No sound is heard Is the volume level of the RG-7 (p. 20) or connected device turned all the way down? Are headphones plugged in? (p. 21) Has a plug remained connected to the... - Page 107 (p. 71) Can’t record/Can’t play back Any performance that has been recorded is deleted when the power to the RG-7 is turned off or a song is The recorded selected. A performance cannot be performance has restored once it’s been deleted. Be sure...
-
Page 108: Error Messages
Prepare image data that can be used with the RG-7 (p. 51). Error 30: The internal memory capacity of the RG-7 is full. The RG-7 cannot deal with the excessive MIDI data sent from the external MIDI device. Error 40: Reduce the amount of MIDI data sent to the RG-7. -
Page 109: Tone List
Tone List ■ Piano 1 Superior Grand Superior Grand + Str Superior Grand + Pad Piano + FM E.Piano ■ Piano 2 Natural Grand Natural Grand + Str Natural Grand + Pad Piano + Bell ■ Harpsichord Harpsichord Coupled Harpsichord Harpsichord + Choir Harpsichord + Str ■... -
Page 110: Internal Song List
Internal Song List Jazz Trio Grande Scrambled Egg Blue Sky Rag One Down And Easy Bop On The Rock Fly Free Late Night Chopin Wedding Song Yesterday’s Dream Sun Daze Keepers Tale Kismet’s Salsa Roll Over Ludwig A Prelude To ... From Matthew’s Passion Hungarian Rag Paganini Boogie... -
Page 111: Parameters Stored To Internal Memory
Parameters Stored to Internal Memory ■ Parameters Stored in Memory Backup Screen Display Touch KEY TOUCH Hammer KeyOff RESONANCE String Damper Master EQUALIZER (Master Tune setting) Stretch TUNE (Tuning Method) EFFECT Reverb Receive Transpose REMOTE VGA, NTSC, PAL EXT DISPLAY Slide Interval Level AUX INPUT... -
Page 112: Music Files That The Rg-7 Can Use
Performance data is transmitted to the RG-7 from music files saved in USB memory and played back without change as songs. This is different than a audio CD, since the music file does not contain a recording of the sound itself. -
Page 113: Midi Implementation Chart
MIDI Implementation Chart DIGITAL PIANO Model RG-7 Function... Basic Default Channel Changed Default Mode Messages Altered Note True Voice Number : Note ON Velocity Note OFF After Key’s Touch Ch’s Pitch Bend 0, 32 6, 38 Control Change 98, 99... -
Page 114: Main Specifications
Speakers Display External Display Control Pedal Other Function RG-7 88 keys (Progressive Hammer Action Keyboard with Escapement) Touch: 100 levels Hammer Response: Light, Medium, Heavy, Off Whole, Layer (as layer tones. volume balance adjustable), Split (split point adjustable) 128 voices... - Page 115 57-1/2 (W) x 55-1/8 (D) x 39-13/16 (H) inches 225 kg / 497 lbs Owner’s Manual, USB Installation Guide, Power Cord, CD (Music Disc with Vocals), CD-ROM (Roland Digital Piano USB Driver), Maintenance Kit, Key Cover, Remote Control, Dry-cell Batteries USB Memory...
-
Page 116: Index
Index ] (Select +) button ... 14 ] (Value +) button ... 14 ] (Value -) button ... 14 AC Inlet ... 15, 19 Access Indicator ... 16 Audio Equipment ... 97 Automatic Demos ... 93 Aux Input Jacks ... 15, 36 Aux Output Jacks ... - Page 117 Jack Panel ... 15 Karaoke Feature ... 37 Key Off Resonance ... 57 Key Touch ... 55 Layer Balance ... 54 Layer Tones ... 54 LCD Contrast knob ... 15, 23 Lid ... 18 Lid Lock ... 18 Loading Saved User Program Sets ... 83 Local Control ...
- Page 118 Index MIC ECHO screen ... 39 MIDI screen ... 92, 100–103 MISC Harmony Part screen ... 95 MISC Moving Key Part screen ... 89 NOTATION screen ... 94 PEDAL screen ... 69 PLAY screen ... 27, 93 RECORD screen ... 74 REMOTE screen ...
- Page 119 MEMO...
- Page 120 MEMO...
- Page 121 Information When you need repair service, call your nearest Roland Service Center or authorized Roland distributor in your country as shown below. AFRICA PHILIPPINES G.A. Yupangco & Co. Inc. 339 Gil J. Puyat Avenue EGYPT Makati, Metro Manila 1200, Al Fanny Trading Office...
-
Page 122: Federal Communications Commission Radio Frequency Interference Statement
This product complies with the requirements of European Directives EMC 89/336/EEC and LVD 73/23/EEC. FEDERAL COMMUNICATIONS COMMISSION RADIO FREQUENCY INTERFERENCE STATEMENT This equipment has been tested and found to comply with the limits for a Class B digital device, pursuant to Part 15 of the FCC Rules. - Page 124 03896145 08-01-4N...
Need help?
Do you have a question about the RG-7 and is the answer not in the manual?
Questions and answers