Table of Contents
Advertisement
Owner's Manual
Thank you, and congratulations on your choice of the BOSS DR-670 Dr. Rhythm.
Before using this unit, carefully read the sections entitled:
• USING THE UNIT SAFELY (page 2–4)
• IMPORTANT NOTES (page 10–11)
These sections provide important information concerning the proper operation of the unit.
Additionally, in order to feel assured that you have gained a good grasp of every feature provided by
your new unit, Owner's manual should be read in its entirety. The manual should be saved and kept
on hand as a convenient reference.
■ Printing Conventions in This Manual
• Text or numerals enclosed in square brackets [ ] indicate bottons.
[START]
START button
[REC]
REC button
• Reference such as (p. **) indicate pages in this manual to which you can refer.
Copyright © 2001 BOSS CORPORATION
All rights reserved. No part of this publication may be reproduced in any form without the written permission of BOSS
CORPORATION.
Advertisement
Table of Contents

Related Manuals for Boss Dr. Rhythm DR-670


Summary of Contents for Boss Dr. Rhythm DR-670
- Page 1 Owner’s Manual Thank you, and congratulations on your choice of the BOSS DR-670 Dr. Rhythm. Before using this unit, carefully read the sections entitled: • USING THE UNIT SAFELY (page 2–4) • IMPORTANT NOTES (page 10–11) These sections provide important information concerning the proper operation of the unit.
- Page 2 Refer all servicing to your retailer, the nearest Roland Service Center, or an autho- rized Roland distributor, as listed on the "Information" page. • Never use or store the unit in places that are: •...
- Page 3 • Before using the unit in a foreign country, consult with your retailer, the nearest Roland Service Center, or an authorized Roland distributor, as listed on the “Information” page. • Batteries must never be recharged, heated, taken apart, or thrown into fire or water.
- Page 4 101b • The unit and the AC adaptor should be located so their location or position does not interfere with their proper ventilation. 102d • Always grasp only the plug or the body of the AC adaptor when plugging into, or unplugging from, an outlet or this unit.
-
Page 5: Main Features
Main Features Plays Bass Parts The DR-670 plays bass parts that are synchronized with the drum parts. This lets you enjoy backing performances with rhythm patterns using various combinations of drum and bass sounds. High-Quality Sound Generator The DR-670 features high-quality internal instrument sounds, including 256 drum part sounds and sixteen bass part sounds. -
Page 6: Table Of Contents
Contents Main Features ... 5 IMPORTANT NOTES... 10 Panel Descriptions ... 12 Front Panel... 12 Rear Panel ... 14 Quick Start ... 16 Install batteries ... 16 Making Connections... 17 Turning On the Power ... 18 Turning Off the Power ... 18 Reset to Default Factory Settings (Factory Reset) ... - Page 7 Playing Patterns with the DPP Function... 49 Adjusting the Tempo... 50 Adjusting the Tempo with the Tap Tempo Function... 50 Inserting Fill-Ins ... 50 Adding Fill-Ins While the Pattern is Playing... 50 Playing a Fill Pattern at the Beginning of the Following Pattern ... 51 Starting Performances from the Fill Pattern ...
- Page 8 Returning Transmitted Data to the DR-670 (Bulk Load) ... 90 Using in Combination with the BR-8 ... 90 Synching the DR-670’s Patterns and Songs with the BR-8 ... 90 Playing the BR-8’s Rhythm Guide Sound as a DR-670 Drum Sound ... 91...
- Page 9 Contents Error Message List ... 92 Troubleshooting ... 94 Operation List ... 95 Parameter List... 97 Instrument/Bass Tone List ... 99 Preset Drum Kit List ... 102 Preset Pattern List... 110 MIDI Implementation Chart ... 112 Specifications ... 114 Index ... 115...
-
Page 10: Important Notes
IMPORTANT NOTES 291a In addition to the items listed under “USING THE UNIT SAFELY” on page 2–4, please read and observe the following: Power Supply: Use of Batteries • Do not use this unit on the same power circuit with any device that will generate line noise (such as an electric motor or variable lighting system). -
Page 11: Memory Backup
• Unfortunately, it may be impossible to restore the contents of data that was stored in the unit’s memory once it has been lost. Roland Corporation assumes no liability concerning such loss of data. • Use a reasonable amount of care when using the unit’s buttons, sliders, or other controls;... -
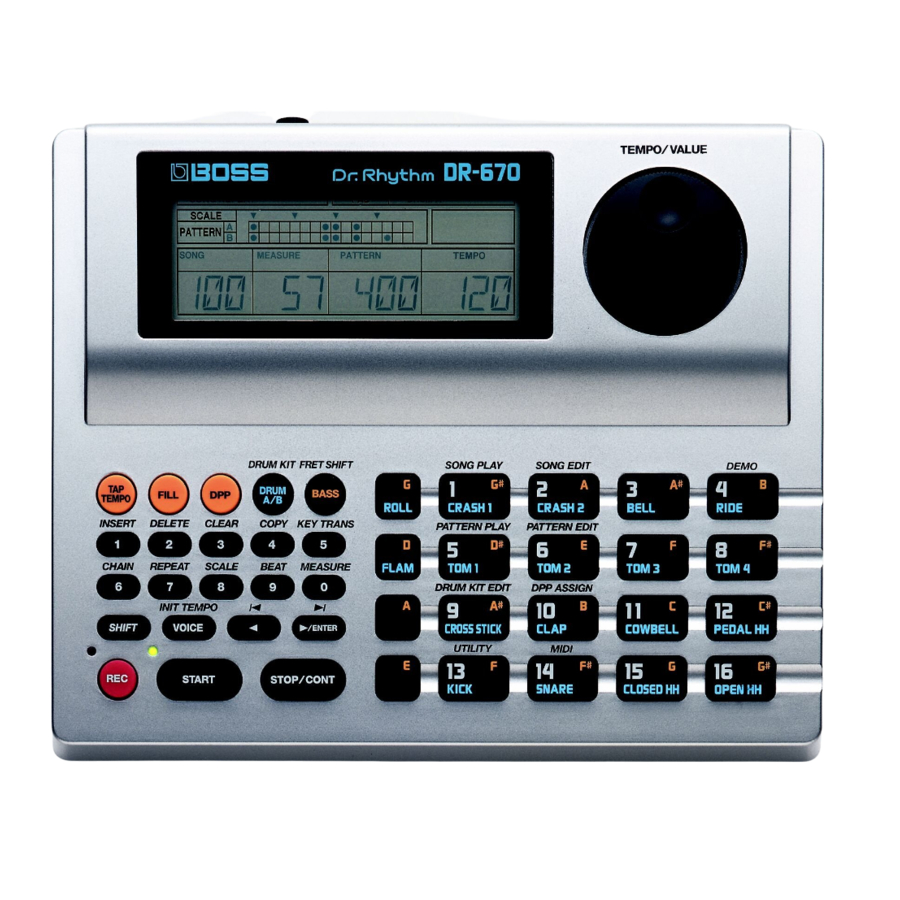
Page 12: Panel Descriptions
Panel Descriptions Front Panel fig.00-001 Display TEMPO/VALUE Dial Selects patterns and songs. You can set tempos by rotating the dial while holding down the TAP TEMPO button. This is also used during editing to input settings values. TAP TEMPO Button This is tapped in time to input the tempo. - Page 13 BASS Button Pressing this button allows you to play bass sounds with the key pad. By holding down SHIFT while pressing this button you can change the pitch of the bass sound with the key pad. Numeric Keys Used for entering song numbers and pattern numbers. By holding down SHIFT while pressing the numeric keys, you can access a variety of editing functions and make changes in parameter settings.
-
Page 14: Rear Panel
Panel Descriptions Rear Panel fig.00-002 MIDI Connector IN/OUT External MIDI devices can be connected to these connectors. FOOT SW (Switch) Jack By connecting a foot switch, you can obtain pedal control over the start and stop of performances, the addition of fills, or other actions. OUTPUT Jack R/L (MONO) Provides output of the audio signals. - Page 15 Memo ...
-
Page 16: Quick Start
Quick Start Install batteries Make sure that the power is turned off. Remove the battery cover on the unit’s underside. * When turning the unit upside-down, get a bunch of newspapers or magazines, and place them under the four corners or at both ends to prevent damage to the buttons and controls. Also, you should try to orient the unit so no buttons or controls get damaged. -
Page 17: Making Connections
Connect the amp and audio gear as shown in the diagram. If necessary, connect headphones and foot switches. In order to take full advantage of the DR-670’s sound we recommend that you play it in stereo. When using the system in mono, connect to the OUTPUT L (MONO) jack. -
Page 18: Turning On The Power
Before you turn the power on, make sure of the following points. • Are external devices connected correctly? • Is the volume level of the DR-670 or connected amp turned all the way down? Turn on the POWER switch located on the rear panel of the DR-670. -
Page 19: Reset To Default Factory Settings (Factory Reset)
Reset to Default Factory Settings (Factory Reset) If changes are made to the settings after purchase of the DR-670, you may be unable to operate the unit as described in the Quick Start manual. If this occurs, then follow the instructions below to restore the unit to the original factory settings (Factory Reset), then proceed to read Quick Start. -
Page 20: Listen To The Demo Song
Quick Start Listen to the Demo Song The DR-670 features internal demo songs that exhibit the special capabilities of the instrument. Here’s how to listen to the demo song. fig.00-09 Hold down [SHIFT] and press Key Pad 4 (DEMO). fig.00-10 Press [START] to begin playback. -
Page 21: Using The Key Pads To Play Sounds
Using the Key Pads to Play Sounds Let’s try playing the DR-670’s internal rhythm instrument sounds by tapping the key pads. fig.00-11 Hold down [SHIFT] and press Key Pad 5 (PATTERN PLAY). fig.00-12 Tapping the key pads now plays the instruments assigned to each of the pads. -
Page 22: Specialized Performance Techniques (Roll)
Quick Start ■ Specialized Performance Techniques (Roll) A roll is performed by playing the same sound consecutively at the same interval. fig.00-13 While pressing [ROLL], hold down a key pad. ◆ You can change the roll interval. Refer to “Changing the Roll Settings” (p. 77). -
Page 23: Adding Character To Performances (Flam)
■ Adding Character to Performances (Flam) What is a Flam? A flam is produced by striking the snare or other drum simultaneously with the two sticks held in the hands, but with a slight difference in force used in playing each stick. fig.00-14 While pressing [FLAM], press a key pad. -
Page 24: Playing Different Sounds (Switching Pad Drum Banks)
Quick Start ■ Playing Different Sounds (Switching Pad Drum Banks) You can have different instruments sound, even when the same key pad is tapped, by switching the pad’s drum bank. Pad drum banks are collections of drum instrument sounds that are assigned as a single group to the sixteen key pads. -
Page 25: Playing Bass Sounds
■ Playing Bass Sounds fig.00-17 You can play bass sounds with the key pads by pressing [BASS]. fig.00-18 When a key pad is pressed, a bass sound plays at the pitch predetermined for that key pad. The bass sound stops playing when the key pad is released. Pitches are assigned to the key pads in such a way as to simulate the frets of a bass guitar. -
Page 26: Performing Rhythm Patterns
Quick Start Performing Rhythm Patterns The DR-670 comes with 200 different Preset Patterns and 200 User Patterns for you to use. Use the following procedure to perform these patterns and listen to the sounds. Pattern refers to a one- to two-measure rhythm performance pattern. - Page 27 Hold down [SHIFT] and press Key Pad 5 (PATTERN PLAY). fig.00-18b Rotate the TEMPO/VALUE dial to select the pattern number. fig.00-18c Press [START] to begin playback. The Tempo indicator flashes once each beat. Turning the TEMPO/VALUE dial while a performance is in progress sets up the pattern number for the next pattern to be played.
-
Page 28: Selecting And Performing Patterns (Dpp Function)
Quick Start ■ Selecting and Performing Patterns (DPP Function) Ordinarily, tapping the key pads plays the instruments assigned to those pads, but with DPP (Direct Pattern Play), you can instead trigger the playback of the patterns that are assigned to the key pads. - Page 29 When you tap the key pad, performance of the assigned pattern begins. The Tempo indicator flashes once each beat. The pattern number for the pattern currently being played appears in the display. fig.00-22a When you tap a different key pad while the pattern is still being played, the performance of the current pattern stops, and the performance of the pattern assigned to the pad that was tapped then begins.
-
Page 30: Adjusting The Tempo
Quick Start ■ Adjusting the Tempo Try changing the tempo used for performing the pattern. fig.00-23 Hold down [TAP TEMPO] and rotate the TEMPO/VALUE dial to change the tempo. fig.00-24 The tempo can be changed with in the range from 20 to 260 beats per minute. -
Page 31: Changing The Tempo Using The Tap Tempo Function
■ Changing the tempo using the Tap Tempo function You can determine the tempo by the timing with which you press [TAP TEMPO]. fig.00-25 Press [TAP TEMPO] at least three or four times in a row at the desired timing; the tempo will be set to the same timing you’ve just used for your tapping. -
Page 32: Inserting Fill-Ins
Quick Start ■ Inserting Fill-Ins With the DR-670, you can add fill-ins to a pattern being played at whatever timing you want. fig.00-26... - Page 33 Hold down [SHIFT] and press Key Pad 5 (PATTERN PLAY). fig.00-28 Press [START] to start the performance of the pattern. Press [FILL] at the points where you want a fill-in added. The fill-in pattern is played instantly after [FILL] is pressed. fig.00-29 When the fill-in pattern is played to the end, the performance reverts to the original pattern.
-
Page 34: Using The Foot Switches
Quick Start ■ Using the Foot Switches You can use up to two foot switches (such as the optional FS-5U) to start and stop performance and insert fill-ins. * When only one foot switch is connected, the foot switch only starts and stops performances. * A special PCS-31 cable (optional) is required when connecting two foot switches. - Page 35 Hold down [SHIFT] and press Key Pad 5 (PATTERN PLAY). When the foot switch connected with a plug that has a white stripe is pressed while the performance is stopped, the performance then starts. fig.00-34 Pressing the foot switch connected with a plug that has a red stripe while the performance is in progress inserts a fill-in.
-
Page 36: Playing A Pattern Using A Different Sound (Switching Drum Kits)
A drum kit is a collection of 32 drum instruments and one bass tone that is selected as a single set. The DR-670 features 64 Preset Drum Kits along with 64 additional User Drum Kits whose settings you can change. - Page 37 ◆ When you want to make changes to the drum kit settings, refer to “Chapter 8 Creating Your Own Favorite Drum Kits” (p. 79). You Can Create Songs With the DR-670, you can compose and perform songs by arranging sequences of rhythm pattern performances. For more detailed information, refer to “Chapter 1 Before Composing Rhythm Patterns and Songs”...
-
Page 38: Chapter 1 Before Composing Rhythm Patterns And Songs
Chapter 1 Before Composing Rhythm Patterns and Songs This section provides a summary description of the DR-670. How the Work Progresses The process of creating one song’s worth of rhythm patterns can be divided broadly into two steps: creating the patterns, then composing the song. - Page 39 Chapter 1 Before Composing Rhythm Patterns and Songs Composing the Song Compose (record) the song by stringing together a sequence of performances using your User Patterns and the 200 Preset Patterns. There are two methods used for recording songs as well.
-
Page 40: About Operational Modes
To go into Pattern Play mode, hold down [SHIFT] and press Key Pad 5 (PATTERN PLAY) while the performance is stopped. The DR-670 will initially be in the Pattern Play mode each time it is powered up. fig.01-03 Pattern Edit mode (Refer to Chapter 3 Recording and Editing Patterns;... -
Page 41: Utility Mode
MIDI mode Used for making settings to synchronize performances with the BR-8 or other external MIDI devices. Also used for transmission and reception of the DR-670’s internal data with respect to an external MIDI sequencer (Bulk function). To go into MIDI mode, hold down [SHIFT] and press Key Pad 14 (MIDI) while the performance is stopped. -
Page 42: Drum Kits And Pad Performances
User Drum Kits, thus enabling you to handle such sounds as new instruments distinct from the internal instruments. ● On the DR-670 you can use only one drum kit when creating any one pattern. You cannot use multiple drum kits simultaneously to make one pattern. -
Page 43: Pad Performances
CY 1 CY 2 CY 9 PC12 Bass With the DR-670, you can elect to have either Drum Bank A or B, or bass sounds played when the key pads are tapped. fig.01-14 Drum Kit Instrument of Pad number A1–A16 Instrument of Pad number B1–B16... -
Page 44: How To View The Scale/Pattern Display
The following shows the relationship between the pattern and what is indicated. fig.01-20 The DR-670 uses patterns that are composed of either one or two measures. When a two- measure pattern is selected, it is indicated as shown below. fig.01-21 ■... -
Page 45: Scale Display
■ Scale Display The “▼” mark in the scale display indicates the timing of the quarter notes. fig.01-23 When there are too many beats to allow all of the notes from the beginning to the end of the pattern to be displayed at one time, “ being displayed. -
Page 46: Using [Shift]
The text (or symbols) printed above the buttons and key pads on the DR-670’s panel indicate the functions selected when [SHIFT] is held down while they are pressed. -
Page 47: Chapter 2 Playing Patterns (Pattern Play Mode)
Chapter 2 Playing Patterns (Pattern Play Mode) Patterns are played in Pattern Play mode. You can also tap the key pads to play drum sounds and bass sounds. ◆ To switch to Pattern Play mode, hold down [SHIFT] while the performance is stopped and press Key Pad 5 (PATTERN PLAY). -
Page 48: Changing The Bass Pitch (Fret Shift)
Chapter 2 Playing Patterns (Pattern Play Mode) ■ Changing the Bass Pitch (Fret Shift) You can shift the entire tuning of the bass sound. 1. Hold down [SHIFT] and press [BASS] (FRET SHIFT). 2. Hold down [SHIFT] and rotate the TEMPO/ VALUE dial to select the number of frets you want to shift by. -
Page 49: Playing Patterns
Playing Patterns You can select from 200 Preset and 200 User patterns to play. Patterns 001–200 are Preset patterns, and Patterns 201–400 are User patterns. * When the unit left the factory, the User patterns were empty of all data. 1. -
Page 50: Adjusting The Tempo
You can adjust the tempo this way within the range from 20 to 260. fig.02-15 Inserting Fill-Ins With the DR-670, you can add fill-in patterns at any point in a pattern while the performance is in progress. Each pattern features a fill-in prepared for use with that pattern. -
Page 51: Playing A Fill Pattern At The Beginning Of The Following Pattern
2. Press [FILL] at the time you want to have the fill pattern inserted. You are moved to the fill pattern the moment [FILL] is pressed. fig.02-21 When the fill pattern plays to the end, you are returned to the basic pattern. fig.02-22 3. -
Page 52: Chapter 3 Recording And Editing Patterns (Pattern Edit Mode)
Chapter 3 Recording and Editing Patterns (Pattern Edit Mode) This section describes the procedures used for recording (Realtime Recording and Step) and editing User patterns. These operations are carried out in Pattern Edit mode. ◆ To switch to Pattern Edit mode, hold down [SHIFT] while the performance is stopped and press Key Pad 6 (PATTERN EDIT). -
Page 53: 1> Select An Unrecorded Pattern
<1> Select an Unrecorded Pattern 1. With the performance stopped, select a User pattern (201–400). Turn the TEMPO/VALUE dial to select the pattern number. * You can also select the pattern by inputting the pattern number with the numeric keys and pressing [ The following appears in the display when an unrecorded pattern (a pattern which... -
Page 54: 3> Select The Measures
Chapter 3 Recording and Editing Patterns (Pattern Edit Mode) <3> Select the Measures This setting determines whether a one-measure or two-measure pattern is recorded. 1. Hold down [SHIFT] and press [0] (MEASURE). * Continue to hold down [SHIFT]. fig.03-06 2. While still holding down [SHIFT], rotate the TEMPO/VALUE dial to select a one- measure or two-measure pattern. -
Page 55: 5> Set The Quantization
<5> Set the Quantization Using Quantize in Realtime Recording corrects any timing discrepancies made while tapping the key pads during recording. Normally, this is set to the smallest note unit to be recorded. To record without the quantization, set this to “OFF.”... - Page 56 Chapter 3 Recording and Editing Patterns (Pattern Edit Mode) Realtime Recording of the Drum Part 1. Hold down [REC] and press [START]. The REC indicator lights, and the metronome begins playing. The metronome sound begins, and the tempo indicator flashes in time with the count. The BEAT display follows the count.
-
Page 57: (6-1B) Do Step Recording
6. Press [STOP] to stop recording. The REC indicator goes out. * Note that pressing [START] during Step Recording (while the REC indicator is lit) switches the DR-670 to Realtime Recording. To Erase Previously Recorded Sounds As You Record a. Press [ the step to be deleted. - Page 58 Chapter 3 Recording and Editing Patterns (Pattern Edit Mode) 3. Press [ step to be recorded. Holding down [SHIFT] and pressing ] lets you jump to the first step. 4. Tap the key pad with the note to be recorded. At this time, the velocity (the force used to tap the key pad) is also recorded.
-
Page 59: Confirm The Recorded Sounds
b. Tap a key pad, and continue holding it down instead of releasing it. c. While continuing to hold down the key pad, press [ ] to specify Step 2-4. fig.03-19 d. Release the key pad. fig.03-20 ■ (6-2) Confirm the Recorded Sounds 1. -
Page 60: Erasing Patterns (Pattern Clear)
Chapter 3 Recording and Editing Patterns (Pattern Edit Mode) Erasing Patterns (Pattern Clear) You can clear unneeded User patterns. * The Preset patterns (1–200) cannot be cleared. 1. With the performance stopped, select the User pattern to be cleared. Turn the TEMPO/VALUE dial to select the pattern number. -
Page 61: Copying Patterns
Copying Patterns This copies User and Preset patterns to other User patterns. * Note that when a pattern is recorded to a copy destination, the data previously occupying the copy destination is discarded. 1. With the performance stopped, select the User pattern you want to copy. -
Page 62: Replacing Drum Kits
Chapter 3 Recording and Editing Patterns (Pattern Edit Mode) Replacing Drum Kits You can substitute a drum kit selected in recording with a different drum kit. * You cannot select different drum kits for the basic pattern and the fill pattern. 1. -
Page 63: Chapter 4 Recording And Editing Songs (Song Edit Mode)
Chapter 4 Recording and Editing Songs (Song Edit Mode) This section describes the procedures used for recording (Realtime/Step) and editing User patterns. These operations are carried out in Song Edit mode. ● You can record up to a maximum of 100 songs. -
Page 64: 1> Select An Unrecorded Song
Chapter 4 Recording and Editing Songs (Song Edit Mode) <1> Select an Unrecorded Song 1. Switch to Song Edit mode. With the performance stopped, press Key Pad 2 (SONG EDIT). * Continue to hold down [SHIFT]. fig.04-02a Holding down 2. Select the song. Hold down [SHIFT] and rotate the TEMPO/ VALUE dial to select the song. -
Page 65: Do Realtime Recording
<3A> Do Realtime Recording Here, select the pattern and then record it as it is being performed. * When recording over a song that has already been recorded, the newly recorded data overwrites the previously recorded data, which is discarded. 1. -
Page 66: Using The Dpp Function In Realtime Recording
Chapter 4 Recording and Editing Songs (Song Edit Mode) ■ Using the DPP Function in Realtime Recording 1. Press [DPP]; “DPP” appears in the display. fig.04-08a 2. With the song stopped, press the key pad to which the first pattern to be recorded is assigned. -
Page 67: Starting Realtime Recording Within A Song
■ Starting Realtime Recording Within a Song You can start Realtime Recording from a point other than the beginning of the song. This is convenient when you want to insert patterns in lengthy songs. 1. With the performance stopped, press [ ] to specify the measure where recording is to begin. -
Page 68: Do Step Recording
1. With the performance stopped, press [REC]. The DR-670 is put in Step Recording mode, and the REC indicator flashes. 2. Select a pattern to record. Rotate the TEMPO/VALUE dial to select the pattern. -
Page 69: Adding Patterns In The Song (Insert)
Adding Patterns In the Song (Insert) This operation inserts a pattern at a point within the song. fig.04-08 Pattern 5 Insert Pattern 1 Pattern 2 Pattern 3 Pattern 4 measure Pattern 1 Pattern 2 Pattern 5 Pattern 3 measure * When the pattern to be inserted is two measures, you cannot insert only one measure. -
Page 70: Removing Unneeded Song (Song Clear)
Chapter 4 Recording and Editing Songs (Song Edit Mode) Removing Unneeded Song (Song Clear) This erases content of the cullently selected Song. 1. Hold down [SHIFT] and press [3] (CLEAR). * Continue to hold down [SHIFT]. fig.04-12 2. If you are sure you want to clear the song, while still holding down [SHIFT], press The song is erased, and when it is finished the display will indicate “DONE.”... -
Page 71: Connecting Multiple Songs Into One Song (Song Chain)
Connecting Multiple Songs Into One Song (Song Chain) You can have a number of songs performed in one connected sequence. This function is called “Song Chain.” Each song is assigned the song number of the song that is to follow it—you can chain up to 100 songs this way. -
Page 72: Chapter 5 Performing Songs (Song Play Mode)
Chapter 5 Performing Songs (Song Play Mode) In Song Play mode, you can play the songs that have been created. ◆ To switch to Song Play mode, hold down [SHIFT] while the performance is stopped and press Key Pad 1 (SONG PLAY). fig.05-01 Holding down Performing Songs... -
Page 73: Starting A Song From A Point Other Than The Beginning
Song Repeat function is on. fig.05-08 3. Release [SHIFT]. * Song Repeat settings are not saved when the power is turned off. The function is always turned off when the DR-670’s power is turned off. Pattern Pattern Pattern... -
Page 74: Performing Multiple Songs In One Sequence (Song Chain)
Chapter 5 Performing Songs (Song Play Mode) Performing Multiple Songs In One Sequence (Song Chain) “SONG CHAIN” appears in the display when the currently selected song is specified in “Song Chain” (p. 71). fig.05-09 ■ Checking the Song Chain Settings You can confirm the Song Chain settings in Song Play mode. -
Page 75: Chapter 6 Assigning Patterns To The Key Pads (Dpp Assign Mode)
Here, patterns are assigned to the key pads (1– 16) for DPP (Direct Pattern Play). 1. With the performance stopped, hold down [SHIFT] and press Key Pad 10 (DPP ASSIGN). The DR-670 switches to DPP Assign mode. fig.06-01 Holding down fig.06-02 Pattern Number Key Pad assigned to pattern 2. -
Page 76: Chapter 7 Customizing Your Setup (Utility Mode)
BASS: The bass part is played, and the drum part is muted * Output Part settings are not saved. The function always reverts to “ALL” when the DR-670’s power is turned off. * The Output Part settings are effective only with respect to the playback of patterns. -
Page 77: Assigning Functions To The Foot Switches
Assigning Functions to the Foot Switches Settings for the functions controlled with the foot switches 1 and 2. fig.07-05 Foot Switch 1 Foot Switch 2 STRT: Used for starting the pattern or song from the beginning and stopping the pattern or song. -
Page 78: Changing The Flam Settings
Chapter 7 Customizing Your Setup (Utility Mode) Changing the Flam Settings By changing the flam interval and flam ratio settings, you can change the way the flam sounds. * Changing the flam settings only changes the way flams are played in patterns that have already been recorded. -
Page 79: Chapter 8 Creating Your Own Favorite Drum Kits (Drum Kit Edit Mode)
Chapter 8 Creating Your Own Favorite Drum Kits (Drum Kit Edit Mode) In Drum Kit Edit mode, you can select drum and bass instruments, change the way they sound, and make other changes to drum kit settings to create up to 64 original User drum kits. ◆... -
Page 80: Editing Procedure
Chapter 8 Creating Your Own Favorite Drum Kits (Drum Kit Edit Mode) ■ Editing Procedure 1. If editing a drum part, press [DRUM A/B] then specify Drum Bank A or B. If editing a bass part, press [BASS] to specify the bass part. -
Page 81: Lengthening And Shortening The Reverberation (Decay)
■ Lengthening and Shortening the Reverberation (Decay) This lengthens and shortens the reverberation of the sound (the decay) for each instrument. Valid Settings: -32– +31 fig.08-08 Positive (+) Values: As the value increases, the decay is lengthened relative to the original decay. -
Page 82: Determining Whether Or Not Sounds Overlap (Assign Type)
Chapter 8 Creating Your Own Favorite Drum Kits (Drum Kit Edit Mode) * The Pan settings of instruments in the “Instrument/Bass Tone List” (p. 99) that are marked with three asterisks (***) are disabled. ■ Determining Whether Or Not Sounds Overlap (Assign Type) This sets the way each instrument sounds (the assign type) when one or more instruments continue to be played. -
Page 83: Editing The Bass Part
Editing the Bass Part ■ Selecting the Tone (Bass Tone) This selects the tone for the bass part (the bass tone). For more on the bass tones you can select, refer to the “Instrument/Bass Tone List” (p. 99). fig.08-20 * You cannot select drum instruments for use in bass parts. -
Page 84: Positioning The Sound (Pan)
Chapter 8 Creating Your Own Favorite Drum Kits (Drum Kit Edit Mode) Decay Time After Note Off (Release) Valid Settings: -7– +7 fig.08-25 Positive (+) Values: The release gets longer than the original as the value increases. 0: Original nuance Negative (-) Values: The release gets shorter than the original as the value increases. -
Page 85: Chapter 9 Connecting And Using External Midi Devices (Midi Mode)
MIDI connectors, each device can send data to, or receive data from any of the others. MIDI Connectors The DR-670 is equipped with a MIDI IN connector and MIDI OUT connector. fig.09-01 MIDI OUT MIDI IN... -
Page 86: About Midi Mode
Chapter 9 Connecting and Using External MIDI Devices (MIDI Mode) About MIDI Mode With the DR-670, you can use MIDI data to do the following. ● Synchronize performances with a digital recorder or MIDI sequencer ● Use an external MIDI device to play the DR-... -
Page 87: Setting Sync Mode
* For more information on the MIDI messages handled by the devices you are connecting, refer to the owner’s manual for each device. ■ Setting Sync Mode Select whether the DR-670 is to be the master or slave in Sync mode. fig.09-06 AUTO: Master and slave are switched automatically. -
Page 88: Using An External Midi Device To Play The Dr-670/ Using The Dr-670 To Play An External Midi Device
Note Number as shown below. fig.09-08b Bank A When you tap one of the DR-670’s key pads, the Note Number for that key pad is transmitted. When a Note Number is received from an external MIDI device, the instrument or bass... -
Page 89: Transmitting The Dr-670'S Data To An External Midi Device
External MIDI Device/ Returning Transmitted Data to the DR-670 Transmitting the DR-670’s data to a MIDI sequencer or another DR-670 is known as “Bulk Dump.” Conversely, returning data saved to a MIDI sequencer back to the DR-670, or receiving data transmitted from another DR-670 is referred to as “Bulk Load.”... -
Page 90: Returning Transmitted Data To The Dr-670 (Bulk Load)
After a few moments, the REC indicator goes out, and the Bulk Load is completed. Using in Combination with the BR-8 The following is an introduction to using the DR-670 in combination with the BR-8. MIDI IN Connecting fig.09-15 Receive device... -
Page 91: Playing The Br-8'S Rhythm Guide Sound As A Dr-670 Drum Sound
Making the DR-670 Settings On the DR-670, select the song (Song Play mode) or pattern (Pattern Play mode) to use. * You can use the DR-670’s MIDI settings with the power left on. If you mistakenly make changes to the Sync mode settings (p. 87), set the DR-670 to “AUTO”... -
Page 92: Error Message List
DR-670, the recorded pattern and song data may be lost if the power is turned off. fig.10-03 ● Data stored in the DR-670 is corrupted; resetting the data is necessary (this message appears when the power is turned on). ❍ Press [ ] to restore the factory settings. - Page 93 MIDI messages) all at once, and try to reduce the amount of data. fig.10-07b ● An unknown error has occurred in the system. ❍ Immediately stop using the unit, and consult your dealer or nearest Roland Service Center. Error Message List...
-
Page 94: Troubleshooting
Troubleshooting If you find the DR-670 is not operating correctly, check the items listed below. If the DR-670 still does not work properly after you check these points, consult your local Roland Service or your dealer. No Sound ❏ Is the volume turned down (p. 18)? ❏... -
Page 95: Operation List
Operation List Operations Common to All Modes Operation [START] [STOP/CONT] [TAP TEMPO] + [TEMPO/VALUE] [REC] [REC] + [START] [TAP TEMPO] [FILL] [DPP] [DRUM A/B] [BASS] [SHIFT] + [DRUM A/B] (DRUM KIT) [SHIFT] + [BASS] (FRET SHIFT) [VOICE] [SHIFT] + [8] (SCALE) [SHIFT] + [ Key Pad [ROLL] + Key Pad... -
Page 96: Pattern Play Mode
Operation List Song Edit Mode Operation [SHIFT] + (Key Pad 2 (SONG EDIT) ➔ [TEMPO/VALUE]) [SHIFT] + (Key Pad 2 (SONG EDIT) ➔ Numeric Keys ➔ [ [SHIFT] + [6] (CHAIN) [SHIFT] + [7] (REPEAT) [SHIFT] + [VOICE] (INIT TEMPO) [SHIFT] + [1] (INSERT) [SHIFT] + [2] (DELETE) [SHIFT] + [3] (CLEAR) -
Page 97: Parameter List
Parameter List Parameters marked with an asterisk (*) are not saved. These are reset each time the DR-670’s power is turned on. Parameter Display System Mode* Pattern Number* Song Beat* Drum Kit Pad* Scale* SCAL Quantize* QNTZ Fred Shift* FRET... - Page 98 Parameter List DPP Assign (Pads 1–16) Pattern Number Utility Output Part* Foot Switch 1 Foot Switch 2 Roll Type Flam Interval Flam Ratio Pad Sensitivity Clock Level Click Beat* Master Tune MIDI Sync Mode* Drum Part MIDI Channel Bass Part MIDI Channel Device ID Bulk Damp Bulk Road...
-
Page 99: Instrument/Bass Tone List
Instrument/Bass Tone List Instrument Display Instrument * KC1 attack kick real dry kick * KC3 dry kick * KC4 dry medium kick * KC5 dry hard kick * KC6 heavy kick * KC7 pillow kick * KC8 vintage kick 1 * KC9 vintage kick 2 * KC10... - Page 100 Instrument/Bass Tone List Display Instrument * SN41 rock snare 2 * SN42 ring maple snare SN43 brush roll snare 1 * SN44 brush roll snare 2 * SN45 brush slap snare 1 * SN46 brush slap snare 2 * SN47 brush slap snare 3 * SN48 brush swish snare...
- Page 101 Display Instrument tambourine sleigh bell castanet triangle open woodblock * PC7 bongo high * PC8 bongo low * PC9 conga high mute * PC10 conga high slap * PC11 conga high open * PC12 conga low open * PC13 timbale high * PC14 timbale low PC15...
-
Page 102: Preset Drum Kit List
Preset Drum Kit List No. 1 No. 2 Standrd Room 1 Pad No. Instrument Instrument CY12 CY12 TM25 TM25 TM25 TM26 STK3 STK1 KC30 SN37 HH10 HH11 PC22 PC22 PC16 PC20 PC20 PC17 PC17 PC25 PC25 PC25 PC25 PC18 PC18 PC19 PC19 PC14... - Page 103 No. 9 No. 10 Exprsn Pad No. Instrument Instrument CY11 CY11 STK3 STK1 KC16 PC22 PC16 PC20 CY11 PC17 PC25 PC25 PC18 PC19 STK1 PC14 PC13 KC12 PC11 PC12 BASS STCK FNG2 No. 11 No. 12 No. 13 Power 2 Loud Studio Instrument...
- Page 104 Preset Drum Kit List No. 17 No. 18 Dance 1 Rock Pad No. Instrument Instrument CY12 CY12 TM21 TM21 TM22 TM22 STK1 STK1 PC43 PC43 PC35 HH14 KC39 KC26 SN54 SN35 HH18 HH10 HH19 HH13 PC22 PC22 PC16 PC16 PC20 PC20 PC17 PC17...
- Page 105 No. 25 No. 26 Brazil India Pad No. Instrument Instrument CY12 CY12 PC30 PC10 PC30 PC11 PC31 PC11 PC32 PC12 STK3 PC16 PC43 KC10 KC35 SN27 PC22 PC22 PC22 PC16 PC20 PC20 PC17 PC25 PC25 PC25 PC25 PC18 PC18 PC19 PC19 PC14 PC14...
- Page 106 Preset Drum Kit List No. 33 No. 34 Boom Jazz 2 Pad No. Instrument Instrument CY17 CY17 CY11 CY11 CY10 TM29 TM17 TM29 TM17 TM29 TM18 TM29 TM18 STK6 STK3 PC43 SN34 HH16 KC50 KC16 SN55 SN34 HH16 HH17 PC22 PC22 PC16 PC16...
- Page 107 No. 41 No. 42 Jazz 3 BigFunk Pad No. Instrument Instrument CY12 CY12 TM21 TM21 TM21 TM22 STK2 STK2 PC33 PC33 KC11 KC12 SN25 HH10 HH11 PC25 PC25 PC25 PC25 PC18 PC18 PC19 PC19 PC14 PC14 PC13 PC13 KC35 SN15 PC11 PC11 PC12...
- Page 108 Preset Drum Kit List No. 49 No. 50 Ring Light Pad No. Instrument Instrument CY11 CY11 TM23 TM19 TM23 TM19 TM24 TM20 TM24 TM20 STK2 STK3 SN33 SN47 KC35 SN42 SN27 HH10 HH11 PC22 PC22 PC16 PC16 PC20 PC20 PC17 PC17 PC25 PC25...
- Page 109 No. 57 No. 58 CtryBas SmbaBas Pad No. Instrument Instrument CY12 CY12 TM21 TM21 TM21 TM22 STK3 STK3 PC33 KC12 SN21 HH10 HH11 PC22 PC16 PC20 PC17 PC14 PC13 PC11 PC12 BASS FNG1 FNG1 No. 59 No. 60 No. 61 BluzBas RockBas FunkBas...
-
Page 110: Preset Pattern List
Preset Pattern List (Recommend) No. Tempo Pattern Hard Rock 1-1 Hard Rock 1-2 Hard Rock 2-1 Hard Rock 2-2 Hard Rock 3-1 Hard Rock 3-2 Hard Rock 4-1 Hard Rock 4-2 Hard Rock 5-1 Hard Rock 5-2 Hard Rock 6-1 Hard Rock 6-2 Hard Rock 7-1 Hard Rock 7-2... - Page 111 (Recommend) No. Tempo Pattern Smooth Jazz 1 Smooth Jazz 2 Heavy Funk 1 Heavy Funk 2 Technical Fusion 1 Technical Fusion 2 Hip Hop 1-1 Hip Hop 1-2 Hip Hop 2-1 Hip Hop 2-2 Hip Hop 3-1 Hip Hop 3-2 Hip Hop 4-1 Hip Hop 4-2 Drum ’n’...
-
Page 112: Midi Implementation Chart
MIDI Implementation Chart... -
Page 114: Specifications
Roland Service (Information sheet) Options AC Adaptor: PSA series Foot Switch: FS-5U Foot Switch cable: PCS-31 (Roland) (1/4 inches Phone Plug (stereo) - 1/4 inches Phone Plug (mono) x 2) * In the interest of product improvement, the specifications and/or appearance of this unit are... -
Page 115: Index
Index Assign Type ... 82 Attack ... 83 Basic Pattern ... 50–51 Basic Pitch ... 78 Bass ... 47 Bass Part ... 56–58, 62, 76, 78 Bass Tone ... 36, 42, 83 BEAT ... 53 Beat ... 52–53 Bulk Dump ... 89 Bulk Load ... - Page 116 Index Polarity Switch ... 34 POLY ... 82 Polyphony ... 43 PRESET ... 53 Preset Pattern ... 26, 49 Program Change ... 88 Quantize ... 55 Realtime Recording ... 38–39, 56, 59, 65–66 Rehearse ... 55 Release ... 83–84 REPEAT ... 73 Roll ...
- Page 117 Memo ...
- Page 118 Memo ...
-
Page 119: Federal Communications Commission Radio Frequency Interference Statement
Apparatus containing Lithium batteries ADVARSEL! Lithiumbatteri - Eksplosionsfare ved fejlagtig håndtering. Udskiftning må kun ske med batteri af samme fabrikat og type. Levér det brugte batteri tilbage til leverandøren. ADVARSEL Eksplosjonsfare ved feilaktig skifte av batteri. Benytt samme batteritype eller en tilsvarende type anbefalt av apparatfabrikanten. - Page 120 G6017449 ’00-xx-xx-xxx...
Need help?
Do you have a question about the Dr. Rhythm DR-670 and is the answer not in the manual?
Questions and answers