Table of Contents
Advertisement
Quick Links
Advertisement
Table of Contents

Related Manuals for Celestron 95507


Summary of Contents for Celestron 95507
- Page 1 USB 3.0 ASTRONOMICAL CAMERA INSTRUCTIONAL MANUAL...
-
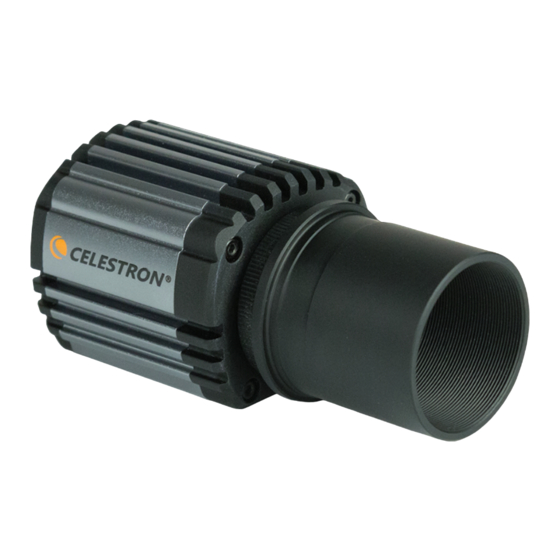
Page 2: Included Items
INCLUDED ITEMS NOSEPIECE SKYRIS CAMERA BODY USB 3.0 CABLE iCAP SOFTWARE CD SYSTEM REQUIREMENTS Computer with Windows XP, Vista, 7, or 8 (32-bit and 64-bit supported), or Mac OS X Snow Leopard and newer Pentium M processor equivalent or higher, 1.7 GHz or higher ®... -
Page 3: Camera Driver Installation
CAMERA DRIVER INSTALLATION Insert the software CD into your computer’s CD-ROM drive. The language selection screen will appear. Select your language and click OK. The iCap Software launch screen will appear. - Page 4 Click Install Driver. The Driver Installation Wizard will appear and prompt you to connect your camera. Plug the Skyris camera into the computer’s USB port using the included cable. If equipped, use a USB 3.0 port. The Driver Installation Wizard will automatically detect your Skyris model.
-
Page 5: Software Installation
SOFTWARE INSTALLATION Click Install iCap and follow the prompts to complete installation. Click Install RegiStax and follow the prompts to complete installation. CONNECTING THE CAMERA TO A TELESCOPE Remove the dust cap on the camera body and thread the 1.25” nosepiece to the camera body. -
Page 6: Capturing Images
CAPTURING IMAGES Detailed Solar System images are created by stacking several individual images or “frames” to one master image. The images are captured in video, allowing you to accumulate hundreds of frames in just a few seconds. The video fi les will later be exported to RegiStax and processed as shown in “Processing Images. - Page 7 Select your Skyris camera from the Available Video Capture Devices window and click OK. The live video window will automatically appear and display the framerate. Gain and exposure are set to automatic by default, but you may need to make adjustments for the object you are imaging.
- Page 8 Video framerate will depend on the Skyris model used and the exposure. If the exposure time is slower than the camera’s maximum frame rate, the FPS count will closely match the exposure time (1/exposure time). For iCap version 2.3 and older, use the dropdown menu to select the framerate closest to the exposure time used.
- Page 9 Click on the Video File tab to access the file naming convention settings. Choose the folder path you wish to save your video, and select an object name and time stamp if desired. Check the Index box to automatically number your video files. Click the Advanced tab to access custom video recording limits.
-
Page 10: Processing Images
ROI SUBFRAMING If the object you are imaging does not consume most of the field of view, you can select an ROI (region of interest) to increase the framerate and save disk space. Go to the Device menu and select Specifiy, or click on the ROI icon. - Page 11 Press the Select button (A) and select the video that was just recorded. Press the Set Alignment Points button (B) to have RegiStax automatically select the alignment positions over your image. Press the Align button (C) to begin the alignment process. Select the Best Frame option under the Limit Setup box (D) and enter a number that represents one-half of the number of image frames that were captured, i.e.
- Page 12 Skyris monochrome cameras require the use of Red, Green, and Blue (RGB) imaging filters to achieve a color image. A filter wheel helps you easily toggle between the filters while imaging. A Skyris Filter Wheel is available from Celestron (filters not included).
- Page 13 TIPS FOCUSING To achieve best focus, concentrate on a high contrast feature of the object you are imaging. Focusing on small features such as a moon’s shadow on Jupiter or Cassini’s division in the ring of Saturn will guarantee best focus across the entire image. Once the frames of your video are stacked, the overall brightness of the composite (stacked) image is usually brighter than its individual component frames.
- Page 14 PHD Guiding (www.stark-labs.com/phdguiding.html) using a guider port interface such as GPUSB from Shoestring Astronomy (www.store.shoestringastronomy.com). Celestron mounts can be used without a GPUSB, simply by interfacing the PC to the hand controller and connecting to the mount via ASCOM. An RS-232 to USB adapter and serial cable is required.
-
Page 15: Specifications
1.25” barrel and Software iCap, IC Capture, C-thread compatibility DirectShow, FireCapture Backfocus Distance A/D Conversion 19mm, 17.5mm 12-bit w/Nosepiece, w/C-thread Power USB, 5V 500mA Shutter Requirements CMOS Rolling Shutter Subframing Hardware Selectable Weight 3.6 oz VISIT WWW.CELESTRON.COM FOR CAMERA SPECIFIC SPECIFICATIONS... - Page 16 Telephone: 800.421.9649 • www.celestron.com WARRANTY Your Skyris camera has a two year warranty. Please see Celetron’s website for detailed information on all Celestron products at www.Celestron.com. FCC Note: This equipment has been tested and found to comply with the limits for a Class B digital device, pursuant to part 15 of the FCC Rules.
Need help?
Do you have a question about the 95507 and is the answer not in the manual?
Questions and answers