Table of Contents
Advertisement
Quick Links
Advertisement
Table of Contents

Related Manuals for NAD C399


Summary of Contents for NAD C399
- Page 1 C 389 ® Hybrid Digital DAC Amplifier Owner’s Manual...
-
Page 2: Important Safety Instructions
IMPORTANT SAFETY INSTRUCTIONS • Read instructions - All the safety and operating instructions should be read • Damage Requiring Service - Unplug this product from the wall outlet and refer before the product is operated. servicing to qualified service personnel under the following conditions: •... - Page 3 To ensure compliance, operations at closer than this distance is not recommended. IF IN DOUBT CONSULT A COMPETENT ELECTRICIAN. NAD® is a trademark of NAD Electronics International. NAD Electronics International is a division of Lenbrook Industries Limited. ©NAD, All Rights Reserved...
-
Page 4: Table Of Contents
INTRODUCTION TABLE OF CONTENTS IMPORTANT SAFETY INSTRUCTIONS . . . . . . . . . . . . . . . . . . . . . . . . 2 NETWORK STANDBY . -
Page 5: Introduction
INTRODUCTION GETTING STARTED WHAT’S IN THE BOX RESTORING C 389 TO FACTORY DEFAULT SETTINGS Press and hold both front panel’s a SOURCE s buttons until the display Packed with your C 389 you will find • Two detachable mains power cord shows the following two reset options. -
Page 6: Identification Of Controls
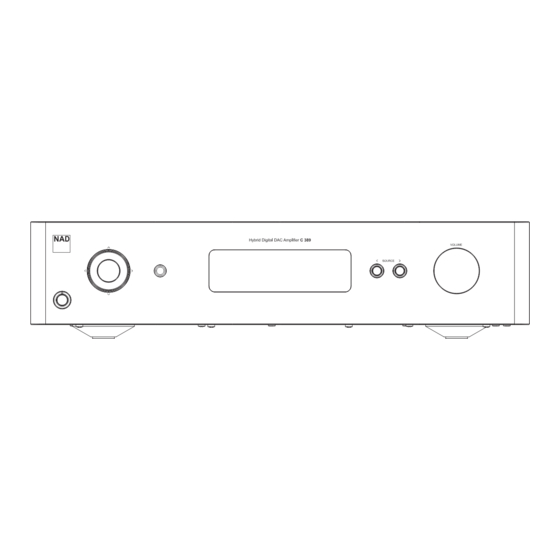
IDENTIFICATION OF CONTROLS FRONT PANEL 1 POWER INDICATOR 5 DISPLAY • • This indicator will be amber when the C 389 is in standby mode. Visual and menu information are shown according to the selected • When the C 389 is powered up from standby mode, this indicator settings. -
Page 7: Rear Panel
• It is not recommended to use RESET button unless necessary. Use with the C 389. For non-NAD models, please check with your other the RESET function button when everything else fails and the unit product’s service specialists with respect to their compatibility to may not be able to recover. - Page 8 16 FUSE HOLDER 10 LINE 1-2 IN • Only qualified NAD service technicians can have access to this fuse • Input for line level sources such as CD player, tuner or any holder. Opening this fuse holder may cause damage thus voiding compatible devices.
-
Page 9: Mdc2 Upgrade Slots
IDENTIFICATION OF CONTROLS REAR PANEL MDC2 UPGRADE SLOTS C 389 supports NAD’s MDC2 architecture. By enabling two-way communications between the module and component, MDC2 opens up the future for new upgrades. MDC2 BLUOS-D The optional MDC2 BluOS-D module lets listeners play music from their favourite streaming services through the C 389. -
Page 10: Sr 10 Remote Control
IDENTIFICATION OF CONTROLS SR 10 REMOTE CONTROL The SR 10 remote control handset handles the key functions of the C 389. It can also control up to 4 devices. SR 10 will operate up to a distance of 23ft (7m). Two AA batteries should be fitted in the battery compartment at the rear of the remote control handset. - Page 11 Applicable only if optional MDC2 BluOS D is installed. CD PLAYER CONTROL (applicable to most NAD CD Players): Select CD among the DEVICE SELECTOR buttons to gain access to the following applicable control buttons. Check the owner’s manual of your applicable NAD CD Player for control button compatibility.
-
Page 12: Using The Sr 10 Remote Control Library
USING THE SR 10 REMOTE CONTROL LIBRARY The SR 10 can store a different library of default NAD codes for each of its DEVICE SELECTOR “pages. ” If the original default library does not control your NAD CD player, BluOS player or Tuner, follow the procedure below to change the library code. -
Page 13: Reset Sr 10 To Its Factory Default Settings
IMPORTANT The SR 10 may not necessarily contain all the control buttons applicable for the above-mentioned NAD products. Use the prescribed remote control of the specific NAD product for a full complement of applicable remote control buttons. RESET SR 10 TO ITS FACTORY DEFAULT SETTINGS The SR 10 remote control can be restored to its factory default settings (including default libraries) by the following procedures. -
Page 14: Operation
OPERATION USING C 389 ACCESS MAIN MENU TONE CONTROL Tone control allows the boosting or reduction of particular audio frequencies. The tone control levels, Bass and Treble, can be turned on or off. • On: Tone control levels are active. At Tone Controls On, Bass and Treble control levels are available for configuration. -
Page 15: Auto Standby
The C 389 has the capability to operate via Alternate IR channel. This is NETWORK STANDBY useful if you have two NAD products that can be operated by similar remote control commands. With alternate IR Channel, two different NAD products can be controlled independently in the same zone by setting each one to a different IR channel. -
Page 16: Bluetooth Mode
OPERATION USING C 389 • C 389 AS A BLUETOOTH SINK Press [ENTER] while still holding down the device button [AMP]. The AMP device selector will flash once to indicate that the library input is successful. With both C 389 and SR 10 set to “Channel 1”, the C 389 can now be remotely controlled independent of the T 758. -
Page 17: Brightness
OPERATION USING C 389 C 389 AS A BLUETOOTH SOURCE 4 Having settled on a Bluetooth Source device, toggle a SOURCE s to select the source media you would like streamed to the connected Bluetooth device. For example, if you want to stream audio from OPTICAL 1, select OPTICAL 1 as the active source. -
Page 18: Volume Display Mode
OPERATION USING C 389 VOLUME DISPLAY MODE ENABLE SOURCE Volume Display Mode gives the user two options on how to display Volume level. Use a or s to select between “Decibel” and “Percent” Volume display mode. VOLUME LIMITS One can enable/disable a Source via this option. This is particularly useful if only few Sources are used thereby bypassing unused sources. -
Page 19: Volume Control
OPERATION USING C 389 VOLUME CONTROL 2 While at “Fixed” option, use front panel [d] or SR 10’s [D] button to select “Fixed” level and return to “Source Setup” menu selections. a With “Fixed” level selected and back to “Source Setup” menu selections, use front panel [a/s] or SR 10’... -
Page 20: Analog Bypass
OPERATION USING C 389 ANALOG BYPASS If the optional MDC2 BluOS D is installed, the BluOS firmware version, IP Address, MAC Address (Ethernet) and MAC Address (Wi-Fi) information are also shown. All analog signals remain in the analog domain without analog-to-digital conversions. -
Page 21: Reference
REFERENCE SPECIFICATIONS All specs are measured according to IHF 202 CEA 490-AR-2008 standard. THD is measured using AP AUX 0025 passive filter and AES 17 active filter. PREAMPLIFIER SECTION LINE INPUT, PRE-OUT (Analog bypass on) THD (20 Hz – 20 kHz) <0.002 % at 2 V out Signal-to-Noise Ratio >100 dB (IHF;... - Page 22 All rights reserved. NAD and the NAD logo are trademarks of NAD Electronics International, a division of Lenbrook Industries Limited. No part of this publication may be reproduced, stored or transmitted in any form without the written permission of NAD Electronics International.
Need help?
Do you have a question about the C399 and is the answer not in the manual?
Questions and answers