Table of Contents
Advertisement
Quick Links
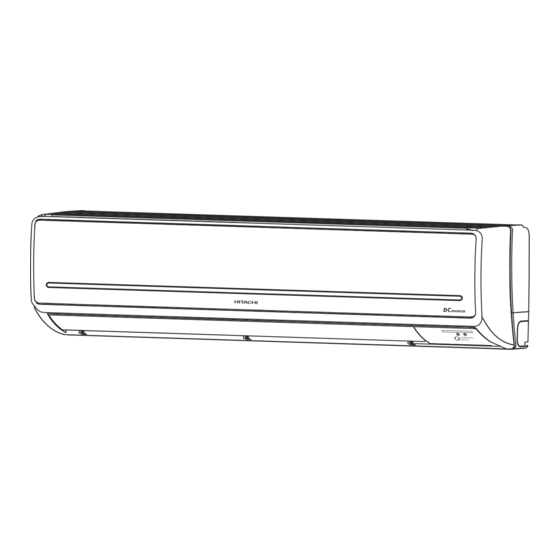
SPLIT TYPE AIR CONDITIONER
INDOOR UNIT/OUTDOOR UNIT
MODEL
RAS-X24CCK/RAC-X24CCK
O
U
T
D
O
O
R
U
N
T I
N I
D
O
O
R
U
N
T I
RAS-X24CCK
RAC-X24CCK
Instruction manual
Page 1~20
To obtain the best performance and ensure years of trouble free use, please read this instruction manual completely.
21~40
– 1 –
- 1 -
- 1 -
Advertisement
Table of Contents

Related Manuals for Hitachi RAS-X24CCK


Summary of Contents for Hitachi RAS-X24CCK
- Page 1 SPLIT TYPE AIR CONDITIONER INDOOR UNIT/OUTDOOR UNIT MODEL RAS-X24CCK/RAC-X24CCK RAS-X24CCK RAC-X24CCK Instruction manual Page 1~20 To obtain the best performance and ensure years of trouble free use, please read this instruction manual completely. 21~40 – 1 – - 1 -...
- Page 2 - 2 -...
-
Page 3: Safety Precaution
SAFETY PRECAUTION Please read the “ Safety Precaution ” carefully before operating the unit to ensure correct usage of the unit. Pay special attention to signs of “ Warning ” and “ Caution ” . The “ Warning ” section contains matters which,if not observed strictly, may cause death or serious injury. -
Page 4: Precautions During Operation
PRECAUTIONS DURING OPERATION The product shall be operated under the manufacturer specification and not for any other intended use. Do not attempt to operate the unit with wet hands, this could cause fatal accident. When operating the unit with burning equipments, regularly ventilate the room to avoid oxygen insufficiency. -
Page 5: Names And Functions Of Each Part
Send out operation signal to the indoor unit. So as to operate the whole unit. (Refer page 7) OUTDOOR UNIT DRAIN PIPE Condensed water drain to outside. CONNECTING CORD AIR INLET (BACK, LEFT SIDE) AIR OUTLET MODEL NAME AND DIMENSIONS MODEL WIDTH(mm) HEIGHT(mm) DEPTH(mm) RAS-X24CCK 1050 RAC-X24CCK - 5 -... -
Page 6: Operation Indicator
TEMPORARY SWITCH TEMPORARY SWITCH CAUTION Turn off the circuit breaker or pull out the power plug if the unit is not be operated for a long period. OPERATION INDICATOR TEMPORARY SWITCH When the remote control device is not functioning, use the Temporary Switch mode (1) W hen the Temporary Switch is pressed, the unit will operate as per the previous setting. - Page 7 NAMES AND FUNCTIONS OF EACH PART REMOTE CONTROLLER • This controls the operation of the indoor unit. The range of control is about 7 meters. If indoor lighting is controlled electronically, the range of control may be shorter, in some cases, the control signal may not be received. This unit can be fixed on a wall using the fixture provided.
-
Page 8: Cooling Operation
COOLING OPERATION Use the device for cooling when the outdoor temperature is 7 to 43°C. If humidity is very high (over 80%) indoors, some dew may form on the air outlet grille of the indoor unit. Press the FUNCTION selector so that the display indicates (COOL). -
Page 9: Dehumidifying Operation
DEHUMIDIFYING OPERATION Use the device for dehumidifying when the room temperature is over 16°C. When it is under 15°C, the dehumidifying function will not work. Press the FUNCTION selector so that the display indicates (DEHUMIDIFY). Press the (FAN SPEED) button to select LOW and SILENT. START Press the (START/STOP) button. -
Page 10: Fan Operation
FAN OPERATION You can use the device simply as an air circulator. Use this function to dry the interior of the indoor unit at the end of summer. Press the FUNCTION selector so that the display indicates (FAN). Press the (FAN SPEED) button. -
Page 11: Timer Reservation
TIMER RESERVATION ON Timer and OFF Timer are available. Operation stop at setting time Timer Reservation OFF TIME setting • Select the OFF TIME by pressing the (OFF) Button. • Setting time will change according to the below sequence when you press the button. 1 hour interval Timer off ON TIME setting... -
Page 12: Eco Operation
ECO OPERATION Energy saving operation by changing set temperature and by limiting the maximum power consumption value. By pressing the (ECO) button during Dehumidifying or Cooling operation, the air conditioner performs the “ECO” operation. Press (ECO) button during operation. " "... - Page 13 HOW TO SET THE SLEEP TIMER By pressing (SLEEP) button during DEHUMIDIFYING, COOLING or FAN operation, the unit shifts the room temperature and reduces the fan speed. Mode Indication Sleep Timer Sleep timer off Sleep Timer: The device will continue working for the desired number of SLEEP hours and then turn off.
- Page 14 ADJUSTING THE AIR DEFLECTORS Adjustment of the conditioned air in the upward and downward directions. The horizontal air deflector is automatically set to the proper angle suitable for each operation. The deflector can be swung up and down continuously and also set to the desired angle using the “...
- Page 15 THE IDEAL WAYS OF OPERATION Suitable Room Temperature Install curtain or blinds I t i s p o s s i b l e Warning to reduce heat Freezing temperature entering the room is bad for health and a through windows. waste of electric power.
- Page 16 FOR USER ’ S INFORMATION The Air Conditioner And The Heat Source In The Room Caution If the amount of heat in the room is above the cooling capability of the air conditioner (for example: more people entering the room, using heating equipments and etc.), the preset room temperature cannot be achieved.
- Page 17 MAINTENANCE OF THE UNITS CAUTION Ensure that the unit is not in operation and all power supply has been disconnected before cleaning the units. Dust Filter Screen Dust filter screens are installed to remove the indoor dust particles hence they should be kept clean at all times. They should be cleaned at each machine operation cycle of approximately 100 hours.
-
Page 18: Cleaning The Front Panel
CLEANING THE FRONT PANEL Front panel can easily get dirty. Use a soft cloth to wipe it. If the front panel is excessively dirty, wipe the front panel with a soft cloth either wet with warm water or containing a mild detergent after which, wipe dry the front panel with a soft dry cloth. - Page 19 AFTER SALE SERVICE AND WARRANTY WHEN ASKING FOR SERVICE, CHECK THE FOLLOWING POINTS. CONDITION CHECK THE FOLLOWING POINTS • Is the fuse all right? • When it does not operate Is the voltage extremely high or low? • Is the circuit breaker “ ON ” ? •...
- Page 20 This product conforms with the protection requirements of council directives 89/336/EEC relating to electromagnetic compatibility and 73/23/EEC relating to electrical equipment designed for use within certain voltage limits. Please note: On switching on the equipment, particularly when the room light is dimmed, a slight brightness fluctuation may occur.
- Page 21 RAS-X24CCK/RAC-X24CCK RAS-X24CCK RAC-X24CCK - 21-...
- Page 22 - 22 -...
- Page 23 如果電源線損壞,必須由生產商、服務代理或類似的合格人員替換,以避免出現危險。 - 23 -...
- Page 24 不要讓小孩單獨操作使用機器。除非在監督責任人的指導下,確保他們能安全正確的使用機器。 請確保小孩遠離機體,不要機體玩耍,以免發生危險。 - 24 -...
- Page 25 RAS-X24CCK 1050 RAC-X24CCK...
- Page 26 TEMPORARY SWITCH TEMPORARY SWITCH...
- Page 27 遙 內機 運轉 範圍 約為 電 內 話 範圍 變 況 導 遙 號無 達 機 裝 墻 請 務 確認 遙 內機 請 遙...
- Page 28 - 28 -...
- Page 29 - 29 -...
- Page 30 • • - 30 -...
- Page 31 • • " " " " - 31 -...
- Page 32 通過溫度控制及限制運轉功率。 - 32 -...
- Page 33 - 33 -...
- Page 34 • • • • • - 34 -...
Need help?
Do you have a question about the RAS-X24CCK and is the answer not in the manual?
Questions and answers