Rimage AutoPrism Setup And Installation Manual
Rimage autoprism: installation guide
Hide thumbs
Also See for AutoPrism:
- Specifications (1 page) ,
- User manual (17 pages) ,
- User manual (17 pages)
Advertisement
Quick Links
Download this manual
See also:
User Manual
Rimage AutoPrism
1
Unpack the Prism printer.
a. Open the Prism printer
packing box.
b. Remove the Prism printer
from the packing box.
c. Remove the packing foam
from the ends of the Prism
printer.
d. Remove the plastic bag
from the Prism printer.
e. Remove the top cover of
the Prism printer.
f. Remove the foam inserts.
g. Replace the top cover.
2
Install the Prism printer.
Place the Prism printer on the AutoPrinter so the plastic
feet slide into the slots on the printer plate.
1
Setup and Installation
™
Top Cover
Foam Inserts
Printer
Packing Foam
Printer Plate
Slots
3
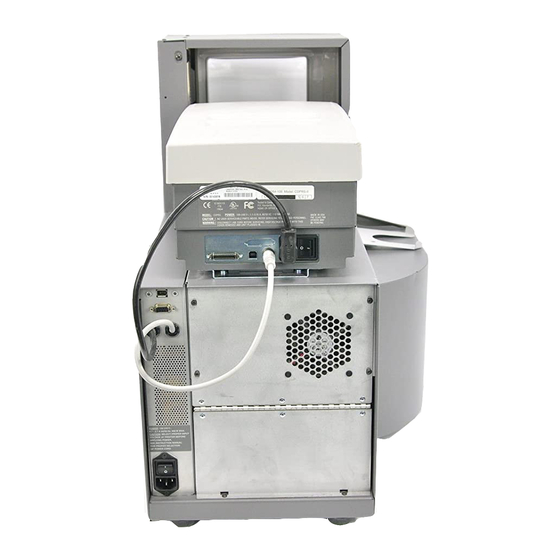
Connect the cables.
a. Connect the printer
cable from the
AutoPrinter to the
Prism printer.
b. Connect the
USB cable from
the Prism printer
to the PC.
c. Connect
the power
cord from the
AutoPrinter to a
power outlet.
4
Install the printer driver.
For detailed instructions, refer to the PrismPlus! Printer User
Guide.
5
Install the CD Designer Software Suite.
With the CD Designer Software Suite disc in the PC disc drive,
navigate to Setup.exe and follow the prompts to install the
software.
d. Connect the
short power
cord from the
AutoPrinter
to the Prism
printer.
110824_C
Advertisement


Need help?
Do you have a question about the AutoPrism and is the answer not in the manual?
Questions and answers