Table of Contents
Advertisement
Quick Links
INSTRUCTION MANUAL
Read these instructions carefully before using your
microwave oven , and keep it carefully.
If you follow the instructions, your oven will provide you with
many years of good service.
SAVE THESE INSTRUCTIONS CAREFULLY
Guangdong Midea Kitchen Appliances Manufacturing Co., Ltd.
No.6, Yong An Road, Beijiao, Shunde, 528311 Foshan,
Guangdong, People's Republic of China
www.midea.com
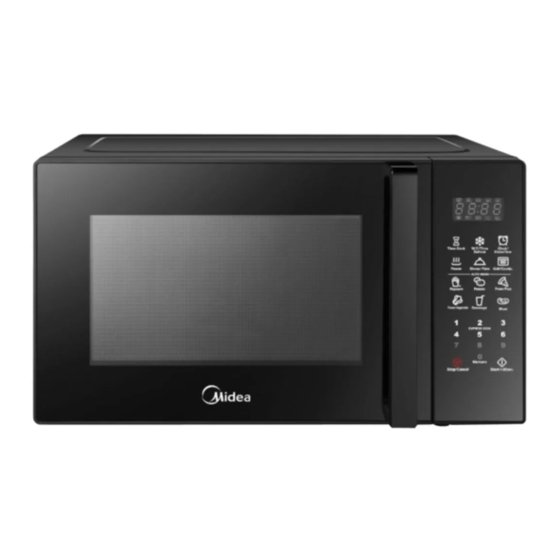
Microwave Oven
Model:EM923A2CI-PS
Advertisement
Table of Contents

Related Manuals for Midea EM923A2CI-PS


Summary of Contents for Midea EM923A2CI-PS
- Page 1 If you follow the instructions, your oven will provide you with many years of good service. SAVE THESE INSTRUCTIONS CAREFULLY Guangdong Midea Kitchen Appliances Manufacturing Co., Ltd. No.6, Yong An Road, Beijiao, Shunde, 528311 Foshan, Guangdong, People's Republic of China...
-
Page 2: Precautions To Avoid Possible Exposure To Excessive Microwave Energy
(d) The oven should not be adjusted or repaired by anyone except properly qualified service personnel. (e)This device complies with Part 18 of the FCC Rules. Sp ec i f i c at i o n s Model: EM923A2CI-PS Rated Voltage: 120 V~ 60H z Rated InputPower (Microwave): 1350W... -
Page 3: Important Safety Instructions
IMPORTANT SAFETY INSTRUCTIONS When using electrical appliances basic safety precautions should be followed, including following: To reduce the risk of burns, electric shock, fire, injury to persons or exposure WARNING - to excessive microwave energy: 1. Read all instructions before using the appliance. 2. - Page 4 If it is necessary to use an extension cord, use only a 3-wire extension cord that has a 3- blade grounding plug, and a 3-slot receptacle that will accept the plug on the appliance. The marked rating of the extension cord shall be equal to or greater than the electrical rating of the appliance.
-
Page 5: Radio Interference
1. A short power supply cord is provided to reduce the risks resulting from becoming entangled in or tripping over a longer cord. 2. Longer cord sets or extension cords are available and may be used if care is exercised in their use. -
Page 6: Removable Parts
SAFE PLUG Combination appliances utilize Safe Plug, a revolutionary, patented design, to conserve electricity and reduce potential fire hazards that can be caused by overloaded circuits. Built into the microwave, works by temporarily shutting off the power to the refrigerator and charging outlets when the microwave is in use. When the microwave is finished, power to the refrigerator and charging outlets resumes. -
Page 7: Materials You Can Use In Microwave Oven
Materials you can use in microwave oven Utensils Remarks Browning dish Follow manufacturer* instructions. The bottom of browning dish must be at least 3/16 inch (5mm) above the turntable. Incorrect usage may cause the turntable to break. Dinnerware Microwave-safe only. Follow manufacturer's instructions. Do not use cracked or chipped dishes. -
Page 8: Setting Up Your Oven
SETTING UP YOUR OVEN Names of Oven Parts and Accessories Remove the oven and all materials from the carton and oven cavity. Your oven comes with the following accessories: Glass tray Turntable ring assembly Instruction Manual A) Control panel B) Turntable shaft C) Turntable ring assembly D) Glass tray E) Observation window... -
Page 9: Control Panel And Features
CONTROL PANEL AND FEATURES DISPLAY WINDOW INDICATORS PROGRAMMED RECIPES (3) POWER LEVEL (4) TIME COOK (5) TIMER (6) TIME DEFROST (7) WEIGHT DEFROST (8) CLOCK (9) POPCORN (10) SOUP (11) POTATO (12) PIZZA (13) DINNER PLATE (14) BEVERAGE 480W 480W (15) EXPRESS COOK (16) NUMBER PADS (17) STOP/CANCEL... -
Page 10: Countertop Installation
Countertop Installation Cabinet: Remove any protective film found Remove all packing material and accessories. Examine the oven for any damage such as on the microwave oven cabinet surface. Do not remove the light brown Mica cover dents or broken door. Do not install if oven is damaged. - Page 11 7. Place the microwave oven on top of the refrigerator/freezer and inside the two upright sides of the brackets. Line up the two (2) holes on each side of the microwave oven with those on the brackets, and attach the microwave oven using the screws from Step 1.
- Page 12 SMOKE SENSOR START/+30SEC. If you press the " " button to cook two minutes before power on, do not make smoke alarm judgment in the first two minutes, and do not alarm conditions. After the smoke alarm, and display "Err1".The Err1 alarm will be cancelled after 5 minutes, and the start button can be pressed again to cook after the alarm is cancelled.
-
Page 13: Operation
OPERATION 1. Power Level 11 power levels are available. Level Power 100% Display PL10 2. Waiting State At the initial power on, buzzer sound once, The LED will display "0:00" ,oven enter waiting state.There are three types of conditions into waiting state: 1) At the initial power on, press any key. - Page 14 Note: (1) The kitchen time is different from 12-hour system. Kitchen Timer is a timer. (2) During kitchen timer's operation, any program cannot be set. TIMER will not be affected by opening or closing the oven door. 5. Microwave cooking (1) Press "...
-
Page 15: Weight Defrost Function
7. Weight Defrost Function (1) Press " WEIGHT DEFROST "once, the screen will display "dEF1". (2) Press numerical buttons to input weight to be defrosted. Input the weight ranged between 4~52 Oz. for example, the LED will display "5 " if the input value is 5Oz, in which the "-"... -
Page 16: Dinner Plate
POTATO POTATO " repeatedly until the number you wish appears in the display, (a) Press " "1", "2", "3" will display in order. "1"SET : 1 potato (approximate 8 Oz) "2"SETS: 2 potatoes (approximate 16 Oz) "3"SETS: 3 potatoes (approximate 24 Oz) For example, press "... -
Page 17: Memory Function
15. MEMORY FUNCTION (1) Press the numeric key "0/MEMORY" once, and then press the key "0/MEMORY" for several times to choose memory 1 to memory 3 in turn, and "1" to "3" will display. (2) If the procedure has been set, press " START/+30SEC. " to use it. If not, continue to set the procedure. - Page 18 (7) Open door during the cooking process, cooking stops with out cancelling the program. Cooking resumes when the door is closed and " START/ +30 SEC. " / "STOP/CANCEL " is pressed. LOCK FUNCTION FOR CHILDREN Lock: In waiting state, press " STOP/CANCEL " for 3 seconds, there will be a long "beep" denoting the entering into the children-lock state;...
- Page 19 Note: . . This function only works for one coleted cooking. If pause or open the oven door during cooking, the current cooking cannot enter the turntable reset function. .. Under the reset state, opening the door or " STOP/CANCE " key is pressed oven will go back to waiting state.
-
Page 20: Maintenance
MAINTENANCE Troubleshooting Check your problem by using the chart below and try the solutions for each problem. If the microwave oven still does not work properly, contact the nearest authorized service center. TROUBLE POSSIBLE CAUSE POSSIBLE REMEDY a. Electrical cord for oven is a.
Need help?
Do you have a question about the EM923A2CI-PS and is the answer not in the manual?
Questions and answers