Table of Contents
Advertisement
Quick Links
SERVICE MANUAL & TEST RUN SERVICE MANUAL
4-Way Cassette
(Type U2)
Indoor Unit
Type
15
22
4-Way Cassette
S-22MU2E5A
U2
4-Way Cassette
S-22MU1E5A
U1
4-Way Cassette
Y2
S-15MY2E5A
S-22MY2E5A
60×60
S-15MF2E5A
S-22MF2E5A
Low Silhouette
F2
Ducted
S-22MF2E5A8 S-28MF2E5A8 S-36MF2E5A8 S-45MF2E5A8 S-56MF2E5A8 S-60MF2E5A8 S-73MF2E5A8 S-90MF2E5A8 S-106MF2E5A8 S-140MF2E5A8 S-160MF2E5A8
Ceiling
T2
Wall Mounted
S-15MK2E5A
S-22MK2E5A
K2
Wall Mounted
K1
Slim Low Static
M1
S-15MM1E5A S-22MM1E5A S-28MM1E5A S-36MM1E5A S-45MM1E5A S-56MM1E5A
Ducted
Indoor Unit
Type
180
224
High Static
S-180ME2E5
S-224ME2E5
E2
Pressure Ducted
85464849332002
VRF SYSTEMS INDOOR UNIT
28
36
S-28MU2E5A
S-36MU2E5A
S-45MU2E5A
S-28MU1E5A
S-36MU1E5A
S-45MU1E5A
S-28MY2E5A
S-36MY2E5A
S-45MY2E5A
S-28MF2E5A
S-36MF2E5A
S-45MF2E5A
S-36MT2E5A
S-45MT2E5A
S-28MK2E5A
S-36MK2E5A
S-45MK1E5A
280
S-280ME2E5
Ceiling
(Type T2)
45
56
60
S-56MU2E5A
S-60MU2E5A
S-73MU2E5A
S-56MU1E5A
S-60MU1E5A
S-73MU1E5A
S-56MY2E5A
S-56MF2E5A
S-60MF2E5A
S-73MF2E5A
S-56MT2E5A
S-73MT2E5A
S-56MK1E5A
S-73MK1E5A
Order No. SBPAC1404002CE
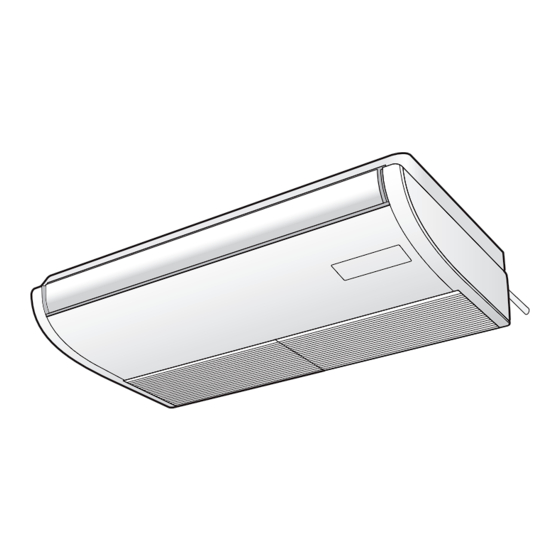
Low Silhouette Ducted
(Type F2)
73
90
106
S-90MU2E5A
S-106MU2E5A
S-140MU2E5A
S-90MU1E5A S-106MU1E5A S-140MU1E5A S-160MU1E5A
S-90MF2E5A
S-106MF2E5A
S-140MF2E5A
S-106MT2E5A
S-140MT2E5A
S-106MK1E5A
SM830232-02
REFERENCE NO.
140
160
S-160MU2E5A
S-160MF2E5A
Advertisement
Table of Contents

Related Manuals for Panasonic S-22MF2E5A8


Summary of Contents for Panasonic S-22MF2E5A8
- Page 1 S-22MF2E5A S-28MF2E5A S-36MF2E5A S-45MF2E5A S-56MF2E5A S-60MF2E5A S-73MF2E5A S-90MF2E5A S-106MF2E5A S-140MF2E5A S-160MF2E5A Low Silhouette Ducted S-22MF2E5A8 S-28MF2E5A8 S-36MF2E5A8 S-45MF2E5A8 S-56MF2E5A8 S-60MF2E5A8 S-73MF2E5A8 S-90MF2E5A8 S-106MF2E5A8 S-140MF2E5A8 S-160MF2E5A8 Ceiling S-36MT2E5A S-45MT2E5A S-56MT2E5A S-73MT2E5A S-106MT2E5A S-140MT2E5A Wall Mounted S-15MK2E5A S-22MK2E5A S-28MK2E5A S-36MK2E5A Wall Mounted...
- Page 2 ● Connectable outdoor unit lineup This document is the Service Manual of the indoor unit. For outdoor unit, refer to the Service Manual of the outdoor unit. ■ For Europe Type Outdoor Unit Type 4 hp 5 hp 6 hp 8 hp 10 hp 2WAY VRF System...
- Page 3 IMPORTANT! • Connect all wiring tightly. Loose wiring Please Read Before Starting may cause overheating at connection points and a possible fire hazard. This air conditioner must be installed by the sales dealer • Provide a power outlet to be used or installer.
- Page 4 …In Moist or Uneven Locations • Keep all tubing runs as short as Use a raised concrete pad or concrete possible. blocks to provide a solid, level foundation • Use the flare method for connecting for the outdoor unit. This prevents water tubing.
- Page 5 CAUTION CAUTION • Ventilate any enclosed areas when installing or testing the refrigeration system. Leaked refrigerant gas, on contact with fire or heat, can produce dangerously toxic gas. • Confirm after installation that no refrigerant gas is leaking. If the gas comes in contact with a burning stove, gas water heater, electric room heater or other heat source,...
- Page 6 This notice is only for High Static CAUTION Pressure Ducted type. • In the area where the temperature inside the unit becomes below 0°C SPECIAL PRECAUTIONS due to cold air in cold climates, install the electrical damper onto When Wiring WARNING the outdoor air duct for antifreeze measurement.
-
Page 7: Table Of Contents
— CONTENTS — Section 1: CONTROL FUNCTIONS-Outdoor Unit . . . . . . . . . . . . . . . . . . . . . . . . . . . . . . 1-1 * Refer to the Service Manual of Outdoor Unit. - Page 8 – MEMO –...
-
Page 9: Control Functions-Outdoor Unit
VRF SYSTEMS Indoor Unit 1. CONTROL FUNCTIONS-Outdoor Unit * Refer to the Service Manual of Outdoor Unit. 1 - 1... - Page 10 – MEMO – 1 - 2...
-
Page 11: Control Functions-Indoor Unit
VRF SYSTEMS Indoor Unit Contents 2. CONTROL FUNCTIONS-Indoor Unit 1. Room Temperature Control ..........2-2 2. -
Page 12: Room Temperature Control
VRF SYSTEMS Indoor Unit 1. Room Temperature Control 1. Room Temperature Control The body sensor or remote controller sensor detects temperature in the room. The detected temperature is called the room temperature. The body sensor is the one contained in the indoor unit. Body sensor is enabled Remote controller sensor is enabled Set temp. - Page 13 VRF SYSTEMS Indoor Unit 1. Room Temperature Control Remote controller sensor is enabled Remote controller sensor is enabled Set temp. in remote Set temp. in remote 28℃ 28℃ 28℃ 20℃ 20℃ 20℃ controller controller Detected temp. by Detected temp. by 30.0℃...
- Page 14 VRF SYSTEMS Indoor Unit 1. Room Temperature Control < FRESH AIR INTAKE MODE (Type E2) > Intake Air Temperature Control This product brings outdoor fresh air into the building and adjusts and supplies the air with nearly current indoor temperature. Automatic cooling and heating operation mode Due to the temperature difference between the outdoor air and preset temperature in remote controller, cooling or heating operation can be automatically selected.
-
Page 15: Heating Standby
VRF SYSTEMS Indoor Unit 2. Heating Standby 2. Heating Standby In heating mode, the indoor fan speed decreases to prevent cold air discharge from the indoor unit. During this time, (heating standby) is displayed on the remote controller. ① This condition occurs in the following cases. ・... -
Page 16: Automatic Fan Speed Control
VRF SYSTEMS Indoor Unit 3. Automatic Fan Speed Control 3. Automatic Fan Speed Control ① The indoor fan mode is controlled as shown below during the automatic fan mode. ② The fan mode does not change for 3 minutes during cooling operation and 1 minute during heating operation once it is changed. -
Page 17: Indoor Unit Mov Control
4. Indoor Unit MOV Control VRF SYSTEMS Indoor Unit 5. Drain Pump Control 4. Indoor Unit MOV Control For details, refer to the Service Manual of Outdoor Unit. The MOV is at 480 pulses in the following cases. ① At the time of factory shipment ②... -
Page 18: Automatic Heating / Cooling Control
VRF SYSTEMS Indoor Unit 6. Automatic Heating / Cooling Control 6. Automatic Heating / Cooling Control This function is only valid as long as one indoor unit is installed within one refrigerant system or all indoor units are controlled within a group control. When operating in a group control, the sub-indoor units become the same operation mode of the main unit. -
Page 19: Discharge Air Temperature Control
7. Discharge Air Temperature Control VRF SYSTEMS Indoor Unit 8. RAP Valve Kit Control 7. Discharge Air Temperature Control Discharge air temperature is controlled using the indoor unit discharge air temperature sensor. The discharge air temperature is set in the EEPROM on the PCB. The setting is different depending on the model. Discharge air temperature setting (at the time of factory shipment) Discharge air temperature setting Indoor unit type... -
Page 20: Automatic Flap Control
9. Automatic Flap Control VRF SYSTEMS Indoor Unit 10. Filter Sign 9. Automatic Flap Control The flap position can be selected from 5 positions. Operating mode Flap position Cooling / Dry F1・F2・F3 * F1・F2・F3・F4・F5 Heating F1・F2・F3・F4・F5 * Type U2 can set the flap position F4 and F5 ①... -
Page 21: Electric Heater Control
11. Electric Heater Control VRF SYSTEMS Indoor Unit 12. Fan Control during Dry Mode 11. Electric Heater Control The electric heater control is performed when an electric heater is installed with the indoor unit. The heater turns ON when all of the following conditions (1 to 3) are satisfied in heating mode (thermostat ON). ①... -
Page 22: Ventilation Fan Output
13. Ventilation Fan Output VRF SYSTEMS Indoor Unit 14. T10 Terminal 13. Ventilation Fan Output The output of ventilation turns ON when the indoor unit turns ON. Also, when the indoor unit turns OFF, the output of the ventilation turns OFF. The ventilation fan can also be turned ON and OFF using the ventilation button on the remote controller. -
Page 23: Parameter
VRF SYSTEMS Indoor Unit 15. Parameter 15. Parameter Indoor item code "06" Indoor item code "1E" Temperature shift for Heating intake cooling / heating change in Type Model temperature shift auto heat / cool mode Setting at time of factory Setting at time of factory shipment shipment... -
Page 24: Indoor Unit Control Pcb
VRF SYSTEMS Indoor Unit 16. Indoor Unit Control PCB Indoor Unit Control PCB Switches and Functions Indoor unit control PCB T10: 6P plug (yellow): Used for remote control. (Refer to the remote control section.) (CN061) Control items: (1) Start/stop input (2) Remote controller prohibit input (3) Start signal output (4) Alarm signal output... - Page 25 VRF SYSTEMS Indoor Unit 16. Indoor Unit Control PCB 1. Wall Mounted (Type K2) CR-22MK2E5 : S-15MK2E5A / S-22MK2E5A / 28MK2E5A / 36MK2E5A 【 LEAD p b】 FREE SOLDERING Indoor heat exchanger (E3) sensor 1FA4B1B108000-4 1FA4B1B108000-4 A747337 A73C A747337 A73C 12 13 EEPROM 2 - 15...
- Page 26 VRF SYSTEMS Indoor Unit 16. Indoor Unit Control PCB 2. Wall Mounted (Type K1) CR-K186XH : S-45MK1E5A / 56MK1E5A / 73MK1E5A / 106MK1E5A OC plug EMG plug Power LED (D002) T10 plug Indoor heat exchanger (E3) sensor EXCT plug Indoor heat exchanger (E1) sensor Room...
- Page 27 VRF SYSTEMS Indoor Unit 16. Indoor Unit Control PCB 3. 4-Way Cassette (Type U1) : S-22~160MU1E5A Ceiling (Type T2) : S-36~140MT2E5A F747931 Power LED FAN DRIVE EEPROM OPTION DISP EXCT JP001 4. Low Silhouette Ducted (Type F2) F747938 : S-15~160MF2E5A Power LED FAN DRIVE EEPROM OPTION...
- Page 28 VRF SYSTEMS Indoor Unit 16. Indoor Unit Control PCB 2-5. 4-Way Cassette 60×60 (Type Y2) CR-22MY2E5, POW-22MY2E5 : S-15~56MY2E5A 5. 4-Way Cassette 60×60 (Type Y2) CR-22MY2E5, POW-22MY2E5 : S-15~56MY2E5A POWER LED EXCT (D002) (CN073) FILTER (CN070) (CN062) DISP (CN061) (CN063) TEST OPTION (CN064)
- Page 29 2. Indoor Unit Control PCB Switches and Functions VRF SYSTEMS Indoor Unit 16. Indoor Unit Control PCB 6. High Static Pressure Ducted (Type E2) CR-280ME2E5 : S-180ME2E5 / 224ME2E5 / 280ME2E5 POWER LED (D002) EEPROM (IC010) EXCT (CN073) Microcomputer Room temperature (TA) sensor Indoor heat...
- Page 30 2. Indoor Unit Control PCB Switches and Functions VRF SYSTEMS Indoor Unit 16. Indoor Unit Control PCB 7. Slim Low Static Ducted (Type M1) A748023 : S-15MM1E5A / 22MM1E5A / 28MM1E5A / 36MM1E5A / 45MM1E5A / 56MM1E5A JP001 POWER LED (D002) Indoor heat exchanger (E3) sensor Indoor heat exchanger...
- Page 31 VRF SYSTEMS Indoor Unit 16. Indoor Unit Control PCB 8. 4-Way cassette (Type U2) ACXA73-02060 : S-22MU2E5A / 28MU2E5A / 36MU2E5A / 45MU2E5A / 56MU2E5A / 60MU2E5A / 73MU2E5A / 90MU2E5A / 106MU2E5A / 140MU2E5A / 160MU2E5A AC IN F301 F302 JP040 D203...
- Page 32 – MEMO – 2 - 22...
-
Page 33: Outdoor Unit Repair Procedures
VRF SYSTEMS Indoor Unit 3. OUTDOOR UNIT REPAIR PROCEDURES * Refer to the Service Manual of Outdoor Unit. 3 - 1... - Page 34 – MEMO – 3 - 2...
-
Page 35: Outdoor Unit Maintenance Remote Controller
VRF SYSTEMS Indoor Unit 4. OUTDOOR UNIT MAINTENANCE REMOTE CONTROLLER * Refer to the Service Manual of Outdoor Unit. 4 - 1... - Page 36 – MEMO – 4 - 2...
-
Page 37: Remote Controller Functions
VRF SYSTEMS Indoor Unit 5. REMOTE CONTROLLER FUNCTIONS 1. Simple Settings Function ..........5-2 2. -
Page 38: Simple Settings Function
VRF SYSTEMS Indoor Unit 1. Simple Settings Function • This allows the filter lifetime, operating mode priority change, central control address, and other settings to be made for an individual or group- control indoor unit to which the remote controller used for simple settings is connected. - Page 39 VRF SYSTEMS Indoor Unit 1. Simple Settings Function <Procedure of CZ-RTC3 / CZ-RTC5A> 20:30 (THU) START Fig. 1-2 Select the “Code no.” by pressing the button. Keep pressing the Change the “Code no.” by pressing the buttons simultaneously for 4 or more seconds. button.
- Page 40 VRF SYSTEMS Indoor Unit 1. Simple Settings Function <Procedure of CZ-RTC4> 1 Press and hold the buttons simultaneously for 4 seconds or longer. 2 “ ”, unit No. “ ” (or “ ” in the case ° of group control), item code “ ”, and settings °...
- Page 41 VRF SYSTEMS Indoor Unit 1. Simple Settings Function List of Simple Setting Items Setting data Item code Item Description 0000 Not displayed 0001 150 hours 0002 2,500 hours Filter sign ON time (filter life time) 0003 5,000 hours 0004 10,000 hours 0005 Use the filter clogging sensor.
- Page 42 VRF SYSTEMS Indoor Unit 1. Simple Settings Function Simple setting items Item code Item Description Filter sign ON time setting Changes the indoor unit filter lifetime when a high-performance filter or other (filter lifetime) optional product is installed. Reduces the filter sign ON time to 1/2 of the standard time (setting at the time of Degree of filter fouling shipping) for cases when filter fouling is more severe than normal.
- Page 43 VRF SYSTEMS Indoor Unit 1. Simple Settings Function Item code Item Description Set when using a central control device. Central control address Used when setting the central control address manually from the remote controller. Operating mode priority change Note (1) NOTE (1) Explanation of operation mode priority change Enabled only in 2WAY System heat-pump models.
- Page 44 VRF SYSTEMS Indoor Unit 1. Simple Settings Function When the operating mode at the priority remote controller is changed, the operating modes of other remote controllers change as shown below. Mode change at priority remote controller Operating modes at other remote controllers Current mode New mode Current mode...
-
Page 45: Detailed Settings Function
VRF SYSTEMS Indoor Unit 2. Detailed Settings Function • This allows the system address, indoor unit address, and other settings to be made for the individual or group-control indoor unit to which the remote controller used for detailed settings is connected. - Page 46 VRF SYSTEMS Indoor Unit 2. Detailed Settings Function <Procedure of CZ-RTC3 / CZ-RTC5A> 20:30 (THU) START Fig. 2-2 Select the “Code no.” by pressing the Keep pressing the button. buttons simultaneously for 4 or more seconds. Change the “Code no.” by pressing the The “Maintenance func”...
- Page 47 VRF SYSTEMS Indoor Unit 2. Detailed Settings Function <Procedure of CZ-RTC4> 1 Press and hold the buttons simultaneously for 4 seconds or longer. 2 “ ”, unit No. “ ”, item code “ ”, and ° settings data “ ” are displayed blinking on the °...
- Page 48 VRF SYSTEMS Indoor Unit 2. Detailed Settings Function Setting the Flap Separately (When setting the CZ-RTC2) Press the timer time buttons to select 1) The 4-air outlet flap can be adjusted separately during the desired setting data. operation. When not adjusted separately, all flaps operate Flap position in the same manner.
- Page 49 VRF SYSTEMS Indoor Unit 2. Detailed Settings Function 2. Detailed Settings Function When setting the flap for each air outlet individually according to the room condition. (from Operating Instructions) <Procedure of CZ-RTC3 / CZ-RTC5A> Display the menu screen. Select the flap direction. (Press 2 times to finish.) To return to the previous screen Press...
- Page 50 VRF SYSTEMS Indoor Unit 2. Detailed Settings Function <Procedure of CZ-RTC4> Press the button. Stop the system before performing these steps. (The display stops blinking and remains lit, and setting is completed.) Press and hold the buttons If you wish to change the selected indoor unit, follow the simultaneously for 4 seconds or longer.
- Page 51 2WAY SYSTEM VRF SYSTEMS Indoor Unit 2. Detailed Settings Function 2. Detailed Settings Function Remote Controller Functions List of Detailed Setting Items Setting data Item code Item Description Description Description 4-Way Cassette (60×60) 2-Way Cassette (L1) 0001 0002 0003 1-Way Cassette (D1) (U1, U2, Y2) Low Silhouette Ducted (F2) High Static Pressure...
- Page 52 VRF SYSTEMS Indoor Unit 2. Detailed Settings Function Setting data Item code Item Description 0000 5 minutes (1B) Forced thermostat ON time 0001 4 minutes –010 Shifts discharge temperature setting 10°C down –009 Shifts discharge temperature setting 9°C down Cooling discharge –008 Shifts discharge temperature setting 8°C down temperature shift...
- Page 53 VRF SYSTEMS Indoor Unit 2. Detailed Settings Function Setting data Item code Item Description 0000 No forced operation 0001 Forced operation for 1 minute Automatic drain pump operation 0060 Continuous operation 0000 None Ventilation fan operation 0001 Ventilation fan operated by remote controller. Wired remote controller 0000 Not used.
- Page 54 VRF SYSTEMS Indoor Unit 2. Detailed Settings Function Setting data Item code Item Description DC fan tap operating Purpose mode 0000 Standard Standard (setting at shipment) High ceiling use High ceiling setting 1 (with standard panel) 0001 For low Ultra long-life filter, oil guard panel, ammonia deodorizing static-pressure filter filter, optical regenerative deodorizing filter Fan tap setting...
- Page 55 VRF SYSTEMS Indoor Unit 2. Detailed Settings Function Setting data Item code Item Description 0000 Without nanoe™ X function With or without nanoe™ X function, 0001 With nanoe™ X function (Not operational if R/C with nanoe™ X not connected) Operation setting 0002 With nanoe™...
- Page 56 VRF SYSTEMS Indoor Unit 2. Detailed Settings Function Item code Item Description Unit type Set when the indoor unit EEPROM memory is replaced during servicing. Indoor unit capacity System (outdoor unit) address These are not set at the time of shipping from the factory. These must be set after installation if automatic address setting is not Indoor unit address performed.
- Page 57 VRF SYSTEMS Indoor Unit 2. Detailed Settings Function Item code Item Description 1F (Upper limit) Cooling 20 (Lower limit) 21 (Upper limit) This setting changes the temperature range (upper limit and lower limit) Heating 22 (Lower limit) Change to the remote which is set from the remote controller or central control device.
- Page 58 VRF SYSTEMS Indoor Unit 2. Detailed Settings Function (Continued from previous page) Item code Item Description Heat exchanger temperature for The heat exchanger temperature control point for prevention of cold air cold air discharge discharge during heating operation can be changed. The indoor unit PCB optional output for the fan can be switched Fan output switching according to the purpose of use.
- Page 59 VRF SYSTEMS Indoor Unit 2. Detailed Settings Function Selecting the DC fan motor tap (when setting with the remote controller) <Procedure of CZ-RTC2> Stop the system before performing these steps. Press and hold the buttons simultaneously for 4 seconds or longer. If group control is in effect, press the button and select the address (unit No.) of the indoor unit to set.
- Page 60 VRF SYSTEMS Indoor Unit 2. Detailed Settings Function 3. Detailed Settings Function <Procedure of CZ-RTC3 / CZ-RTC5A> Stop the system before performing these steps. 1 Keep pressing the buttons simultaneously for 4 or more seconds. Detailed settings 20:30 (THU) The “Maintenance func” screen appears on the LCD display.
- Page 61 VRF SYSTEMS Indoor Unit 2. Detailed Settings Function <Procedure of CZ-RTC4> Stop the system before performing these steps. 1 Press and hold the b uttons simultaneously for 4 seconds or longer. 2 If group control is in effect, press the button to set.
- Page 62 VRF SYSTEMS Indoor Unit 2. Detailed Settings Function 2. Detailed Settings Function Selecting the DC fan motor tap (when setting from the PCB) 4-Way Cassette type (Type U1) <Procedure> Stop the system before performing these steps. Open the electrical component box cover, then check the indoor unit control PCB. (Fig. 2-5) Connect the jumper connector (2P: yellow) which was supplied with the accessory to the correct connector pin on the indoor unit control PCB according to the setting number which was confirmed in Table for DC Fan Motor Tap Settings.
- Page 63 VRF SYSTEMS Indoor Unit 2. Detailed Settings Function ExTERNAL STATIC PRESSURE SETTINg • Low Silhouette Ducted (S-15~160MF2E5A / S-15~160MF2E5A8) Choose one of the following methods from “a”, “b”, “c” or “d” as shown in the flow chart (within the dotted lines) and then make the setting accordingly.
- Page 64 VRF SYSTEMS Indoor Unit 2. Detailed Settings Function (3) Refer to Table 2-5, 2-6, 2-7 and Fig. 2-8 for details on the relationship between the value of item code “b0” and the external static pressure. (4) When set in group control (connecting multiple indoor units with one wired remote controller), set each indoor unit to item code “b0”. When amending the setting after selecting [ b.
- Page 65 VRF SYSTEMS Indoor Unit 2. Detailed Settings Function 1-2. Operating the Timer Remote Controller (CZ-RTC2) Table 2-5 Setting the external static pressure Indoor unit Item code 1-2-1. Setting Item Code “ ” 15, 22, 28, 36, 45, 106, 140, 160 Press and hold down the buttons 56, 60, 73, 90...
- Page 66 VRF SYSTEMS Indoor Unit 2. Detailed Settings Function 1-3. Operating the High-spec Wired Remote Select the “Code no.” by pressing the Controller (CZ-RTC3 / CZ-RTC5A) button. Change the “Code no.” to “B0” by pressing the button (or keeping it pressed). 20:30 (THU) Detailed settings 20:30 (THU)
- Page 67 VRF SYSTEMS Indoor Unit 2. Detailed Settings Function Auto External Static Pressure Setting Operation Press the button. Test run will be started. Test run setting mode screen appears on the LCD display. Keep pressing the buttons simultaneously for 4 or more seconds. 20:30 (THU) The “Maintenance func”...
- Page 68 3. How to install the indoor unit VRF SYSTEMS Indoor Unit 2. Detailed Settings Function 1-4. Operating the Timer Remote Controller (CZ-RTC4) Table 2-7 Setting the external static pressure 1-4-1. Setting Item Code “ ” Indoor unit Item code Press and hold down the buttons 15, 22, 28, 36, 45, 106, 140, 160...
- Page 69 VRF SYSTEMS Indoor Unit 2. Detailed Settings Function Indoor Fan Performance Type 90 Item code “ ” PQ diagram M M M M M M M L L L L 1 -2 1 -3 L L L L 1 -2 L L L L Airflow Volume (m /minute)
- Page 70 VRF SYSTEMS Indoor Unit 2. Detailed Settings Function • High Static Pressure Ducted (S-180, 224, 280ME2E5) Choose one of the methods (selection of “a”, “b”, “c” within the range of dotted line as shown in the flowchart below) and make settings. a.
- Page 71 VRF SYSTEMS Indoor Unit 2. Detailed Settings Function 1-1. How to Set on PC Board Turn off the power breaker to halt the supply of electricity to the PC board. Open the lid of the electrical component box and confirm the location where the Select switch on the indoor unit control PCB is placed. (Fig.
- Page 72 VRF SYSTEMS Indoor Unit 2. Detailed Settings Function 1-3. Operating the High-spec Wired Remote Detailed settings 20:30 (THU) Controller (CZ-RTC3 / CZ-RTC5A) Unit no. Code no. Set data Sel. Next 20:30 (THU) 4. Select the “Set data” by pressing the button.
- Page 73 VRF SYSTEMS Indoor Unit 2. Detailed Settings Function 3. How to install the indoor unit 1-4. Operating the Timer Remote Controller (CZ-RTC4) How to set the external static pressure Table 2-11 Setting the external static pressure 1. Press and hold down the Indoor unit Item code buttons simultaneously for 4 or more seconds.
- Page 74 3. How to install the indoor unit VRF SYSTEMS Indoor Unit 2. Detailed Settings Function 3-7-7. Indoor Fan Performance Indoor Fan Performance Type 180 (Pa) Cooling Heating Cooling Setting at Item code “ ” shipment Heating Cooling Heating Airflow Volume (m /min.) Type 224 Type 280...
- Page 75 VRF SYSTEMS Indoor Unit 2. Detailed Settings Function • Slim Low Static Ducted (S-15~56MM1E5A) Choose one of the methods (selection of “a”, “b”, “c” within the range of dotted line as shown in the flowchart below) and make settings. a. No setting changes: When using as it is factory preset at shipment.
- Page 76 VRF SYSTEMS Indoor Unit 2. Detailed Settings Function 1-1. How to Set on PC Board Table 2-12 External static pressure 1. Turn off the power breaker to halt the supply of electricity to Type the PC board. Standard (Pa) (shipment) High static pressure (Pa) 2.
- Page 77 VRF SYSTEMS Indoor Unit 2. Detailed Settings Function 1-3. Operating the High-spec Wired Remote Detailed settings 20:30 (THU) Controller (CZ-RTC3 / CZ-RTC5A) Unit no. Code no. Set data Sel. Next 20:30 (THU) 4. Select the “Set data” by pressing the button.
- Page 78 VRF SYSTEMS Indoor Unit 2. Detailed Settings Function 3. How to install the indoor unit 1-4. Operating the Timer Remote Controller (CZ-RTC4) How to set the external static pressure Table 2-15 Setting the external static pressure 1. Press and hold down the External static pressure of the buttons simultaneously for 4 or more seconds.
- Page 79 VRF SYSTEMS Indoor Unit 2. Detailed Settings Function External static pressure’s upper limit in high static pressure mode Standard external static Rated external static pressure in high pressure’s upper limit static pressure mode Lower static pressure in high static pressure mode Rated external static pressure at shipment Upper limit airflow...
-
Page 80: Remote Controller Servicing Functions
VRF SYSTEMS Indoor Unit 3. Remote Controller Servicing Functions • The remote controller includes a number of servicing functions. Use these as needed for test runs and inspections. ■ Timer Remote Controller CZ-RTC2 Fig. 3-1 List of Servicing Functions Functions Description Button operation Reset operation... - Page 81 VRF SYSTEMS Indoor Unit 3. Remote Controller Servicing Functions ■ High-spec Wired Remote Controller CZ-RTC3 / CZ-RTC5A Display of "maintenance function" screen Keep pressing the buttons simultaneously for 4 or more seconds. Maintenance func 20:30 (THU) The “Maintenance func” screen appears on the 1.
- Page 82 VRF SYSTEMS Indoor Unit 3. Remote Controller Servicing Functions ■ Timer Remote Controller CZ-RTC4 Fig. 3-3 List of Servicing Functions Functions Description Button operation Reset operation Unit status Operation with forced Press and hold the button for Test run 4 seconds or longer. thermostat ON Sensor Temperature display...
- Page 83 VRF SYSTEMS Indoor Unit 3. Remote Controller Servicing Functions ■ ECONAVI Display When the appears on the LCD display, the state of the sensor unit can be checked in the following method. <Procedure of CZ-RTC3 / CZ-RTC5A> Keep pressing the buttons simultaneously for 4 or more seconds.
- Page 84 VRF SYSTEMS Indoor Unit 3. Remote Controller Servicing Functions Code no. Description ECONAVI sensor ECONAVI panel Data shows the status of the ECONAVI sensor. 0000: The sensor is not connected. 0001: The sensor can detect human motion. 0002: The sensor is initializing. (The sensor cannot detect human motion. ) The initial setting is completed after about 90 seconds when switched on.
- Page 85 VRF SYSTEMS Indoor Unit 3. Remote Controller Servicing Functions Check of ECONAVI Operational Status The status of ECONAVI operation can be checked instantly. It is available to check the operation when installing the indoor unit. <Procedure of CZ-RTC3 / CZ-RTC5A> Keep pressing the buttons simultaneously for 4 or more seconds.
- Page 86 VRF SYSTEMS Indoor Unit 3. Remote Controller Servicing Functions Test Run Function Operates the unit with the thermostat forced ON. <Procedure of CZ-RTC2> Press and hold the button for 4 seconds or longer. “TEST” appears on the remote controller LCD display (Fig.
- Page 87 VRF SYSTEMS Indoor Unit 3. Remote Controller Servicing Functions <Procedure of CZ-RTC4> 1 Press and hold the button for 4 seconds or longer. 2 “ ” appears on the remote controller LCD ° ° display (Fig. 3-8). 3 Press the button to start the test run.
- Page 88 VRF SYSTEMS Indoor Unit 3. Remote Controller Servicing Functions n Sensor Temperature Display Function (displayed regardless of whether unit is operating or stopped) The procedure below displays the sensor temperatures from the remote controller, indoor unit, and outdoor unit on the remote controller. <Procedure of CZ-RTC2>...
- Page 89 VRF SYSTEMS Indoor Unit 3. Remote Controller Servicing Functions <Procedure of CZ-RTC3 / CZ-RTC5A> Keep pressing the buttons simultaneously for 4 or more seconds. Sensor info. 20:30 (THU) The “Maintenance func” screen appears on the Unit no. Code no. Data 0026 LCD display.
- Page 90 VRF SYSTEMS Indoor Unit 3. Remote Controller Servicing Functions <Procedure of CZ-RTC4> 1 Press and hold the buttons simultaneously for 4 seconds or longer. ” 2 The unit No. “X-X” (main unit No.), item code “ (sensor address), and servicing monitor “ ”...
- Page 91 VRF SYSTEMS Indoor Unit 3. Remote Controller Servicing Functions Indoor unit sensors Outdoor unit sensors Room temp. controlled* * Refer to the Service Manual of Outdoor Unit. Remote controller temp. Indoor unit intake temp. (TA) Indoor unit heat exchanger temp. E1 (E1) —...
- Page 92 VRF SYSTEMS Indoor Unit 3. Remote Controller Servicing Functions ■ nanoe™ X Display When the appears on the remote controller (CZ-RTC5A), the status of the nanoe™ X can be checked in the following way. <Procedure of CZ-RTC5A> Switch On the earth leakage circuit breaker. Wait until the remote control display returns to normal.
- Page 93 VRF SYSTEMS Indoor Unit 3. Remote Controller Servicing Functions In the case of the nanoe™ X module status other than "Normal" or "Unsupported" If the menu "13. nanoe" is not displayed or the module status becomes other than "Normal" or "Unsupported" even though the nanoe™...
- Page 94 – MEMO – 5 - 58...
-
Page 95: Trouble Diagnosis
VRF SYSTEMS Indoor Unit 6. TROUBLE DIAGNOSIS * Refer to the Service Manual of Outdoor Unit However, refer to page 5-53 operations in the high-spec wired remote controller (CZ-RTC3 / CZ-RTC5A) of "Sensor temperature display function". 6 - 1... - Page 96 – MEMO – 6 - 2...
-
Page 97: Test Run From The Remote Controller
VRF SYSTEMS Indoor Unit VRF SYSTEMS Indoor Unit 7. TEST RUN from the remote controller 1. Test Run ............. . 7-2 2. -
Page 98: Test Run
VRF SYSTEMS Indoor Unit 1. Test Run Regarding the detailed settings for the test run, refer to the service manual for each outdoor unit. If operating the high-spec wired remote controller (CZ-RTC3 / CZ-RTC5A / CZ-RTC4) is necessary, follow the procedure described below. 7-1. - Page 99 1. Test Run VRF SYSTEMS Indoor Unit VRF SYSTEMS Indoor Unit 1. Test Run <Procedure of CZ-RTC4> 1. Press the remote controller button for 4 seconds or longer. Then press the button. “ ” appears on the LCD display while the test run is in progress.
-
Page 100: Auto Address Setting
VRF SYSTEMS Indoor Unit 2.Auto address setting 7-2. Auto address setting <Procedure of CZ-RTC3 / CZ-RTC5A> 20:30 (THU) Keep pressing the buttons simultaneously for 4 or more seconds. The “Maintenance func” screen appears on the LCD display. Press the button to see each START menu. - Page 101 Test Run VRF SYSTEMS Indoor Unit VRF SYSTEMS Indoor Unit 2.Auto address setting 2. Auto Address Setting <Procedure of CZ-RTC4> Request concerning recording the indoor/outdoor unit combination Nos. Automatic address setting in Cooling mode cannot be done from the remote controller. After automatic address setting has been completed, be sure to record them for future reference.
- Page 102 201703...
Need help?
Do you have a question about the S-22MF2E5A8 and is the answer not in the manual?
Questions and answers