Advertisement
Quick Links
OWNER'S
OWNER'S
OWNER'S
OWNER'S
OWNER'S
MANU
MANU
AL
AL
MANU
MANU AL
MANU
AL
AL
WARNING
FAILURE TO FOLLOW THESE
WARNINGS MAY RESULT IN
SERIOUS INJURY AND/OR
PROPERTY DAMAGE.
Owner must ensure that all
players know and follow these
rules for safe operation of the
unit.
!
Do not dunk on this unit
!
Do not hang from any part of the unit,
including the backboard, rim, or net.
!
Do not slide, climb, or play on pole.
!
Keep organic material away from
pole base. Grass, litter, etc. could
cause corrosion and /or deterioration.
!
Check pole system twice a year for
signs of corrosion (rust, pitting,
chipping). Remove rust and/or loose
paint completely and repaint with
exterior enamel paint. If rust has
penetrated through the steel
anywhere, replace pole immediately.
!
Check unit before each use for loose
hardware, excessive wear, and signs
of corrosion and repair before using.
!
During play, use extreme caution to
keep players face away from the
backboard, rim, and net.
!
Wear a mouthguard when playing to
avoid dental injuries.
!
When adjusting height, keep hands
and fingers away from moving parts.
!
During play, do not wear jewelry
(rings, watches, necklaces, etc.).
Objects may entangle in net.
To make assembly of your basketball pole easier, use the Hardware Identifier on page 2 to identify and sort all fasteners.
Do not tighten hardware until instructed to do so. If hardware is tightened too soon, mounting holes may not align and parts
may not fit together. Leave locknuts slightly loose until you are instructed to tighten them.
Read this manual all the way through before starting to put up your pole. Then read each step completely before beginning that step.
may be shipped inside larger tubes. Check inside tubes before assembling or ordering parts.
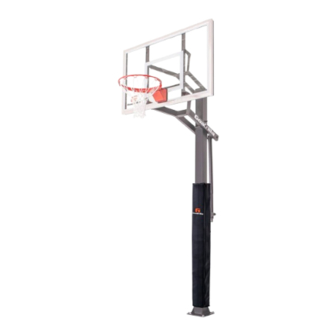
BASKETBALL SYSTEM
BASKETBALL SYSTEM
BASKETBALL SYSTEM
BASKETBALL SYSTEM
BASKETBALL SYSTEM
Thank you for purchasing our basketball system. We try hard to ensure that our products are of high quality
and free of manufacturing defects and of missing parts. However, if you have any problems with your
basketball pole, such as a manufacturing defect or a missing part, please DO NOT RETURN IT TO THE
STORE. Call us at:
TOLL FREE 1-888-USA-GOAL
(THIS IS A CONSUMER ONLY NUMBER)
CUSTOMER SERVICE DEPT., P.O. Box 889, Evansville, IN 47706
Please provide model number, serial number, and/or part number of the product and/or part when you call or
write. These numbers can be found on the product, packaging, or in this owner's manual.
Model III
MODEL NUMBER
B2306
FAX: (812) 467-1399
Or write us at:
Some smaller parts
2L-6631-00
Advertisement

Related Manuals for ESCALADE GOALRILLA III


Summary of Contents for ESCALADE GOALRILLA III
- Page 1 OWNER'S OWNER'S OWNER'S OWNER'S OWNER'S MANU MANU MANU MANU MANU AL WARNING FAILURE TO FOLLOW THESE WARNINGS MAY RESULT IN SERIOUS INJURY AND/OR PROPERTY DAMAGE. Owner must ensure that all players know and follow these rules for safe operation of the unit.
- Page 3 WELCOME TO THE FAMILY OF GOALRILLA OWNERS In order to have the safest fun and longest use of your Goalrilla system, please note and heed the following: Prior to main post preparation and goal assembly, call utility services for location of underground utility lines before you dig.
- Page 4 GOALRILLA III ASSEMBLY INSTRUCTIONS (Day 5) NOTE: It is important for the installer to understand the necessity of the nylon washers (#5) provided. Figure 3 These washers adequately space painted parts at all pivot points. Neglecting the use of these washers will result in rusted parts.
- Page 5 Attach Upper Arms (#6) to Pole (#2), as shown in Figure 6, using a bolt (#7), two flatwashers (#3), four plastic washers (#5) and hex nut (#4). Tighten bolts snug but, do not over tighten. Board Arms must pivot freely. If the four Tube Plugs (#9) are not already installed insert them into open ends of Upper Arms (#6).
- Page 6 ATTACHING BACKBOARD TO BOARD ARMS REQUIRES AT LEAST FOUR CAPABLE ADULTS. 13. With at least three capable people, raise the backboard assembly up and have the fourth attach Lower Board Arms to lower mounting tubes on backboard using two bolts (#20), four Board Bushings (#22) (shipped already installed), two plastic washers (#5), two washers (#3) and two hex nuts (#4).
-
Page 7: Limited Lifetime Warranty
Escalade Sports assumes no other obligations or liability on the part of the purchaser, and Escalade Sports neither assumes nor authorizes any other person to assume for it any other liability in connection with the goods sold. - Page 8 Key# Part # Description Qty. 3M-6474-00 4" Square Tube Plug 1A-6295-01 Post Assembly 2B-6093-00 1/2 Flat Washer 2B-6095-00 1/2-13 Nylon Locknut 3M-6245-00 1-1/4" OD Plastic Washer 8S-6543-01 Upper Board Arm 1B-6222-00 1/2-13 X 10" Hex Bolt-Grade 5 3M-6465-00 1-1/2 X 2-1/2 Tube Plug 11 1A-6304-01 Lower Board Arm 12 4L-7283-00...
- Page 9 2L-6631-00...
Need help?
Do you have a question about the GOALRILLA III and is the answer not in the manual?
Questions and answers