Table of Contents
Advertisement
Quick Links
MN-47966-EN
REV.01
05/23
EN
alto-shaam.com
10-10E Classic
10-20E Classic
20-10E Classic
20-20E Classic
For the most current manual, visit alto-shaam.com
Die neueste Fassung des Handbuchs finden Sie auf alto-shaam.com
Pour la dernière version du manuel, visiter alto-shaam.com
Para obtener el manual más actual, visite alto-shaam.com
Ga voor de meest recente handleiding naar alto-shaam.com
За самой последней версией руководства обращайтесь на сайт alto-shaam.com
要查看当前最新⼿册,请访问 alto-shaam.com
Operator's Manual
6-10E Classic
7-20E Classic
™
Prodigi
Classic Control
6-10G Classic
10-10G Classic
7-20G Classic
10-20G Classic
20-10G Classic
20-20G Classic
Advertisement
Table of Contents

Related Manuals for Alto-Shaam Prodigi 6-10E Classic


Summary of Contents for Alto-Shaam Prodigi 6-10E Classic
- Page 1 20-10G Classic 20-20E Classic 20-20G Classic MN-47966-EN For the most current manual, visit alto-shaam.com Die neueste Fassung des Handbuchs finden Sie auf alto-shaam.com REV.01 Pour la dernière version du manuel, visiter alto-shaam.com 05/23 Para obtener el manual más actual, visite alto-shaam.com Ga voor de meest recente handleiding naar alto-shaam.com...
-
Page 2: Manufacturer's Information
© Copyright 5/23 by Alto-Shaam, Inc. All rights reserved. This manual or any portion thereof may not be reproduced or used in any manner whatsoever without the express written permission of Alto-Shaam, Inc. Trademarks All trademarks referenced in this documentation are the property of their respective owners. -
Page 3: Foreword
OREWORD Enjoy your Alto-Shaam Prodigi™ Oven! The Alto-Shaam Prodigi oven combines a steam and convection oven into one versatile unit and can serve a variety of cooking functions. Alto-Shaam’s Prodigi ovens allow chefs to control humidity and temperature separately, with powerful results. - Page 4 OREWORD This page is intentionally left blank. P rod i gi ™ O p e r a tor’ s Man u a l MN-47966 Rev 01 5 /23 ▪ ▪ ▪ ▪...
-
Page 5: Table Of Contents
Foreword Enjoy your Alto-Shaam Prodigi™ Oven! ....3 Extend Your Manufacturer’s Warranty ....3 Alto-Shaam 24/7 Emergency Repair Service . - Page 6 ABLE OF ONTENTS How to View the Cleaning Log ..... . 74 How to Set the Cleaning Time ..... . . 76 Troubleshooting Error Codes .
-
Page 7: Safety
AFETY The Meaning of Signal Words This manual contains signal words where needed. These signal words must be obeyed to reduce the risk of death, personal injury, or equipment damage. The meaning of these signal words is explained below. DANGER Danger indicates a hazardous situation which, if not avoided, will result in serious injury or death. -
Page 8: Appliance Description And Intended Use
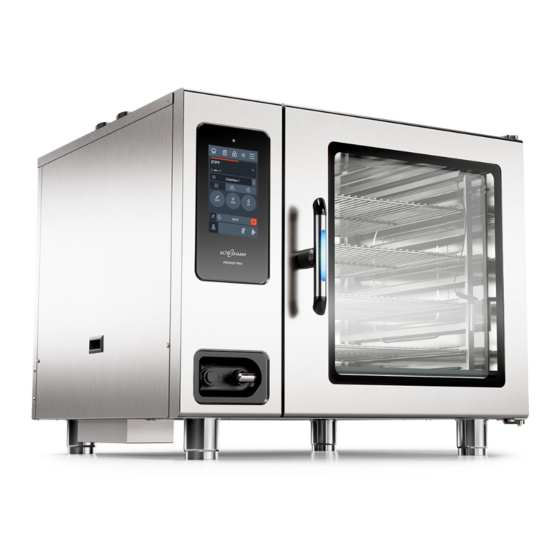
AFETY Appliance Description and Intended Use Appliance Engineered for dependability, connectivity, and cost savings, Prodigi™ description combination ovens are an all-in-one solution for efficient and consistent food production. These ovens do the work of a convection oven, kettle, steamer, fryer, smoker and more. -
Page 9: Safety Precautions
AFETY Safety Precautions Before you begin Read and understand all instructions in this manual. Electrical precautions Obey these electrical precautions when using the appliance: All electrical connections must be made by a qualified and trained service ▪ technician in accordance with applicable electrical codes. Consult local codes and Specification Sheets for the electrical cable and breaker ▪... - Page 10 Keep this manual and all supplied instructions, diagrams, schematics, parts lists, ▪ notices, and labels with the appliance if the appliance is sold or moved to another location. Contact Alto-Shaam for additional training if needed. ▪ Operator Only trained personnel are permitted to use the appliance. They must meet the...
- Page 11 Alto-Shaam of all liability. To prevent serious injury, death or property damage, have the appliance ▪...
- Page 12 AFETY Continued from previous page DANGER: Before starting the oven, make sure you do not detect the odor of gas. If you smell gas: Shut off the gas supply immediately. ▪ Do not attempt to light any appliance. ▪ Do not touch any electrical elements. ▪...
-
Page 13: Labels
Always load liquids, or foods that can become liquid when heated, at an eye level where they can be seen. LA-39155 Every Alto-Shaam product is precision calibrated prior to release from the factory to ensure accurate temperature control. Equipotential terminal LA-36443-E Pr odi g i™... - Page 14 ABELS Drain water connection point. LA-38911 Untreated, drinkable water connection point. LA-38910 Treated, drinkable water connection point. LA-38909 Capacities ∑ ∑ ∑ kg max. liter max. GN 1/1 6-10 10-10 7-20 10-20 20-10 20-20 LA-48238 WARNING WARNING/ADVERTENCIA/AVERTISSEMENT Fire hazard Fire Hazard This appliance is only for use with factory-supplied legs, casters, or base.
- Page 15 WARNING Failure to follow cleaning instructions can cause injury or ADVERTENCIA AVERTISSENENT equipment damage. Clean oven only with Alto-Shaam Failure to follow cleaning instructions can concentrated cleaning tablets. Cleaner is caustic. Avoid cause injury or equipment damage. Clean oven only with Alto-Shaam concentrated contact with skin or eyes.
- Page 16 ABELS WARNING Improper installation, adjustment, alteration, service or maintenance can cause property damage, injury or death. Read the installation, operating and maintenance instructions thoroughly before installing or servicing the equipment. Water and waste connection shall comply with the basic plumbing code of the Building Officials and Code Administrators International, Inc.
- Page 17 ABELS NOTICE For trained personnel only: The installation manual and the wiring diagram for this appliance can be found inside the oven attached to the opposite side of this panel. WARNING WARNING/ADVERTENCIA/AVERTISSEMENT Electric Shock Hazard Electric shock hazard To reduce the risk of electric shock, do not remove or open cover.
- Page 18 ABELS NOTICE: Use only factory-supplied casters when needed. When this appliance includes casters, the following must also be installed: ◾a connector complying with ANSI Z21.69 / CSA 6.16; ◾a quick-disconnect device complying with ANSI Z21.41 / CSA 6.9; ◾a restraining device to guard against transmission of strain to the connector as specified in the manual.
- Page 19 ABELS Unit ready for natural gas. Unit ready for propane gas. LA-23733 Pr odi g i ™ O pe rat or ’ s M a nual MN -47 966 Re v 01 5/2 3 ▪ ▪ ▪ ▪...
- Page 20 ABELS This page is intentionally left blank. P rod i gi ™ O p e r a tor’ s Man u a l MN-47966 Rev 01 5 /23 ▪ ▪ ▪ ▪...
-
Page 21: Operation
PERATION How to Turn On and Turn Off the Oven Before you begin The oven must be connected to electric power. ▪ Make sure the gas supply is connected. ▪ Make sure the water supply is connected. ▪ Turning on the oven To turn on the oven, do the following. -
Page 22: How To Preheat The Oven
PERATION How to Preheat the Oven Before you begin Make sure: The oven is turned on. ▪ The oven door is closed. ▪ Procedure To preheat the oven, do the following. Step Action From the professional cook screen, touch the preheat icon Enter the preheat temperature using the number pad. -
Page 23: How To Cook With Programmed Recipes
PERATION How to Cook with Programmed Recipes Before you begin Make sure: The oven is preheated. ▪ Your food is prepared and ready to cook. ▪ Procedure To cook using a programmed recipe, do the following. Step Action Touch the recipe book icon . - Page 24 PERATION Continued from previous page During the cooking The cooking status screen displays the details on the current cook setting. process During the cooking process: Action Result Touch the hand icon when to continue the cooking process. action is required... Touch “X”...
-
Page 25: How To Cook In Professional Mode
PERATION How to Cook in Professional Mode Before you begin Make sure: The oven is preheated. ▪ Your food is prepared and ready to cook. ▪ Background This procedure consists of: setting the food loading action; ▪ and setting the cooking stage parameters (temperature, time, humidity, and fan ▪... - Page 26 PERATION Continued from previous page Touch the cooking temperature icon Enter the cooking temperature using the key pad. Touch the fan speed icon Select the fan speed. Touch the humidity percentage icon Enter the humidity percentage using the key pad. CT-TS-016284 If cooking by time, touch...
- Page 27 PERATION Continued from previous page Cooking by probe If cooking by probe, touch the cook by probe icon . Then, touch the probe temperature Enter the probe temperature set-point using the key pad. Touch the check mark. CT-TS-016290 Load the food into the appropriate chamber. Touch the start icon .
- Page 28 PERATION Continued from previous page During the cooking process Action Result Touch the hand icon when to continue the cooking process. action is required... Touch the chamber... to show the recipe details. Touch “X”... to cancel the cooking process. At the end of the cooking process, the oven sounds an alert and the cavity light flashes.
-
Page 29: How To Use The Multiple Timers
PERATION How to Use the Multiple Timers Before you begin Make sure: The oven is preheated. ▪ Your food is prepared and ready to cook. ▪ Background There may be times when you will want to cook multiple pans of food at the same time, but at different intervals. - Page 30 PERATION Continued from previous page Touch the cooking temperature icon Enter the cooking temperature using the key pad. Touch the fan speed icon Enter the fan speed using the key pad. The fan speed can be set in increments of five percent. Touch the humidity percentage icon Enter...
- Page 31 PERATION Continued from previous page Touch the cooking time Enter the cooking time using the key pad. Touch the check mark. CT-TS-016311 Enter the cooking time for the second pan of food. CT-TS-016314 Load pan 1 into the oven. Touch the start icon The cooking stage timer starts to count down for pan 1.
- Page 32 PERATION Continued from previous page Load pan 2 into the oven. Touch the start icon The cooking stage timer starts to count down for pan 2. CT-TS-016320 At the end of the cooking process, the oven sounds an alert and the cavity light flashes.
-
Page 33: How To Lock And Unlock The Screen
PERATION How to Lock and Unlock the Screen Before you begin The oven is turned on. Background The screen can be locked to prevent changes being made during the cooking process. Procedure To lock and unlock the screen, do the following. Step Action Touch... -
Page 34: How To Cool Down The Oven
PERATION How to Cool Down the Oven Procedure To cool down the oven, do the following. Step Action From the manual cooking screen, touch the cooldown icon Enter the cooldown temperature using the number pad. Touch the check mark. Open the door. -
Page 35: How To Create A Recipe
PERATION How to Create a Recipe Background Creating a recipe consists of: Setting the cooking stage(s) parameters (temperature, time, humidity ▪ percentage, and fan speed); setting an action step if desired such as adding an ingredient ▪ naming the recipe; ▪... - Page 36 PERATION Continued from previous page Touch the step type icon to choose the step type. CT-TS-014530 Touch “Recipe Name” . The recipe name screen displays. CT-TS-014533 Enter the recipe name. Touch the check mark icon to return to the create recipe screen.
- Page 37 PERATION Continued from previous page Touch “Recipe Description” . The recipe description screen displays. Enter the recipe description. Touch the check mark icon to return to the create recipe screen. CT-TS-014539 Touch the cook by time icon or cook by probe icon Touch the cooking time or probe set-point temperature Enter...
- Page 38 PERATION Continued from previous page Touch the humidity icon Enter the humidity percentage using the key pad. Touch the check mark. CT-TS-014545 Touch the chamber temperature set-point icon Enter the chamber temperature set-point using the key pad. Touch the check mark. CT-TS-014548 Touch the fan speed icon...
- Page 39 PERATION Continued from previous page Touch the plus icon to add an additional stage or action. Touch the delete icon to delete a stage or action. CT-TS-014554 Touch the save icon when finished to save the recipe. CT-TS-014557 Result A new recipe has been created. Pr odi g i ™...
-
Page 40: How To Modify Or Delete A Recipe
PERATION How to Modify or Delete a Recipe Procedure To modify, duplicate, or delete a recipe, do the following. Step Action Touch the recipes icon . The “Browse Recipes” screen displays. CT-TS-014520 Modifying To modify a recipe, touch the recipe edit icon of the desired recipe. - Page 41 PERATION Continued from previous page Deleting To delete a recipe, touch the delete icon CT-TS-016299 Select the recipe(s) that you want to delete. Touch the delete icon again. Touch “Continue” to confirm that you want to delete the recipe(s). CT-TS-016302 Result The procedure is now complete.
-
Page 42: How To Backup Or Restore Settings With A Usb Drive
PERATION How to Backup or Restore Settings with a USB Drive Before you begin Make sure: The oven is on, but not in a cooking mode. ▪ You will need a USB drive. ▪ Procedure To backup or restore settings with a USB drive, do the following. Step Action Touch... - Page 43 PERATION Continued from previous page Plug the USB drive into the port. CT-TS-015862 Scroll to “System Backup & Update.” Touch “Backup settings to USB” or “Restore settings from USB” System Backup & Update Backup Settings to USB Restore Settings from USB Download Recipes to USB Upload Recipes from USB Update System Software...
-
Page 44: How To Load Recipes From A Usb Drive
PERATION How to Load Recipes from a USB Drive Before you begin Make sure: The oven is on, but not in a cooking mode. ▪ You will need a USB drive loaded with recipes. ▪ Procedure To load recipes from the USB drive to the oven, do the following. Step Action Touch... - Page 45 PERATION Continued from previous page Plug the USB drive into the port. CT-TS-015862 Scroll to “System Backup & Update.” Touch the “Upload Recipes from USB” setting. System Backup & Update Backup Settings to USB Restore Settings from USB Download Recipes to USB Upload Recipes from USB Update System Software Security Locks...
-
Page 46: How To Save Recipes To A Usb Drive
PERATION How to Save Recipes to a USB Drive Before you begin Make sure: The oven is on, but not in a cooking mode. ▪ You will need a USB drive. ▪ Procedure To download recipes from the oven to a USB drive, do the following. Step Action Touch... - Page 47 PERATION Continued from previous page Plug the USB drive into the port. CT-TS-015862 Scroll to “System Backup & Update.” Touch the “Download Recipes to USB” setting. System Backup & Update Backup Settings to USB Restore Settings from USB Download Recipes to USB Upload Recipes from USB Update System Software Security Locks...
-
Page 48: How To Update Software With A Usb Drive
You will need a USB drive with the updated software. To download the most up to ▪ date oven software and register for email notifications when new software versions are released, please visit https://www.alto-shaam.com/en/customer- support/software-downloads. Do not remove the USB drive during the update process. - Page 49 PERATION Continued from previous page Plug the USB drive into the port. CT-TS-015862 Scroll to “System Backup & Update.” Touch the “Update System Software” setting. System Backup & Update Backup Settings to USB Update Control Board (CB) Restore Settings from USB Update Back End Software (BE) Download Recipes to USB Update Front End Software (FE)
- Page 50 PERATION Continued from previous page Touch the check mark when the update is complete to restart the oven. Update complete To successfully complete procedure, roboot is required. Touch “Check” button to proceed. CT-TS-016195 Remove the USB drive. Result The software has now been updated. P rod i gi ™...
-
Page 51: How To Change The Home Screen
PERATION How to Change the Home Screen Procedure To change the home screen, do the following. Step Action Touch the menu icon . The menu screen displays. CT-TS-014502 Touch the “Settings” icon . The “General Settings” screen displays. CT-TS-014505 Continued on next page Pr odi g i ™... - Page 52 PERATION Continued from previous page Touch the “Home Screen” setting . The select home screen menu displays. Professional Cooking Main Menu CT-TS-016198 Select your desired home screen from the list. Touch the check mark to save the home screen setting. Professional Cooking Professional Cooking Main Menu...
-
Page 53: How To Change The Temperature Scale
PERATION How to Change the Temperature Scale Procedure To change the temperature scale from °F to °C and vice versa, do the following. Step Action Touch the menu icon . The menu screen displays. CT-TS-014502 Touch the “Settings” icon . The “General Settings” screen displays. CT-TS-014505 Continued on next page Pr odi g i ™... - Page 54 PERATION Continued from previous page Touch the “Temperature Units” setting . The select temperature units screen displays. Celcius (C°) Fahrenheit (F°) CT-TS-016204 Select your desired temperature scale. Touch the check mark to save the temperature scale setting. Celcius (C°) Fahrenheit (F°) Celcius (C°) CT-TS-016207 Result...
-
Page 55: How To Enable/Disable The Handle Light
PERATION How to Enable/Disable the Handle Light Procedure To enable the handle light, do the following. Step Action Touch the menu icon . The menu screen displays. CT-TS-014502 Touch the “Settings” icon . The “General Settings” screen displays. CT-TS-014505 Continued on next page Pr odi g i ™... - Page 56 PERATION Continued from previous page Scroll to the “Handle Light” setting. Touch the Handle Light button Touch the check mark . The handle light is now enabled. Repeat the procedure to disable the handle light. Sound & Light Alerts Sound & Light Alerts Volume Volume Light Brightness...
-
Page 57: How To Enable/Disable Automatic Preheat
PERATION How to Enable/Disable Automatic Preheat Background Enabling the automatic preheat function preheats the oven upon start up to the set preheat temperature. Make sure to set your preheat temperatures. See topic How to Preheat the Oven. Procedure To enable/disable automatic preheat, do the following. Step Action Touch... - Page 58 PERATION Continued from previous page Touch the “Auto Preheat” button Touch the check mark . The automatic preheat function is now enabled. Repeat the process to disable the automatic preheat function. CT-TS-016210 Result The automatic preheat function is now enabled/disabled. P rod i gi ™...
-
Page 59: How To Lock Recipe Editing, The Settings Screen, Or Auto Screen Lock
PERATION How to Lock Recipe Editing, the Settings Screen, or Auto Screen Lock Procedure To lock recipe editing, the settings screen, or auto screen lock, do the following. Step Action Touch the menu icon . The menu screen displays. CT-TS-014502 Touch the “Settings”... - Page 60 PERATION Continued from previous page Scroll to the “Security Locks.” Touch the Lock Recipe Editing button . The “Enter passcode” screen displays. Restore Settings from USB Download Recipes to USB Upload Recipes from USB Update System Software Security Locks Lock Recipe Editing Lock Settings Screen Auto Screen Lock CT-TS-016219...
-
Page 61: How To View Oven Information
PERATION How to View Oven Information Background This procedure is to be done through the touchscreen on the oven, not through the ChefLinc™ oven management system. The oven information screen shows the oven model, serial number, software version, and system information. Procedure To view oven information, do the following. -
Page 62: How To Download Haccp Data
PERATION How to Download HACCP Data Before you begin Make sure: The oven is on, but not in a cooking mode. ▪ You will need a USB drive. ▪ Background HACCP data provides automated record keeping, set-point validation, recipes used, dates and times. The data is stored until the information is downloaded. Once downloaded, the information is removed from the oven’s memory. - Page 63 PERATION Continued from previous page Plug the USB drive into the port. CT-TS-015862 Touch the download icon CT-TS-016241 Loading the data The oven downloads the data onto the USB drive. When the process is complete, the “Download Successful” screen displays. Touch the check mark to return to the menu screen.
-
Page 64: How To Calibrate The Temperature Probe
PERATION How to Calibrate the Temperature Probe Before you begin Make sure: The oven is on, but not in cooking mode. ▪ You have a thermometer. ▪ You have a container filled with ice and water. ▪ Procedure To calibrate the probe, do the following. Step Action Insert... - Page 65 PERATION Continued from previous page Touch the calibrate probes icon CT-TS-016272 Compare the probe temperature reading against 32°F (0°C). Touch the “+” or “–” symbols until the temperature displayed is 32°F (0°C). XX° CT-TS-016275 Remove the probe from the ice water. Result The probe is now calibrated.
- Page 66 PERATION This page is intentionally left blank. P rod i gi ™ O p e r a tor’ s Man u a l MN-47966 Rev 01 5 /23 ▪ ▪ ▪ ▪...
-
Page 67: Maintenance
AINTENANCE Maintenance Schedule Requirements See topic How to Clean the Oven. ▪ Make sure the oven is cooled down and off—inside of chamber 140°F (60°C) or ▪ less. Daily For daily maintenance, do the following. Remove any spills with disposable paper wipes or a damp cloth. ▪... - Page 68 AINTENANCE Continued from previous page Inspect the oven cavity for any signs of scale buildup. ▪ Inspect the ventless hood paper filter (if ventless hood is equipped, replace as ▪ needed). Test the ventless hood drain for proper drainage and signs of leaking. ▪...
-
Page 69: How To Clean The Oven Using Cleaning Tablets
AINTENANCE How to Clean the Oven using Cleaning Tablets Precautions WARNING: Burn hazard. Wear protective gloves, protective clothing, eye protection, and face protection when handling oven cleaner. Do not open the oven door during the cleaning cycle. Do not use steel pads, wire brushes, or scrapers when NOTICE cleaning. - Page 70 AINTENANCE Continued from previous page Touch the “Cleaning” icon . The Cleaning screen displays. CT-TS-014570 Select the desired cleaning level, for example Heavy Clean CT-TS-014573 Insert the appropriate number of cleaning tablets into the drain. CT-TS-016323 Touch the “Ok” icon Continued on next page P rod i gi ™...
- Page 71 AINTENANCE Continued from previous page The oven heats to the required temperature for the cleaning cycle, then the cleaning cycle starts. NOTE: Touching the cancel icon “X” cancels the cleaning cycle. The oven will start a forced rinse. The forced rinse must complete before operating the oven.
- Page 72 AINTENANCE Continued from previous page Spray the exterior of the oven with stainless steel polish. Wipe the exterior of the oven with a non-abrasive scrub pad. Follow safety instructions on the bottle of the stainless steel polish. NOTICE Use only non-caustic cleaners. Do not spray directly into the fan openings on the rear of the oven.
-
Page 73: How To Descale The Oven
Alto-Shaam ScaleFree Descaling Powder (CE-27889). Procedure To descale the oven, do the following. Step Action Place 7 oz. (198 g) of Alto-Shaam ScaleFree Descaling Powder into the cavity drain. Close the drain screen. CT-TS-016419 Clean the oven with a heavy clean cycle. See topic How to Clean the Oven Using Cleaning Tablets or How to Clean the Oven Using Liquid Cleaner. -
Page 74: How To View The Cleaning Log
AINTENANCE How to View the Cleaning Log Background The cleaning log allows the user to view details about the previously completed cleaning cycles on the unit. Procedure To view the cleaning log, do the following. Step Action Touch the menu icon . - Page 75 AINTENANCE Continued from previous page Touch the cleaning log icon . The “Cleaning log” screen displays. CT-TS-016256 Result The cleaning log has been viewed. Pr odi g i ™ O pe rat or ’ s M a nual MN -47 966 Re v 01 5/2 3 ▪...
-
Page 76: How To Set The Cleaning Time
AINTENANCE How to Set the Cleaning Time Background The user can set a cleaning frequency to schedule when the unit will go through a cleaning cycle. The cleaning frequency can be set by hours or day and time. Procedure To set the cleaning time, do the following. Step Action Touch... - Page 77 AINTENANCE Continued from previous page Scroll until “Cleaning Settings” displays. Touch the “Set Cleaning Frequency” setting. Cleaning Settings Next Cleaning Last Cleaning Set Cleaning Frequency Visible Cleaning Cleaning Lockout Date & Time Settings Timezone CT-TS-016226 Setting the cleaning Touch the “Hours” setting to set the cleaning frequency hours.
- Page 78 AINTENANCE Continued from previous page The “Set cleaning frequency time” screen will display. Touch the “AM”/“PM” button to choose whether the cleaning time is set for AM or PM. Enter the time of day for the cleaning. Touch the check mark. Touch the check mark on the “Set Cleaning Frequency”...
-
Page 79: Troubleshooting
ROUBLESHOOTING Error Codes Code Component Description Troubleshooting steps 2 - Convection fan Convection fan (upper) under speed 1. Power down control using on/off icon. 2. Cycle power to the oven either by unplugging the unit or by turning the main power switch off and then back on. - Page 80 ROUBLESHOOTING Code Component Description Troubleshooting steps E-11 52 - Steam injector Stem injector sensor open 1. Power down control using on/off icon. 2. Cycle power to the oven either by unplugging the unit or by turning the main power switch off and then back on. 3.
- Page 81 ROUBLESHOOTING Code Component Description Troubleshooting steps E-31 8 - Control Board Control board too warm 1. Make sure cooling fan(s) are operating. 2. Make sure exhaust vents are clean and free of debris. 3. Make sure oven clearances are met. 4.
- Page 82 ROUBLESHOOTING Code Component Description Troubleshooting steps E-78 19 - Voltage sensor Voltage monitor too low 1. Check to make sure the unit plug is fully seated in the electrical outlet. 2. Reset the main circuit breaker for the oven. If error reappears contact service provider. E-78 2 - Convection fan VFD (upper) under voltage 1.
- Page 83 State synchronization error between the 1. Clear error by pressing the check mark on interface board and control board the display to accept the error. 2. If the error persists contact Alto-Shaam Technical Support. E-94 10 - Control Board Communication error between Interface 1.
- Page 84 ROUBLESHOOTING Code Component Description Troubleshooting steps E-105 6 - Chamber Low water pressure 1. Water supply not connected. 2. Water supply is shut off. 3) Water supply to unit blocked or obstructed (check filter). E-109 6 - Chamber Chamber high limit 1.
-
Page 85: Warranty
ARRANTY Warranty Introduction Alto-Shaam, Inc. warrants to the original purchaser only, that any original part found to be defective in material or workmanship will be replaced with a new or rebuilt part at Alto-Shaam's option, subject to provisions hereinafter stated. - Page 86 No person except an officer of Alto-Shaam, Inc. is authorized to modify this warranty or to incur on behalf of Alto-Shaam any other obligation or liability in connection with Alto-Shaam equipment.
-
Page 87: Declaration Of Conformity
ECLARATION OF ONFORMITY Pr odi g i™ O pe rato r ’ s M anual MN-47 966 Re v 01 5/23 ▪ ▪ ▪ ▪... - Page 88 ECLARATION OF ONFORMITY P rod i gi ™ O p e r a tor’ s Man u a l MN-47966 Rev 01 5 /23 ▪ ▪ ▪ ▪...
- Page 89 ECLARATION OF ONFORMITY Pr odi g i ™ O pe rat or ’ s M a nual MN -47 966 Re v 01 5/2 3 ▪ ▪ ▪ ▪...
- Page 92 Miami, FL US A INDIA MEXICO Pune, India Leon, Mexic o AUSTRALIA Brisbane, Queenslan d Menomonee Falls, WI U.S.A. Phone 800 -558-8 744 | +1-262-251-3800 | alto-shaam.co m ASIA FRANCE MEXICO Shanghai, China Aix en Provence, France Phone +52 1 477-717-3108 Phone +86-21-6173-0336 Phone +33(0)4-88-78-21-73 MIDDLE EAST &...
Need help?
Do you have a question about the Prodigi 6-10E Classic and is the answer not in the manual?
Questions and answers