Table of Contents
Advertisement
Quick Links
Advertisement
Table of Contents

Subscribe to Our Youtube Channel
Related Manuals for Cloos GL 502


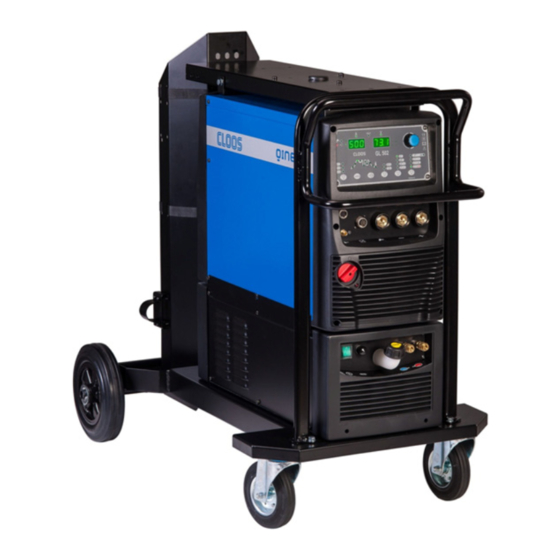
Summary of Contents for Cloos GL 502
- Page 1 GL 502 01/15 Rev.0 - EN -...
- Page 2 Carl Cloos Schweisstechnik GmbH Industriestrasse 35708 Haiger Germany Telefon (0 27 73) 85-0 Telefax (0 27 73) 85-275 E-Mail: info@cloos.de Internet: http://www.cloos.de RW - FP - Rev.0 Ausgabedatum 3. 02 2015 Keep for fur ther use.
- Page 3 CARL CLOOS Schweisstechnik GmbH Industriestrasse 35708 Haiger Tel.(+49) 2773/85-0 Fax.(+49) 2773/85-275 mail: info@cloos.de www.cloos.de Document: QIGLW502 Month/Year: 10/14 EC-Declaration of Conformity in accordance with EC Directives 2006/95/EG (low voltage) and 2004/108/EG (EMV) We herewith certify that the welding machine mentioned below has been developed, designed and manufactured in accordance with the EC Directives and brought on the market.
-
Page 4: Table Of Contents
DELETING A JOB ................................27 TECHNICAL DATA ............................28 SPARE PARTS ............................... 30 ELECTRICAL DIAGRAM ..........................32 GL 502 ................................32 CONNECTOR FOR "COM1" ........................... 32 CONNECTOR FOR "COM2" ........................... 37 TORCH CONNECTOR ............................ 39 REMOTE CONTROLLER CONNECTOR ......................39... -
Page 5: Introduction
Cod.006.0001.1681 GL 502 23/04/2014 v2.0 ENGLISH INTRODUCTION INTRODUCTION IMPORTANT! This professional and rugged welding power source for DC MMA and This handbook must be consigned to the user prior to TIG welding with exceptional arc characteristics is designed to installation and commissioning of the unit. -
Page 6: Installation
Cod.006.0001.1681 GL 502 23/04/2014 v2.0 ENGLISH INSTALLATION DANGER! REAR PANEL Lifting and positioning Read the warnings highlighted by the following symbols in the “General prescriptions for use”. CONNECTIONS TO THE ELECTRICAL MAINS NETWORK The characteristics of the mains power supply to which the equipment shall be connected are given in the section entitled “Technical data”... -
Page 7: Preparing For Mma Welding
Cod.006.0001.1681 GL 502 23/04/2014 v2.0 ENGLISH 6. Connector for connection to the programmer. PREPARING FOR MMA WELDING (Programming connector for the "frontal logic" circuit board) 1. Set the welding power source ON/OFF switch to “O” (unit de- You can update the software of the equipment using the energized). - Page 8 Cod.006.0001.1681 GL 502 23/04/2014 v2.0 ENGLISH (polarity to basic electrode) 7/40...
-
Page 9: Preparing For Tig Welding
Cod.006.0001.1681 GL 502 23/04/2014 v2.0 ENGLISH PREPARING FOR TIG WELDING NOTE: For the cooler to power source assembly procedure refer to the cooler instruction manual. 1. Set the welding power source ON/OFF switch to “O” (unit de- energized). 2. Plug the power cable plug into a mains socket outlet. - Page 10 Cod.006.0001.1681 GL 502 23/04/2014 v2.0 ENGLISH (polarity for tungsten electrode) 9/40...
-
Page 11: Commissioning
Cod.006.0001.1681 GL 502 23/04/2014 v2.0 ENGLISH COMMISSIONING USER INTERFACE CODE SYMBOL DESCRIPTION This LED illuminates to confirm the presence of power on the output sockets. This LED illuminates to show an anomaly in the operating conditions. See § 3.5 ALARMS MANAGEMENT page 16. - Page 12 Cod.006.0001.1681 GL 502 23/04/2014 v2.0 ENGLISH CODE SYMBOL DESCRIPTION When this LED illuminates the following parameter can be set: SECOND CURRENT B-LEVEL When this LED illuminates the following parameter can be set: BASE CURRENT When this LED illuminates the following parameter can be set:...
- Page 13 Cod.006.0001.1681 GL 502 23/04/2014 v2.0 ENGLISH CODE SYMBOL DESCRIPTION This button selects the torch trigger procedure. See § 4.1 page 17. This button selects the welding mode. Data setting: The encoder sets the value of the selected parameter. Welding: The encoder sets the value of the following parameter:...
-
Page 14: Unit Power-Up
Cod.006.0001.1681 GL 502 23/04/2014 v2.0 ENGLISH UNIT POWER-UP Set the welding power source ON/OFF switch to “I” to switch on the unit. The message appears on the following displays: D2 x.x= software version First power-up or power-ups following a RESET procedure The welding power source sets up for welding with the factory presets. -
Page 15: Set-Up (Initial Set-Up Of The Welding Power Source)
Cod.006.0001.1681 GL 502 23/04/2014 v2.0 ENGLISH SET-UP (INITIAL SET-UP OF THE WELDING POWER SOURCE) Set the welding power source ON/OFF switch to “O” to switch the unit off. Press the button. Set the welding power source ON/OFF switch to “I” to switch on the unit. - Page 16 Cod.006.0001.1681 GL 502 23/04/2014 v2.0 ENGLISH FINAL CURRENT The value of this parameter can be set as a percentage of the welding current or as an absolute value expressed in Amperes. HF CURRENT This parameter establishes the current value during HF discharge. The value of this parameter can be set as an absolute value or in SYN.
-
Page 17: Alarms Management
Cod.006.0001.1681 GL 502 23/04/2014 v2.0 ENGLISH ALARMS MANAGEMENT This LED illuminates if an incorrect operating condition occurs. An alarm message appears on the following display: D2 Tab. 2 - Alarm messages MESSAGE MEANING EVENT CHECKS - Make sure that the power required by the... -
Page 18: Welding Settings
Cod.006.0001.1681 GL 502 23/04/2014 v2.0 ENGLISH WELDING SETTINGS TORCH TRIGGER PROCEDURE 2 STROKE LIFT-ARC WELDING (2T) 1. Touch the workpiece with the torch electrode. 2. Press (1T) and keep the torch trigger pressed. 3. Slowly lift the torch to strike the arc. - Page 19 Cod.006.0001.1681 GL 502 23/04/2014 v2.0 ENGLISH 4 STROKE B-LEVEL WELDING WITH HIGH FREQUENCY ARC STRIKE (4T B-L HF) 1. Bring the torch up to the work until the electrode tip is approximately 2 or 3 mm away. 2. Press (1T) and release (2T) the torch trigger.
- Page 20 Cod.006.0001.1681 GL 502 23/04/2014 v2.0 ENGLISH PILOT ARC WELDING The pilot arc can be activated in the following torch trigger procedures: - 4T WELDING - 4T HF WELDING - 4T B-L HF WELDING The welding procedure with pilot arc differs with respect to the procedure without pilot arc in the part of the torch trigger procedure described below.
-
Page 21: Selection Of The Welding Mode And Torch Trigger Procedure
Cod.006.0001.1681 GL 502 23/04/2014 v2.0 ENGLISH SELECTION OF THE WELDING MODE AND TORCH TRIGGER PROCEDURE Specific torch trigger procedures are available in accordance with the selecting welding mode. The availability of certain procedures depends on whether or not certain parameters or functions of the unit are enabled or set in the associated menus. -
Page 22: Welding Parameters
Cod.006.0001.1681 GL 502 23/04/2014 v2.0 ENGLISH WELDING PARAMETERS For a better understanding of the parameter functions described in the table, refer to the following diagram. (I1) WELDING CURRENT (I2) BASE CURRENT (I3) FINAL CURRENT (I4) STARTING CURRENT (t1) UP SLOPE TIME... - Page 23 Cod.006.0001.1681 GL 502 23/04/2014 v2.0 ENGLISH PULSED CURRENT FREQUENCY The result of this is a very precise, not oxidized welding spot without any plastic deformation of the sheet. Consequences of a higher value: - Slower melt speed. HF ARC START - Reduction of heat-affected zone.
-
Page 24: Parameters Activation
Cod.006.0001.1681 GL 502 23/04/2014 v2.0 ENGLISH PARAMETERS ACTIVATION The welding parameters are available in accordance with the selected welding mode and procedure. Certain parameters are available only after other parameters or functions of the unit have been enabled or set. -
Page 25: Parameters Setting: (1St Level)
Cod.006.0001.1681 GL 502 23/04/2014 v2.0 ENGLISH PARAMETERS SETTING: (1ST LEVEL) Press this button to scroll the list of settings to edit. The acronym relative to the setting to be edited appears on the following displays: D1 The value relative to the selected setting appears on the following displays: D2 Using the encoder, edit the value of the selected setting. - Page 26 Cod.006.0001.1681 GL 502 23/04/2014 v2.0 ENGLISH Tab. 7 - Parameters of the 1st level menu: SYNERGIC DC TIG mode ACRONYM PARAMETER MIN DEFAULT MAX Pr.G. PRE-GAS TIME 0.0 s 10.0 s 500 A *4 St.C. STARTING CURRENT 200 % *4 Sl.u.
-
Page 27: Parameters Setting: (2Nd Level)
Cod.006.0001.1681 GL 502 23/04/2014 v2.0 ENGLISH PARAMETERS SETTING: (2ND LEVEL) Hold down the button for 3 seconds to gain access to the 2nd level menu. The acronym relative to the setting to be edited appears on the following displays: D1 The value relative to the selected setting appears on the following displays: D2 Press this button to scroll the list of settings to edit. -
Page 28: Jobs Management
Cod.006.0001.1681 GL 502 23/04/2014 v2.0 ENGLISH JOBS MANAGEMENT Personalised welding settings, or JOBs, can be saved in memory locations and subsequently uploaded. Up to 50 JOBS can be saved (j01-j50). JOBs can be managed only when the unit is not in welding mode. -
Page 29: Technical Data
Cod.006.0001.1681 GL 502 23/04/2014 v2.0 ENGLISH TECHNICAL DATA Waste electrical and electronic equipment (WEEE) Electromagnetic compatibility (EMC) Directives applied Low voltage (LVD) Restriction of the use of certain hazardous substances (RoHS) Construction standards EN 60974-1; EN 60974-3; EN 60974-10 Class A... - Page 30 Cod.006.0001.1681 GL 502 23/04/2014 v2.0 ENGLISH 50 % (40° C) 24.8 A 60 % (40° C) 23.3 A 100 % (40° C) 25.5 A 50 % (40° C) 18.6 A Maximum Effective Supply Current 60 % (40° C) 17.7 A 100 % (40°...
-
Page 31: Spare Parts
Spare Parts... - Page 32 order number description 0835 27 41 00 KNOB WITH CAP 0835 26 41 01 FRONT PANEL LABEL 0835 27 41 02 LOGIC BOARD PLATE 0835 26 41 02 LOGIC BOARD 0835 27 41 05 FRONT/REAR PLASTIC PANEL 0835 27 41 06 FRONT/REAR PLATE 0835 27 41 07 THREE-POLE SWITCH...
-
Page 33: Connector For "Com1
order number description 0835 21 00 34 ILME CONNECTOR CAP 0835 27 41 44 RS-232 CONNECTOR CAP 0835 27 41 49 FUSE HOLDER CAP 0835 27 41 47 SUPPLY CABLE 0835 27 41 45 SOCKET FOR HEATER 0831 93 00 31 FUSE HOLDER 0835 27 41 43 CABLE CLAMP... - Page 34 order number description TORCH CONNECTORS COMPLETE KIT 0835 21 00 43 SLEEVE HOSE ADAPTER FOR RUBBER HOSE 1/4 0835 21 00 44 HOSE CLAMP Ø=11-13 0835 21 00 45 HOSE CLAMP Ø=07-09 0835 21 00 46 SLEEVE HOSE ADAPTER FOR RUBBER HOSE M10 0835 21 00 47 AMPHT3360-001 M/5V.
-
Page 35: Electrical Diagram
ELECTRICAL DIAGRAM GL 502... -
Page 40: Remote Controller Connector
CONNECTOR FOR "REMOTE 1" welding side CONNECTOR FOR "REMOTE 2" welding side... - Page 41 LEGEND: = output signal coming out of RC = input signal going into RC. Pin IN / OUT Signal FUNCTION NOTES Insulated 10 Volt +10 V-ISO ANALOG AMPERE AMPERE CONTROL: it communicates the welding current Analogue signal 0- (+10 V) (10 V) with an analogical signal of between 0 V and +10 V.
-
Page 42: Torch Connector
TORCH CONNECTOR welding side • Torch • Up & Down Torch... - Page 43 REMOTE CONTROLLER CONNECTOR welding side • Torch with potentiometer Potentiometer 2 kΩ-10 kΩ • Remote Controller Potentiometer 2 kΩ-10 kΩ • Foot pedal controller Potentiometer 2 kΩ-10 kΩ...
- Page 44 www.qineo.de...
Need help?
Do you have a question about the GL 502 and is the answer not in the manual?
Questions and answers