Table of Contents
Advertisement
Available languages
Available languages
Quick Links
Installation Guide
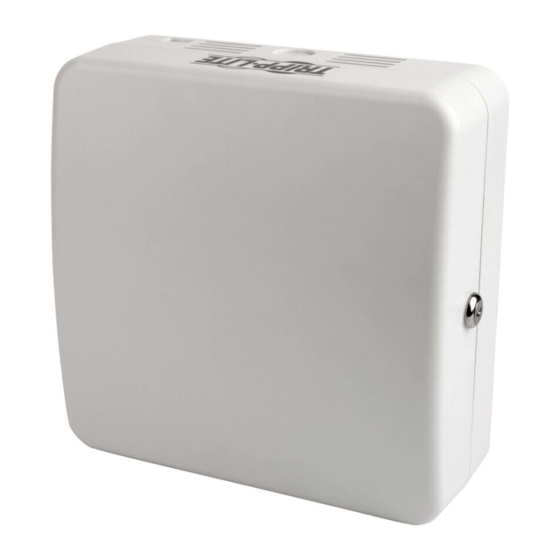
11" x 11" ABS Wireless Access
Point Enclosure with Lock
Model: EN1111
Español 5 • Français 9 • Русский 13
PROTECT YOUR INVESTMENT!
Register your product for quicker service and ultimate peace of mind.
You could also win an ISOBAR6ULTRA surge protector—a $100 value!
www.tripplite.com/warranty
1111 W. 35th Street, Chicago, IL 60609 USA • www.tripplite.com/support
Copyright © 2018 Tripp Lite. All trademarks are the sole property of their respective owners.
1
Advertisement
Table of Contents

Subscribe to Our Youtube Channel
Related Manuals for Tripp Lite EN1111


Summary of Contents for Tripp Lite EN1111
- Page 1 Register your product for quicker service and ultimate peace of mind. You could also win an ISOBAR6ULTRA surge protector—a $100 value! www.tripplite.com/warranty 1111 W. 35th Street, Chicago, IL 60609 USA • www.tripplite.com/support Copyright © 2018 Tripp Lite. All trademarks are the sole property of their respective owners.
-
Page 2: Components List
Components List IMPORTANT: Ensure that you have received all parts according to the component checklist prior to installing. If any parts are missing or faulty, visit www.tripplite.com/support for service. (x1) (x1) (x1) (x2) (x2) (x2) (x2) (x1) Installation 1. Mount Enclosure Box to Wall Find a wood stud location for mounting Mark the exact location of the... - Page 3 Installation • Installers are responsible for providing wall-mounting hardware. Use a minimum of two #10 x 2” or larger screws (not included) to secure the enclosure in place. • Make sure mounting screws are anchored into the center of the studs. Use of a stud finder is highly recommended. •...
-
Page 4: Warranty And Product Registration
PRODUCT REGISTRATION Visit www.tripplite.com/warranty today to register your new Tripp Lite product. You’ll be automatically entered into a drawing for a chance to win a FREE Tripp Lite product!* * No purchase necessary. Void where prohibited. Some restrictions apply. See website for details. -
Page 5: Guía De Instalación
Inalámbrico de 11” de ABS con Cerradura Modelo: EN1111 English 1 • Français 9 • Русский 13 1111 W. 35th Street, Chicago, IL 60609 USA • www.tripplite.com/support Copyright © 2018 Tripp Lite. Todas las marcas registradas son propiedad de sus respectivos propietarios. -
Page 6: Lista De Componentes
Lista de Componentes IMPORTANTE: Asegúrese antes de instalar, de haber recibido todas las partes de acuerdo a la lista de comprobación de componentes. Si faltara cualquier parte o estuviese dañada, visite www.tripplite.com/support para solicitar servicio. (x1) (x1) (x1) (x2) (x2) (x2) (x2) (x1) - Page 7 Instalación • Los instaladores son responsables de suministrar los accesorios para instalación en la pared. Use un mínimo de dos tornillos #10 x 2” o mayores (no incluidos) para fijar el soporte en su sitio. • Cerciórese que los tornillos de instalación estén anclados en el centro de los travesaños. Es muy recomendable usar un detector de vigas. •...
- Page 8 Tripp Lite tiene una política de mejora continua. Las especificaciones del producto están sujetas a cambio sin previo aviso. 1111 W. 35th Street, Chicago, IL 60609 USA • www.tripplite.com/support...
-
Page 9: Guide D'installation
Modèle : EN1111 English 1 • Español 5 • Русский 13 1111 W. 35th Street, Chicago, IL 60609 USA • www.tripplite.com/support Droits d’auteur © 2018 Tripp Lite. Toutes les marques de commerce sont la propriété exclusive de leurs propriétaires respectifs. -
Page 10: Liste Des Composants
Liste des composants IMPORTANT : S’assurer d’avoir reçu toutes les pièces conformément à la liste de vérification des composants avant de procéder à l’installa- tion. Si des pièces sont manquantes ou défectueuses, visiter www.tripplite.com/support pour obtenir de l’aide. (x1) (x1) (x1) (x2) (x2) - Page 11 Installation • Les installateurs sont responsables de fournir la quincaillerie pour le montage au mur. Utiliser au moins deux vis n° 10 x 2 po ou de plus grande taille (non incluse) pour retenir le montage en place. • S’assurer que les vis de montage sont ancrées au centre des montants. Il est fortement recommandé d’utiliser un localisateur de montants. •...
-
Page 12: Garantie
à des variations importantes, le fabricant ne fait aucune déclaration ou garantie quant à l’aptitude ou l’adaptation de ces dispositifs pour une application spécifique. La politique de Tripp Lite en est une d’amélioration continue. Les caractéristiques techniques sont modifiables sans préavis. 1111 W. 35th Street, Chicago, IL 60609 USA • www.tripplite.com/support... -
Page 13: Руководство По Установке
доступа размером 28 см из АБС-пластика с замком Модель: EN1111 English 1 • Español 5 • Français 9 1111 W. 35th Street, Chicago, IL 60609 USA • www.tripplite.com/support Охраняется авторским правом © 2018 Tripp Lite. Все торговые знаки являются исключительной собственностью своих соответствующих владельцев. - Page 14 Перечень комплектации ВНИМАНИЕ! Перед началом установки убедитесь в том, что вами получены все детали согласно перечню комплектации. В случае отсутствия или повреждения каких-либо деталей обратитесь за помощью на страницу www.tripplite.com/support. (x1) (x1) (x1) (x2) (x2) (x2) (x2) (x1) Установка 1. Крепление корпуса к стене Определите...
- Page 15 Установка • Ответственность за обеспечение оснастки для настенного крепления возлагается на установщика. Для крепления кронштейна используйте два винта #10 x 2” или большего размера (в комплект поставки не входят). • Необходимо обеспечить ввертывание крепежных винтов по центру элементов каркаса. С этой целью настоятельно рекомендуется использование...
-
Page 16: Гарантийные Обязательства
данных изделий для какого-либо конкретного применения или их соответствия каким-либо конкретным требованиям. Компания Tripp Lite постоянно совершенствует свою продукцию. В связи с этим возможно изменение технических характеристик изделия без предварительного уведомления. 1111 W. 35th Street, Chicago, IL 60609 USA • www.tripplite.com/support...
Need help?
Do you have a question about the EN1111 and is the answer not in the manual?
Questions and answers