Advertisement
Quick Links
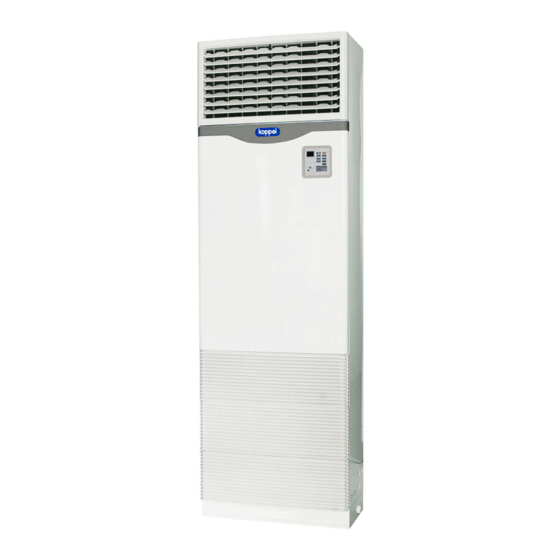
Operation Manual
Packaged Split Type
Air Conditioner
KFM-36E0A / 60E0A
KFM-90E0 / KFM-120E0
KFMD-120E0
1. SAFETY PRECAUTION
Please read this manual carefully before operating the air conditioner.
Pay special attention to signs of "WARNING". The "Warning" section contains
matters, which, if not observed strictly, may cause death or serious injury.
Please follow all instructions strictly to help ensure your safety.
WARNING
All wiring must conform to local and national electrical codes.
To avoid possible electrical shock, you must ground your air conditioner.
This air conditioner requires a separate power supply on a separately fused
circuit.
Do not insert your finger, a stick, or any other object into the air inlet and air
outlet.
Do not expose the skin directly to the indoor airflow for an extended period of
time.
Do not install the outdoor condensing unit near flammable gas. The
condensing unit may catch fire if flammable gas leaks.
REMINDER
Keep this manual for future reference as it contains important installation and
safety instructions.
Call for service immediately when:
Abnormal operating noise is heard.
A fuse blows or a circuit breaker trips frequently.
The controls do not work properly.
2. CONTROL
CONTROL PAD
DISPLAY
SCREEN
HOUR
ADJUSTMENT
BUTTON
TIMER
BUTTON
COOL MODE
INDICATOR
FAN MODE
INDICATOR
SLEEP MODE
INDICATOR
FAN "ON"
INDICATOR
FAN SPEED
TEMPERATURE
SETTING INDICATOR
FAN SPEED BUTTON
SLEEP BUTTON
AIR SWING BUTTON *
(functional only on KFM-36E0A/60E0A )
TIMER BUTTON
REMOTE CONTROL UNIT
(OPTIONAL – CAN BE PURCHASED SEPARATELY
Koppel, Inc.
Severina Industrial Estate
Km. 16, West Service Road
South Superhighway, Parañaque City,
Metro Manila, Philippines
AUTO FAN INDICATOR
FAN SPEED BUTTON
ON / OFF BUTTON
TEMPERATURE
ADJUSTMENT BUTTON
SLEEP BUTTON
AIR SWING BUTTON *
(functional for KFM-36E0A and
KFM-60E0A only).
MODE SELECTOR
BUTTON
VALVE "ON"
INDICATOR
TIMER"ON
INDICATOR
MODE
INDICATOR
TEMPERATURE/ TIMER
ADJUSTMENT BUTTON
"ON" / "OFF" BUTTON
MODE SELECTOR
BUTTON
"SEND" BUTTON
"CANCEL" BUTTON
* Pressing the AIR SWING BUTTON
activates/ deactivates left to right
swiveling motion of the supply grille.
3. USING THE CONTROL PAD
Power On the Unit
Fan Mode
Fan mode operation enables you to select the fan speed (HIGH, MEDIUM, or LOW).
FAN MODE INDICATOR
Cool Mode
Selection of different fan speeds (HIGH, MEDIUM, LOW, or AUTO) is also possible during
COOL MODE.
AUTO FAN
INDICATOR
COOL MODE INDICATOR
Dry Mode
DRY MODE can only be activated/deactivated using the remote control. Fan speed is
automatically set to LOW FAN (fan speed cannot be adjusted during DRY MODE).
Setting the Timer
Using the timer, you can automatically turn on or off your unit (preset time from 1 to 15
hours). The timer does not work when the unit is in sleep mode.
TIMER INDICATOR
Sleep Mode
Sleep function automatically raises the preset temperature by 1° C after an hour.
SLEEP MODE INDICATOR
Lock-Control Function
Lock-control is a security function of the CONTROL PAD, which, when activated,
prevents any change on the current user-setting. However, turning "ON" or "OFF" the
unit is still possible.
While the unit is on,
•
Press the
button until FAN MODE
INDICATOR lights up.
•
Press the
button repeatedly until
A A
the desired fan speed is set. (
for high,
for medium, and
for low). The
blinking display screen will show the actual
.
fan speed for 5 seconds
Call for service.
While the unit is on,
•
Press the
button until the COOL MODE
INDICATOR lights up.
•
Press the
button to set the fan speed
A A
(
for high,
for medium,
and
for auto). The display screen will
show the status as it blinks for 5 seconds.
•
TEMP
Press
or
button to set the
TEMP
temperature. Setting temperature will blink
for 5 seconds before the actual room
temperature is displayed again on the screen.
•
The setting temperature can be adjusted
from 15°C to 30°C.
If the fan speed is set to AUTO, the AUTO LED on
the fan speed button will be lit. The speed will
adjust automatically according to the difference
between the actual room temperature and the
setting temperature.
To set a time to turn the unit off
TIM
•
Press
TIMER
button on the control pad. TIMER
ER
INDICATOR on the button will turn on.
•
HOUR
Press
or
button to change the
HOUR
hour setting on the blinking display screen.
TIME
R
To set a time to turn the unit on
Press
TIMER
button on the control pad. TIMER
INDICATOR on the button will turn on.
HOUR
Press
or
button to change the
HOUR
hour setting on the blinking display screen.
•
Press
SLEEP
button to start the sleep
function. The SLEEP MODE INDICATOR
will turn on.
NOTE
•
When the system is put into sleep mode,
pressing
SLEEP
button again will cancel the
sleep function.
• When in sleep mode, every press of the
TEMP
or
will change the preset temperature
by 1°C.
• Power failure or turning off the unit will cancel
the sleep function.
•
TEMP
Press and hold
or
for 10 seconds
TEMP
until "LC" appears on the display screen.
•
To deactivate, press and hold again
for 10 seconds.
•
During "LC", only the remote control can adjust
the current setting.
for low
TEMP
or
TEMP
TEMP
Advertisement

Related Manuals for koppel KFM-36E0A


Summary of Contents for koppel KFM-36E0A
- Page 1 • When in sleep mode, every press of the TEMP BUTTON AIR SWING BUTTON * TEMP will change the preset temperature (functional only on KFM-36E0A/60E0A ) “SEND” BUTTON by 1°C. TIMER BUTTON • Power failure or turning off the unit will cancel “CANCEL” BUTTON the sleep function.
- Page 2 KOPPEL, INC., this warranty is considered null and void. clean the unit. KOPPEL, INC. is not responsible and will not be held liable in contract or in tort (including strict liability and negligence) for any special, indirect or consequential damages, including but not limited to damage to structure or contents, or injury to persons by reason of the installation, use or failure of any KOPPEL, INC.