Clear-Com HelixNet Partyline Quick Start Manual
Hide thumbs
Also See for HelixNet Partyline:
- Technical manual (22 pages) ,
- User manual (285 pages) ,
- User manual (143 pages)
Advertisement
Quick
Start
Guide
The following quick start guide provides basic installation instructions for your HelixNet Remote and
Speaker Station. It also provides a quick reference to possible topologies and cable capacitance.
Before installing
To ensure that HelixNet Partyline delivers the desired performance, review the cable specifications for
the venue or application space before installing.
Warning:
HelixNet Partyline operates at a different voltage than two-wire
partyline systems (such as Clear-Com Encore or PL-Pro). Do not connect
any analog two-wire partyline equipment to the Main Station powerlines as
severe damage may occur.
Installing a Remote Station or Speaker Station
1. Connect a powerline XLR-3 port on the
Remote/Speaker Station (A) to a powerline XLR-3
port on a Main Station. (D)
Or
Connect an Ethernet port on the Remote/Speaker
Station (B) to an Ethernet port on an HMS-4X HLI-
ET2 option module (C)
2. Connect a headset or microphone to the
Remote/Speaker Station.
3. Connect power supply to the DC power port on the
Remote/Speaker Station (E). (Not necessary if
using Powerline or PoE).
Installing a Speaker Station in a wall box
1. Connect the Digital Intercom screw terminals (A)
on the Speaker Station to a powerline XLR-3 port
on an HMS-4X (B).
Or
Connect an Ethernet port on the Speaker Station
to an Ethernet port on an HMS-4X HLI-ET2 option
module. External switches including PoE switches
can be used.
2. Connect a headset or microphone to the Speaker
Station.
3. If required, remove the connector from the
optional power supply and connect the power
supply to the Power screw terminals on the
Speaker Station.
Page 1
399070 Rev B
HelixNet
12 November 2015
Partyline
®
D
C
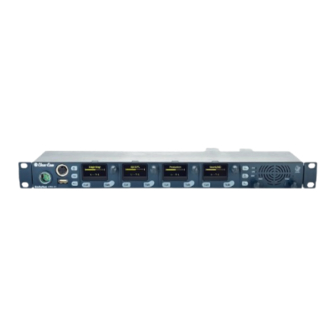
HMS-4X Main Station
To mains
power
E
A
B
B
HRM-4X Remote Station
B
A
To mains
power
HKB-2X Speaker Station
B
A
E
HKB-2X Speaker Station
E
HMS-4X Main Station
XLR-3
Screw Terminal
PSU
Screw Terminal
1*
5*
0V
1
2
4
48V
2
3
2
* Use cable shield
Advertisement
Table of Contents

Related Manuals for Clear-Com HelixNet Partyline


Summary of Contents for Clear-Com HelixNet Partyline
- Page 1 The following quick start guide provides basic installation instructions for your HelixNet Remote and Speaker Station. It also provides a quick reference to possible topologies and cable capacitance. Before installing To ensure that HelixNet Partyline delivers the desired performance, review the cable specifications for the venue or application space before installing. Warning: HelixNet Partyline operates at a different voltage than two-wire partyline systems (such as Clear-Com Encore or PL-Pro).
- Page 2 The attenuation of a cable increases with distance, and this can impact audio quality. If your priority is audio quality, experiment with attaching one or two fewer devices to each line. For in-depth cabling advice, contact your Clear-Com representative. Copyright © 2015 HME Clear-Com Ltd. All rights reserved. Page 2 399G070 Rev B...
Need help?
Do you have a question about the HelixNet Partyline and is the answer not in the manual?
Questions and answers