Lennox MERIT Series Installation Instructions Manual
Hide thumbs
Also See for MERIT Series:
- Installation instructions manual (55 pages) ,
- Care and operation instructions manual (30 pages) ,
- User's information manual (11 pages)
Table of Contents
Advertisement
Quick Links
© 2022 Lennox Industries Inc.
Dallas, Texas USA
HORIZONTAL LEFT
Contents
Unit Dimensions - inches (mm) ......................................2
ML180UHE Gas Furnace ...............................................3
Shipping and Packing List ..............................................3
Safety .............................................................................3
Use of Furnace as a Construction Heaterl .....................4
General ...........................................................................4
Combustion, Dilution, Ventilation Air...............................5
Setting Equipment ..........................................................8
Filters ............................................................................ 11
Duct System .................................................................12
Venting..........................................................................13
AIR FLOW
UPFLOW
HORIZONTAL RIGHT
INSTALLATION
INSTRUCTIONS
ML180UHE
MERIT
SERIES GAS FURNACE
®
UPFLOW / HORIZONTAL AIR DISCHARGE
507103-03
03/2022
Supersedes 08/2019
THIS MANUAL MUST BE LEFT WITH THE
HOMEOWNER FOR FUTURE REFERENCE
This is a safety alert symbol and should never be
ignored. When you see this symbol on labels or in man-
uals, be alert to the potential for personal injury or death.
As with any mechanical equipment, contact with sharp
sheet metal edges can result in personal injury. Take
care while handling this equipment and wear gloves and
protective clothing.
IMPORTANT
DO NOT use the heat exchanger bracket to lift, drag
or pull the furnace to its installation location. Doing so
will loosen the bracket causing noise and or unsafe
operation.
Bracket
Gas Piping ....................................................................20
Electrical .......................................................................22
Integrated Control .........................................................26
Unit Start-Up .................................................................28
Gas Pressure Measurement.........................................29
Proper Combustion.......................................................29
High Altitude .................................................................29
Other Unit Adjustements...............................................30
Service..........................................................................31
Start-Up Checklist.........................................................35
Blower Data ..................................................................37
Page 1
CAUTION
Advertisement
Table of Contents

Subscribe to Our Youtube Channel
Related Manuals for Lennox MERIT Series


Summary of Contents for Lennox MERIT Series
-
Page 1: Table Of Contents
INSTALLATION INSTRUCTIONS ML180UHE © 2022 Lennox Industries Inc. Dallas, Texas USA MERIT SERIES GAS FURNACE ® UPFLOW / HORIZONTAL AIR DISCHARGE 507103-03 03/2022 Supersedes 08/2019 THIS MANUAL MUST BE LEFT WITH THE HOMEOWNER FOR FUTURE REFERENCE This is a safety alert symbol and should never be ignored. -
Page 2: Unit Dimensions - Inches (Mm)
Unit Dimensions - inches (mm) NOTE - 60C and 60D units that require air volumes 3−1/8 (79) over 1800 cfm must have one of the following: 1. Single side return air and Optional Return Air Base with transition that must accommodate required 20 x 25 x 1 in. -
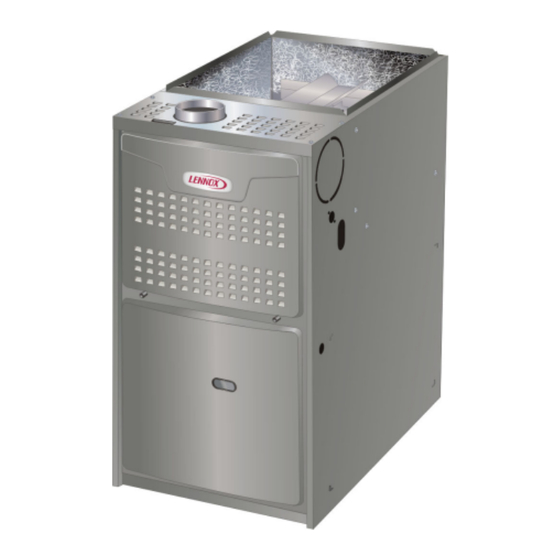
Page 3: Ml180Uhe Gas Furnace
Certifications ML180UHE Gas Furnace ML180UHE units are CSA International certified to ANSI The ML180UHE unit is shipped ready for installation in the up- Z21.47. flow or horizontal right position (for horizontal left position the In the USA, installation of gas furnaces must conform with combustion air pressure switch must be moved) fueled by natu- local building codes. -
Page 4: Use Of Furnace As A Construction Heaterl
Use of Furnace as Construction Heater means to control the flow of air) must adequately prevent Lennox does not recommend the use of ML180UHE units chilled air from entering the furnace. If the damper is man- as a construction heater during any phase of construc- ually operated, it must be equipped to prevent operation of tion. -
Page 5: Combustion, Dilution, Ventilation Air
• Do not install the furnace where drafts might blow CAUTION directly into it. This could cause improper combus- Insufficient combustion air can cause headaches, tion and unsafe operation. nausea, dizziness or asphyxiation. It will also cause • Do not block the furnace combustion air openings excess water in the heat exchanger resulting in rusting with clothing, boxes, doors, etc. - Page 6 Confined Space Air from Inside A confined space is an area with a volume less than 50 If the confined space that houses the furnace adjoins a cubic feet (1.42 m3) per 1,000 Btu (.29 kW) per hour of space categorized as unconfined, air can be brought in by the combined input rating of all appliances installed in that providing two permanent openings between the two spac- space.
- Page 7 EQUIPMENT IN CONFINED SPACE ALL AIR FROM OUTSIDE (Inlet Air from Crawlspace and Outlet Air to Ventilated Attic) CHIMNEY OR GAS VENT VENTILATION LOUVERS (Each end of attic) OUTLET WATER FURNACE HEATER INLET VENTILATION LOUVERS (For unheated crawl space) AIR FLOW NOTE-The inlet and outlet air openings shall each have a free area of at least one square inch (645 ) per 4,000 Btu (1.17 kW) per hour of the total input rating of all equipment in the enclosure.
-
Page 8: Setting Equipment
Upflow Applications Setting Equipment Allow for clearances to combustible materials as indicated WARNING on the unit nameplate. Minimum clearances for closet or alcove installations are shown in figure 7. Do not install the furnace on its front or its back. Do not connect the return air ducts to the back of the furnace. - Page 9 Return Air -- Upflow Applications Single Side Return Air Return air can be brought in through the bottom or either (with transition and filter) side of the furnace installed in an upflow application. If the furnace is installed on a platform with bottom return, make an airtight seal between the bottom of the furnace and the platform to ensure that the furnace operates properly and safely.
- Page 10 Pivot the bottom cap down to release the bottom plications. Order horizontal suspension kit (51W10) from panel. Once the bottom panel has been removed, reinstall Lennox, or use equivalent suspension method. the bottom cap. See figure 10. Allow for clearances to combustible materials as indicated on the unit nameplate.
-
Page 11: Filters
Lennox Product the living space. Use screws and joint tape to seal the Specifications bulletin. Additional information is provided return air system to the furnace. -
Page 12: Duct System
Return Air Plenum Duct System NOTE - Return air must not be drawn from a roomwhere Use industry-approved standards (such as those pub- this furnace, or any other gas-fueled appliance (i.e., water lished by Air Conditioning Contractors of America or Amer- heater), or carbon monoxide producing device (i.e., wood ican Society of Heating, Refrigerating and Air Conditioning fireplace) is installed. -
Page 13: Venting
1 - Remove the four mounting screws (figure 15) which Venting secure the combustion air inducer / pressure switch A 4-inch diameter flue transition is factory-installed on assembly to the orifice plate. Lift the assembly and the combustion air inducer outlet of all models. Figure 16 rotate it 90 degrees clockwise or counterclockwise shows the combustion air inducer as shipped from the fac- to either the 3 o’clock position or to 9 o’clock... - Page 14 HORIZONTAL RIGHT POSITION HORIZONTAL LEFT POSITION Top Vent Discharge Top Vent Discharge Vent Pipe vent pipe pressure switch flue transition Pressure Switch cover plate Flue Transition FLOW FLOW collector box Cover Plate Collector Box Make-Up Box make-up box Disconnect pressure switch hose from barbed fitting on the Gas supply piping must be brought into the unit from the bottom pressure switch assembly.
- Page 15 The ML180UHE series units are classified as fan-assisted lining system or dedicated gas vent. Unlined masonry Category I furnaces when vertically vented according to chimneys are prohibited. See figures 24 and 25 for com- the latest edition of National Fuel Gas Code (NFPA 54 / mon venting.
- Page 16 When inspection reveals that an existing chimney is not Common Venting Using Metal-Lined Masonry Chimney safe for the intended purpose, it shall be rebuilt to conform to nationally recognized standards, lined or relined with SEALED suitable materials, or replaced with a gas vent or chimney suitable for venting ML180UHE series units.
- Page 17 Common Venting Using Tile-Lined Interior Masonry Chimney and Combined Vent Connector MINIMUM LENGTH = AS SHORT AS PRACTICAL. INTERIOR TILE-LINED FOR MAXIMUM LENGTH SEE NOTE TO LEFT MASONRY CHIMNEY NOTE- Refer to provided venting tables for installations. NOTE - the chimney must be properly sized per provided venting tables or lined with listed metal lining system.
- Page 18 17 - If vent connectors are combined prior to entering 20 - Do not install a manual damper, barometric draft the common vent, the maximum common vent regulator or flue restrictor between the furnace and capacity listed in the common venting tables must the chimney.
- Page 19 TABLE 4 Vent Connector Capacity Type B Double-Wall Vents with Type B Double-Wall Connectors Serving Two or More Category I Appliances Vent and Connector Diameter - D (inches) Height Lateral 3 inch 4 inch 5 inch 6 inch Appliance Input Rating in Thousands of Btu Per Hour (feet) (feet) TABLE 5...
-
Page 20: Gas Piping
Removal of the Furnace from Common Vent Gas Piping In the event that an existing furnace is removed from a Gas supply piping should not allow more than 0.5”W.C. venting system commonly run with separate gas applianc- drop in pressure between gas meter and unit. Supply gas es, the venting system is likely to be too large to properly pipe must not be smaller than unit gas connection. - Page 21 TABLE 6 Gas Pipe Capacity - ft3/hr (m3/hr) Nominal Internal Length of Pipe - feet (m) Iron Pipe Diameter Size Inches inches (3.048) (6.096) (9,144) (12,192) (15.240) (18.288) (21.336) (24.384) (27.432) (30,480) (mm) (mm) .622 (12.7) (17.799) (4.87) (3.34) (2.69) (2.29) (2.03) (1.84)
- Page 22 Horizontal Applications Possible Gas Piping Configurations MANUAL MAIN SHUT-OFF VALVE Horizontal Application MANUAL MAIN SHUT-OFF Left-Side Air Discharge VALVE GROUND JOINT UNION GROUND JOINT DRIP LEG UNION DRIP LEG MANUAL MAIN SHUT-OFF VALVE FIELD PROVIDED GROUND JOINT INSTALLED UNION Horizontal Application NOTE - BLACK IRON PIPE ONLY TO BE ROUTED INSIDE OF CABINET DRIP LEG Right-Side Air Discharge...
-
Page 23: Electrical
Leak Check WARNING After gas piping is completed, carefully check all field-in- Fire Hazard. Use of aluminum wire with this product may stalled piping connections for gas leaks. Use a commer- result in a fire, causing property damage, severe injury cially available leak detecting solution specifically manu- or death. - Page 24 Complete the wiring connections to the equipment. Use One 24V ”H” 1/4” spade terminal is provided on the fur- the provided unit wiring and field wiring diagram shown in nace integrated control. See figure 31 for integrated con- figure 30. Use 18-gauge wire or larger that is suitable for trol configuration.
- Page 25 ML180UHE Schematic Wiring Diagram Figure 30 Page 25...
-
Page 26: Integrated Control
Integrated Control 103217-03 RED LED Flash Code Diagnostic Codes / Status of Furnace No power to control or board fault detected Heartbeat Normal Operation - Idle, Continuous Fan, Cool Continuous Rapid Flash Call For Heat / Burner Operation Reverse Line Voltage Polarity Improper Earth Ground Burner failed to light, or lost flame during heat demand Low Flame Signal - check flame sensor... - Page 27 Integrated Control 107163-01 RED LED Flash Code Diagnostic Codes / Status of Furnace No Power to Control or Board Fault Detected Board Fault Detected Fast Heartbeat Call for Heat / Burner Operation Slow Heartbeat Normal Operation – Idle, Continuous Fan, or Cool 1 Flash Reverse Line Voltage Polarity or Phasing of 120V power 2 Flashes...
-
Page 28: Unit Start-Up
7 - Wait five minutes to clear out any gas. If you then Unit Start-Up smell gas, STOP! Immediately call your gas supplier FOR YOUR SAFETY READ BEFORE LIGHTING from a neighbor’s phone. Follow the gas supplier’s instructions. If you do not smell gas go to next step. WARNING MANIFOLD MANIFOLD... -
Page 29: Gas Pressure Measurement
11 - Are flame rollout switches tripped? If flame rollout Supply Pressure Measurement switches are tripped, call the service technician for A threaded plug on the inlet side of the gas valve provides inspection. access to the supply pressure tap. Remove the thread- Heating Sequence Of Operation (follow steps below ed plug, install a field-provided barbed fitting and connect or see Figure 30 for more detail) -
Page 30: Other Unit Adjustements
TABLE 12 Manifold Pressure Settings at all Altitudes Line Pressure in. wg. Model 7501 - 10,000 0 - 2000 ft. 2001 -4500 ft . 4501 - 7500 ft. Input Size 13.0 LP/Propane 10.0 10.0 10.0 10.0 11.0 13.0 13.0 LP/Propane 10.0 10.0 10.0... -
Page 31: Service
At the beginning of each heating season, and to comply at each of the five selectable speeds. The motor has five with the Lennox Limited Warranty, your system should speed taps. Each tap requires 24 volts to energize. be checked by a licensed professional technician (or... - Page 32 6- Check the cleanliness of blower assembly and 3 - Clock gas meter to ensure that the unit is operating clean the housing, blower wheel and blower motor at the specified firing rate. Check the supply if necessary The blower motors are prelubricated pressure and the manifold pressure.
- Page 33 BURNER ASSEMBLY & REMOVAL Ignitor Burner Detail Front View Rollout Switches Cross Over Sensor Retention Rings Manifold And Gas Valve Figure 34 Page 33...
- Page 34 Repair Parts List The following repair parts are available through independent Lennox dealers. When ordering parts, include the complete furnace model number listed on the CSA International nameplate -- Example: ML180UHE045P24A-01. All service must be performed by a licensed professional installer (or equivalent), service agency, or gas supplier.
-
Page 35: Start-Up Checklist
Start-Up & Performance Check list UNIT SET UP (typical) Unit Model Number_______________ Serial Number___________________ SUPPLY Line Voltage upflow furnace shown Gas Supply Pressure Filter RETURN RETURN DUCT SYSTEM GAS SUPPLY SUPPLY AIR DUCT Natural Gas LP/Propane Gas Sealed Piping Connections Tight Insulated (if necessary) Leak Tested Registers Open and Unobstructed... - Page 36 UNIT OPERATION (typical) Combustion CO SUPPLY Thermostat Gas Manifold Pressure Temperatures upflow furnace shown Filter Blower Motor Amps Duct Static RETURN RETURN COOLING MODE HEATING MODE INDOOR BLOWER AMPS______ GAS MANIFOLD PRESSURE “W.C._____ TEMPERATURE DROP COMBUSTION SAMPLE CO CO PPM_______ ______ Return Duct Temperature _________ Supply Duct Temperature...
-
Page 37: Blower Data
BLOWER DATA ML180UH045E36A PERFORMANCE (Less Filter) Air Volume / Watts at Various Blower Speeds External Static High Medium-High Medium Medium-Low Pressure (Black) (Brown) (Blue) (Yellow) (Red) in. w.g. Watts Watts Watts Watts Watts 0.00 1380 1155 0.10 1345 1120 0.20 1320 1080 0.30... - Page 38 ML180UH090E48B PERFORMANCE (Less Filter) Air Volume / Watts at Various Blower Speeds External Static High Medium-High Medium Medium-Low (Black) (Brown) (Blue) (Yellow) (Red) Pressure in. w.g. Watts Watts Watts Watts Watts 0.00 1785 1570 1440 1395 1190 0.10 1755 1535 1420 1350 1140...
- Page 39 BLOWER DATA ML180UH110E60C PERFORMANCE (Less Filter) Air Volume / Watts at Different Blower Speeds Bottom Return Air, Side Return Air with Return Air from Single Side Return Air − Air volumes in bold require Both Sides or Return Air from Bottom and One Side. Optional return Air Base and field fabricated transition to External accommodate 20 x 25 x 1 in.
Need help?
Do you have a question about the MERIT Series and is the answer not in the manual?
Questions and answers