
Related Manuals for Ecler PLAYER ONE


Summary of Contents for Ecler PLAYER ONE
- Page 1 TUTORIAL Cloud Disk Sync (S&F) - VPS PLAYER ONE / PLAYER ZERO 50-0437-0100 PLAYER ONE / PLAYER ZERO...
-
Page 2: Table Of Contents
TABLE OF CONTENTS 1. INTRODUCTION .......................... 3 2. CREATE A VPS and SET IT UP WITH UBUNTU 22.04 ............. 4 2.1 Necessary tools .......................... 4 2.2 Necessary steps .......................... 4 3. CONNECT TO VPS VIA SSH VIA PuTTY SOFTWARE ............. 6 4. -
Page 3: Introduction
The third-party tools and procedures discussed in this manual are for information purposes only, and no support queries will be answered in relation to them. From now on in this tutorial, we will use the word PLAYER to refer both to Player ONE and to Player ZERO models. -
Page 4: Create A Vps And Set It Up With Ubuntu 22.04
2. CREATE A VPS and SET IT UP WITH UBUNTU 22.04 2.1 Necessary tools • Ubuntu 22.04 • VPS Provider VPS is a virtual private server. It acts as an isolated server. Unlike shared hosting, it works as if it were your own private server. 2.2 Necessary steps The steps may differ depending on the contracted VPS provider, but the principle is the same. - Page 5 In the time slot section, you must select the region in which you want to create your VPS. In the Renewal Frequency section, you must select the desired option. Verify that all information is correct and proceed to finalise the subscription. Once subscribed, in the VPS configuration screen, you will be able to adjust network settings, add additional storage, adjust security, etc.
-
Page 6: Connect To Vps Via Ssh Via Putty Software
CONNECT TO VPS VIA SSH VIA PuTTY SOFTWARE Once your VPS has been created and validated, the provider should provide you, via your email account, with all the relevant information you will require to enter in the PuTTY terminal: • IPv4 address of the VPS. •... - Page 7 Accept the security message. Enter your VPS username and password when prompted. You are now connected to your VPS. 10. As you are now logged in with high permissions (a sudo user), you can enter commands to perform administrative tasks. We recommend that you change your password first.
-
Page 8: User Creation For Store & Forward (S&F)
4. USER CREATION FOR STORE & FORWARD (S&F) Now that we have our VPS up and running through the Putty terminal, let's create a new user for the specific use of S&F. It is important not to use the ADMIN user for the S&F implementation. Before creating the new user, both for new versions of Linux and Ubuntu 22.04, we must enter the following commands. -
Page 9: Generating Ssh Keys
5. GENERATING SSH KEYS We use the command ssh-keygen -m PEM to generate the keys and press ENTER directly in response to each question (without typing anything). Add the public keys to the authorised keys with the following command and then press ENTER: cat .ssh/id_rsa.pub >>... -
Page 10: Uploading Content To Vps With Filezilla (Ftp)
6. UPLOADING CONTENT TO VPS WITH FileZilla (FTP) Download and install FileZilla on your computer. Open FileZilla and select "File" from the toolbar. Click on "Site Manager" and then on "New site". 4. In the "Protocol" section, select "SFTP". 5. Enter the IP address of your VPS in the "Server" field. 6. - Page 11 9. Click on "Connect". 10. Once connected, you will be able to see the files on your VPS in the right-hand window of FileZilla.
- Page 12 11. To upload files to your VPS, simply drag and drop files from your computer to the right- hand window of FileZilla to place them in the "sync" folder. 12. When you have finished uploading the files, log out of the SFTP session by clicking on icon under the toolbar.
-
Page 13: Store And Forward Module (Rsync)
7. STORE and FORWARD MODULE (Rsync) Now that you have all the necessary data to implement the configuration, you will implement it in the S&F module of your PLAYER. “General” Section • Enabled: In this section, activate the S&F Module (Rsync) by checking the box. •... - Page 14 “Remote Source” Section In this section you must fill in all the data that we have previously configured and completed. In our example: • Host: 5.196.22.104 • Port: • Folder: /home/saf/sync • Username: • Private Key: key we saved earlier. •...
- Page 15 3. “Local Target” Section In this section, you will indicate where Rsync will synchronise the files it receives from the SSH server, either on a USB stick or SD card inserted in the PLAYER, in FAT32 format. a) Indicate the Path you wish to use, which you will later configure in the associated PRESET1.
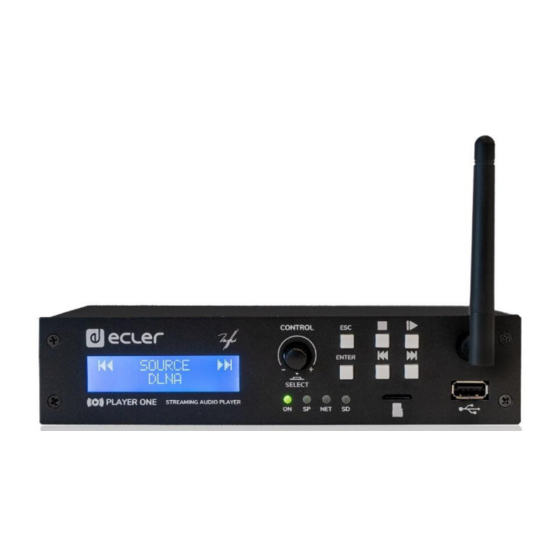
- Page 16 The S&F module starts automatically and will start to dump and playback the contents to the storage previously indicated. Example of display in Player ONE (Player ZERO does not have a display and must therefore be monitored via the Web App).
- Page 17 NEEC AUDIO BARCELONA S.L. reserves the right to make changes or improvements in the design or manufacturing that may affect these product specifications. For technical queries contact your supplier, distributor or complete the contact form on our website, Support / Technical requests. Motors, 166‐168 08038 Barcelona, Spain (+34) 932238403 information@ecler.com www.ecler.com...
Need help?
Do you have a question about the PLAYER ONE and is the answer not in the manual?
Questions and answers