Table of Contents
Advertisement
Quick Links
Advertisement
Table of Contents

Related Manuals for RCA DRC622N


Summary of Contents for RCA DRC622N
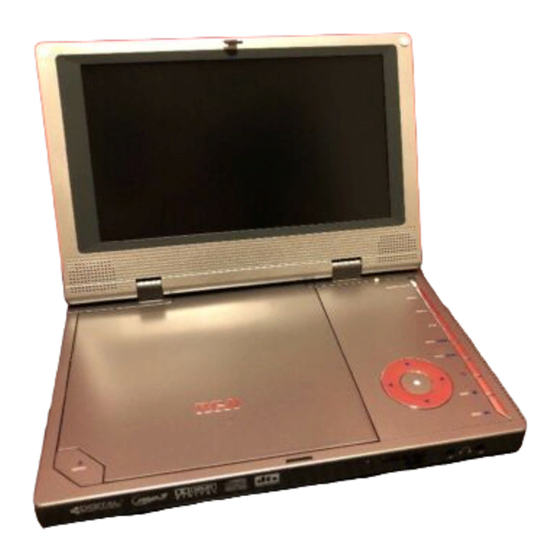
- Page 1 DVD Player User’s Guide Changing entertainment. Again. DRC622N...
-
Page 2: Class 1 Laser Product
Product Registration: Please fill out the product registration card (packed separately) and return it immediately. For U.S. customers: Your RCA Consumer Electronics product may also be registered at www.rca.com/productregistration Registering this product allows us to contact you if necessary. -
Page 3: Table Of Contents
Chapter 1: Setup and Connections What’s in the Box...2 Inserting the battery ...3 Initial setup of the remote control...3 The player’s power supply ...4 Connecting your DVD player to other components...5 Buttons, jacks, and controls...6 Remote control ...8 Turn on the DVD player ...9 Using Different menus ...9 Chapter 2: Playing Discs Compatible Discs ...10... -
Page 4: Connections And Setup
Chapter 1 What’s in the Box Thank you for purchasing our DVD Player. Unpack the box completely and tear off any protection films. Your portable DVD player Power adapter and charger S-Video cable Audio/Video Cable Important: Graphics in this User’s Guide are for representation only.Your unit and its operation may differ slightly. -
Page 5: Inserting The Battery
Connections and Setup Inserting the battery beneath the player The battery has 3 locating pegs and 2 retaining brackets.These must be inserted into the player’s 3 holes and 2 slots respectively. Install the battery beneath the player using the locating pegs and retaining brackets intended for this purpose: 1. -
Page 6: The Player's Power Supply
Connections and Setup The Player’s Power Supply You can power your player either from the power adapter or from the battery.The battery must first be charged using the power adapter. Using the power adapter 1. Connect the output from the power adapter to the player’s DC IN socket. 2. -
Page 7: Connecting Your Dvd Player To Other Components
Connecting your DVD player to other components Connecting the player to a television set If you want to use your portable player for home viewing, connect it to your television’s Video Input and Audio Input using the Audio-Video cables supplied. Caution! The selector switch must be in the OUT position. -
Page 8: Buttons, Jacks, And Controls
9 ■ (stop): stops playback. 10 play: plays disc. 11 ● (ok/select): selects a highlighted menu. 12 Headphones jacks: your portable DVD player has two headphones jacks (ordering information for compatible headphones is on page 37). 13 Navigation buttons adjustments (e.g., display mode settings). - Page 9 p-scan out Jacks and controls on the side of the DVD player A VOLUME adjustment. B P-SCAN OUT: Connect Component Video Adapter Cable (supplied) to your the DVD player and to a Progressive Scan TV’s Y, Pb, Pr, Input Jacks to display DVD content in progressive scan format.
-
Page 10: The Remote Control
Connections and Setup The Remote Control info angle play mode audio subtitle title menu clear return zoom again Buttons listed alphabetically Use to input information such as chapter numbers, track numbers. AGAIN Quick reverse—plays approximately the last 30 seconds. ANGLE Accesses the Camera Angle icon of DVD disc Info Display. -
Page 11: Connection And Setup
Turn on the DVD Player . Set the player on a table or on a steady surface Unlock the screen by pushing the locking clip to the right. Raise the screen to the open position. Turn on the DVD player (slide the ON•POWER•OFF switch to the ON position. English Select a Menu Language Select langue de menu... -
Page 12: Chapter 2: Playing Discs
Chapter 2 DVD+Rewritable Regional Coding Both the DVD Player and the discs are coded by region.These regional codes must match in order for the disc to play.This player’s code is Region 1 (U.S.A and Canada). Other regions are: 2: Europe, the Middle East, Rep. of South Africa, Japan - 3: Southeast Asia,Taiwan - 4: Central America, South America, Australia, Mexico, New Zealand - 5: Russian Federation, Africa (except Egypt and Rep. -
Page 13: Playback Options
info angle play mode audio subtitle Pause title menu clear Forward Reverse return zoom again info angle play mode audio subtitle title menu clear return Previous Next chapter chapter or track or track again zoom AGAIN ZOOM Graphics are for representation only.Your unit may differ slightly. Playing Discs Playback Options To search a disc, you can use the FORWARD button or... -
Page 14: Using The On-Screen Info Displays
Playing Discs Using the On-Screen Info Displays The Info Display appears across the top of the screen when you press the INFO button on the remote while you’re playing a disc. Use the an icon is highlighted, follow the on-screen instructions, and use the remote to scroll through the options. -
Page 15: How To Navigate In The Info Display
Left Down Right Time Display (all Info Displays) This feature displays the time that has elapsed during playback. For DVD discs, the time displayed refers to the current title and acts as a Time Search feature.You can skip right to any scene. Highlight the Time Display, and use the number buttons on the remote to enter the elapsed time you want to go to.You must use two digits for each field. -
Page 16: Subtitles Icon
Playing Discs Subtitles Icon (DVD Info Display) By default, subtitles are off.To turn subtitles on: With Info Display on the screen, press the icon is highlighted. To turn subtitles on or change the language, press the repeatedly to see what settings are available (the options appear in the box at the bottom of the Info Display). -
Page 17: Play Mode Icon
Play Mode Icon (DVD, CD Info Displays) The Play Mode options available depend upon the type of disc you’re playing. The default play mode (standard play) plays the disc’s contents in the order in which the disc was created (i.e., track 1 plays first, followed by track 2, etc.). Play Mode Options Standard: The discs contents (chapters or tracks) play in the order specified on the disc. -
Page 18: Playing Discs
Playing Discs AB Repeat (DVDs only) AB Repeat lets you define a specific segment on the disc that you want to repeat.To watch a scene over and over: With the Play Mode icon highlighted in the Info Display, press the Repeat Mode: AB. -
Page 19: Bookmark Icon
Bookmark Icon (DVD Info Display) The Bookmark feature lets you mark a point on the disc so you can quickly start playing the disc from a bookmarked point. Creating a Bookmark Highlight the Bookmark icon on the Info Display. Press OK (the Bookmark Banner appears). Highlight an unused bookmark.When the disc reaches the scene you want to mark, press the OK button on the remote (the bookmark icon changes to two icons side-by-side: an arrow and a trash can). -
Page 20: Camera Angle Icon
Playing Discs Camera Angle Icon (DVD Info Display) Some discs contain multiple angles of a particular scene or sequence. If the disc only has one angle, this feature won’t work. Currently, very few discs have this feature. While a disc is playing, press ANGLE on the remote. If the disc wasn’t created with multiple angles, (the invalid symbol) appears. -
Page 21: Playing Mp3,Wma, And/Or Jpeg Files
PLAY -3.jA- - LET_S_ 01.THE REASON 04. WHY ON WHY 02.IMMORTALIT 03.TREAT HER 04.WHY ON WHY 05.LOVE IS IN Example of mp3 files. wiseview.jpg Press Play to start. Example of JPEG files. Fast Normal Slow Press OK to select a slideshow speed. Example of slideshow speed screen. -
Page 22: Musical Slide Show
Playing Discs Musical Slide Show: playing JPEG and mp3 or WMA music files at the same time You can display JPEG files while listening to mp3 or WMA music files recorded on the same disc. Insert the disc containing the two types of files in the player. Select an image file using the selection.The name of the folder where the file is located and the name of the file appear on the right in the "Current selection"... -
Page 23: The Dvd Player Menu System
Chapter 3 The DVD Player Menu System The DVD player menu system is not the same as the disc menu or the Info Display.The DVD player menu appears when there’s no disc playing. If you are playing a disc, press STOP on the remote control to stop playback (the DVD player menu appears). -
Page 24: Program Play
Menu System Program Play (Audio CDs) With this option, you choose the order in which the chapters (or tracks) play. Highlight Program Play, and press the OK button (the Program Playlist screen appears). Follow the on-screen instructions to create your program: Audio CD: select a track using the the tracks. -
Page 25: Parental Control Menu
The Parental Control Menu You can set up ratings limits and lock your player in order to control the type of content people watch on your DVD Player.The padlock icon indicates whether the player is locked or unlocked. Locked: You need to enter the password in order to play discs that have a higher rating than what you’ve allowed.When the player is locked, nobody can access the without entering the password. -
Page 26: Explanation Of Ratings Limits
Menu System Explanation of Ratings Limits The Rating Limits feature lets you determine what types of discs can be played in the player, and what types of discs will require a password to override the rating limit that you’ve set. In the United States of America (USA), the ratings feature is based on the ratings set up by the MPAA (Motion Pictures Association of America) such as R, PG, G, etc. -
Page 27: Unrated Titles
Unrated Titles Free Access Password Required Unlocking your DVD Player If you’re playing a disc, press STOP (the DVD Player’s main menu appears). Press the button until Parental Control screen appears). Use the number buttons to enter the password you created, and press OK (the Control menu items appear). -
Page 28: Display Menu
Menu System The Display Menu Display menu contains the settings that affect how a disc’s content looks on the screen. Play Play Mode Parental Control Display TV Image Progressive Scan Sound Black Level Languages To return to the previous menu, press button. -
Page 29: Progressive Scan
Progressive Scan If you connected your DVD player to a Progressive Scan TV using the Component Video (Y, Pb, Pr) jacks on your TV, you must select On in the Progressive Scan menu in order to display DVD titles in the progressive scan format. Black Level Black Level menu lets you adjust the brightness of the picture. -
Page 30: Sound Menu
Menu System The Sound Menu Sound menu lets you adjust the player’s settings to match the equipment you connected to your DVD Player, and to use the DVD Player’s Sound features. Sound Logic The Sound Logic feature compresses the dynamic range (quietest sound to loudest sound) of a disc’s soundtrack to even out the volume range. -
Page 31: Languages Menu
Resume Play Play Mode Player Menus English Lock Disc Menus Display Audio Sound Subtitle Languages Resume Play Play Mode Player Menus Lock Disc Menus English Display Francais Audio Sound Español Subtitle Languages Notes: Discs are created differently.The DVD player can’t override some language preferences. If a disc’s software was created to play the movie (title) in a preferred language, the preference you set might be ignored. -
Page 32: Chapter 4:Additional Information
Note: If you prefer, we can provide you with the name of an Authorized Service Representative who will visit your home for a fee to install your electronic entertainment system and to instruct you in its operation. For details about this service, call 1-888-206-3359. For additional assistance while using your RCA product, please visit www.rca.com/customersupport. -
Page 33: Additional Information
Troubleshooting The colors don‘t seem natural. • Check that all the various plugs are completely plugged in. The picture format does not match the screen format. • The picture format is adjustable (page 13). Some discs dictate the format, in which case no adjustment is possible. -
Page 34: Maintenance Of Cabinet
Additional Information Maintenance of Cabinet For safety reasons, when cleaning the cabinet be sure to disconnect the AC power cord from the AC outlet • Do not use benzene, thinner, or other solvents for cleaning. • Wipe the cabinet with a soft cloth. Formation of Condensation •... -
Page 35: Recommendations And Information Concerning Discs
Recommendations and information concerning discs CD-R and CD-RW discs This player can play most CD-R and CD-RW discs. However, depending on the recorder of the discs of your personal computer, the type of disc and recording method used, some discs might not play, or the performance might not meet the expected standard of quality.When playing a CD-R disc, it is completely normal for the unit to take up to 20 seconds to recognize the disc before it plays. - Page 36 Additional Information CD-R and CD-RW discs with JPEG format “image” files To view your JPEG images on a TV set you do not need to record your photographs with a resolution above 400,000 pixels (which corresponds to an image format of about 720 x 576 dots) because of the resolution of most TVs.
-
Page 37: Limited Warranty
Limited Warranty What your warranty covers: • Defects in materials or workmanship. For how long after your purchase: • 90 days from date of purchase - Unit exchange, which includes parts and labor. • 91 days to 1 year from date of purchase - Unit exchange, which includes parts only; you pay the labor. -
Page 38: What Your Warranty Does Not Cover
Thomson. Product Registration: Please complete the online Product Registration on www.rca.com/productregistration or complete and mail the Product Registration Card packed with your unit. It will make it easier to contact you should it ever be necessary. The return of the card is not required for warranty coverage. -
Page 39: Accessories To Complement Your Dvd Player
To place an order by phone, have your Visa, MasterCard, or Discover Card ready (and model number of your DVD player) and call the toll-free number listed below. 1-800-338-0376 (Use this number only to place an order for accessory items.) For more information about accessories, go to www.rca.com Power adapter and charger Battery... - Page 40 Visit the RCA website at www.rca.com Please do not send any products to the Indianapolis address listed below or on the carton.This will only add delays in service for your product. Thomson Inc. 10330 North Meridian Street Indianapolis, IN 46290 ©2003 Thomson Inc.
Need help?
Do you have a question about the DRC622N and is the answer not in the manual?
Questions and answers