Advertisement
Quick Links
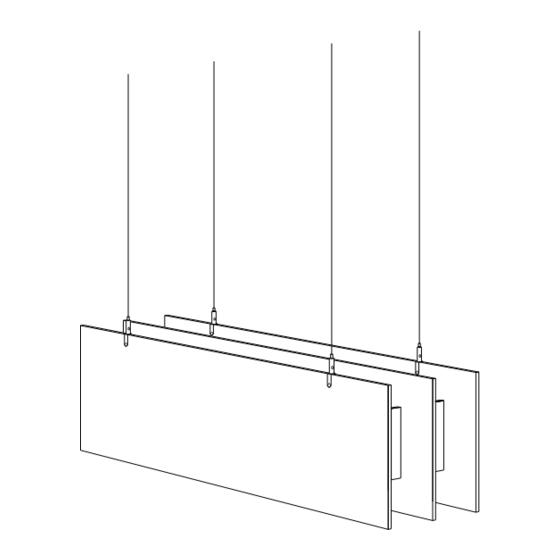
LAYER
ceiling mounting
Tools
Power Drill
(Not Included)
Product
Styles
Wire Cutters
Crimper
(Not Included)
(Not Included)
Base
Pitch
Wave
Warning
It is important to utilize the correct screws for each
corresponding ceiling and floor surface. Screws are not
provided. Screws should be able to support 40 lbs of weight.
Advertisement

Related Manuals for LOFTWALL LAYER


Summary of Contents for LOFTWALL LAYER
- Page 1 LAYER Warning It is important to utilize the correct screws for each corresponding ceiling and floor surface. Screws are not provided. Screws should be able to support 40 lbs of weight. ceiling mounting Tools Power Drill Wire Cutters Crimper (Not Included)
- Page 2 Coupler Step 1 Step 2 Using a bolt and nut, attach an adjustable clamp to the Layer Before cutting wire, determine the desired length and add 2-3 baffle using the precut holes. Repeat this process one more time more inches; this will allow wiggle room for hanging. Cut the wire to complete step 1.
- Page 3 Using a drill attach the upper half of the ceiling coupler to the ceiling using appropriate screws for your ceiling. There is 31.5” bottom half of the ceiling coupler into the top half. between each clamp. Ceiling Coupler Assembly Layer Assembly Guide | Loftwall 2...
- Page 4 Coupler Step 1 Step 2 Using a bolt and nut, attach an adjustable clamp to the Layer Before cutting wire, determine the desired length and add 2-3 baffle panel using the precut holes. more inches; this will allow wiggle room for hanging. Using wire cutters, cut the wire to the desired length making sure the wire lengths match.
- Page 5 If you are hanging multiple baffles, you can also attach two tracks perpindicular to the baffles. Note that the distance between each coupler is 31.5”. Ceiling Track Assembly Layer Assembly Guide | Loftwall 4...
- Page 6 Raise the panel and attached components and slide the track couplers into the track. Postion the couplers so the wires hang vertically. Tighten the track coupler by twisting the center component against the track. 5 Loftwall | Layer Assembly Guide Ceiling Track Assembly...
- Page 7 Layer Assembly Guide | Loftwall 6...