Roland SA-300 - Stage Amplifier Manual
- Owner's manual (24 pages) ,
- Brochure & specs (2 pages)
Advertisement
Introduction
Before using this unit, carefully read the sections entitled
- IMPORTANT SAFETY INSTRUCTIONS
- USING THE UNIT SAFELY
- IMPORTANT NOTES
Additionally, in order to feel assured that you have gained a good grasp of every feature provided by your new unit, Owner's manual should be read in its entirety. The manual should be saved and kept on hand as a convenient reference.
Names of Things and What They Do
Control Panel

Channel Controls (CH 1–4)
- INPUT SELECT Button
Use this button to select MIC or LINE input. This switches the input to match the connected device (mic or line-level device). The MIC indicator lights when MIC is selected; when LINE is selected, the LINE indicator lights. - VOICE ENHANCER Button (CH 1, CH 2)
This switches the Voice Enhancer effect on and off when the input is set to MIC. Switching this on enables you to give the sound a clearer contour and make vocals more prominent. - REVERB/DELAY Knob (CH 1, CH 2)
You can switch between reverb and delay by adjusting the knob position. When not using reverb or delay, set the knob to "OFF." The reverb and delay position on the scale shown on the panel is approximate. Listen to confirm the effect as you adjust the amount of effect applied. - REVERB Knob (CH 3, CH 4)
This adjusts the amount of reverb. When not using reverb, set the knob to "OFF."
-
VOLUME Knobs
These adjust the volume levels of the channels.
* To minimize noise as much as possible, we recommend turning the VOLUME knob for any channel not being used to 0 and setting INPUT SELECT to LINE.
- ANTI-FEEDBACK (CH 1, CH 2)
This automatically detects and eliminates acoustic feedback.
For further instructions on how to use anti-feedback, refer to "About the Anti-Feedback Function"
ON/OFF Button
Press this button to turn the function on. When switched on, the indicator lights, and the system automatically works to prevent sudden feedback, as well as feedback that occurs during quiet stretches.
SWEEP Button
When the ON/OFF button is set to ON, holding down this button for one second or longer generates a calibration signal from the speakers. The microphone picks up the sound and the SA-300 analyzes the characteristics of the microphone and the surroundings. Based on the results of this analysis, the microphone and environmental characteristics are compensated for automatically, making it difficult for feedback to crop up. The indicator flashes while this automatic correction is in progress. When the process is completed, the indicator remains lit, signifying that the feedback prevention function is in effect.
MASTER
-
LOW BOOST Button
This switches the low boost effect on and off. When this is switched on, the low-frequency range is boosted. -
WIDE Button
This switches the wide effect on and off. When this is switched on, the sonic image extends beyond the SA-300's speakers, providing an effect that seems to envelop the listener in sound. -
LEVEL Indicator
his indicates the MASTER output level.
- EQUALIZER
The SA-300 includes a 3-band equalizer.
LOW Knob
This adjusts the tone in the low-frequency range.
MIDDLE Knob
This adjusts the tone in the middle-frequency range.
HIGH Knob
This adjusts the tone in the high-frequency range. - PHONES Knob
This adjusts the headphone volume level. - Headphone Jack
Connect headphones here.
* Be sure to turn the PHONES knob setting to 0 before connecting or disconnecting headphones.
* The sound from the SA-300's speakers is not muted when headphones are connected. - VOLUME Knob
This adjusts the overall volume output from the SA-300's speakers. - SUBWOOFER ACTIVE Indicator
This lights when the subwoofer is connected to the SPEAKER jack. While the indicator is lit, the low-frequency response with the subwoofer (SA-300W) connected is modified accordingly. - POWER Switch
This switches the power on and off.
* Be sure to turn the MASTER VOLUME knob down to 0 whenever turning the power on or off.
* This unit is equipped with a protection circuit. A brief interval (a few seconds) after power up is required before the unit will operate normally.
Jack Panel

Inputs (CH 1–4)
-
MIC Jack
Connect a microphone here. For balanced input, you can connect to the TRS 1/4-inch phone jacks and XLR type connector.
![]()

-
PHANTOM Switch (CH 3, CH 4)
This switches the phantom power on and off. When connecting a microphone that requires phantom power (such as condenser microphones), switch this to "ON."
![]()
- Set this to "OFF" when connecting mics that do not require phantom power or other devices.
- Use the following sequence when connecting mics that require phantom power:
- Turn the PHANTOM switch off.
- Connect the mic.
- Turn the PHANTOM switch on.
- Supplying phantom power to mics that do not require it or supplying it to other devices may cause such equipment to malfunction. Always be sure to turn the switch off before connecting.
- To protect the circuitry, the channel output is muted momentarily after the PHANTOM switch is turned on or off.
- Phantom power is supplied only when a microphone is connected to the XLR connector in the Channel 3 and/or Channel 4 MIC jack section.
- Do not connect or disconnect connectors while the phantom power is turned on.
-
LINE Jack
Connect keyboards, CD players, and other line-level devices here. These are stereo inputs; mono input is available by connecting to the left jack. These connectors are compatible with line-level input (- 20 dBu). Channels 3 and 4 also feature RCA phono type inputs. In addition, you can input to both the RCA phono type and 1/4-inch phone jacks simultaneously.
* All Channel 4 LINE jacks function as mono inputs when the STEREO LINK IN jack is in use.
FOOT SW (FOOT SWITCH)
-
ANTI-FEEDBACK SWEEP Jack
You can connect a momentary-type foot switch (optional BOSS FS-5U or FS-6) and operate the automatic feedback frequency detection with your foot. Holding down the foot switch for one second or longer starts the automatic feedback frequency detection. Based on the results of this analysis, the microphone and environmental characteristics are compensated for automatically, making it difficult for feedback to crop up. * Set the FS-5U's polarity switch as shown below.
![]()
* If using a FS-6 switch, set the MODE and POLARITY switches as shown below.
![]()
-
EXP PEDAL/REMOTE SW Jack
You can connect an expression pedal or remote switch here.
EXP PEDAL
You can connect an expression pedal (optional EV-5, etc.) and use it to control the MASTER volume level.
* Set the minimum volume on the expression pedal to the "MIN" position. Unless the minimum volume is set to "MIN," the expression pedal will not work correctly.
REMOTE SW
Using a connection cable to connect foot switches (optional BOSS FS-5L and FS-5U), you can then use the FS-5L (latch type) switch to switch the mute on and off, and use the FS-5U (momentary type) switch to turn on and off the effects (reverb or delay).
Mute On/Off
When the FS-5L's indicator is lit, the mute function is switched on, and the output from the speakers and headphones, as well as from LINE OUT and STEREO LINK OUT is muted.
Effect On/Off
The effect is alternately switched on and off each time you press the FS-5U.
* When connecting only one foot switch using a connection cable with a 1/4-inch phone (mono) plug, only the mute can be switch on and off. In that case, connect the switch with an FS-5L.
* When an FS-5U (momentary type) switch is used for switching the mute on and off, the mute is switched on only while the switch is held down.
![]()
* If using a FS-6 switch, set the MODE and POLARITY switches as shown below.
![]()


STEREO LINK
After connecting two SA-300s together with one or two audio cables (1/4-inch phone type), you can easily play back high power sounds (350 W + 350 W) in stereo.
-
STEREO LINK IN Jack
When using Stereo Link, the audio output by the STEREO LINK OUT L or STEREO LINK OUT R jack on the other SA-300 is input here. You can use it as an external input jack also. Input level is 0 dBu. * All Channel 4 LINE jacks function as mono inputs when the STEREO LINK IN jack is in use.
-
STEREO LINK OUT Jacks (L/R)
Connect this jack to the STEREO LINK IN jack on the other SA-300 when using Stereo Link. If you are not using the SA-300's speakers, but using external amp speakers instead, the output from the left or right channel is taken here. When the STEREO LINK OUT L jack is used, the left channel audio is not played through the SA-300's speakers. In the same manner, when the STEREO LINK OUT R jack is used, the right channel audio is not played through the SA-300's speakers. Output level is 0 dBu.
* Signals output from these jacks are not routed through the MASTER section (EQUALIZER, LOW BOOST, WIDE, VOLUME).
For further instructions on connecting with Stereo Link, refer to "About Stereo Link".
LINE OUT
-
LINE OUT Connectors/Jacks
Mixers, recording equipment, and other such devices are connected here. Nominal output level is +4 dBu. This section includes balanced output compatible XLR type connectors (left and right stereo output) and 1/4- inch phone jacks (stereo output). You can use the XLR type connectors and the 1/4-inch phone jacks simultaneously. Output is in mono when only the left 1/4-inch phone jack is connected.
![]()

-
GND LIFT Switch
Using external equipment connected to the LINE OUT connectors may result in generation of the "hum" of loop ground noise. If this occurs, you may be able to mitigate the problem by sliding this switch. Normally, this is set to "OFF."
ON: Pin 1 is disconnected from the SA-300's ground.
OFF: Pin 1 is connected to the SA-300's ground.
SPEAKER
- SPEAKER Jack
Use this jack to output sounds to the SA-300W subwoofer. Use the special connection cable included with the unit to connect to the SA-300W's INPUT jack. This provides an even more powerful low end to the sound.
* Turn off the power on the SA-300 before connecting or disconnecting cable.
![]()
- Connect only the SA-300W. Never connect any other equipment.
- Be sure to use only the connection cable included with the unit to connect the subwoofer. Do not use ordinary audio cables.
Making the Connections
Refer to the figure shown below to connect the SA-300 and the other equipment.

* To prevent malfunction and/or damage to speakers or other devices, always turn down the volume, and turn off the power on all devices before making any connections.
* Before making any connections, set the SA-300's MASTER VOLUME knob to "0."
* Use only the specified expression pedal (EV-5, etc.; optional). By connecting any other expression pedals, you risk causing malfunction and/or damage to the unit.
* When connection cables with resistors are used, the volume level of equipment connected to the inputs may be low. If this happens, use connection cables that do not contain resistors, such as those from the Roland PCS series.
Switching the Power On and Off
Once the connections have been completed, turn on power to your various devices in the order specified. By turning on devices in the wrong order, you risk causing malfunction and/or damage to speakers and other devices.
- Make sure that all volume controls on the SA-300 and connected devices are set to 0.
- Turn on all the devices connected to the SA-300's input jacks (CH 1 through CH 4).
- Turn on the SA-300.
- Switch on any equipment connected to the SA-300's LINE OUT jacks.
- Adjust the volume levels for the devices.
- Before switching off the power, lower the volume on each of the devices in your system and then Turn Off the devices in the reverse order to which they were switched on.
* If you need to turn off the power completely, first turn off the POWER switch, then unplug the power cord from the power outlet. Refer to "Power Supply".
* This unit is equipped with a protection circuit. A brief interval (a few seconds) after power up is required before the unit will operate normally. For protection from sudden big sound, always make sure to have the volume level turned down before switching on power.
* Even with the volume all the way down, you may still hear some sound when the power is switched on, but this is normal, and does not indicate a malfunction.
About Setting the Volume
To obtain the best sound from the SA-300, set the volume level using the following procedure.

- Use the INPUT SELECT buttons for CH 1 through CH 4 to switch the input sensitivity in accordance with the connected devices (microphones or line-level equipment).
- Use the CH 1 through CH 2 VOICE ENHANCER buttons, REVERB/DELAY knobs and the CH 3 through CH 4 REBERB knobs to adjust the tone to your liking.
- Operate the CH 1 through CH 4 volume knobs to adjust the volume level for CH 1 through CH 4.
* If the sound is distorted (when level indicator 0 dB is lit), adjust the volume either with the VOLUME knobs (Channels 1–4) or the volume knobs on devices connected to the inputs (Channels 1–4).
At this point, balance the volume levels of Channels 1–4.
![]()
- Use the EQUALIZER knobs (LOW/MIDDLE/HIGH), LOW BOOST button, and WIDE button to adjust the tone to your liking.
- Use the MASTER VOLUME knob to adjust the overall volume level.
- Set up the ANTI-FEEDBACK if necessary.

About Stereo Link
You can easily play back high power sounds (350 W + 350 W) in stereo by connecting two SA-300s together with one or two audio cables (1/4-inch phone type). This function is called "Stereo Link."
The SA-300 features a stereo mixer function, which enables you to output either left or right channel signals from the STEREO LINK OUT jack.
Connecting the SA-300s according to the instructions below allows you to play sounds in stereo.
Example 1
Up to four input devices can be connected.

Operation
- Connect the devices to the SA-300 (L).
- Connect the STEREO LINK OUT R jack on the SA-300 (L) and the STEREO LINK IN jack on the SA-300 (R).
- Turn on both SA-300 (L) and SA-300 (R).
- Adjust the volume levels on all devices.
- Adjust the SA-300 (L) and SA-300 (R) volume levels separately using their MASTER VOLUME knobs.
If you want to connect input sources to the SA-300 (R)
As described in step 1 of example 1, connect the R side's STEREO LINK OUT L jack to the L side's STEREO LINK IN jack.
Example 2
This arrangement lets you play in stereo, making maximum use of the two SA-300s' mixer functions (with eight inputs). All Channel 4 LINE jacks function as mono inputs.

Operation
- Connect the devices to the SA-300 (L) and SA-300 (R).
- Connect the STEREO LINK OUT R jack on the SA-300 (L) and the STEREO LINK IN jack on the SA-300 (R).
- Connect the STEREO LINK OUT L jack on the SA-300 (R) and the STEREO LINK IN jack on the SA-300 (L).
- Turn on both SA-300 (L) and SA-300 (R).
- Adjust the volume levels on all devices.
- Adjust the SA-300 (L) and SA-300 (R) volume levels separately using their MASTER VOLUME knobs.
About the Volume and Tone Settings
Adjust the R and L volume levels separately using their MASTER VOLUME knobs. You can adjust the EQUALIZER (LOW/MIDDLE/HIGH knobs), LOW BOOST, and WIDE independently for the L and R sides. Basically, they should be set to the same positions, but you can adjust each one as necessary to suit the needs of a particular setup. The EXP PEDAL/REMOTE SW jack affects only the input signals to the SA-300 to which the expression pedal or the foot switch is connected.
About the Anti-Feedback Function
Features of SA-300 ANTI-FEEDBACK
Many previous anti-feedback systems use methods of determining feedback that actually generate feedback in order to detect the feedback point, resulting in a system that is extremely unpleasant to use.
On the other hand, the SA-300 employs a newly developed method that does not require generation of feedback, but instead uses a microphone to capture a calibration signal output from the SA-300's own speakers, then performs a feedback analysis to estimate the feedback point.
- What is Acoustic Feedback
When sounds output by speakers reenter a microphone, they end up being output from the speakers at even greater volume, and as this cycle is repeated, an unpleasant and uncomfortable oscillating sound is created.
Pointing microphones towards speakers or placing them near the speakers allows the amplified sounds from the speakers to enter the microphones again, thus making it even easier for feedback to arise. - To Avoid Feedback
In general, avoiding feedback requires the following measures:- Setting output levels so they're appropriate for the particular site or room
- Setting connected devices to suitable levels
- Keeping microphones and speakers as distant from each other as possible, and avoiding placing microphones such that they are pointed directly at the speakers.
These methods will allow you to suppress the most serious types of feedback.
In actuality, however, feedback can still occur as you attempt to achieve necessary output levels, while on the other hand, moving speakers away to avoid causing feedback can end up making the sound difficult to hear.
- Reducing Acoustic Feedback with the SA-300 (Anti-Feedback)
The SA-300 includes the following three built-in functions, which allow you to achieve an acoustically stable system that automatically controls the occurrence of feedback and makes it more difficult for feedback to arise.
Dynamic Function
- Suppresses feedback that occurs at times when there is no sound from the microphone.
For feedback generated when no audio is being input via the microphone (for example, at times when the performer is not at the microphone), the feedback point is automatically detected and the feedback is cut with a dedicated filter. - Prevents sudden feedback that occurs when the microphone is in use.
This system automatically cuts out feedback that crops up suddenly due to changes in the surroundings or movement of the microphone, using an extremely narrow filter to minimize alterations in the sound quality.
Safety Margin Function
- Conditions are calibrated automatically to help prevent feedback.
Frequencies prone to feedback will change depending on the microphones used, the placement of the SA-300 (speakers), and the SA-300's output level settings.
The SA-300 measures conditions first to detect these frequencies and secure a sufficient safety margin (i.e., an ample margin of gain before feedback starts to occur).
The entire process, from measurement to securing of the safety margin, takes only a few seconds.
The dedicated filter is optimally processed for each feedback point, resulting in an acoustically stable system that minimizes tonal changes.
Relationship Between Anti-Feedback Functions and ButtonsON/OFF Button: Switches Dynamic function on and off SWEEP Button: Activates the Safety Margin function
- About Speaker and Mic Placement
Conventional PA systems generally require performers using mics to stand behind speakers to avoid feedback. This makes it difficult to hear the sound from the speakers, making comfortable monitoring impossible.
The SA-300's internal anti-feedback system suppresses feedback, allowing performers to monitor the sound in comfort, even when standing in front of the speakers.
How to Use Anti-Feedback
Anti-feedback is enabled only for Channels 1 and 2. In addition, the function can be used only when INPUT SELECT is set to MIC.
When Using a Mic Stand
Both the mic characteristics and the characteristics of the surrounding environment can be compensated for.
- Set up and connect the SA-300 and the mic.
- Set up the SA-300 and the mic in the positions they will be used.
- Adjust the height of the mic stand and the angle of the mic.
- Set the SA-300's VOLUME knob to the level actually to be used in performance.
- Press the ANTI-FEEDBACK ON/OFF button so its indicator is lit.
- Hold down the ANTI-FEEDBACK SWEEP button for at least one second.
The indicator flashes, and the sound of the calibration signal is output from the speaker. The calibration signal is set automatically in accordance with the mic position and volume setting.
* Be aware that the sound output is relatively loud.
When measurement and analysis are finished and the feedback prevention processing is completed, the indicator stops flashing and remains lit.
When Using a Handheld Mic
Only the mic conditions can be corrected.
- Press the ANTI-FEEDBACK ON/OFF button so its indicator is lit.
- Set up and connect the SA-300 and the mic.
- Set the SA-300's VOLUME knob to the level actually to be used in performance.
- To accurately measure the mic characteristics, keep the mic, whether held by hand or mounted on a stand, fixed in the position shown below. To setting up the mic position, please be careful of feedback.
![]()
1 Angle Directly facing the front of the SA-300 2 Distance Approx. 50 cm (19-11/16") 3 Height 120 cm (47-1/4") or more (Height during actual use) 4 Mic Direction Level and directed at the SA-300

- Hold down the ANTI-FEEDBACK SWEEP button for at least one second.
The indicator flashes, and the sound of the calibration signal is output from the speaker.
The calibration signal is set automatically in accordance with the position of the mic and the volume setting.
Take care not to stand between or leave any object obstructing the space between the mic and the SA-300.
To increase measurement accuracy, keep the surroundings as quiet as possible.
When measurement and analysis are finished and the feedback prevention processing is completed, the indicator stops flashing and remains lit.
When automatic measurement is not completed
- If you press the SWEEP button to start the calibration without a microphone connected or with the volume level turned down too low, SA-300 outputs an error sound from the speaker and stops analysis. If this occurs, check your connections and settings.
- If the surrounding noise level is too loud or the microphone position is too far, SA-300 outputs an error sound from the speaker and stops analysis. If this occurs, the SWEEP indicator light goes off.

- If you press the ON/OFF button while the SWEEP indicator is lit, the indicator light goes off, and the antifeedback function is switched off. The results of the correction process are stored in memory, though, so turning the function on again returns the function to its previous status. However, turning off the power clears the results of the correction.
- SA-300 does not respond to panel operations while in SWEEP calibration. It responds after the calibration is completed.
- The anti-feedback function does not work on LINE jack input.
- The sound quality is altered somewhat while the antifeedback is operational.
- With some settings, feedback may not be suppressed, even after you have run the anti-feedback process with the SWEEP button.
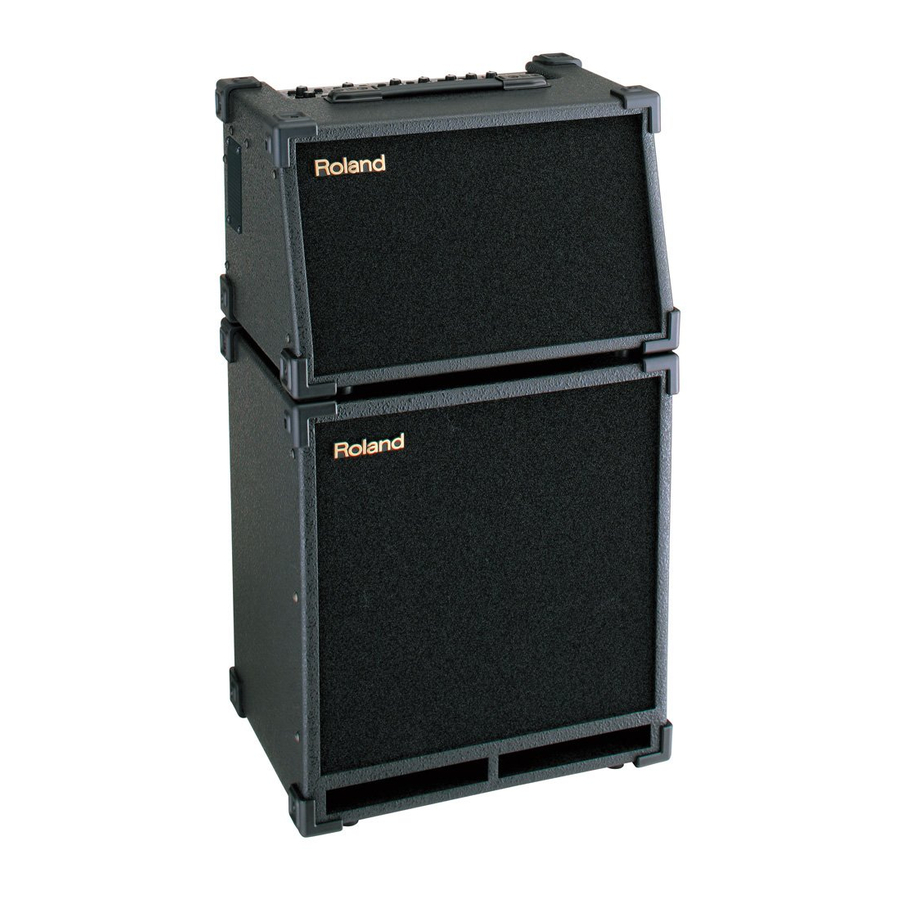
About the Use of Stacks
 When stacking, be sure to follow the instructions below.
- Be sure to set up and use these units in stable, level locations.
- Be careful not to get your fingers pinched.
- Stack so that the speaker side of both the top cabinet and the bottom cabinet face the same direction.
![]()
- Adjust the horizontal position of the top cabinet so that the corner protectors are properly engaged and locked at all four corners between the top and bottom cabinets.
Do not use the amplifiers without proper corner protector engagement. Otherwise, you risk having the top cabinet tumble down. Always make sure that the corners are properly engaged before you use the amplifiers.
![]()


About the Protection Circuit
This unit is equipped with a protection circuit.
The protection circuit helps ensure safety by activating when excessive input continues for a long time while the device is at a location with a high ambient temperature.
When the protection circuit is active, the INPUT SELECT indicator flashes, and the sound output drops in volume or ceases altogether.
Position this device away from walls or other objects so that the vents remain unobstructed, thus preventing the activation of the protection circuit.
Using a Speaker Stand
By using a speaker stand, you can mount the SA-300 at the optimal height for use as a monitor speaker or simple PA device.

- The SA-300 is designed to be used only with speaker stands whose dimensions meet the specifications described below.
Do not use it with a speaker stand that does not meet the following specifications.
![]()
- Before use, adjust the speaker stand to a height of 140 cm (55-1/8") or less and a leg spread of 120 cm (47-1/4") or more, as shown in the figure below.
![]()
- Using a speaker stand that does not meet the specifications at left or that is adjusted to a height over 140 cm (55-1/8"), or a leg spread of less than 120 cm (47- 1/4") may result in damage to equipment or injury due to the stand tipping over.
- When using SA-300 with a speaker stand, the speaker stand must be carefully placed so it is level and sure to remain stable.
- Cables connected to SA-300 should be given enough slack to prevent accidents that might result from someone tripping over them.
- To prevent accidents due to falls, do not place any object on the SA-300 when it's mounted on a speaker stand.
- Always have at least one other person assist you when mounting the SA-300 on a speaker stand, or when adjusting the height of the stand while the SA-300 remains mounted on it.


Block Diagram

Main Specifications
SA-300
- Rated Power Output
350 W (75 W x 2 + SUBWOOFER 200 W) - Nominal Input Level (1 kHz)
INPUT (MIC): -50 dBu INPUT (PHONE): -20 dBu INPUT (RCA): -20 dBu STEREO LINK INPUT: 0 dBu - Nominal Output Level (1 kHz)
* 0 dBu = 0.775 VrmsLINE OUT: +4 dBu BALANCED OUT: +4 dBu STEREO LINK OUTPUT: 0 dBu - Speakers
16 cm + Tweeter (Coaxial, 2-way) x 2
6.5 inches + Tweeter (Coaxial, 2-way) x 2 - Controls
[Channel Controls]
CH 1, CH 2
INPUT SELECT Button (MIC/LINE)
VOICE ENHANCER Button
Channel VOLUME Knob
REVERB/DELAY Knob
ANTI-FEEDBACK Button (ON/OFF)
ANTI-FEEDBACK SWEEP Button
CH 3, CH 4
INPUT SELECT Button (MIC/LINE)
Channel VOLUME Knob
REVERB Knob
PHANTOM Switch
[Master Controls]
Equalizer
LOW Knob
MIDDLE Knob
HIGH Knob
LOW BOOST Button
WIDE Button
MASTER VOLUME Knob
PHONES VOLUME Knob
POWER Switch
GND LIFT Switch - Indicators
MIC, LINE (CH 1–CH 4)
ANTI-FEEDBACK ON/OFF (CH 1, CH 2)
ANTI-FEEDBACK SWEEP (CH 1, CH 2)
LEVEL METER SUBWOOFER ACTIVE - Connectors
CH 1, CH 2
MIC INPUT Jacks (XLR type, 1/4" TRS phone type)
LINE INPUT Jacks (L/MONO, R) (1/4" phone type)
CH 3, CH 4
MIC INPUT Jacks (XLR type, 1/4" TRS phone type, PHANTOM Power)
LINE INPUT Jacks (L/MONO, R) (1/4" phone type)
LINE INPUT Jacks L, R (RCA phono type)
Output
LINE OUTPUT Jacks (L/MONO, R) (1/4" phone type)
LINE OUTPUT Connectors L, R (XLR type)
Stereo Link
STEREO LINK IN Jack (1/4" phone type)
STEREO LINK OUT Jacks L, R (1/4" phone type)
Others
PHONES Jack (Stereo 1/4" phone type)
SUBWOOFER OUT Jack (1/4" phone type)
Foot SW Jacks (ANTI-FEEDBACK SWEEP) (1/4" phone type)
Foot SW Jack (EXP PEDAL/ REMOTE SW) (1/4" TRS phone type) - Power Supply
AC 117 V, AC 220 V, AC 230 V, AC 240 V (50/60 Hz) - Power Consumption
94 W - Dimensions
456 (W) x 343 (D) x 297 (H) mm 18 (W) x 13-9/16 (D) x 11-3/4 (H) inches - Weight
11.5 kg / 25 lbs 6 oz
SA-300W (SUBWOOFER)
- Speaker
30 cm / 12 inches - Nominal Impedance
4 Ω - Connection
INPUT Jack (1/4" phone type) - Dimensions
456 (W) x 325 (D) x 510 (H) mm
18 (W) x 12-13/16 (D) x 20-1/8 (H) inches - Weight
10.5 kg / 23 lbs 3 oz - Accessories
Owner's Manual
Speaker connection cable - Options
Foot Switch:
FS-5L (Mute) (BOSS)
FS-5U (ANTI-FEEDBACK / Effect) (BOSS)
FS-6 (BOSS)
Expression Pedal:
EV-5 FV-300L (BOSS)
FV-500L (BOSS)
FV-500H (BOSS)
Connection Cable: PCS-31
In the interest of product improvement, the specifications and/or appearance of this unit are subject to change without prior notice.
Copyright © 2005 ROLAND CORPORATION
All rights reserved. No part of this publication may be reproduced in any form without the written permission of ROLAND CORPORATION.

Documents / ResourcesDownload manual
Here you can download full pdf version of manual, it may contain additional safety instructions, warranty information, FCC rules, etc.
Advertisement


Need help?
Do you have a question about the SA-300 and is the answer not in the manual?
Questions and answers