Oregon Scientific THGN122N, THGR122N - Temperature, Humidity Sensor Manual
- User manual (2 pages)
Advertisement
Introduction
Thank you for selecting the Oregon Scientific™ remote sensor (THGR122N / THGN122N). This product is compatible with various wireless weather station products.
Keep this manual handy as you use your new product. It contains practical step-by-step instructions, as well as technical specifications and warnings you should know about.
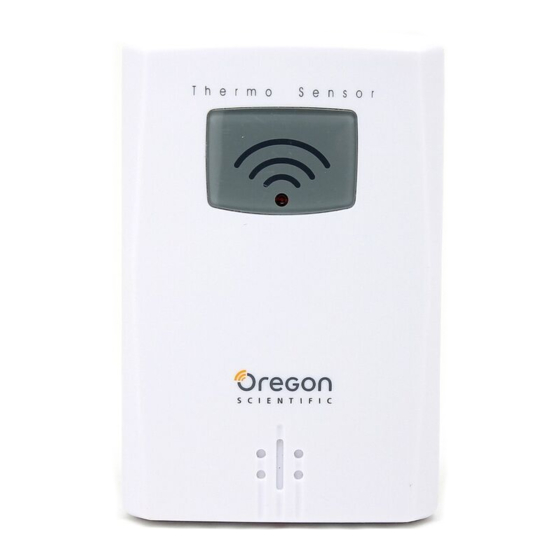
PRODUCT OVERVIEW

- LCD display
(THGN122N does not have an LCD screen): Shows the channel number, temperature and humidity readings - LED status indicator

- Wall mount
- RESET hole
- CHANNEL switch
- Battery compartment
GETTING STARTED
To set up the sensor:
- Open the remote sensor battery compartment with a small Phillips screwdriver.
- Insert the batteries, matching the polarity (+ and -).

- Set the channel. If you are using more than one sensor, select a different channel for each sensor.
- Place the sensor near the main unit. Press RESET on the sensor. Then, press the appropriate main unit button (as specified in the main unit manual) to initiate signal sending between the sensor and the main unit. The reception icon on the main unit will blink for approximately 3 minutes while it is searching for the sensor.
- Close the sensor battery compartment.
- Secure the sensor in the desired location using the wall mount or table stand.


NOTE
 - shows on the THGR122N when the batteries are low.
NOTE
Install batteries in the remote sensor before the main unit. Press RESET after each battery change. Do not use rechargeable batteries. We recommend that you use alkaline batteries with this product for longer usage and lithium batteries in temperatures below freezing.
For best results:
- Place the sensor out of direct sunlight and moisture.
- Do not place the sensor more than 98 feet (30 meters) from the main (indoor) unit.
- Position the sensor so that it faces the main (indoor) unit, minimizing obstructions such as doors, walls, and furniture.
- Place the sensor in a location with a clear view to the sky, away from metallic or electronic objects.
- Position the sensor close to the main unit during cold winter months as below-freezing temperatures may affect battery performance and signal transmission.
You may need to experiment with various locations to get the best results.
Standard Alkaline batteries contain significant amounts of water. Because of this they will freeze in low temperatures of approximately -12ºC (10ºF). Disposable Lithium batteries have a much lower threshold for temperature with an estimated freezing range of below -40ºC (-29°F).
Wireless ranges can be impacted by a variety of factors such as extremely cold temperatures. Extreme cold may temporarily reduce the effective range between the sensor and the base station. If the unit's performance fails due to low temperature, the unit will resume proper functioning as the temperature rises to within the normal temperature range (i.e. no permanent damage will occur to the unit due to low temperatures).
RESET
Press RESET to return the unit to the default settings.
PRECAUTIONS
This product is engineered to give you years of satisfactory service if you handle it carefully. Here are a few precautions:
- Do not immerse the unit in water. If you spill liquid over it, dry it immediately with a soft, lint-free cloth.
- Do not clean the unit with abrasive or corrosive materials.
- Do not subject the unit to excessive force, shock, dust, temperature or humidity, which may result in malfunction, shorter electronic life span, damaged battery and distorted parts.
- Do not tamper with the unit's internal components. Doing so will invalidate the warranty on the unit and may cause unnecessary damage. The unit contains no user-serviceable parts.
- Only use fresh batteries as specified in the user's instructions. Do not mix new and old batteries.
- Do not use rechargeable batteries.
- Remove batteries when storing the product for a long time.
- Due to printing limitations, the displays shown in this manual may differ from the actual display.
- The contents of this manual may not be reproduced without the permission of the manufacturer.
- Do not dispose this product as unsorted municipal waste. Collection of such waste separately for special treatment is necessary.
NOTE
The technical specifications for this product and the contents of the user manual are subject to change without notice.
TROUBLESHOOTING
| PROBLEM | SYMPTOM | REMEDY |
| Remote sensor | Cannot locate remote sensor | Check batteries |
| Check location | ||
| Cannot change channel | Check sensors. Only one sensor is working | |
| Data does not match main unit | Initiate a manual sensor search |
SPECIFICATIONS
| L x W x H | 92x60x20 mm (3.6 x 2.4 x 0.79 inches) |
| Weight | 62 grams (2.22 ounces) |
| Humidity range | 5% to 95% |
| Humidity resolution | 1% |
| Temperature unit | ºC (ºF) |
| Temperature outdoor range | -30ºC (-22ºF) to 60ºC (140ºF) |
| Temperature resolution | 0.1ºC (0.2ºF) |
| RF frequency | 433 MHz |
| Range | 30 meters (98 feet) |
| Transmission | Every 40 seconds |
| Channel No. | 1 - 3 |
| Batteries | 2 x UM-4 (AAA) 1.5V |
NOTE
It is recommended that you use alkaline batteries with this product for longer usage and lithium batteries in temperatures below freezing.

Documents / ResourcesDownload manual
Here you can download full pdf version of manual, it may contain additional safety instructions, warranty information, FCC rules, etc.
Download Oregon Scientific THGN122N, THGR122N - Temperature, Humidity Sensor Manual
Advertisement


Need help?
Do you have a question about the THGN122N and is the answer not in the manual?
Questions and answers