
Related Manuals for Beko BBVM13400DXS


Summary of Contents for Beko BBVM13400DXS
- Page 1 Built-in Oven User Manual Piekarnik do zabudowy Instrukcja obsługi BBVM13400DXS 385442443/ EN/ PL/ R.AA/ 10/04/23 09:39 7768287697...
-
Page 2: Table Of Contents
6.1.3 Grill ..........35 Table of Contents 6.1.4 Test foods........36 1 Safety Instructions......7 Maintenance and Cleaning... 38 Intended Use........General Cleaning Information ..38 Child, Vulnerable Person and Pet Cleaning Accessories ....39 Safety ..........Cleaning the Control Panel.... 39 Electrical Safety...... - Page 3 EN / 3...
-
Page 4: Safety Instructions
1 Safety Instructions • This section includes the Intended Use safety instructions necessary • This product is designed to be to prevent the risk of personal used at home. It is not suitable injury or material damage. for commercial use. •... -
Page 5: Electrical Safety
supervised or trained about the • When the door is open, do not safe use and hazards of the put any heavy objects on it or product. allow children to sit on it. You • Children should not play with may cause the oven to tip over the product. -
Page 6: Transportation Safety
• The product must not be • If the power cable is damaged, plugged into the outlet during it must be replaced by the installation, repair, and trans- manufacturer, an authorized portation. service or a person to be spe- • Plug the product into an outlet cified by the importer company that meets the voltage and fre- in order to prevent possible... -
Page 7: Installation Safety
• The product is heavy, carry the Safety of Use product with at least two • Ensure that the product is people. switched off after every use. • Do not use the door and / or • If you will not use the product handle to transport or move for a long time, unplug it or the product. -
Page 8: Temperature Warnings
Temperature Warn- detailed information, refer to the section "Usage of ac- ings cessories". • WARNING: The accessible • Accessories can damage the parts of the product will be hot door glass when closing the during use. Care should be product door. Always push the taken to avoid touching the accessories to the end of the product and heating elements. -
Page 9: Maintenance And Cleaning Safety
preheated oven. Remove any food too far in the back of the excessive pieces of grill. This is the hottest area greaseproof paper hanging and fatty foods may catch fire. from the accessory or con- 1.10 Maintenance and tainer to avoid the risk of Cleaning Safety touching the oven heater ele- •... -
Page 10: Environmental Instructions
2 Environmental Instructions 2.1 Waste Directive aging waste with the household or other wastes, take it to the packaging material 2.1.1 Compliance with the WEEE Dir- collection points designated by the local ective and Disposing of the authorities. Waste Product 2.3 Recommendations for Energy This product complies with EU WEEE Dir- Saving... -
Page 11: Your Product
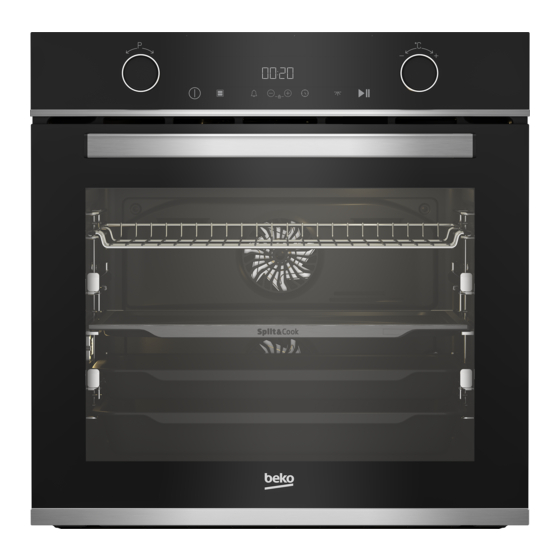
3 Your product 3.1 Product Introduction 1 Control panel 2 Lamp 3 Wire shelves 4 Partition sheet 5 Door 6 Handle 7 Lower heater (under the steel plate) 8 Lower fan motor (behind the steel plate) 9 Shelf positions 10 Upper fan motor (behind the steel plate) 11 Upper heater 12 Ventilation holes... -
Page 12: Control Panel
3.2.1 Control Panel 1 Function selection knob 2 Control unit 3 Temperature selection knob If there are knob(s) controlling your Oven inner temperature indicator product, in some models this/these knob(s) You can understand the oven inner temper- may be so that they come out when pushed ature from the inner temperature symbol on (buried knobs). - Page 13 Food is heated from above and below at the same time. Suitable for cakes, Top and bottom heat- 40-280 pastries or cakes and stews in baking moulds. Cooking is done with a single tray. Only lower heating is on. It is suitable for Bottom heating 40-220 foods that need browning on the bottom.
- Page 14 The hot air heated by the large grill is quickly distributed into the oven with the Fan assisted full grill 40-280 fan. It is suitable for grilling in large amounts. It is used to keep the food at a temperat- Keep warm 40-100 ure ready for service for a long time.
-
Page 15: Product Accessories
Oven cooking sections ive, the function screen for both sections is customized to a single section. The tem- You can cook in 4 different ways in differ- perature indicator and time/duration indic- ent sections using the cross-partition sheet ator screens for the lower compartment ap- in your oven or by exiting the product. -
Page 16: Use Of Product Accessories
Wire grill It is used for frying or placing the food to be baked, fried and stewed on the desired shelf. On models with wire shelves : Placement of the cross-partition sheet In order to cook only in the upper, lower or together in the lower and upper sections in your oven, place the cross-partition sheet On models without wire shelves :... - Page 17 Tray stopping function There is also a stopping function to prevent the tray from tipping out of the wire shelf. While removing the tray, release it from the rear stopping socket and pull it towards yourself until it reaches the front side. You must pass over this stopping socket to re- move it completely.
-
Page 18: Technical Specifications
3.6 Technical Specifications General specifications Product external dimensions (height/width/depth) (mm) 595 /594 /567 Oven installation dimensions (height / width / depth) 590 - 600 /560 /min. 550 (mm) Voltage/Frequency 220-240 V ~; 50/60 Hz Cable type and section used/suitable for use in the min. -
Page 19: First Use
4 First Use Before you start using your product, it is re- commended to do the following stated in the following sections respectively. 4.1 First Timer Setting Always set the time of day before 6. Touch the keys to set the minute. using your oven. - Page 20 6. Wipe the surfaces of the product with a NOTICE: Some detergents or cleaning wet cloth or sponge and dry with a cloth. agents may cause damage to the surface. Do not use abrasive detergents, cleaning Before using the accessories: powders, cleaning creams or sharp objects Clean the accessories you remove from the during cleaning.
-
Page 21: Using The Oven
5 Using the Oven 5.1 General Information on Using the If there is key on the control panel: In cases where the oven lamp is automatically Oven switched on or off, you can turn the lamp Cooling fan ( It varies depending on the on and off at any time by touching the product model. - Page 22 on the screen. If the crosspartition sheet is Keys : inserted, the first working function for the : On/off key lower section is displayed. The operating : Cooking section selection key function, temperature and baking time can : Alarm key be adjusted when the display is in this : Decrease and advance key status.
- Page 23 If you change the operating func- tion after you change the pre-set temperature of the operating func- tion, the last temperature set is shown on the display. However, if the selected temperature is not Illustration 1: If the cross-partition sheet is within the temperature range of the inserted: selected operating function, the...
- Page 24 11.If you cooked by setting the cooking time, after the set cooking time is com- pleted, "End" text appears on the screen, an audible warning is heard and cooking stops. ð The warning sounds for two minutes. Illustration 4: Only for lower section: While the audible warning is given and "End"...
- Page 25 To quickly set the baking time, you can touch the key to set the bak- ing time to 30 minutes after setting the operating function and temper- ature then use keys to change the time. 6. Set the cooking time with the keys.
- Page 26 10.If you want to cook without setting 13.After setting up operating function, the temperature and the baking time, touch the cooking time, tap key to start cooking. key to start baking. ð The upper section of your oven will If the cooking is started without ad- start operating immediately at the justing the cooking time, the oven selected function and temperature.
-
Page 27: Settings
ator screen of that section, an audible » The symbol disappears from the dis- warning is heard and that section stops play and the key lock is disabled. cooking. Setting the alarm ð Within each section, the warning You can also use the control unit of the sounds for two minutes at the end of product for any warning or reminder other the alarm period. - Page 28 Turning off the alarm 4. Set the desired brightness with the keys. (d-1, d-2, d-3) 1. At the end of the alarm period, the warn- ing sounds for two minutes. Touch any ð Selected brightness setting is con- key to stop the audible warning. firmed immediately.
-
Page 29: General Information About Baking
ð The timer field and the symbol ð The minutes field and the sym- flash on the display. bol flash on the display. 4. Set the time of day by touching the 5. Touch the keys to set the minute. keys and activate the minutes field by Confirm the setting by touching the touching the... -
Page 30: Pastries And Oven Food
6.1.1 Pastries and oven food • If the cake is moist, use a small amount of liquid or reduce the temperature by • We recommend using the accessories of 10°C. the product for a good cooking perform- • If the top of the cake is burnt, put it on ance. - Page 31 Food Accessory to be used Operating func- Shelf position Temperature Baking time tion (°C) (min) (approx.) Top and bottom Cake on the tray Standard tray * 30 … 40 heating Cake mould on wire Cake in the mould Fan Heating 40 …...
- Page 32 Food Accessory to be used Operating func- Shelf posi- Temperature Baking time tion tion (°C) (min) (approx.) 1 - Standard tray * Small cakes Fan Heating 1 - 4 35 … 45 4 - Pastry tray * 2 - Standard tray * Cookie Fan Heating 2 - 4...
-
Page 33: Meat, Fish And Poultry
“Eco fan heating” operating function ternal temperature is optimized to save energy, and this temperature may differ • Do not change the temperature setting from what is shown on the display. after starting cooking in the operating • Do not preheat in the “Eco fan heating” function “Eco fan heating”. - Page 34 Cooking table for meat, fish and poultry in a single large section Food Accessory to be Operating func- Shelf position Temperature (°C) Baking time used tion (min) (approx.) 15 mins. 250/ Steak (whole) / Fan assisted bot- Standard tray * max, after 180 …...
-
Page 35: Grill
Cooking table for meat, fish and poultry in lower section Food Accessory to be Operating func- Shelf position Temperature (°C) Baking time used tion (min) (approx.) Fried chicken 15 mins. 250/ Standard tray * Fan Heating 70 ... 95 (1,8-2 kg) max, after 210 Fish Standard tray *... -
Page 36: Test Foods
Grill table for upper section Food Accessory to be Shelf position Temperature (°C) Baking time (min) used (approx.) Meatball (veal) - 12 Wire grill 20 ... 30 amount Toast bread Wire grill 2 ... 4 It is recommended to preheat for 5 minutes for all grilled food. Turn pieces of food after 1/2 of the total grilling time. - Page 37 Food Accessory to be used Operating func- Shelf posi- Temperature Baking time tion tion (°C) (min) (approx.) 2 - Standard tray * Shortbread (sweet Fan Heating 2 - 4 15 … 25 cookie) 4 - Pastry tray * 1 - Standard tray * Small cakes Fan Heating 1 - 4...
-
Page 38: Maintenance And Cleaning
7 Maintenance and Cleaning 7.1 General Cleaning Information • Stainless-inox surface may change col- our in time. This is normal. After each op- General warnings eration, clean with a detergent suitable • Wait for the product to cool before clean- for the stainless or inox surface. -
Page 39: Cleaning Accessories
• Catalytic surfaces absorb oil thanks to its 7.2 Cleaning Accessories porous structure and start to shine when Do not put the product accessories in a the surface is saturated with oil, in this dishwasher unless otherwise stated in the case it is recommended to replace the user’s manual. -
Page 40: Easy Steam Cleaning
For stubborn dirt, clean the product using dishwashing detergent, warm water and a soft cloth or sponge and dry it with a dry cloth. In the easy steam cleaning func- tion, it is expected that the added water evaporates and condenses on the inside of the oven and the oven door in order to soften the light dirt formed in your oven. -
Page 41: Removing The Inner Glass Of The Oven Door
Do not use harsh abrasive cleaners, metal scrapers, wire wool or bleach materials to clean the oven door and glass. Removing the oven door 1. Open the oven door. 2. Open the clips in the front door hinge socket on the right and left by pushing them downwards as shown in the fig- 8. -
Page 42: Cleaning The Oven Lamp
7.8 Cleaning the Oven Lamp In the event that the glass door of the oven lamp in the cooking area becomes dirty; clean using dishwashing detergent, warm water and a soft cloth or sponge and dry with a dry cloth. In case of oven lamp fail- ure, you can replace the oven lamp by fol- lowing the sections that follow. -
Page 43: Troubleshooting
3. If your oven lamp is type (A) shown in the figure below, rotate the oven lamp as shown in the figure and replace it 3. Lift the lamp's protective glass cover with a new one. If it is type (B) model, with a screwdriver. - Page 44 • (If there is timer on your appliance) Keys on the control panel do not work. >>> If your product has a key lock, the key lock may be enabled, disable the key lock. Oven light is not on. • Oven lamp may be faulty. >>> Replace oven's lamp.
- Page 46 Ogólne ostrzeżenia dotyczące Spis treści pieczenia w piekarniku ....1 Instrukcje bezpieczeństwa ..48 6.1.1 Ciasta i wypieki......75 Przeznaczenie ....... 48 6.1.2 Mięso, ryby i drób ....... 79 Bezpieczeństwo dzieci, osób wy- 6.1.3 Grill ..........80 magających szczególnego trakto- 6.1.4 Test żywności......
- Page 47 PL / 47...
-
Page 48: Instrukcje Bezpieczeństwa
1 Instrukcje bezpieczeństwa • Rozdział ten omawia instrukcje Przeznaczenie bezpieczeństwa, które pomogą • To urządzenie przeznaczone zapobiec ryzyku uszkodzenia jest do użytku domowego. Nie ciała lub mienia. jest przeznaczony do użytku • Jeśli produkt zostanie przeka- komercyjnego. zany komuś innemu do użytku •... -
Page 49: Bezpieczeństwo Dzieci, Osób Wy
Bezpieczeństwo • Produkty elektryczne są nie- bezpieczne dla dzieci i zwie- dzieci, osób wymaga- rząt domowych. Dzieci i zwie- jących szczególnego rzęta nie mogą bawić się, wspi- traktowania i zwierząt nać się na urządzenie ani domowych wchodzić do niego. • Niniejszy urządzenie może być •... - Page 50 cić wykwalifikowanemu elek- nien być skręcony, zgnieciony i trykowi. Nie używać produktu nie powinien stykać się z żad- bez uziemienia zgodnie z lokal- nym źródłem ciepła. nymi/krajowymi przepisami. • Tylna powierzchnia piekarnika • Wtyczka lub złącze elektryczne nagrzewa się podczas pracy. urządzenia powinny znajdo- Przewody zasilające nie mogą...
-
Page 51: Zabezpieczenie Podczas Trans- Portu
• Nie należy podłączać urządze- mocą taśmy, aby zapobiec nia do gniazdka, które jest luź- uszkodzeniu wyjmowanych lub ne, wyszło z puszki, jest zepsu- ruchomych części urządzenia te, brudne, oleiste, istnieje ryzy- oraz samego urządzenia. ko kontaktu z wodą (na przy- •... -
Page 52: Ostrzeżenia Dotyczące Tempera- Tury
• Nie wolno używać wadliwego zaciąć. Podczas otwierania/ lub uszkodzonego urządzenia. zamykania drzwiczek nie wol- Jeśli urządzenie jest uszko- no trzymać za zawiasy. dzone należy odłączyć je od Ostrzeżenia doty- zasilania elektrycznego/gazu i czące temperatury skontaktować się z autoryzo- • OSTRZEŻENIE: Podczas użyt- wanym serwisem. -
Page 53: Używanie Akcesoriów
cego piekarnika, itp. należy za- niu. W przeciwnym razie może wsze używać rękawic odpor- powodować to zatrucie pokar- nych na wysoką temperaturę. mowe lub choroby. • Nie podgrzewaj w piekarniku Używanie akceso- zamkniętych puszek i szkla- riów nych słoików. Ciśnienie, które •... -
Page 54: Bezpieczeństwo Konserwacji I Czyszczenia
• Zamknij drzwiczki piekarnika • Nie wolno myć produktu, spry- podczas grillowania. Gorące skując go lub polewając wodą! powierzchnie mogą powodo- Istnieje ryzyko porażenia prą- wać oparzenia! dem! • Żywność nieodpowiednia do • Nie używaj myjek parowych do grillowania niesie ze sobą ryzy- czyszczenia urządzenia, ponie- ko pożaru. -
Page 55: Opakowanie Urządzenia
• Rozmroź zamrożone jedzenie przed goto- Zgodność z dyrektywą RoHS: waniem. Niniejszy wyrób jest zgodny z dyrektywą • W piekarniku używaj ciemnych lub ema- Parlamentu Europejskiego i Rady RoHS liowanych pojemników, które lepiej prze- (Ograniczenie użycia substancji niebez- noszą ciepło. piecznych) (2011/65/WE). -
Page 56: Produkt
3 Produkt 3.1 Opis urządzenia 1 Panel sterowania 2 Oświetlenie 3 Półka druciana 4 Przegroda 5 Drzwi 6 Uchwyt 7 Dolna nagrzewnica (pod płytą stalo- 8 Silnik wentylatora dolnego (za płytą wą) stalową) 9 Umieszczenie półek 10 Silnik wentylatora górnego (za płytą stalową) 11 Górna grzałka 12 Otwory wentylacyjne... -
Page 57: Panel Sterowania
3.2.1 Panel sterowania 1 Pokrętło wyboru funkcji 2 Jednostka sterująca 3 Pokrętło wyboru temperatury Jeśli urządzenie jest wyposażone w pokrę- Wskaźnik temperatury wewnętrznej pie- tła sterujące, w niektórych modelach pokrę- karnika tła te mogą wysuwać się po naciśnięciu Temperaturę wewnątrz piekarnika można (pokrętła zakopane). - Page 58 Żywność jest podgrzewana jednocześnie od góry i od dołu. Nadaje się do ciast, cia- Górne i dolne ogrze- 40-280 stek lub ciast i gulaszu w formach do pie- wanie czenia. Pieczenie odbywa się przy użyciu pojedynczej tacy. Włączona jest tylko dolna grzałka. Nada- Dolne ogrzewanie 40-220 je się...
- Page 59 Gorące powietrze w piekarniku z wentyla- torem nagrzewane przez duży grill jest Wentylator wspoma- 40-280 szybko rozprowadzane po komorze. Na- gany dużym grillem daje się do grillowania większych kawał- ków. Służy do utrzymywania żywności w tem- Utrzymanie ciepła 40-100 peraturze gotowej do podania przez dłuż- szy czas.
-
Page 60: Akcesoria
Części piekarnika Możesz piec w jednej dużej części. Nadaje się do potraw dużych rozmiarów i wielo- Możesz gotować na 4 różne sposoby w krotnego gotowania. Gdy aktywna jest jed- różnych częściach, używając przegrody w na duża komora, ekran funkcji dla obu czę- swoim piekarniku lub wychodząc z urzą- ści jest dostosowywany do pojedynczej dzenia. -
Page 61: Zastosowanie Akcesoriów Urzą- Dzenia
Ruszt do grilla Służy do smażenia lub układania potraw, które mają być upieczone, smażone i du- szone na wybranej półce. W modelach z półkami drucianymi : Umieszczenie przegrody poprzecznej Aby w piekarniku można było piec tylko w górnej, dolnej lub razem w dolnej i górnej części, należy umieścić... - Page 62 Umieszczenie tacki na półkach do piecze- nia. Funkcja zatrzymywania tacy Bardzo ważne jest prawidłowe umieszcze- Dostępna jest również funkcja zatrzymania, nie tacki na bocznych półkach. Podczas która zapobiega wysuwaniu się tacy z dru- umieszczania tacki na wybranej półce rącz- cianej półki. Podczas wyjmowania tacy ka musi znajdować...
- Page 63 PL / 63...
-
Page 64: Specyfikacje Techniczne
3.6 Specyfikacje techniczne Ogólne specyfikacje Wymiary zewnętrzne produktu (wysokość/szerokość/ 595 /594 /567 głębokość) (mm) Wymiary montażowe piekarnika (wysokość / szerokość / 590 - 600 /560 /min. 550 głębokość)(mm) Napięcie/Częstotliwość 220-240 V ~; 50/60 Hz Typ i przekrój kabla zastosowany/odpowiedni do urzą- min. -
Page 65: Pierwsze Użycie
4 Pierwsze użycie Przed rozpoczęciem korzystania z urządze- nia zaleca się wykonanie poniższych czyn- ności, odpowiednio w poniższych sekcjach. 4.1 Pierwsze ustawienie godziny Zawsze ustawiaj porę dnia przed 6. Naciśnij / , aby ustawić minuty. Po- użyciem piekarnika. Jeśli jej nie twierdź... -
Page 66: Korzystanie Z Piekarnika
5. Poczekaj, aż piekarnik ostygnie. UWAGA: Niektóre detergenty lub środki czyszczące mogą uszkodzić powierzchnię. 6. Wytrzyj powierzchnie produktu wilgotną Podczas czyszczenia nie używaj środków szmatką lub gąbką i wytrzyj szmatką. do szorowania, proszków do czyszczenia, Przed użyciem akcesoriów: kremów ani ostrych przedmiotów. Umyj akcesoria wodą... - Page 67 raturę. Informacje o ustawieniu szybkie- Jednostka sterująca go nagrzewania wstępnego znajdują się w rozdziale „Ustawienia”. Symbol dolnej części gotowania Przyciski : Przycisk włączania/wyłączania Symbol górnej części gotowania Przycisk wyboru części gotowania Symbol podwójnej części gotowania Przycisk alarmu Symbol pilota Przycisk zmniejszania i przesuwania Symbol Wi-Fi * Przycisk zwiększania i przesuwania : Symbol samooczyszczenia *...
- Page 68 Wyłączanie piekarnika 3. Po włożeniu przegrody poprzecznej ak- tywowany jest ekran strefy gotowania Wyłącz piekarnik, dotykając przycisku części dolnej. Wystarczy dotknąć przy- Na wyświetlaczu pokazywana jest godzina. cisk , aby wybrać górną część. Pieczenie w jednej dużej części, tylko w ð...
- Page 69 Jeśli pieczenie zostanie rozpoczęte Aby szybko ustawić czas pieczenia, bez regulacji czasu pieczenia, pie- naciśnij , aby ustawić czas pie- karnik nie wyłączy się automatycz- czenia na 30 minut po ustawieniu nie po zakończeniu pieczenia. Użyt- funkcji pracy i temperatury, następ- kownik musi zakończyć...
- Page 70 sza z wyjątkiem tych, dźwiękowy sy- Jeśli pieczenie zostanie rozpoczęte gnał ostrzegawczy zostanie wyłączo- bez regulacji czasu pieczenia, pie- karnik nie wyłączy się automatycz- nie po zakończeniu pieczenia. Użyt- Wspólne pieczenie w części dolnej i górnej kownik musi zakończyć pieczenie. ü...
- Page 71 ð Dolna część piekarnika zacznie ną temperaturę, zaświeci się każdy działać natychmiast z wybraną etap symbolu . Czas, jaki upły- funkcją i temperaturą. Odliczany nął od rozpoczęcia pieczenia, poja- jest czas pieczenia ustawiony na wia się na ekranie Czas/godzina. wyświetlaczu. Na wyświetlaczu 11.Jeśli chcesz piec, ustawiając czas wyświetlane są...
-
Page 72: Ustawienia
14.Jeśli pieczenie odbywało się bez 5.3 Ustawienia ustawienia czasu pieczenia, piekarnik nie wyłączy się automatycznie dla obu Odliczanie 3-2-1 jest wyświetlane części. Pieczenie trzeba kontrolować i na wyświetlaczu w menu lub usta- wyłączać samodzielnie. Zakończ pie- wieniach, które należy aktywować czenie, naciskając przycisk , gdy przez dłuższe naciśnięcie przyci-... - Page 73 czony o określonej godzinie. Gdy tylko upły- 2. Alarm można również anulować, naci- nie ustawiony czas, timer wyemituje ostrze- skając na dłużej żenie dźwiękowe. Ustawienie głośności Możesz ustawić głośność swojej jednostki Maksymalny czas alarmu może wy- sterującej. Aby wykonać to ustawienie, pie- nosić...
-
Page 74: Ogólne Informacje Dotyczące Pieczenia
aktywować ustawienie szybkiego nagrze- 2. Naciśnij aż na wyświetlaczu poja- wania. Aby wykonać to ustawienie, piekar- wi się symbol nik powinien być wyłączony. 3. Naciśnij przycisk , aby podświetlić po- 1. Przy wyłączonym piekarniku (gdy na wy- le czasu. świetlaczu pojawia się godzina), naciśnij ð... -
Page 75: Ciasta I Wypieki
• Ze względu na różnicę temperatur inten- • Jeśli zamierzasz piec stawiając naczynie sywna para wodna wytwarzana podczas na ruszcie, umieść ją na środku, a nie w pieczenia może tworzyć krople wody pobliżu tylnej ściany. skroplonej na wewnętrznej i zewnętrznej •... - Page 76 nie jest zbyt duża na dnie ciasta. Aby cia- Tabela pieczenia ciast i potraw z piekarni- sto równomierne się zarumieniło, spróbuj ka w pojedynczej dużej części równomiernie rozprowadzić „sos” między Sugestie dotyczące pieczenia na jednej arkuszami papieru a ciastem. tacy •...
- Page 77 Żywność Akcesoria Funkcja opera- Pozycja półki Temperatura Czas pieczenia cyjna (°C) (min.) (ok.) Górne i dolne Standardowa taca * 250 … 280 8 … 15 ogrzewanie Pizza Standardowa taca * Funkcja pizzy 250 … 280 6 … 12 Wstępne nagrzewanie jest zalecane dla wszystkich potraw. * Akcesoria te mogą...
- Page 78 Żywność Akcesoria Funkcja opera- Pozycja półki Temperatura (°C) Czas pieczenia cyjna (min.) (ok.) Forma do ciasta Ogrzewanie wen- Ciasto w formie na ruszcie drucia- 45 … 55 tylatorem nym ** Okrągła forma do ciasta o średnicy Ciasta biszkopto- Ogrzewanie wen- 26 cm z zaci- 40 …...
-
Page 79: Mięso, Ryby I Drób
6.1.2 Mięso, ryby i drób • Po upłynięciu czasu pieczenia trzymaj mięso w piekarniku przez około 10 minut. Przyciski grillowania Sok z mięsa lepiej rozprowadza się na • Doprawienie sokiem z cytryny i pieprzem smażonym mięsie i nie wypływa po roz- przed pieczeniem całego kurczaka, indy- krojeniu. -
Page 80: Grill
Tabela mięsa, ryb i drobiu w górnej części Żywność Akcesoria Funkcja opera- Pozycja półki Temperatura (°C) Czas pieczenia cyjna (min.) (ok.) Smażony kurczak Standardowa taca Ogrzewanie wen- 15 min. 250/max, 80 ... 105 (1,8-2 kg) tylatorem po 210 Standardowa taca Ogrzewanie wen- Ryby 20 ... -
Page 81: Test Żywności
Tabela grillowania w pojedynczej dużej części Żywność Akcesoria Pozycja półki Temperatura (°C) Czas pieczenia (min.) (ok.) Ryby Ruszt do grilla 4 - 5 20 ... 25 Kawałki kurczaka Ruszt do grilla 4 - 5 25 ... 35 Klopsik (cielęcina) - Ruszt do grilla 20 ... - Page 82 Żywność Akcesoria Funkcja opera- Pozycja półki Temperatura (°C) Czas pieczenia cyjna (min.) (ok.) Okrągła czarna metalowa forma o Górne i dolne średnicy 20 cm na 60 … 75 ogrzewanie ruszcie drucianym Szarlotka Okrągła czarna metalowa forma o Ogrzewanie wen- średnicy 20 cm na 60 …...
-
Page 83: Czyszczenie I Konserwacja
Sekcja goto- Żywność Akcesoria Funkcja ope- Pozycja półki Temperatura Czas piecze- wania racyjna (°C) nia (min.) (ok.) Forma do cia- Ciasto w for- Ogrzewanie Górna sta na ruszcie 45 … 55 wentylatorem drucianym ** Standardowa Ogrzewanie Dolna Ryby 20 … 30 taca * wentylatorem Standardowa... - Page 84 • Powierzchnia ze stali nierdzewnej może z • Katalityczne ściany mają lekką matową i czasem zmienić kolor. Jest to normalne. porowatą powierzchnię. Katalityczne Po każdej pracy wyczyść je detergentem ściany piekarnika nie powinny być czysz- odpowiednim do powierzchni ze stali nie- czone.
-
Page 85: Czyszczenie Akcesoriów
Części z tworzyw sztucznych i malowane Czyszczenie bocznych ścian piekarnika powierzchnie Ściany boczne płyty kuchennej mogą być • Plastikowe części i pomalowane po- pokryte emaliowanymi lub katalitycznymi wierzchnie należy czyścić za pomocą pły- ścianami. Zależy od modelu. Jeśli istnieje nu do mycia naczyń, ciepłej wody i mięk- ściana katalityczna, należy zapoznać... -
Page 86: Czyszczenie Drzwiczek Piekarnika
7.6 Czyszczenie drzwiczek piekarnika Możesz zdjąć drzwi piekarnika i szyby, aby je wyczyścić. Jak zdemontować drzwi i okna, opisano w rozdziałach „Zdejmowa- 3. Wybierz funkcję łatwego czyszczenia nie drzwi piekarnika” i „Zdejmowanie parą. Na ekranie pojawia się czas czysz- wewnętrznych szyb drzwi”. Po zdjęciu czenia i nie można go zmienić. -
Page 87: Zdejmowanie Wewnętrznej Szyby Drzwiczek Piekarnika
5. Zawias typu (B) jest dostępny w wer- 2. Pociągnij do siebie plastikowy element sjach z cichym domykaniem drzwi. przymocowany w górnej części przed- nich drzwiczek, jednocześnie naciskając punkty dociskowe po obu stronach ele- mentu i wyjmij go. 6. Zawias typu (C) jest dostępny w wer- sjach z miękkim otwieraniem/zamyka- niem drzwi. -
Page 88: Czyszczenie Lampki Piekarnika
szkła tak, aby zetknęła się ze ściętą kra- • Lampki zastosowane w tym urządzeniu wędzią plastikowej szczeliny. (Jeśli są odporne na ciężkie warunki fizyczne, urządzenie ma szybę wewnętrzną). Szy- takie jak temperatura powyżej 50°C. ba wewnętrzna (2) musi być przymoco- Jeśli piekarnik ma okrągłą... -
Page 89: Rozwiązywanie Problemów
4. Jeśli lampka jest typu (A) pokazanego na poniższym rysunku, obróć lampkę tak jak pokazano na rysunku i wymień na nową. Jeśli jest to model typu (B), wyciągnij go, jak pokazano na rysunku i wymień na nowy. 3. Podnieś szklaną osłonę żarówki za po- mocą... - Page 90 • Brak prądu. >>> Upewnij się, że sieć jest sprawna i sprawdź bezpieczniki w skrzynce. W razie potrzeby wymień bez- pieczniki lub ponownie je włącz. (Dla modeli z timerem) Wyświetlacz timera miga lub symbol timera pozostaje otwarty. • Wystąpiła wcześniej awaria zasilania. >>>...
Need help?
Do you have a question about the BBVM13400DXS and is the answer not in the manual?
Questions and answers