
Related Manuals for Beko BBO6851PDX


Summary of Contents for Beko BBO6851PDX
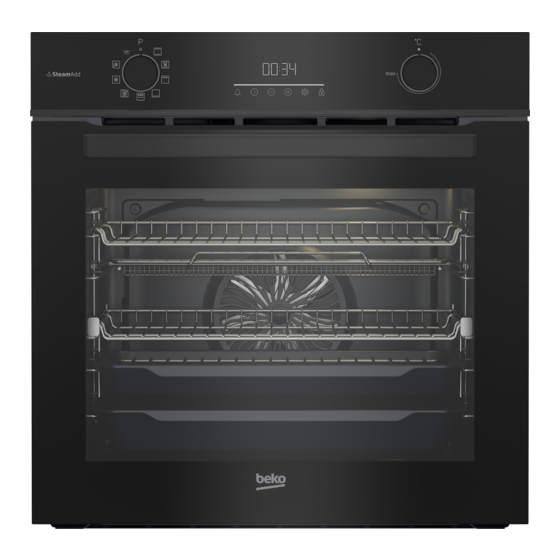
- Page 1 Built-in Oven User Manual BBO6851PDX 385442479/ EN/ R.AA/ 14/11/2022 14:21 7724086727...
-
Page 2: Table Of Contents
Settings ......... 24 Table of Contents 6 General Information About Bak- 1 Safety Instructions......ing ........... Intended Use ......... General Warnings About Baking Child, Vulnerable Person and Pet in the Oven ........Safety ..........6.1.1 Pastries and oven food..... 27 Electrical Safety ...... - Page 3 Welcome! Dear Customer, Thank you for choosing the Beko product. We want your product, manufactured with high quality and technology, to offer you the best efficiency. Therefore, carefully read this manual and any other documentation provided before using the product.
-
Page 4: Safety Instructions
1 Safety Instructions • This section includes the Intended Use safety instructions necessary • This product is designed to be to prevent the risk of personal used at home. It is not suitable injury or material damage. for commercial use. •... -
Page 5: Electrical Safety
they are supervised or trained • When the door is open, do not about the safe use and haz- put any heavy objects on it or ards of the product. allow children to sit on it. You • Children should not play with may cause the oven to tip over the product. -
Page 6: Transportation Safety
• The product must not be • If the power cable is damaged, plugged into the outlet during it must be replaced by the installation, repair, and trans- manufacturer, an authorized portation. service or a person to be spe- • Plug the product into an outlet cified by the importer com- that meets the voltage and pany in order to prevent pos-... -
Page 7: Installation Safety
• The product is heavy, carry the • To prevent overheating, the product with at least two product should not be in- people. stalled behind decorative • Do not use the door and / or doors. handle to transport or move Safety of Use the product. -
Page 8: Temperature Warnings
• The hinges of the product door Accessory Use move when opening and clos- • It is important that the wire ing the door and might jam. grill and tray are placed prop- When opening / closing the erly on the wire shelves. For door, do not hold the part with detailed information, refer to the hinges. -
Page 9: Steam System
• Do not heat closed tins and food too far in the back of the glass jars in the oven. The grill. This is the hottest area pressure that would build-up and fatty foods may catch fire. in the tin/jar may cause it to 1.10 Steam System burst. -
Page 10: Maintenance And Cleaning Safety
1.11 Maintenance and • To remove the lime that may occur in the water pool on the Cleaning Safety oven base after steam as- • Wait for the product to cool sisted cooking-easy steam before cleaning the product. cleaning operations, add 350 Hot surfaces may cause cc of white vinegar (acidity of burns! -
Page 11: Environmental Instructions
• During self-cleaning, smoke and cooking utensils from the will be released due to the oven. If your product has a burning of food residues. pyro proof accessory (resist- Ventilate your kitchen well ant to high temperature self- during the cleaning process. cleaning), you do not need to •... -
Page 12: Your Product
rack. In addition, if you cook your meals ternal temperature is optimized to save one after the other, it will save energy energy in the “Eco fan heating” operating because the oven will not lose its heat. function, and this temperature may differ •... -
Page 13: Product Control Panel Introduc- Tion And Usage
3.2 Product Control Panel Introduc- In this section, you can find the overview and basic uses of the product's control tion and Usage panel. There may be differences in images and some features depending on the type of product. 3.2.1 Control Panel 1 Function selection knob 2 Timer 3 Temperature selection knob... -
Page 14: Oven Operating Functions
be set for these functions are shown. The * It varies depending on the product model. It may not be available on your product. order of the operating modes shown here may differ from the arrangement on your 3.3 Oven operating functions product. -
Page 15: Use Of Product Accessories
On models without wire shelves : The trays inside your appliance may be deformed with the effect of the heat. This has no effect on the functionality. Deformation disap- pears when the tray is cooled. Standard tray It is used for pastries, frozen foods and fry- ing large pieces. - Page 16 On models with wire shelves : On models without wire shelves : It is crucial to place the wire grill on the side shelves properly. The wire grill has one direction when placing it on the shelf. While placing the wire grill on the desired shelf, the open section must be on the front.
- Page 17 towards yourself until it reaches the front side. You must pass over this stopping socket to remove it completely. Stopping function of the wire grill There is a stopping function to prevent the wire grill from tipping out of the wire shelf. With this function, you can easily and safely take out your food.
- Page 18 basket inside the handles of the wire frame by stretching the front a little. And remove the wire basket by stretching the front handle of the wire frame. Place the frying grill in the oven so as its short handle will face the front. EN / 18...
-
Page 19: Technical Specifications
3.6 Technical Specifications General specifications Product external dimensions (height/width/depth) (mm) 595 /594 /567 Oven installation dimensions (height / width / depth) 590 - 600 /560 /min. 550 (mm) Voltage/Frequency 220-240 V ~; 50 Hz Cable type and section used/suitable for use in the min. -
Page 20: First Use
4 First Use Before you start using your product, it is If the first timer is not set, “12:00” recommended to do the following stated in symbol continue to flash the following sections respectively. and your oven will not start. For your oven to function, you must 4.1 First Timer Setting confirm the time of day by setting... -
Page 21: Using The Oven
NOTICE: Some detergents or cleaning NOTICE: During the first use, smoke and agents may cause damage to the surface. odour may come up for several hours. This Do not use abrasive detergents, cleaning is normal and you just need good ventila- powders, cleaning creams or sharp objects tion to remove it. - Page 22 Afterwards, the time elapsed since the : Alarm symbol start of baking is displayed in order. : Meat probe symbol * When the temperature inside the oven : Key lock symbol reaches the set temperature the : Temperature symbol symbol disappears and it gives you an : Settings symbol audible warning.
-
Page 23: Steam Assisted Cooking
5.3 Steam Assisted Cooking Your oven has a steam assisted cooking feature. Better baking results are achieved with steam assist Steam assist ensures that the surface of pastry foods are brighter, their crust is more crunchy and they are more voluminous. Also, steam as- sist reduces the moisture loss of the foods The baking time increases by 1 such as meat and allows them to be... -
Page 24: Settings
ð The symbol is shown on the display and the 3-2-1 count down starts. The key lock activates when the count- down ends. When any key is touched Do not use distilled or filtered wa- after the key lock is set, the timer ter. - Page 25 2. Set the alarm time with the keys. 2. Set the desired level with the keys. (b-01-b-02-b-03) ð After setting the alarm time, the symbol remains lit and the alarm ð Touch the key for confirmation or time starts to countdown on the wait without touching any key.
-
Page 26: General Information About Baking
Changing the time of day On your oven to change the time of day that you have previously set: 1. Touch the key until the symbol appears on the display. 2. Set the time of day by touching the keys. 4. -
Page 27: Pastries And Oven Food
6.1.1 Pastries and oven food Tips for baking cakes • If the cake is too dry, increase the tem- General Information perature by 10°C and shorten the baking • We recommend using the accessories of time. the product for a good cooking perform- •... - Page 28 Food Accessory to be Operating func- Shelf position Temperature (°C) Baking time used tion (min) (approx.) On models with wire shelves : 3 Small cakes Standard tray * Fan Heating 25 … 35 On models without wire shelves : 2 Round cake mould, 26 cm in Top and bottom...
-
Page 29: Meat, Fish And Poultry
Suggestions for cooking with two trays Food Accessory to be Operating func- Shelf position Temperature (°C) Baking time used tion (min) (approx.) On models with On models with wire shelves : 25 wire shelves :150 2-Standard tray * … 40 Small cakes Fan Heating 2 - 4... -
Page 30: Grill
Cooking table for meat, fish and poultry Food Accessory to be Operating func- Shelf position Temperature (°C) Baking time used tion (min) (approx.) 15 mins. 250/ Steak (whole) / Fan assisted bot- Standard tray * max, after 180 … 60 … 80 Roast (1 kg) tom/top heating Lamb's shank... -
Page 31: Steam Assisted Cooking
tray may not be supplied with the product. Put some water into the oven tray for easy cleaning. Grill table Food Accessory to be Shelf position Temperature (°C) Baking time (min) used (approx.) Fish Wire grill 4 - 5 250/max 20 …... -
Page 32: Shallow Or Oil-Free Frying Function
Food Accessory Shelf posi- Temperat- Amount of Water in- Baking time Approx. to be used tion ure (°C) water to be take time (min) (ap- food weight used (ml) prox.) Standard before pre- Yeasted bun 25 … 35 1200 tray * heating Standard before pre-... - Page 33 Cooking table for test meals Suggestions for baking with a single tray Food Accessory to be Operating func- Shelf position Temperature (°C) Baking time used tion (min) (approx.) Shortbread Top and bottom Standard tray * 20 … 30 (sweet cookie) heating On models with wire shelves :3...
-
Page 34: Maintenance And Cleaning
Grill Food Accessory to be Shelf position Temperature (°C) Baking time (min) used (approx.) Meatball (veal) - 12 Wire grill 250/max 20 … 30 amount Toast bread Wire grill 250/max 1 … 3 It is recommended to preheat for 5 minutes for all grilled food. Turn pieces of food after 1/2 of the total grilling time. -
Page 35: Cleaning Accessories
• The oven must cool down before clean- Plastic parts and painted surfaces ing the cooking area. Cleaning on hot • Clean plastic parts and painted surfaces surfaces shall create both fire hazard using dishwashing detergent, warm wa- and damage the enamel surface. ter and a soft cloth or sponge and dry them with a dry cloth. -
Page 36: Cleaning The Inside Of The Oven (Cooking Area)
7.4 Cleaning the inside of the oven Cleaning the water pool on the base of the oven (cooking area) Depending on the frequency of steam as- Follow the cleaning steps described in the sisted cooking-easy steam cleaning oper- "General Cleaning Information" section ac- ations and the hardness of the water used, cording to the surface types in your oven. -
Page 37: High Temperature Self-Cleaning
Select an operating function in which the To start the pyrolysis function: lower heater is active and operate the oven 1. Remove all accessories inside the oven. at 100 °C for 2-3 minutes. Then, turn off In the models with wire shelves, re- the oven and spray the inside of the oven member to remove the wire shelf. -
Page 38: Cleaning The Oven Door
9. When the symbol disappears on the 5. Turn the temperature knob to the display, remove the remaining deposits highest "max" (maximum) temperat- with vinegar water. ure. 10.Touch any key to stop the audible 6. When the pyrolysis function is started, warning. - Page 39 lime residue that may form on the oven glass, wipe the glass with vinegar and rinse. Do not use harsh abrasive clean- ers, metal scrapers, wire wool or bleach materials to clean the oven door and glass. Removing the oven door 1.
-
Page 40: Removing The Inner Glass Of The Oven Door
2. Pull the plastic component, attached on Illustration 6: Hinges - open position the upper section of the front door, to- wards yourself by simultaneously 7. Get the oven door to a half-open posi- pushing on the pressure points on both tion. -
Page 41: Cleaning The Oven Lamp
with a dry cloth. In case of oven lamp fail- ure, you can replace the oven lamp by fol- lowing the sections that follow. Replacing the oven lamp General Warnings • To avoid the risk of electric shock before replacing the oven lamp, disconnect the product and wait for the oven to cool. -
Page 42: Troubleshooting
with a new one. If it is type (B) model, pull it out as shown in the figure and re- place it with a new one. 4. Refit the glass cover. 3. Lift the lamp's protective glass cover If your oven has a square lamp, with a screwdriver. - Page 43 • (If there is timer on your appliance) Keys • For the models with timer, the time is not on the control panel do not work. >>> If set. >>> Set the time. your product has a key lock, the key lock •...
- Page 44 Error codes Error reasons Possible solutions Internet connection errors (in Consult an authorized service for the error to be re- Er 86 - Er 88 ovens with Homewhiz feature) solved. Microwave errors (in ovens Consult an authorized service for the error to be re- Er 89 - Er 92 with microwave feature) solved.
Need help?
Do you have a question about the BBO6851PDX and is the answer not in the manual?
Questions and answers