RCA CC6364 User Manual
Rca cc6364: user manual
Hide thumbs
Also See for CC6364:
- User manual (104 pages) ,
- User manual (104 pages) ,
- User manual (104 pages)
Table of Contents
Advertisement
Advertisement
Table of Contents

Subscribe to Our Youtube Channel
Related Manuals for RCA CC6364


Summary of Contents for RCA CC6364
- Page 1 Camcorder User’s Guide Changing Entertainment. Again. CC6364/CC6374...
-
Page 2: Product Information
Important Information WARNING To reduce the risk of fire or electric shock, do not expose this product or AC charger to rain or moisture. To reduce risk of injury, charge only rechargeable batteries recommended by the manufacturer for this product. Other types of batteries may burst causing damage and personal injury. -
Page 3: Table Of Contents
Chapter 1: Connections & Setup Parts Checklist ... 6 Buttons and Controls ... 7 Getting Started ... 9 Unpack the camcorder and accessories ... 9 Adjust the hand strap ... 10 Attach the lens cap ... 10 Attach the power supply ... 11 Turn on the camcorder ... - Page 4 Table of Contents Chapter 2: Using the Monitors Seeing What You Are Recording ... 26 Using the LCD Monitor ... 26 Using the Viewfinder ... 27 On-screen Icons ... 28 Warning Icons ... 28 Recording and Playback Icons ... 29 Other Icons ...
- Page 5 Chapter 5: Advanced Features Using the Menus For Advanced Adjustment ... 56 Menu Definitions ... 57 Camera Menu ... 57 System Menu ... 57 System Menu (continued) ... 58 Using the Advanced Features ... 60 Fade/Wipe Effects ... 60 Program AE With Special Effects ... 62 Digital Effects ...
- Page 6 Table of Contents Tape Care and Storage ... 82 Things to Avoid ... 83 Traveling Tips ... 83 Specifications ... 84 Customer Assistance and Service ... 85 Limited Warranty ... 87 FCC and Industry Canada Information ... 91 Optional Accessories ... 92 Accessories Order Form ...
-
Page 7: Connections And Setup
Connections & Setup Chapter Overview: • Parts Checklist • Buttons and Controls • Getting Started • Powering the Camcorder • Using the Shoulder Strap • Setting the Date and Time • Setting the Tape Recording Speed • Setting the Tape Length Changing Entertainment. -
Page 8: Parts Checklist
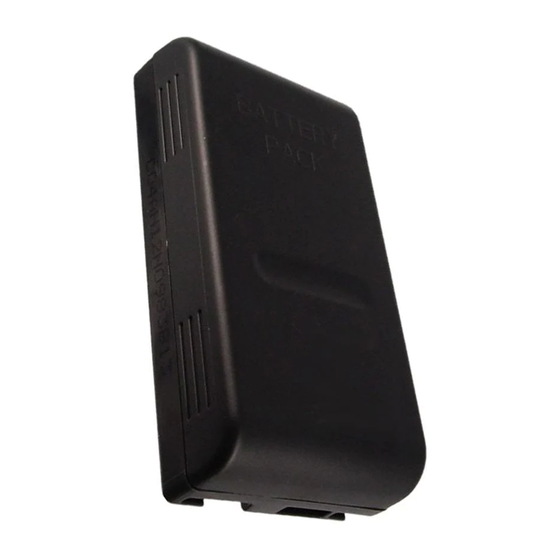
AC power supply Part # 250814 AA battery for Lens cap cassette tape Part # 251624 adapter Audio/ Video cables Part # VH83 (CC6364 only) Battery pack Part # 244427 (FB1260) Shoulder strap Part # ACS091 Chapter 1... -
Page 9: Buttons And Controls
Buttons and Controls Viewfinder Audio/Video jacks BATTERY RELEASE switch Eyepiece focus control Speaker Hand strap Chapter 1 Connections & Setup MENU/ 5 SEC. REC Power Zoom/ VOL lever BRIGHT/ button TRACKING dial Recording Start/Stop button Microphone STEADY PIX™ button Power switch Video light (CC6374 only) - Page 10 Connections & Setup Video LIGHT switch (CC6374 only) COUNTER R/M and FADE/WIDE button LCD monitor Camcorder bottom view Playback CHARGE buttons indicator STOP RETAKE DIGIFECT P.AE button button Area marked CLOSE Tripod mounting sockets POWER indicator EJECT switch REFRESH button Shoulder strap eyelets...
-
Page 11: Getting Started
Getting Started This section describes the basics on how to set up your camcorder to record for the first time. Refer to the other sections for detailed operation and feature options. Unpack the camcorder and accessories • The items shown are packed with the camcorder. If any pieces are missing or appear damaged, contact your dealer immediately. -
Page 12: Adjust The Hand Strap
Connections & Setup Adjust the hand strap Lift the flap on the hand strap and separate the Velcro strip. Insert your hand so your fingers can comfortably reach the buttons. Adjust the strap to fit snugly. Refasten the strap, and fold the flap back down. Attach the lens cap To protect the lens, attach the provided lens cap to the camcorder as shown in the illustration. -
Page 13: Attach The Power Supply
AC power supply Attach the power supply Since the battery must be charged before it can be used the first time, you need to use an AC outlet to power the camcorder. Plug the small end of the power supply into the DC IN jack on the camcorder. Plug the other end of the power supply into a working AC outlet. -
Page 14: Turn On The Camcorder
Connections & Setup Power switch POWER indicator STOP RETAKE Video LIGHT switch (CC6374 only) Turn on the camcorder Set the Power switch to the desired setting, either automatic ( ) or manual ( off (OFF), or in playback mode ( The POWER indicator comes on when the camcorder is turned on. -
Page 15: Insert A Cassette Tape
STOP RETAKE EJECT switch Tape window Tape wheel Area marked CLOSE BATTERY RELEASE switch Cassette tape holder Chapter 1 Connections & Setup Insert a cassette tape Make sure the camcorder is connected to a power supply. Open the LCD monitor fully or adjust the viewfinder. -
Page 16: Use The Lcd Monitor Or Viewfinder To See What's Recording
Connections & Setup MENU dial LCD monitor Viewfinder Eyepiece focus control Use the LCD monitor or viewfinder to see what’s recording Using the LCD monitor Remove the lens cap. Open the monitor 90˚ from the camcorder body. Tilt the monitor 180˚ forward or 90˚ down as required for convenient viewing while recording. -
Page 17: Start Recording
Power switch Recording Start/Stop button STOP RETAKE Playback buttons on top of the camcorder include: Stop ( ), Rewind ( Play/Pause ( Fast Forward ( Chapter 1 Connections & Setup Start recording Remove the lens cap. Set the Power switch to (The POWER indicator comes on.) Press and release the Recording Start/Stop button to start recording. -
Page 18: Turn Off The Camcorder
Connections & Setup DC IN jack Power switch CHARGE indicator STOP RETAKE Before extended use, it is recommended that you prepare enough battery packs to cover 3 times the planned shooting time. Turn off the camcorder Set the Power switch to OFF. Close the LCD monitor. - Page 19 Notes: • If a protective cap is on the battery, remove it before use or charging. • When charging a battery for the first time or after a long storage period, the CHARGE indicator may not come on. Remove the battery and try again. •...
-
Page 20: Refreshing The Battery
Connections & Setup BATTERY RELEASE switch CHARGE REFRESH indicator indicator STOP RETAKE REFRESH button Removing the Battery Slide the BATTERY RELEASE switch and pull out the battery pack. Refreshing the Battery If you charge a battery before it has been fully discharged, the battery’s capacity may be reduced over time. -
Page 21: Battery Level Icon
Do not attempt to disassemble or modify the battery. There are no user-serviceable parts inside. • Use the battery only with specified adapter/chargers and camcorders. • Throwing the battery into a fire or exposing it to excessive heat – over 149˚F (65˚C) could be hazardous. -
Page 22: Removing The Power Supply
Connections & Setup Using the Power Supply The power supply attaches to the camcorder and lets you power it directly from standard household power. The power supply operates on 110-240 volts, 50/60 Hz, so it can be used virtually anywhere in the world to power the camcorder or recharge the battery. Plug the small end of the power supply into the DC IN jack on the camcorder. -
Page 23: Using The Shoulder Strap
Using the Shoulder Strap The camcorder’s shoulder strap is designed to let you carry the camera from your shoulder and – when ready– bring the camcorder to shooting position in one quick movement. Following the illustration, thread the strap through the eyelet. Fold the strap back and thread it through the buckle. -
Page 24: Setting The Date And Time
Important: A separate internal battery is used for the time and date. Under normal conditions, this battery should last for 10 years or more. If you should need to replace it, see your nearest RCA authorized service center. (manual record). Chapter 1... -
Page 25: Setting The Tape Recording Speed
MENU dial Power switch POWER indicator STOP RETAKE Chapter 1 Connections & Setup Setting the Tape Recording Speed You need to select the tape recording speed for the quality of recording you want. Set the Power switch to (The POWER indicator comes on.) Press the MENU dial in. -
Page 26: Setting The Tape Length
Connections & Setup MENU dial Power switch POWER indicator STOP RETAKE Setting the Tape Length You need to select the tape length so that the camera can alert you how much time you have left on the tape. Set the Power switch to POWER indicator comes on.) Press the MENU dial in. -
Page 27: Chapter 2: Using The Monitors
Using the Monitors Chapter Overview: • Seeing What You Are Recording • On-screen Icons Changing Entertainment. Again. Graphics contained within this publication are for representation only. Chapter 2... -
Page 28: Seeing What You Are Recording
Using the Monitors Seeing What You Are Recording To see what is recording, use either the LCD monitor or the viewfinder monitor. When the LCD monitor is open more than 25˚, the viewfinder turns off. When you close the LCD monitor, the viewfinder turns on. Using the LCD Monitor The camcorder’s LCD monitor is a miniature color screen that you can use for recording playback. -
Page 29: Using The Viewfinder
Viewfinder Eyepiece focus control Chapter 2 Using the Monitors Using the Viewfinder The camcorder’s viewfinder is a miniature monitor that displays in black and white. For convenient viewing, rotate the viewfinder up or down. Note: When the LCD monitor is open more than 25˚, the viewfinder turns off. -
Page 30: On-Screen Icons
Using the Monitors On-screen Icons Several displays appear on the LCD monitor or in the viewfinder to aid in the operation of the camcorder. Although it may look crowded, all of the icons shown below do not appear on-screen at the same time. Also, not all screen icons are shown in the illustration. -
Page 31: Recording And Playback Icons
(battery, etc.) and wait a few minutes for the warnings to clear. If they do, you can resume using the camcorder. If the warnings remain, consult your nearest RCA authorized service center. Recording and Playback Icons... - Page 32 Using the Monitors Special Effect Icons SEPIA Appears when you select SEPIA to give your recordings a brown- tone like old photographs. Appears when you select SPORTS to record fast-moving action, SPORTS such as sporting events. Appears when you select SD:SHADOW to darken the picture and SD:SHADOW reduce glare.
- Page 33 Preset Titles • The preset title selected in the TITLE menu appears here. It will be recorded on the tape when it appears. M. W. B. (Manual White Balance) Icons The icon for the manual white balance selected in the M.W.B. menu appears here. Appears when you select Appears when you select day.
- Page 34 Using the Monitors Zoom Icon Appears when you use the zoom lever. Bright and Volume Icons BRIGHT Appears when you adjust the brightness of the monitor with the BRIGHT dial. VOLUME During playback, the VOLUME icon appears when you adjust the volume of the speaker with the VOL control (also zoom lever).
-
Page 35: Other Icons
Focus Icons Appear when you are adjusting focus manually using the FOCUS menu. The icons also flash when the auto-focus system cannot operate properly or you can’t adjust the focus any farther. These icons flash while you adjust manual focus (see page 66). Animation and Time-Lapse Recording Icons Appears when you select the interval time for time-lapse recording ( 15S, 30S, 1MIN, or 5MIN;... - Page 36 Using the Monitors TBC (Time Base Corrector) Icon Appears when the time base corrector is turned on (see page 46). Time Counter Icon Appears during playback. It is not recorded. An M appears in front of M0:00:00 the time counter when memory-stop is on (see page 47). Time-Remaining Icon 120MIN Indicates the approximate time remaining on the tape.
-
Page 37: Chapter 3: Recording
Recording Chapter Overview: • Recording Details • Recording Tips Changing Entertainment. Again. Graphics contained within this publication are for representation only. Chapter 3... -
Page 38: Recording Details
Recording Recording Start/ Power switch Stop button POWER indicator STOP RETAKE Recording Details Remove the lens cap. Set the Power switch to record or manual record mode). (The POWER indicator comes on.) Open the LCD monitor or adjust the viewfinder. Press and release the Recording Start/Stop button to start recording. -
Page 39: Self-Recording
5 SEC. REC button Recording Start/ Stop button STOP RETAKE Rewind and playback buttons Chapter 3 Self-Recording You can shoot yourself while viewing your own image in the LCD monitor. Open the LCD monitor and tilt it upward 180 so that it faces forward, then point the lens toward yourself and start recording. -
Page 40: Retake
Recording STOP RETAKE RETAKE and playback buttons Zoom lever The further you rotate the zoom lever, the quicker the zoom action. Retake You can also rerecord certain segments. Make sure the camcorder is in the Record– Standby mode. Press and hold either RETAKE button to reach the start point for new recording. - Page 41 MENU dial Power switch Chapter 3 Notes: • While zooming, focusing may become unstable. If so, set the zoom while in record-standby mode and adjust the image using manual focus (see page 66). Once the focus is set, zoom the camcorder in or out while recording.
-
Page 42: Using Steady Pix
Recording MENU STEADY PIX dial button Power switch Video light Using Steady Pix™ Digital Image Stabilization is used to compensate for unstable images cause by camera shake, especially at high magnifications. To turn on image stabilization, press the STEADY PIX button. -
Page 43: Video Light Details
Do not place the camcorder in a carrying case right after using the light. • Never operate the video light close to flammable or explosive material. • Consult your nearest RCA authorized service center to replace the video light. • The video light and bulb need to cool for approximately 30 minutes after use before the bulb assembly is replaced. -
Page 44: Recording Tips
Recording Recording Tips • To improve picture quality and color reproduction, try to make sure indoor scenes are well-lit. • Don’t move the camcorder rapidly from side-to-side while recording. A steady, gradual “pan” avoids blurring and “jitter”. • Use the viewfinder or LCD monitor to make sure the camcorder is level while recording so that your scene isn’t “tilted.”... -
Page 45: Chapter 4: Playback
Playback Chapter Overview: • Playback Options • Choose Your Connection Changing Entertainment. Again. Graphics contained within this publication are for representation only. Chapter 4... -
Page 46: Playback Options
Playback Power switch POWER indicator STOP RETAKE Playback buttons Playback Options The camcorder’s playback features include displaying still images and high-speed shuttle search. In this section, you’ll also learn how to connect your camcorder to a TV, VCR, or computer. Playback features (Play, Pause, Forward, Reverse, Stop) can be handled using the camcorder’s buttons. - Page 47 Tips The playback picture can be viewed in the viewfinder (with the LCD monitor shut), on the LCD monitor, or on a connected TV (see page 52). You can also view the playback picture on the LCD monitor with it flipped over and retracted.
- Page 48 AT appears • Manual Tracking may not work with tapes that were recorded on other VCRs or camcorders. Using TBC (Time Base Corrector) You may need to remove jitter from fluctuating video signals to deliver a stable picture even with old tapes.
-
Page 49: Still Playback Mode
STOP RETAKE COUNTER R/M Playback buttons button Chapter 4 Using Counter Memory Counter Memory makes it easier to locate a specific tape segment. Press and hold the COUNTER R/M button for more than 1 second. (The counter resets to 0:00:00.) Press COUNTER R/M for less than 1 second. -
Page 50: Shuttle Search
Playback STOP RETAKE Playback buttons Shuttle Search Shuttle search allows high-speed searching in either forward or reverse directions. Press during playback. To resume normal playback, press • During playback, press and hold The search continues as long as you hold down the button. -
Page 51: Choose Your Connection
Choose your Connection This manual includes information for some basic types of connections. You may also need to refer your TV and VCR user’s guides for specific instructions. Cassette tape adapter Battery compartment cover Chapter 4 Using the Cassette Tape Adapter (supplied with CC6374 only) Before choosing a connection, you may find it easier to use the cassette tape adapter (supplied with... - Page 52 Playback VHS-C tape Tape window Tape wheel Cassette tape adapter EJECT switch Inserting the Tape into the Cassette Tape Adapter Before inserting the tape into the adapter, remove any slack in the tape by turning the tape wheel on the side of the tape. Slide EJECT to the right to open the tape compartment lid.
- Page 53 EJECT switch Chapter 4 Removing the Tape from the Cassette Tape Adapter Slide the adapter’s EJECT switch to the right. The load detector extends from the side and the whirring sound indicates the tape is being released before the adapter’s tape compartment lid opens.
-
Page 54: Connecting To A Tv (Or Vcr) With Audio/Video Input Jacks
To connect your camcorder to a TV monitor (or VCR) with audio/video inputs, you need an optional audio/video cable, such as VH83 (supplied with CC6364) (see page 93). If your TV is already connected to a VCR, attach the camcorder to the VCR and watch what the camcorder is recording or playing on the TV. -
Page 55: Playback On A Tv (Or Vcr) With Audio/Video Input Jacks
Power switch POWER indicator STOP RETAKE Playback buttons Chapter 4 Playback on a TV (or VCR) with Audio/Video Input Jacks Turn on the TV and tune it to the video input channel or turn on VCR and place it in the “line” or “camera mode”. -
Page 56: Tape Dubbing
Playback Power switch STOP RETAKE Playback buttons Tape Dubbing Following the illustration in this chapter, connect the camcorder and the VCR. Set the camcorder’s Power switch to on the VCR’s power, and insert the appropriate tapes in the camcorder and the VCR. Make sure the VCR is in the appropriate AUX mode and the Record-Pause mode. -
Page 57: Chapter 5: Advanced Features
Advanced Features Chapter Overview: • Using the Menus for Advanced Adjustment • Menu Definitions • Using the Advanced Features Changing Entertainment. Again. Graphics contained within this publication are for representation only. Chapter 5... -
Page 58: Using The Menus For Advanced Adjustment
Advanced Features MENU dial Power switch POWER indicator STOP RETAKE Using the Menus For Advanced Adjustment This camcorder is equipped with an on-screen menu system that simplifies many of the more detailed camcorder settings. Set the Power switch to manual record ( (The POWER indicator comes on.) Press in the MENU dial. -
Page 59: Menu Definitions
Menu Definitions The following charts will help you get acquainted with the various menus and some brief definitions of their features. For more detailed explanation, refer to the corresponding sections. Camera Menu FOCUS Refer to Focusing (see page 65). EXPOSURE Refer to Exposure Control (see page 64). -
Page 60: System Menu (Continued)
Advanced Features System Menu (continued) 16 x 9 TAPE LENGTH DISPLAY FULL SIMPLE REC TIME INT. TIME TELE MACRO Factory Preset: Doesn’t display black bars. Allows you to record black bars at the top and bottom of the screen to produce a cinema-like wide-screen effect. Allows you to set the tape length depending on the tape used (see page 24). - Page 61 TITLE LANG DATE/TIME DEMO MODE Chapter 5 Advanced Features Allows you to select the language (ENGLISH, FRENCH, or SPANISH) of Instant Titles (see page 70). Allows you to set the current date and time (see page 22). Factory Preset: Demonstrates certain functions automatically. When DEMO MODE is set to ON and you have exited all menus, the demonstration starts.
-
Page 62: Using The Advanced Features
Advanced Features MENU dial Power switch Recording Start/Stop button POWER indicator STOP RETAKE FADE/WIPE button Using the Advanced Features Fade/Wipe Effects These effects let you make professional-looking scene transitions. Fade-ins or wipe-ins work at recording start, and fade-outs or wipe-outs work at recording end. - Page 63 MENU dial Power switch Recording Start/Stop button POWER indicator STOP RETAKE P.AE button Chapter 5 Advanced Features Wipes SHUTTER Wipes in as a black screen from the top and bottom, closing over the image like a shutter. Wipes out as a new image, pushing open the black screen vertically from the center.
-
Page 64: Program Ae With Special Effects
Advanced Features Program AE With Special Effects Set the Power switch to Press P.AE repeatedly until the desired mode’s name and icon appear. (They are displayed for approximately 2 seconds, then the name disappears so that only the icon remains.) To cancel the effect, press P.AE repeatedly until OFF appears. -
Page 65: Digital Effects
MENU dial Power switch POWER indicator STOP RETAKE DIGIFECT button Chapter 5 Advanced Features S1/2000 (1/2000 sec. High Speed Shutter) Captures faster action than Sports mode. Notes: • The screen becomes slightly dark in the High Speed Shutter mode. Use in well-lit situations. -
Page 66: Exposure Control
Advanced Features NEGA POSI (Negative Positive) The colors of a picture are reversed. MOSAIC Turns recorded scenes into a mosaic pattern. STRETCH Doubles the width of the picture horizontally. Note: Digital Effects can be changed during recording or during Record-Standby. Exposure Control This feature automatically adjusts the iris for the best available picture quality, but you can override it and make the adjustment manually. -
Page 67: Focusing
MENU dial Power switch POWER indicator STOP RETAKE Chapter 5 Advanced Features Notes: • To return to the factory setting, select AUTO in step 4. • To readjust exposure, repeat the procedure from step 2. Focusing Auto Focus The camcorder’s Full Range automatic focus system offers continuous shooting ability from close-up to infinity. -
Page 68: Manual Focus
Advanced Features MENU dial Power switch POWER indicator STOP RETAKE Manual Focus Make the necessary viewfinder adjustments to use the viewfinder (see page 27). Set the Power switch to (The POWER indicator comes on.) Press the MENU dial in. (The CAMERA MENU appears.) Rotate the MENU dial to highlight FOCUS. -
Page 69: White Balance Adjustment
White Balance Adjustment White balance refers to the correctness of color reproduction under various lighting. If the white balance is correct, all other colors will be accurately reproduced. The white balance is usually adjusted automatically. However, more advanced camcorder operators control this function manually to achieve a more professional color/tint reproduction. -
Page 70: Manual White Balance
Advanced Features MENU dial Power switch POWER indicator STOP RETAKE DIGIFECT button Manual White Balance Perform Manual White Balance when shooting under various types of lighting. Follow steps 1 through 4 of the white balance adjustment, and highlight MWB. Hold a sheet of plain white paper in front of the subject. -
Page 71: Date/Time Insert
MENU dial Power switch POWER indicator STOP RETAKE Chapter 5 Advanced Features Date/Time Insert You can display the date and time in the camcorder or on a connected TV, as well as to record them manually or automatically. You should have already performed the Date/Time Setting procedure (see page 22). -
Page 72: Instant Titles
Advanced Features MENU dial Power switch POWER indicator STOP RETAKE Instant Titles The camcorder has 8 preset titles in memory. You can superimpose one of them over the video image. Instant Titles can be displayed in English, French, and Spanish. Set the Power switch to (The POWER indicator comes on.) Press in the MENU dial. -
Page 73: Animation
MENU dial Power switch Recording Start/Stop button POWER indicator STOP RETAKE Chapter 5 Advanced Features Animation You can shoot a series of pictures, each slightly different, of the same object for a brief period of time. Set the Power switch to (The POWER indicator comes on.) Make sure the recording mode is set to SP. -
Page 74: Time-Lapse
Advanced Features MENU dial Power switch Recording Start/Stop button Time-Lapse You can record sequentially at preset time spans. Leaving the camcorder aimed at a specific subject, you can record subtle changes over an extended period of time. Set REC TIME using steps 1-7 of Animation (see page 71). -
Page 75: Chapter 6: Other Information
Other Information Chapter Overview: • Troubleshooting • Final Notes • Care and Cleaning • Traveling Tips • Specifications • Customer Assistance and Service • Limited Warranty • FCC and Industry Canada Information • Optional Accessories • Index Changing Entertainment. Again. Graphics contained within this publication ar e for r epresentation only. -
Page 76: Troubleshooting
If you’re having problems with your camcorder, try the solutions in this section. If the problem still exists, please consult your nearest RCA authorized service center. External noise and interference (from a TV, a radio, etc.) might prevent your camcorder from functioning properly. - Page 77 Other Information Bright, crystal-shaped spots appear in the LCD monitor and the viewfinder. Sunlight is directly entering the lens. This is not a defect of the camcorder. The rear of the LCD monitor is hot. The light used to illuminate the LCD monitor causes it to be hot. Close the LCD monitor to turn it off or set the Power switch to OFF, and let the unit cool down.
-
Page 78: Recording Problems
If Audio/Video connection is used, the TV’s VIDEO/TV switch has not been set to VIDEO. Playback picture is blurred or interrupted. The video heads are dirty or worn out. Consult your nearest RCA authorized service center for head cleaning or replacement. The tape stops during fast-forward or rewind. - Page 79 Other Information The date and time displays disappear. If you remove the power source from the camcorder while the power is on, all settings and selections are erased. Make sure to turn the camcorder’s power off before disconnecting the power source. The wrong date and time are displayed/recorded.
-
Page 80: Final Notes
Detaching the battery from the camcorder. Date/Time Settings • The date/time cannot be stored in memory if the built-in clock battery runs out. Consult an authorized RCA dealer for replacement, or set the date/time as necessary before you start shooting. , or Chapter 6... -
Page 81: Video Recording
Video Recording • When the Power switch is set to of 25˚ or more, the LCD monitor switches on and the viewfinder switches off automatically to save power. • The cassette tape holder can’t be opened unless a power supply is attached. •... -
Page 82: Tapes
Other Information Tapes • A power supply must be attached to load or eject a tape. • When loading a tape, it takes a few seconds for the cassette tape holder open. Never apply force to the holder or door cover as this might result in damage to the camcorder and void the warranty. -
Page 83: Care And Cleaning
Care and Maintenance Care and Cleaning After Using the Camcorder Set the Power switch to OFF. Open the LCD monitor at least 60˚. Slide the EJECT switch to open the cassette tape holder, then remove the tape. Press the area marked CLOSE to close and lock the cassette tape holder. Close and lock the LCD monitor. -
Page 84: Proper Care And Storage
Other Information Proper Care and Storage • Keep dirt from entering the camcorder’s cassette tape door. Dust and grit are abrasive and cause excessive wear to both the recording/playback heads and tapes. • Always cap the lens when the camcorder is not in use. •... -
Page 85: Things To Avoid
95˚F (35˚C). • Do not expose the camcorder or power supply/charger to rain or moisture. If any component becomes wet, turn off the power and take the unit to an authorized RCA camcorder service provider. • Do not use an power supply/charger or batteries other than the ones specified for the camcorder. -
Page 86: Specifications
Power source DC 11 V (Using AC power supply) DC 6 V (Using battery pack) Power consumption Viewfinder on: 4.0 W (CC6364) 4.5 W (CC6374) LCD monitor on: 5.2 W (CC6364) 5.4 W (CC6374) Video light: 3.0 W Signal system NTSC-type... -
Page 87: Customer Assistance And Service
Customer Assistance and Service Customer Assistance and Service You can reach Thomson at the following number: (Toll free inside U.S.A.) Our toll-free camcorder number operates from 8 a.m. to 5 p.m. CST Monday – Friday for U.S. customers only Thomson provides a toll-free telephone number to help with any problems encountered with the camcorder. - Page 88 Other Information Important information to customers who ship defective equipment to Thomson Consumer Electronics The Thomson representative who authorized the return of your equipment will give you an SR number over the phone. They will also provide you with instructions on where and how to return your camcorder. Write the number in large, clear characters on the outside of the box.
-
Page 89: Limited Warranty
Limited Warranty Limited Warranty What your warranty covers: • Any defect in materials or workmanship. For how long after your purchase: • 90 days for labor charges. • One year for parts. The warranty period for rental units begins with the first rental or 45 days from date of shipment to the rental firm, whichever comes first. - Page 90 Other Information To receive a replacement Camcorder before you return yours: Option I Provide your Discover, MasterCard, or Visa account number and expiration date to our phone representative. This is for security purposes. If we receive your unit, excluding all accessories, within 14 days from the date you were provided the SR number, only items not covered by warranty will be charged to your account.
- Page 91 Check with your dealer or call 1-800-336-1900 for the Authorized RCA Camcorder Service Center nearest you. • Take your unit to the Authorized RCA Camcorder Service Center of your choice. • Show the Authorized RCA Camcorder Service Center representative evidence of purchase date, such as a bill of sale.
- Page 92 Other Information How State Law relates to warranty: • This warranty gives you specific legal rights and you also may have other rights that vary from state to state. If you purchased your camcorder outside the United States: • This warranty does not apply. Contact your dealer for warranty information. Service calls that do not involve defective materials or workmanship are not covered by this warranty.
-
Page 93: Fcc And Industry Canada Information
Other Information FCC and Industry Canada Information FCC Regulations state that unauthorized changes or modifications to this equipment may void the user’s authority to operate it. This device complies with part 15 of FCC Rules. Operation is subject to the following two conditions: (1) This device may not cause harmful interference, and (2) This device must accept any interference received, including interference that may cause undesired operation. -
Page 94: Optional Accessories
Other Information Optional Accessories We invite you to take a look at some great ideas for sparking creativity and adding to the fun of using your camcorder. The following pages have a selection of accessories to help make your memorable moments look and sound even better. These accessories are designed to make the process of recording and watching your videos more enjoyable. - Page 95 26" when not in use. Rubber feet allow for sure footing. To order accessories, contact your local Dealer. Chapter 6 Other Information VH83 A/V Cable Replacement for the included A/V cable (CC6364). Used to attach the camcorder to an external component like a TV or VCR. Cautions: •...
- Page 96 Other Information If a dealer is not nearby, you can also follow the directions below to order by telephone or direct-by-mail. United States and Canada Orders To place your order by phone, have your Visa, MasterCard, or Discover card ready and call the toll-free number listed below.
-
Page 97: Accessories Order Form
Description Super Lightweight Tripod Soft Camcorder Case Shoulder Strap Rechargeable Battery (1 hour) A/V Cable Extended Life Battery Cassette Tape Adapter All prices subject to change without notice. Total Merchandise Sales Tax We are required by law to collect the appropriate sales tax for each individual state, county, and locality to which the merchandise is being sent. - Page 98 Other Information Charge your order on your VISA,MasterCard, Copy complete account number from your VISA card Copy complete account number from your MasterCard Copy Number above your name on MasterCard Copy complete account number from your Discover Card Expiration date: Print or type your name and address clearly.
- Page 99 This page left intentionally blank.
-
Page 100: Index
Index Index Symbols 5-Second recording 37 A (audio) and V (video) jacks 52 Accessories 92 carrying case 92 order form 95 tripod 93 Advanced features 60 Animation 71 Animation and Time-Lapse recording icons 33 Area marked close 13 Assistance 6 Audio/video input jacks 52 Auto focus 65 Automatic recording... - Page 101 Fade and wipe icons 32 Fade/wipe effects 60 FCC information 91 Final notes 78 Focus icons 33 Focusing 65 Getting started 9 Handstrap adjusting 10 Important information 2 Industry Canada information 91 Insert a cassette tape 13 Instant titles 70 Journalistic shooting 36 LCD monitor 14, 26 LCD monitor brightness...
- Page 102 Index Quick review 37 Record protection tab 13 Recording icon 15, 36 playing back 15 Recording and playback icons 29 Recording tips 42 Refreshing the battery 18 Removing the battery 18 Removing the power supply 20 Retake 38 Seeing what you are recording 26 Self-recording 37 Service 85 Shoulder strap 6...
- Page 103 W and T (zoom lever) 38 Warning icons 28 Warranty 87 White balance adjustment 67 Zoom level icon 32 Zoom lever 32, 38 Zooming digital 38 optical 38 zoom lever 38 Chapter 6 Index...
- Page 104 Visit the RCA website at www.rca.com Please do not send any products to the Indianapolis address listed in this manual or on the carton. This will only add delays in service for your product. Thomson multimedia Inc. 10330 North Meridian Street Indianapolis, IN 46290 ©2001 Thomson multimedia Inc.
Need help?
Do you have a question about the CC6364 and is the answer not in the manual?
Questions and answers