Advertisement
Quick Links
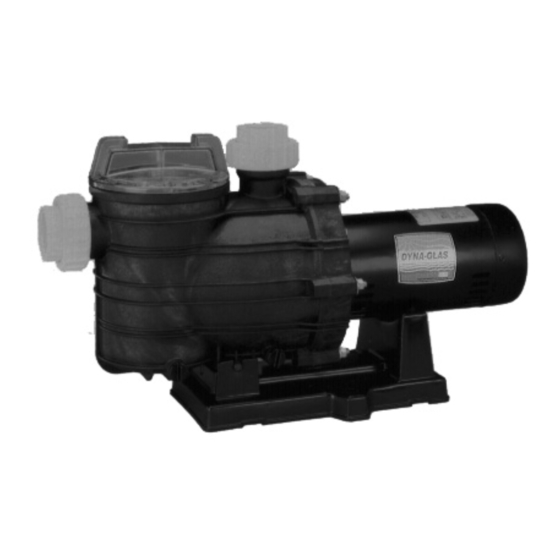
DYNA-GLAS
Sta-Rite Industries, Export Sales & Marketing Group
293 Wright Street, Delavan, WI 53115 U.S.A.
TELEPHONE: (262) 728-5551, TELEFAX: (262) 728-4461, CABLE: STAREX TELEX: ITT 4970245
Printed in U.S.A.
CENTRIFUGAL PUMPS
TM
WITH INTEGRAL TRAP
O
W
N
E
R '
INSTALLATION, OPERATION & PARTS
5MPRA Series MODELS
5MPRA6C-146
5MPRA6D-147
5MPRA6E-148
5MPRA6F-156
S
M
A
N
U
5MPRA6C3-146
5MPRA6D3-147
5MPRA6E3-148
5MPRA6F3-156
A
L
This manual should be furnished to
the end user of this pump; its use will
reduce service calls and chance of
injury and will lengthen pump life.
S289 (Rev. 5/5/04)
Advertisement

Related Manuals for STA-RITE DYNA-GLAS 5MPRA Series


Summary of Contents for STA-RITE DYNA-GLAS 5MPRA Series
- Page 1 Sta-Rite Industries, Export Sales & Marketing Group 293 Wright Street, Delavan, WI 53115 U.S.A. TELEPHONE: (262) 728-5551, TELEFAX: (262) 728-4461, CABLE: STAREX TELEX: ITT 4970245 S289 (Rev.
-
Page 2: Table Of Contents
Internal filter components and valves are warranted for a period of one (1) year from date of installation. The foregoing warranties relate to the original consumer purchaser (“Purchaser”) only. Sta-Rite shall have the option to repair or replace the defective product, at its sole discretion. Purchasers must pay all labor and shipping charges necessary to replace the product covered by this warranty. -
Page 3: Safety Instructions
• Check all clamps, bolts, lids, and system accessories before testing. • Release all air in system before testing. • Tighten Sta-Rite trap lids to 30 ft. lbs. (4.1 kg-m) torque for testing. • Water pressure for test must be less than 25 PSI (7.5 kg/cm •... -
Page 4: Installation
COVER DISCHARGE PORT NOTICE: Port threads TO FILTER OR POOL are: Internal - 2" NPT for direct connection to pipe. External - 3-1/4" SUCTION Buttress. Fits Sta-Rite PORT U11-200P Union Half FROM POOL for quick disconnect pipe connection. VACUUM FILTERS... - Page 5 Teflon Taping Instructions: Use only new or clean PVC pipe fittings. Wrap male pipe threads with one to two layers of Teflon tape. Cover entire threaded portion of pipe. Do not overtighten or tighten past thread stop in pump port! If leaks occur, remove pipe, clean off old tape, rewrap with one to two addi- tional layers of tape and remake the connection.
-
Page 6: Electrical
ELECTRICAL Ground motor before connecting to electrical power supply. Failure to ground motor can cause severe or fatal electrical shock hazard. Do not ground to a gas supply line. To avoid dangerous or fatal electrical shock, turn OFF power to motor before working on electrical connections. -
Page 7: Operation
OPERA TION NOTICE: NEVER run pump dry. Running pump dry may damage seals, caus- ing leakage and flooding. Fill pump with water before starting motor. Before removing trap cover: 1. STOP PUMP before proceeding. 2. CLOSE GATE VALVES in suction and discharge pipes. 3. - Page 8 Drain all water from pump and piping when expecting freezing temperatures or when storing pump for a long time (see instructions below). Keep motor dry and covered during storage. To avoid condensation/corrosion problems, do not cover pump with plastic. For outdoor/unprotected installations: 1.
-
Page 9: Pump Service
PUMP SERVICE Pump should only be serviced by qualified personnel. For best results, use only genuine Sta-Rite factory parts. Be sure to prime pump (Pg. 7) before starting. Before removing trap cover: 1. STOP PUMP before proceeding. 2. CLOSE GATE VALVES in suction and discharge pipes. -
Page 10: Troubleshooting Guide
Pump Reassembly/Installing New Seal 1. Ceramic seat must be clean and free of dirt, grease, dust, etc. Wet outer edge with small amount of liquid detergent; press ceramic seat into seal plate cavity firmly and squarely with finger pressure (Fig. 6). 2. - Page 11 Clogged pipe/trap/impeller, worn impeller: 7. Make sure suction trap is not clogged; if it is, clean trap and strainer. 8. Make sure impeller is not clogged (follow steps 1 through 7 under “Removing Old Seal”, Page 9; check impeller for clogging; follow steps 7 through 11 under “Installing New Seal”, Page 10, for reassembly).
-
Page 12: Repair Parts List
BOX A For quick disconnect pipe connection parts: Box A Adapter Union Pkg ..... 11201-0153 O-Rings (2) 1318 ....35505- Box A REPAIR PARTS LIST 012 0394 DYNAGLAS POOL PUMP 1/2 through 1-1/2 HP Models Parts are common to all models listed except as Part noted: Key Nos.
Need help?
Do you have a question about the DYNA-GLAS 5MPRA Series and is the answer not in the manual?
Questions and answers